Finishing Capacitive Sender and Access Plate on Right Tank

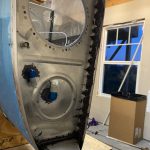
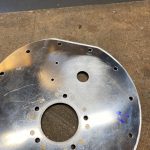
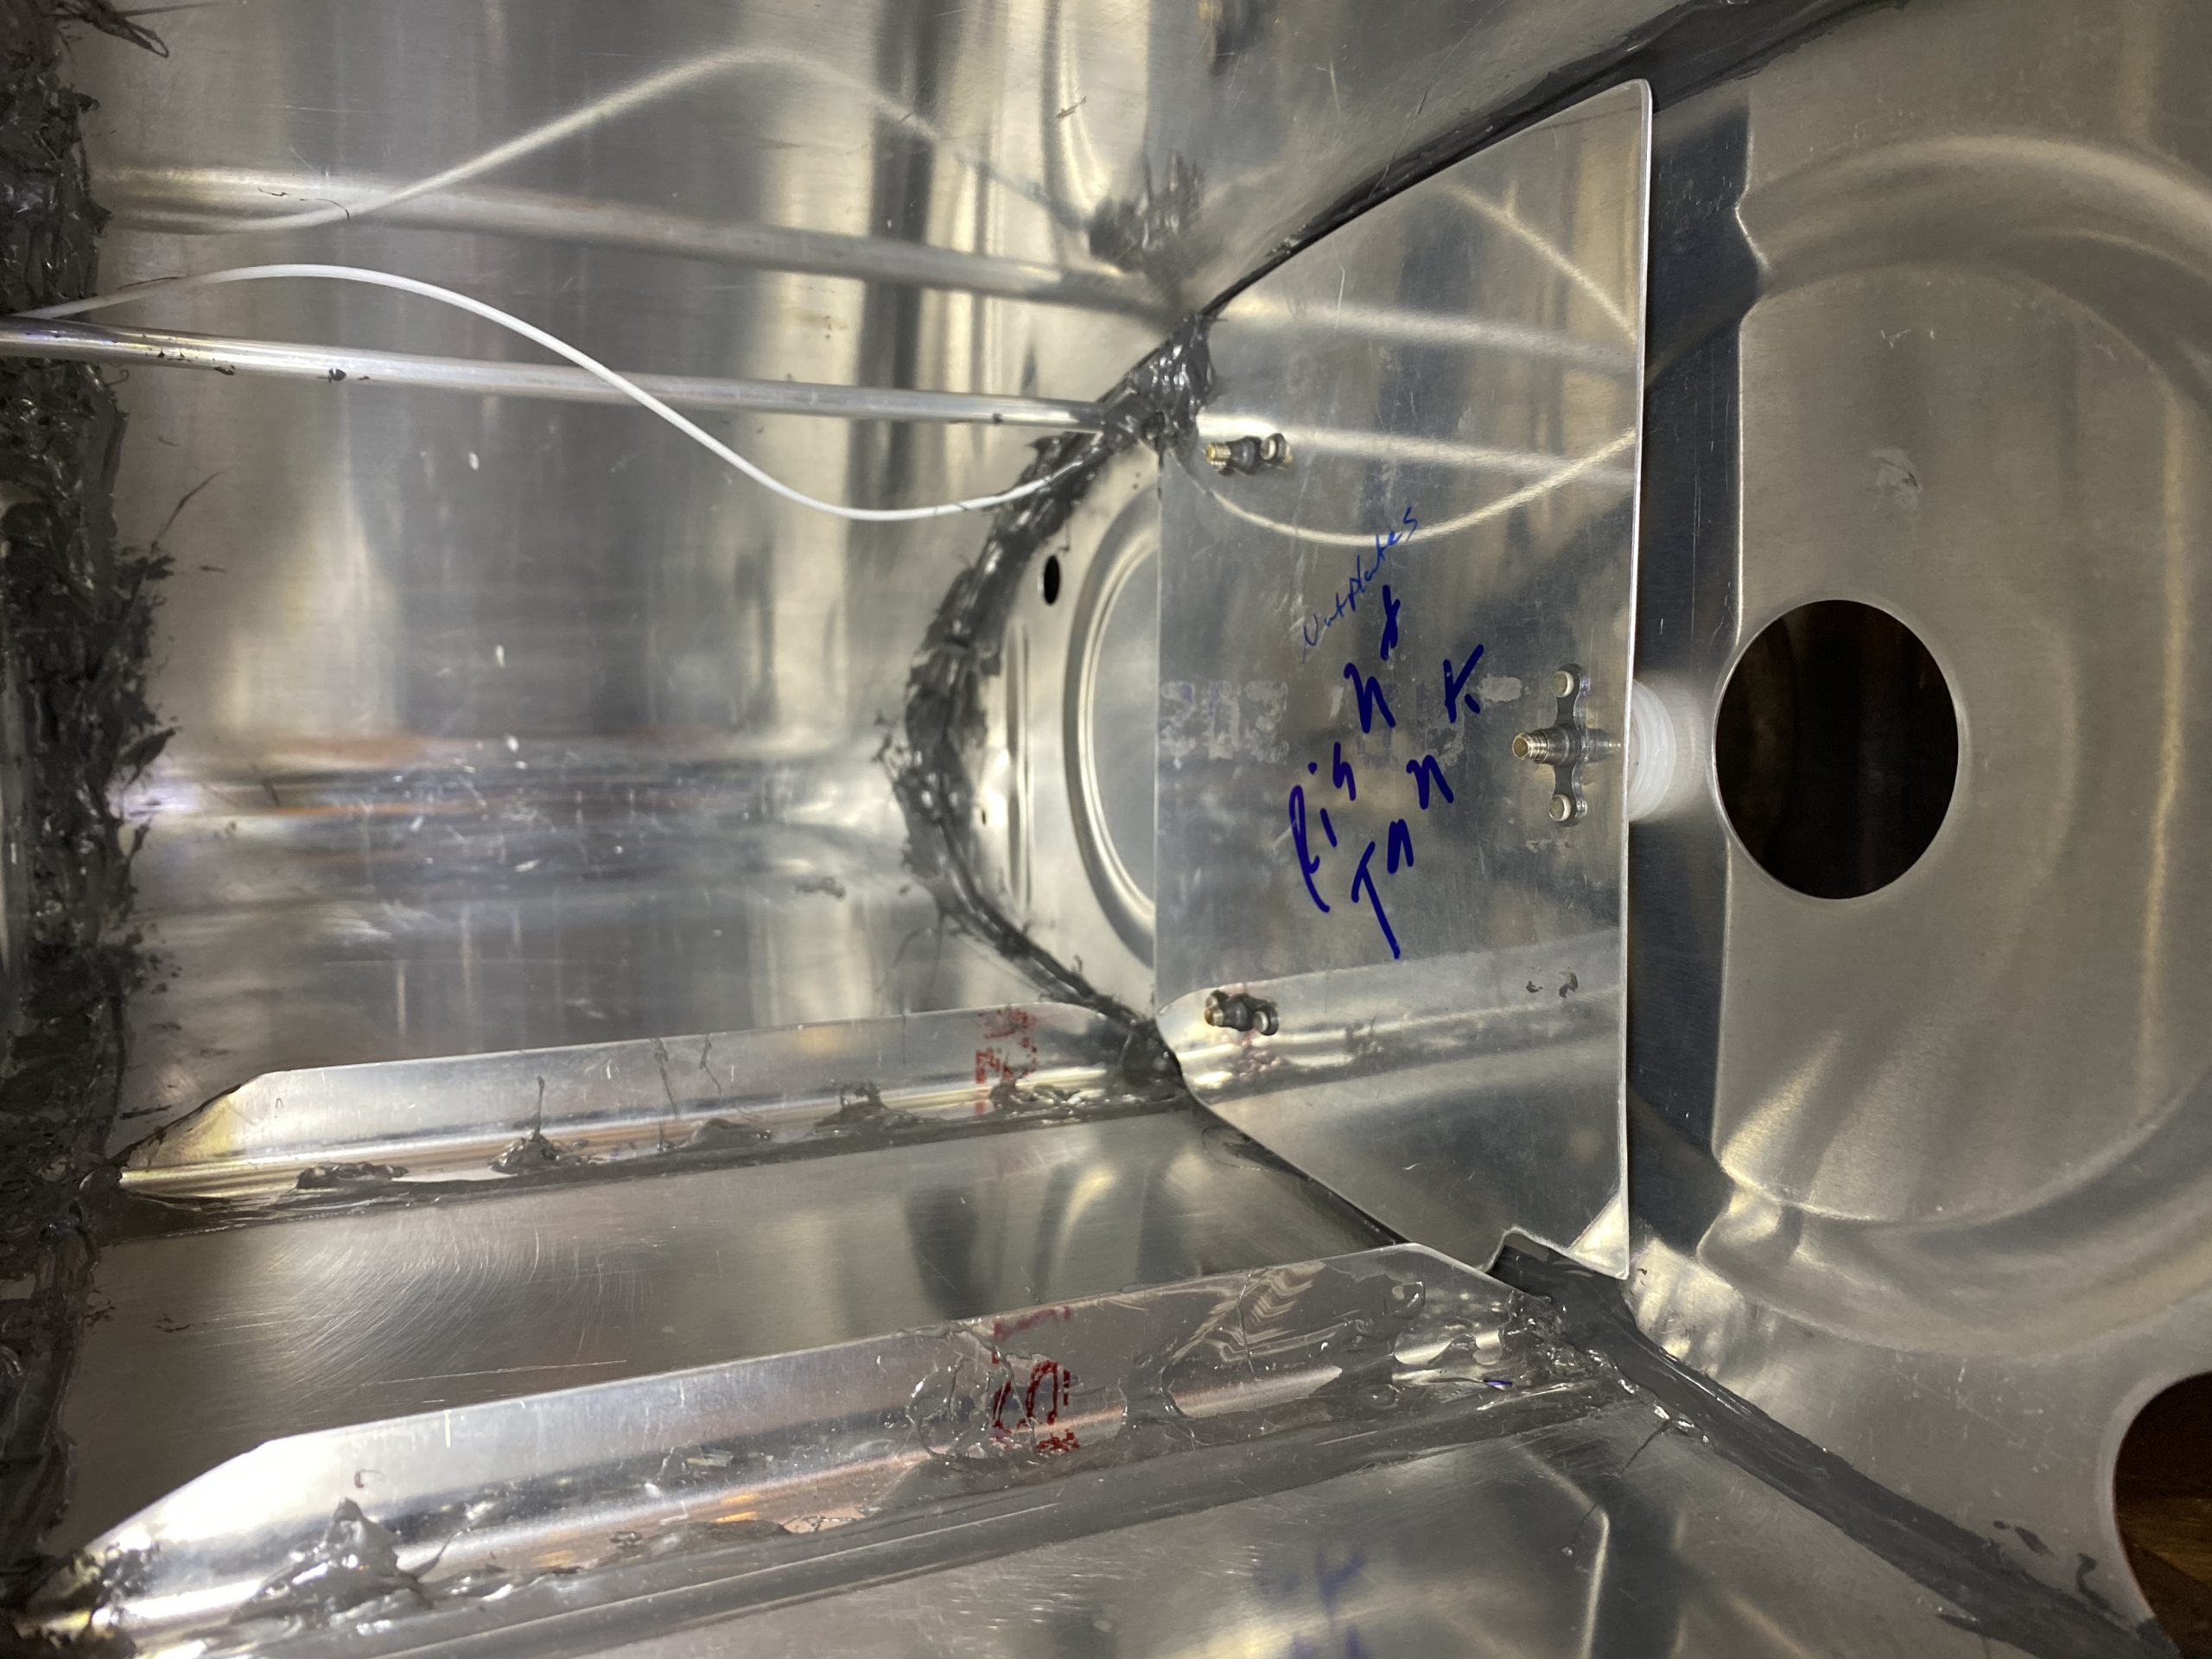
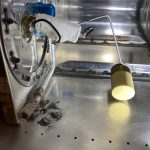
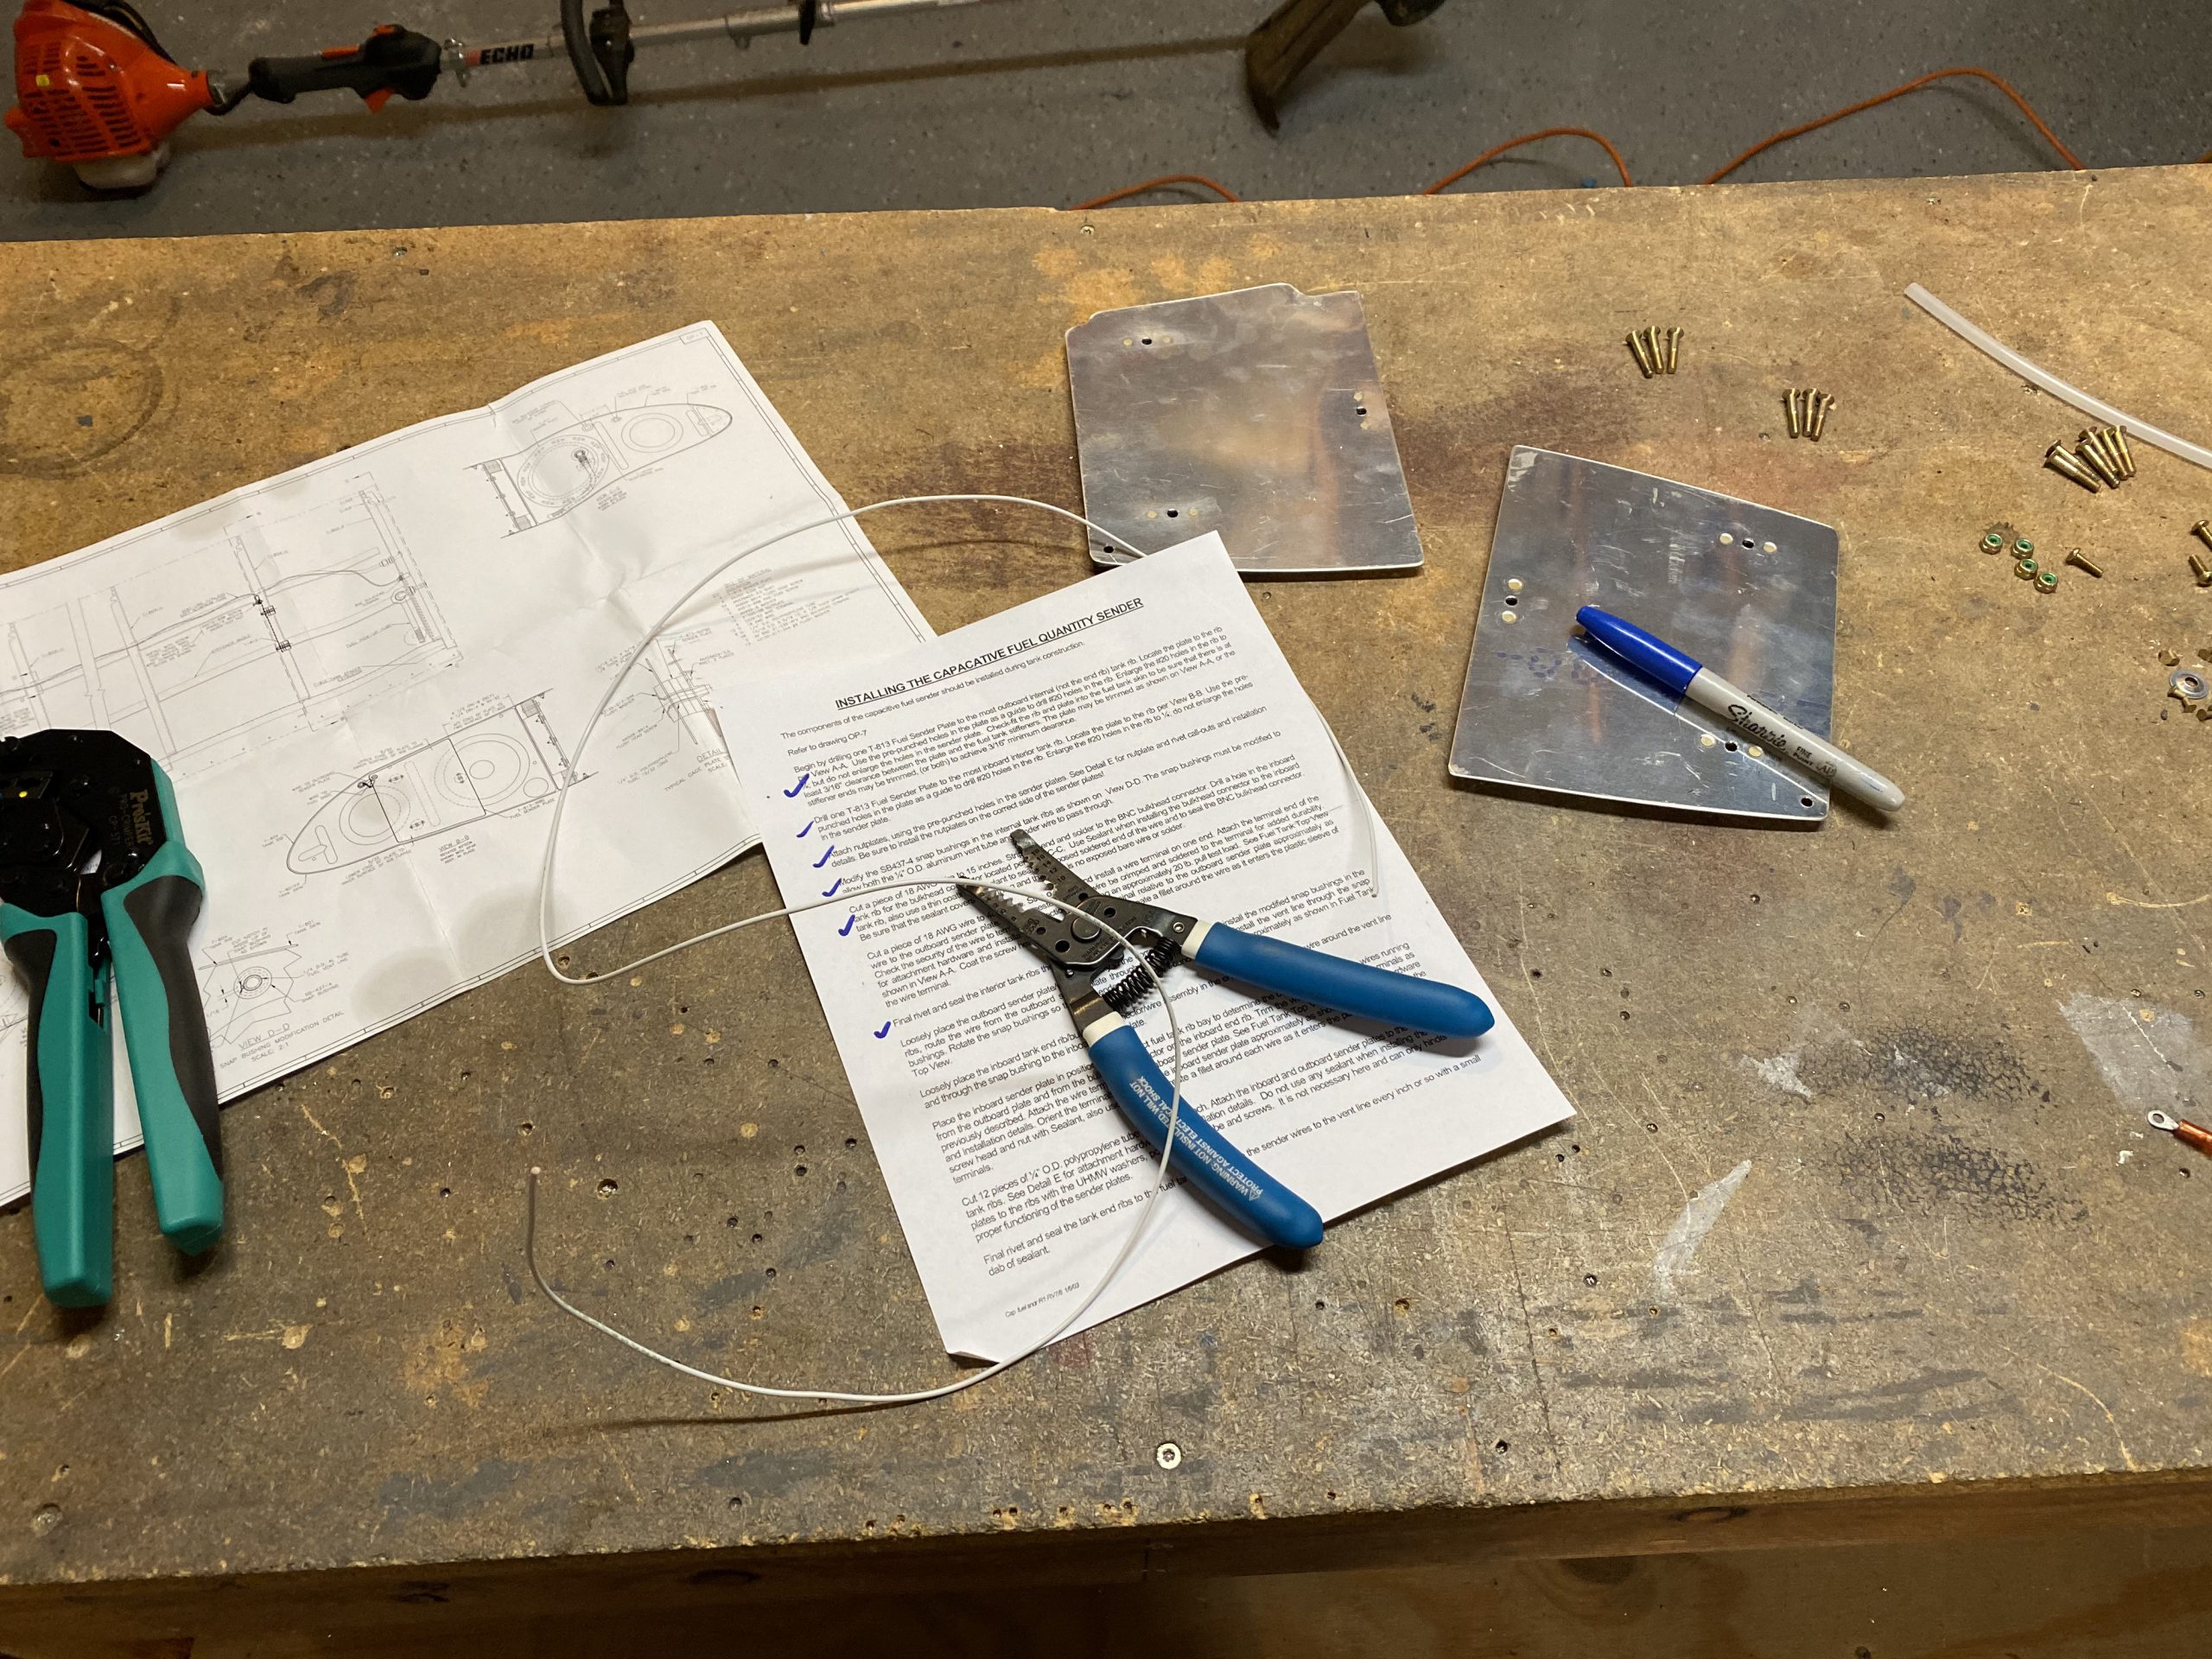
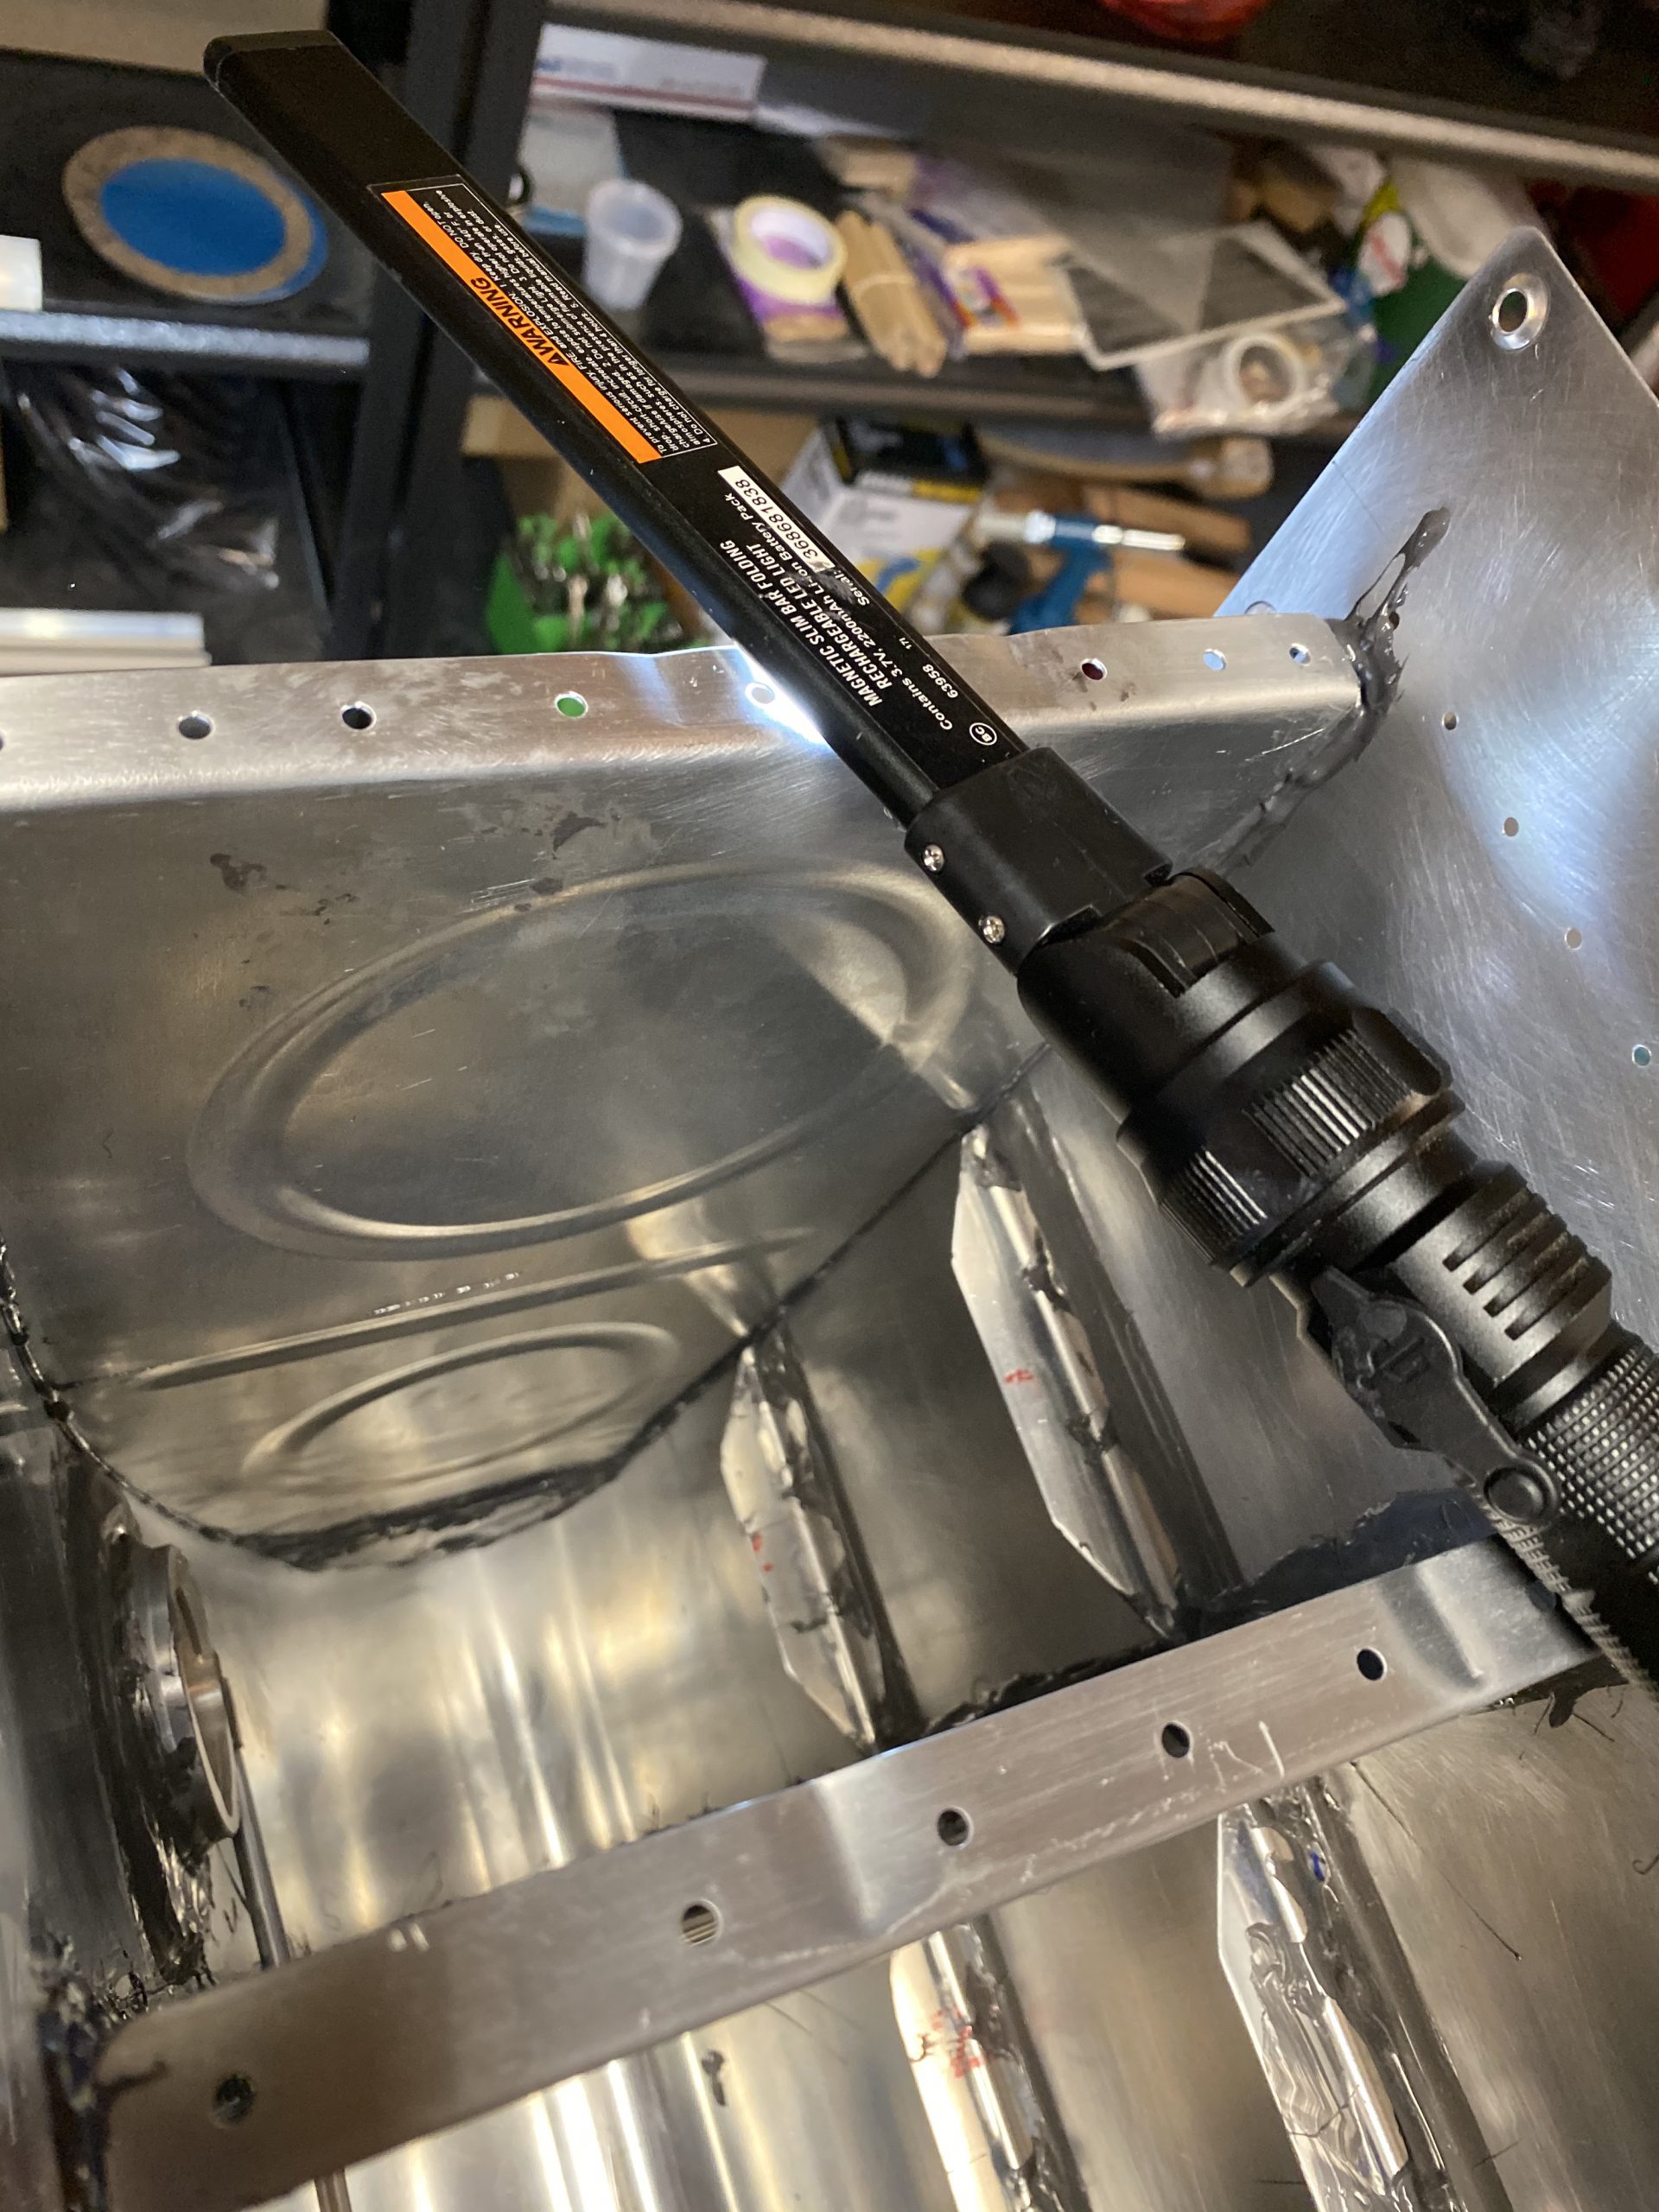
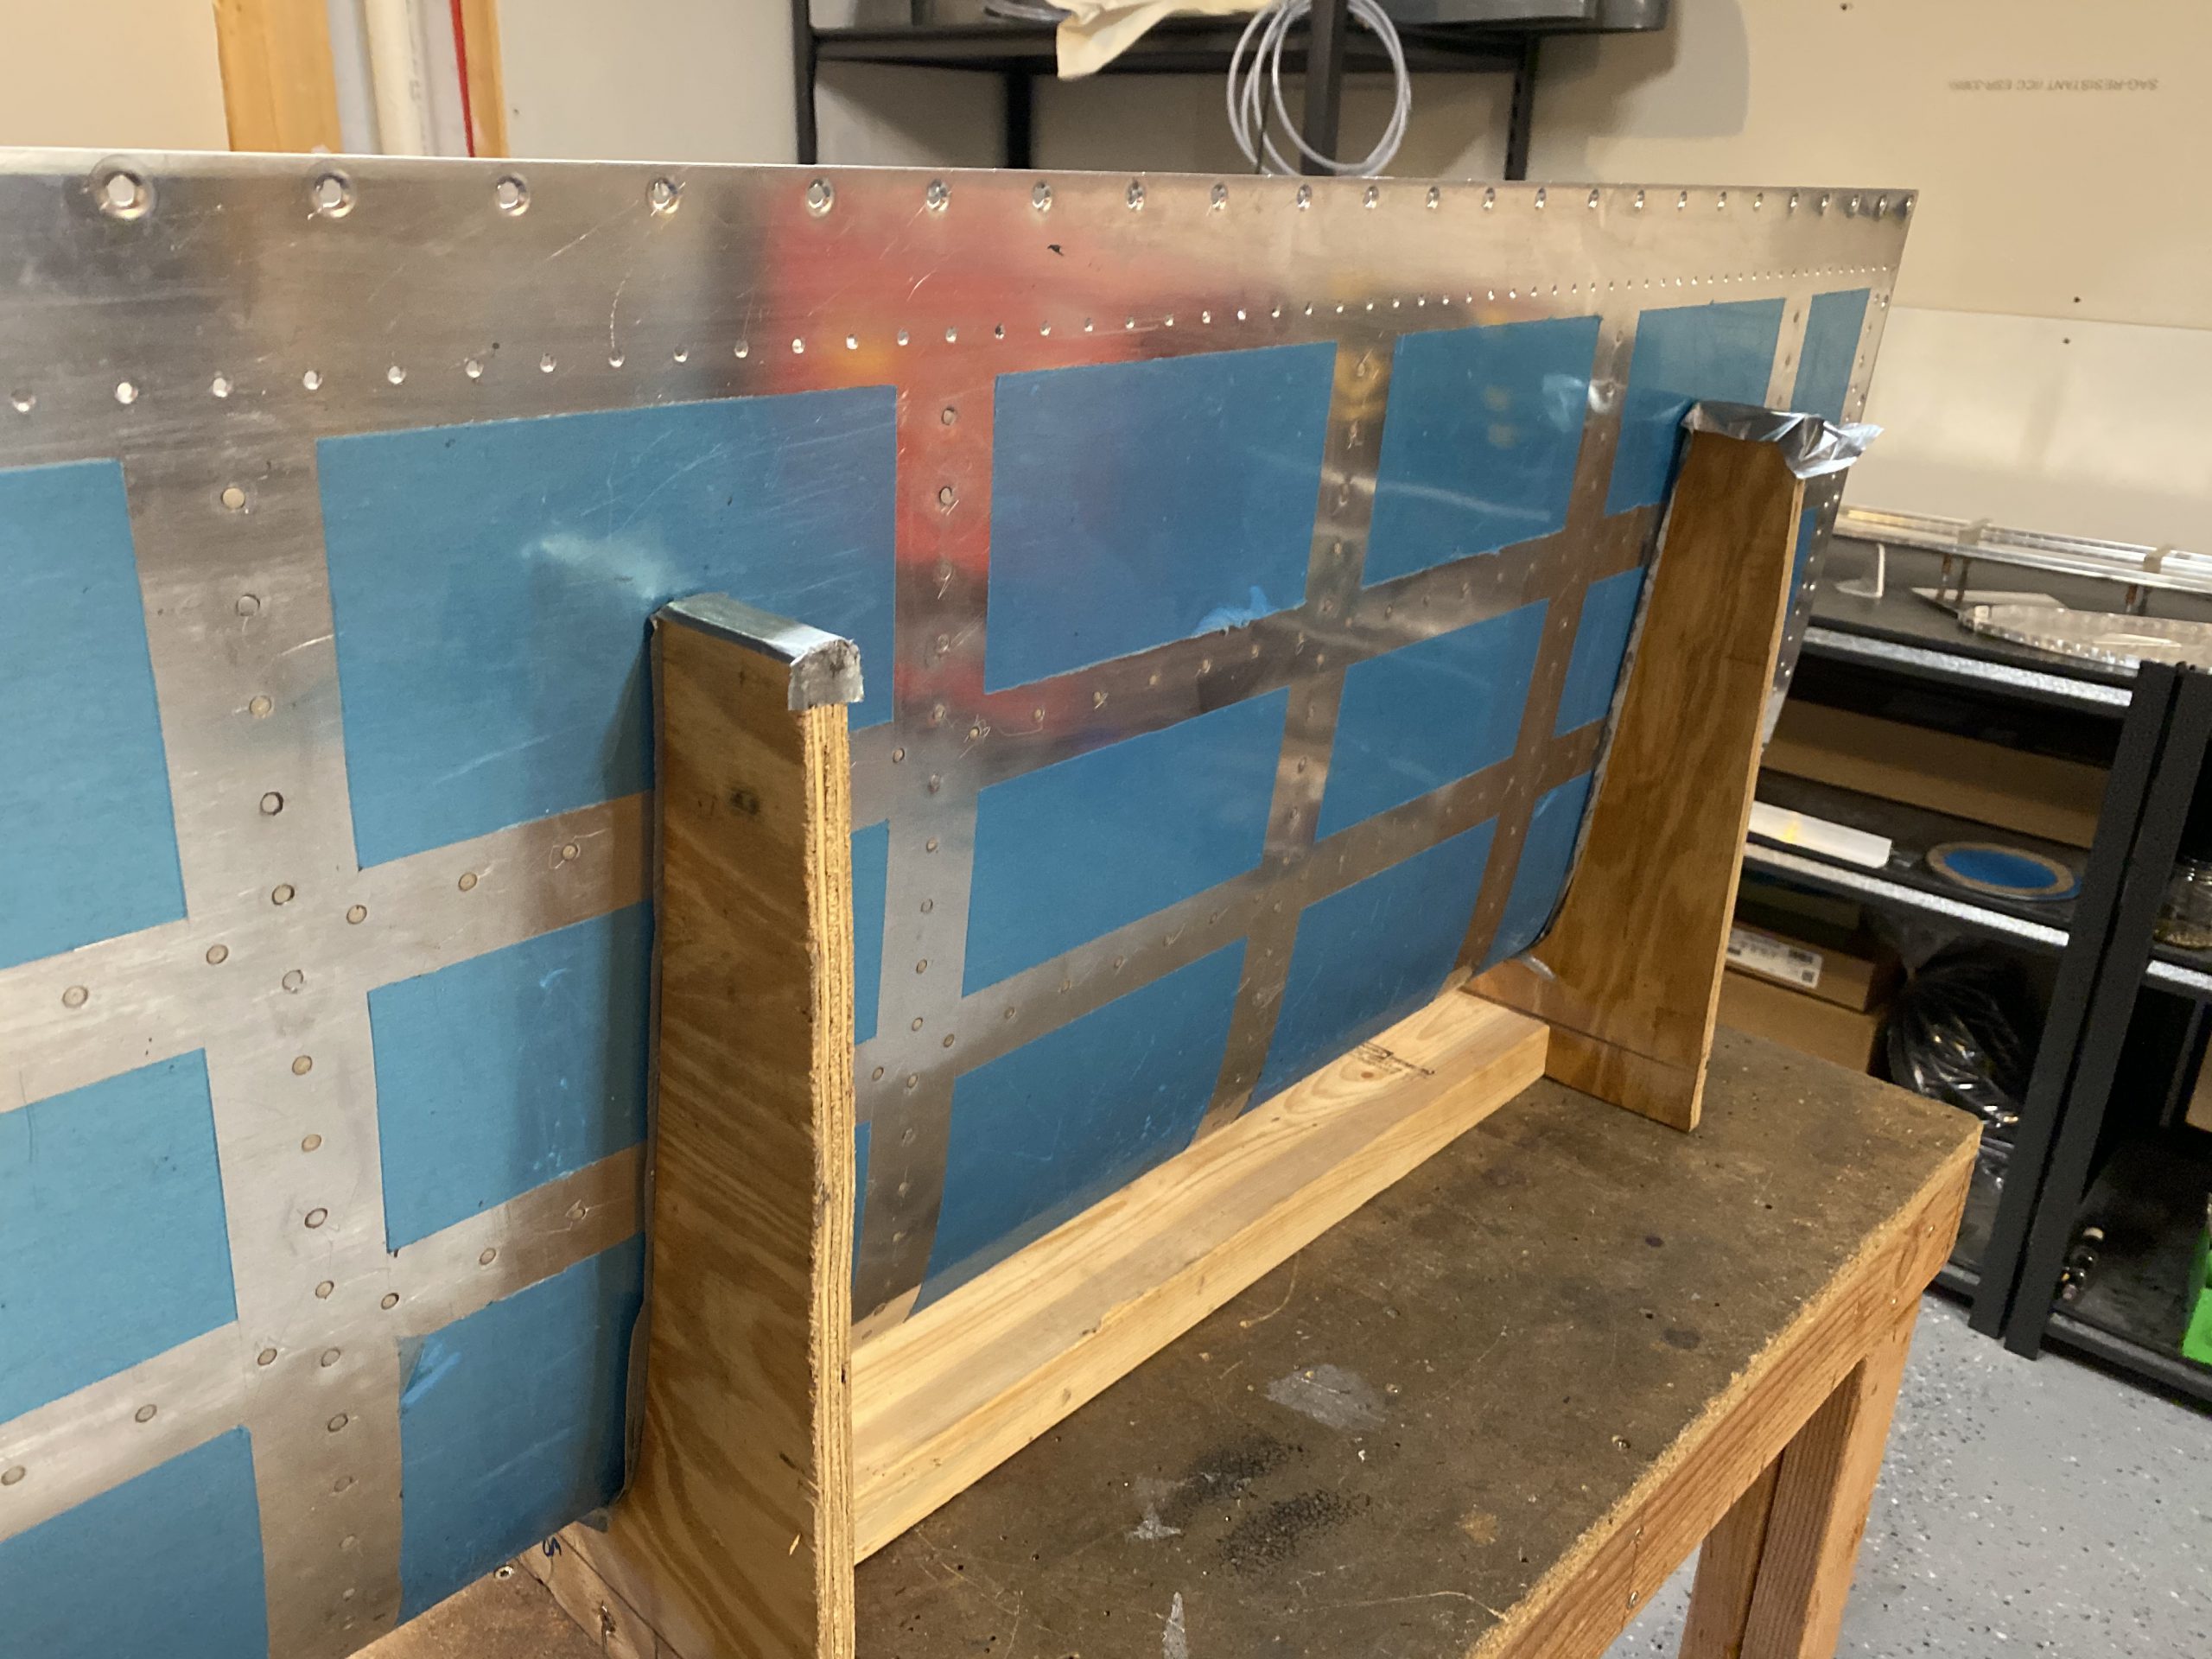
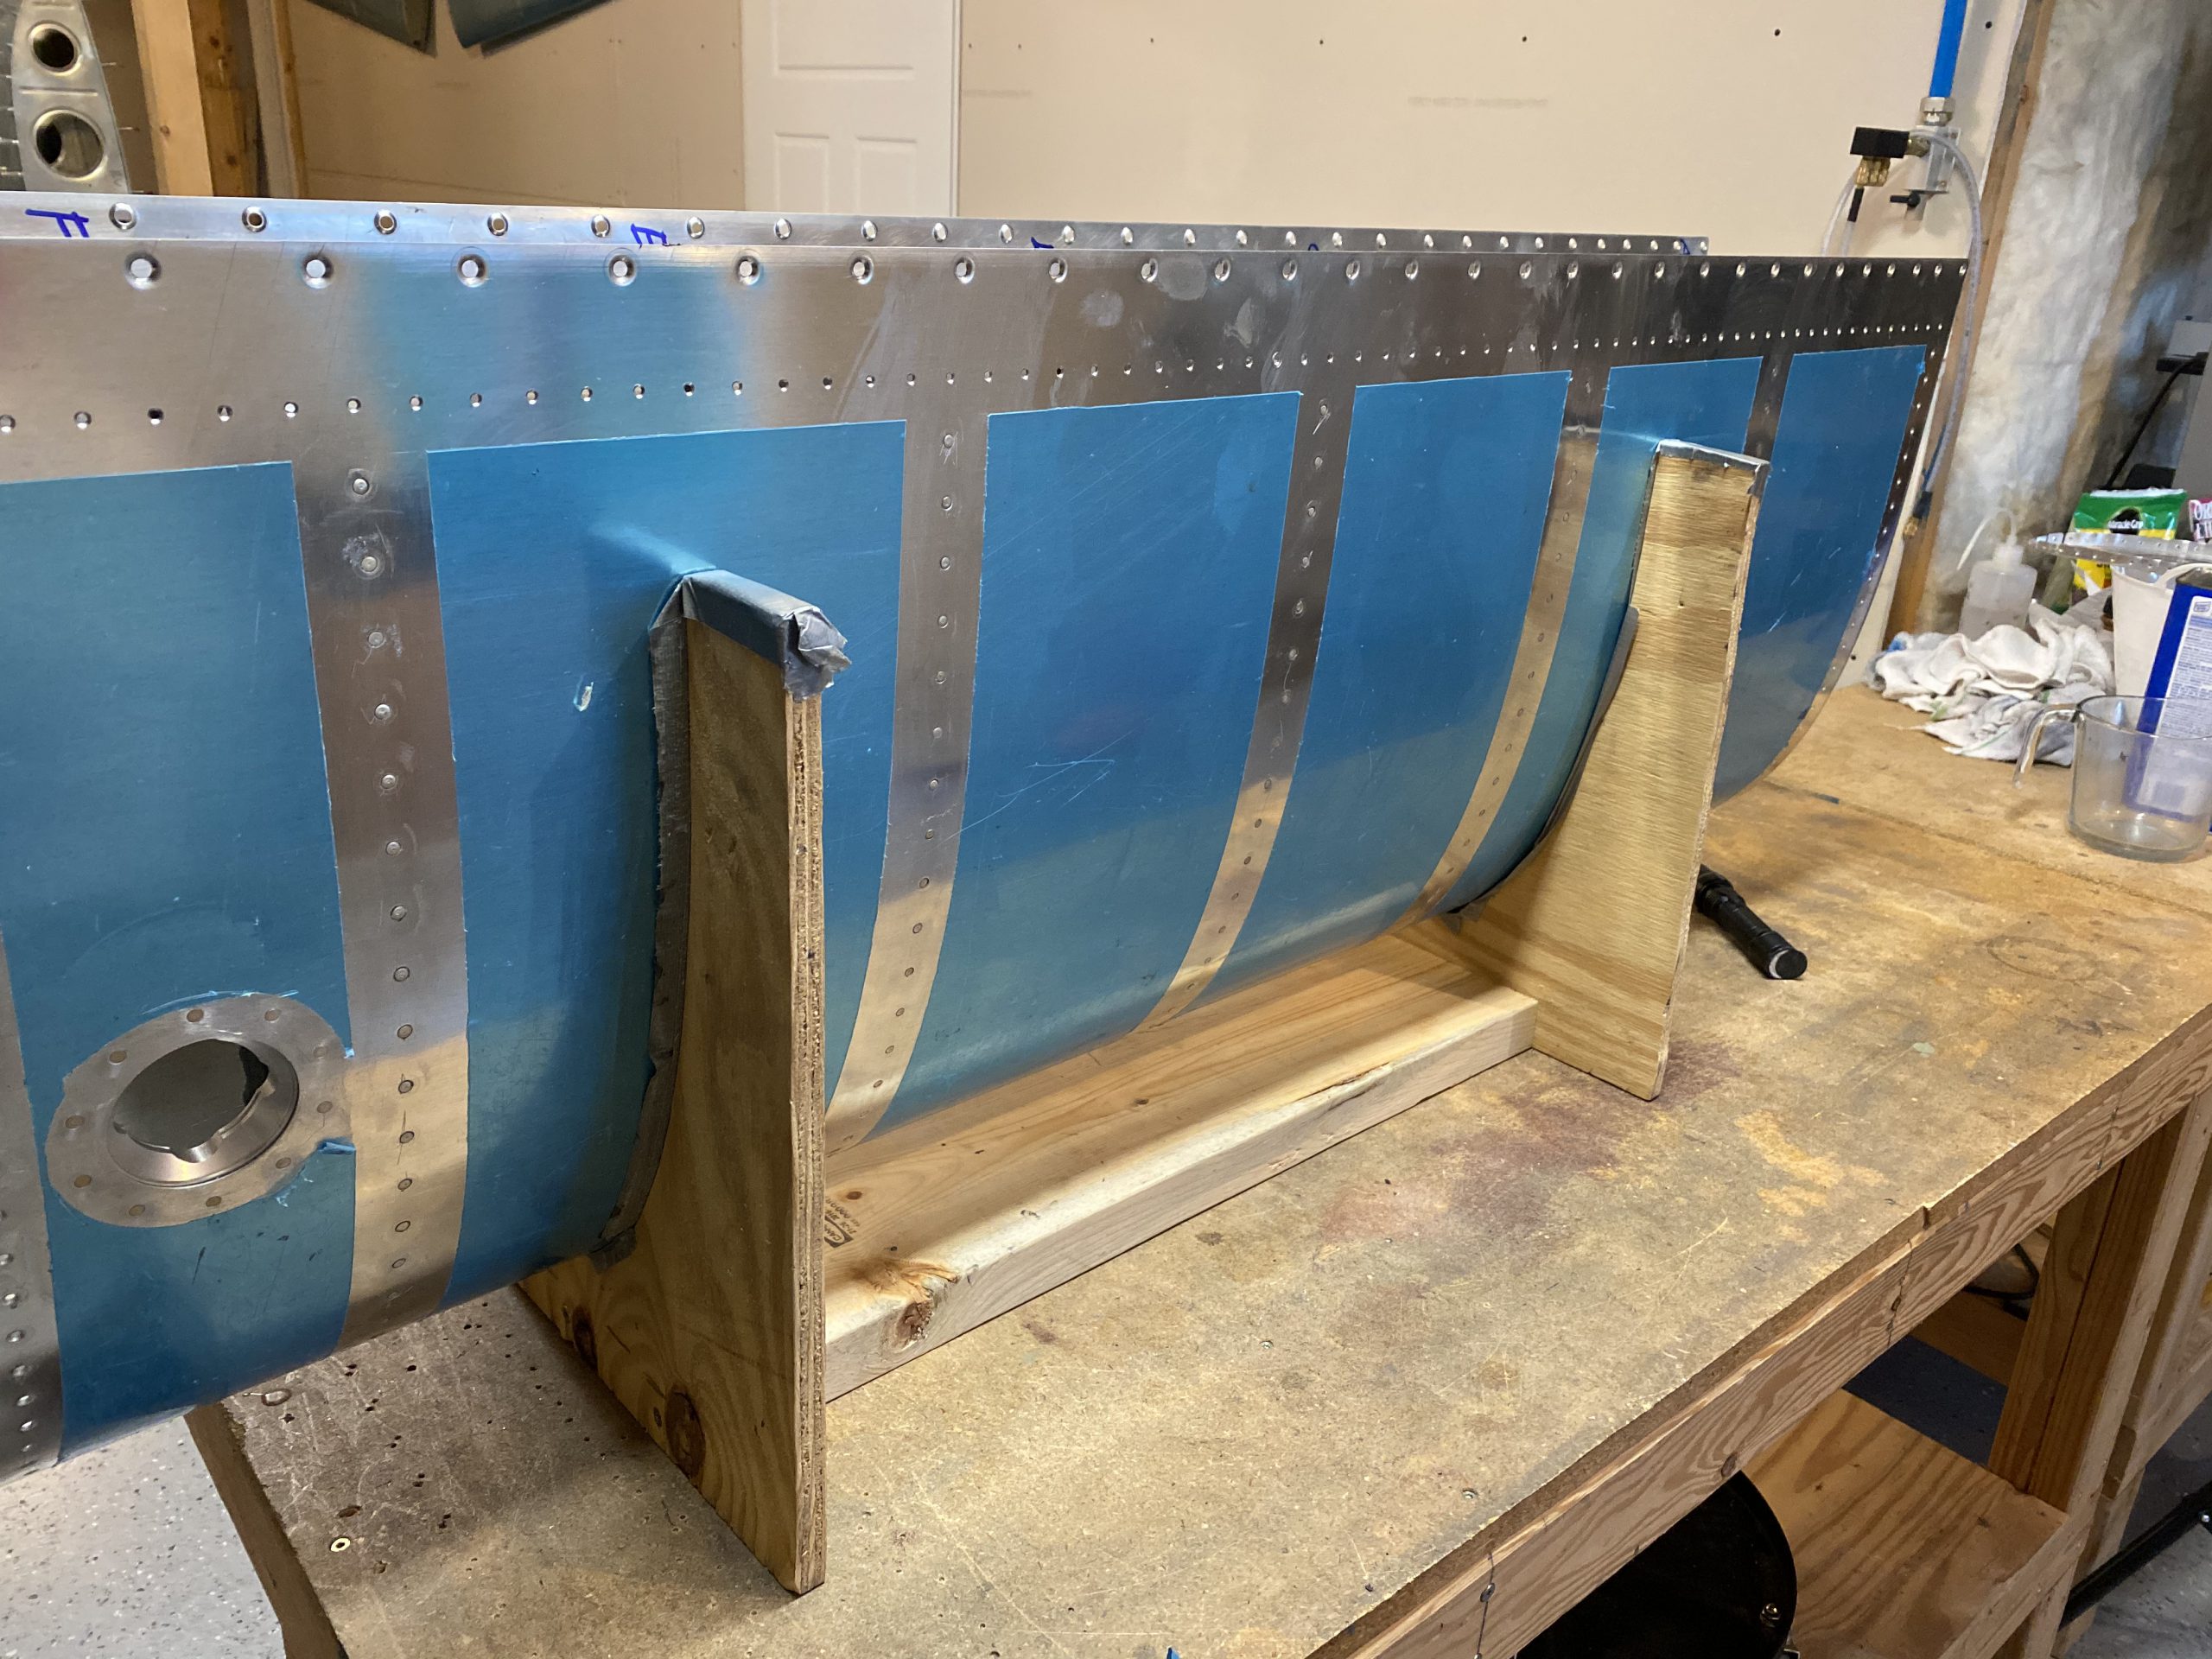
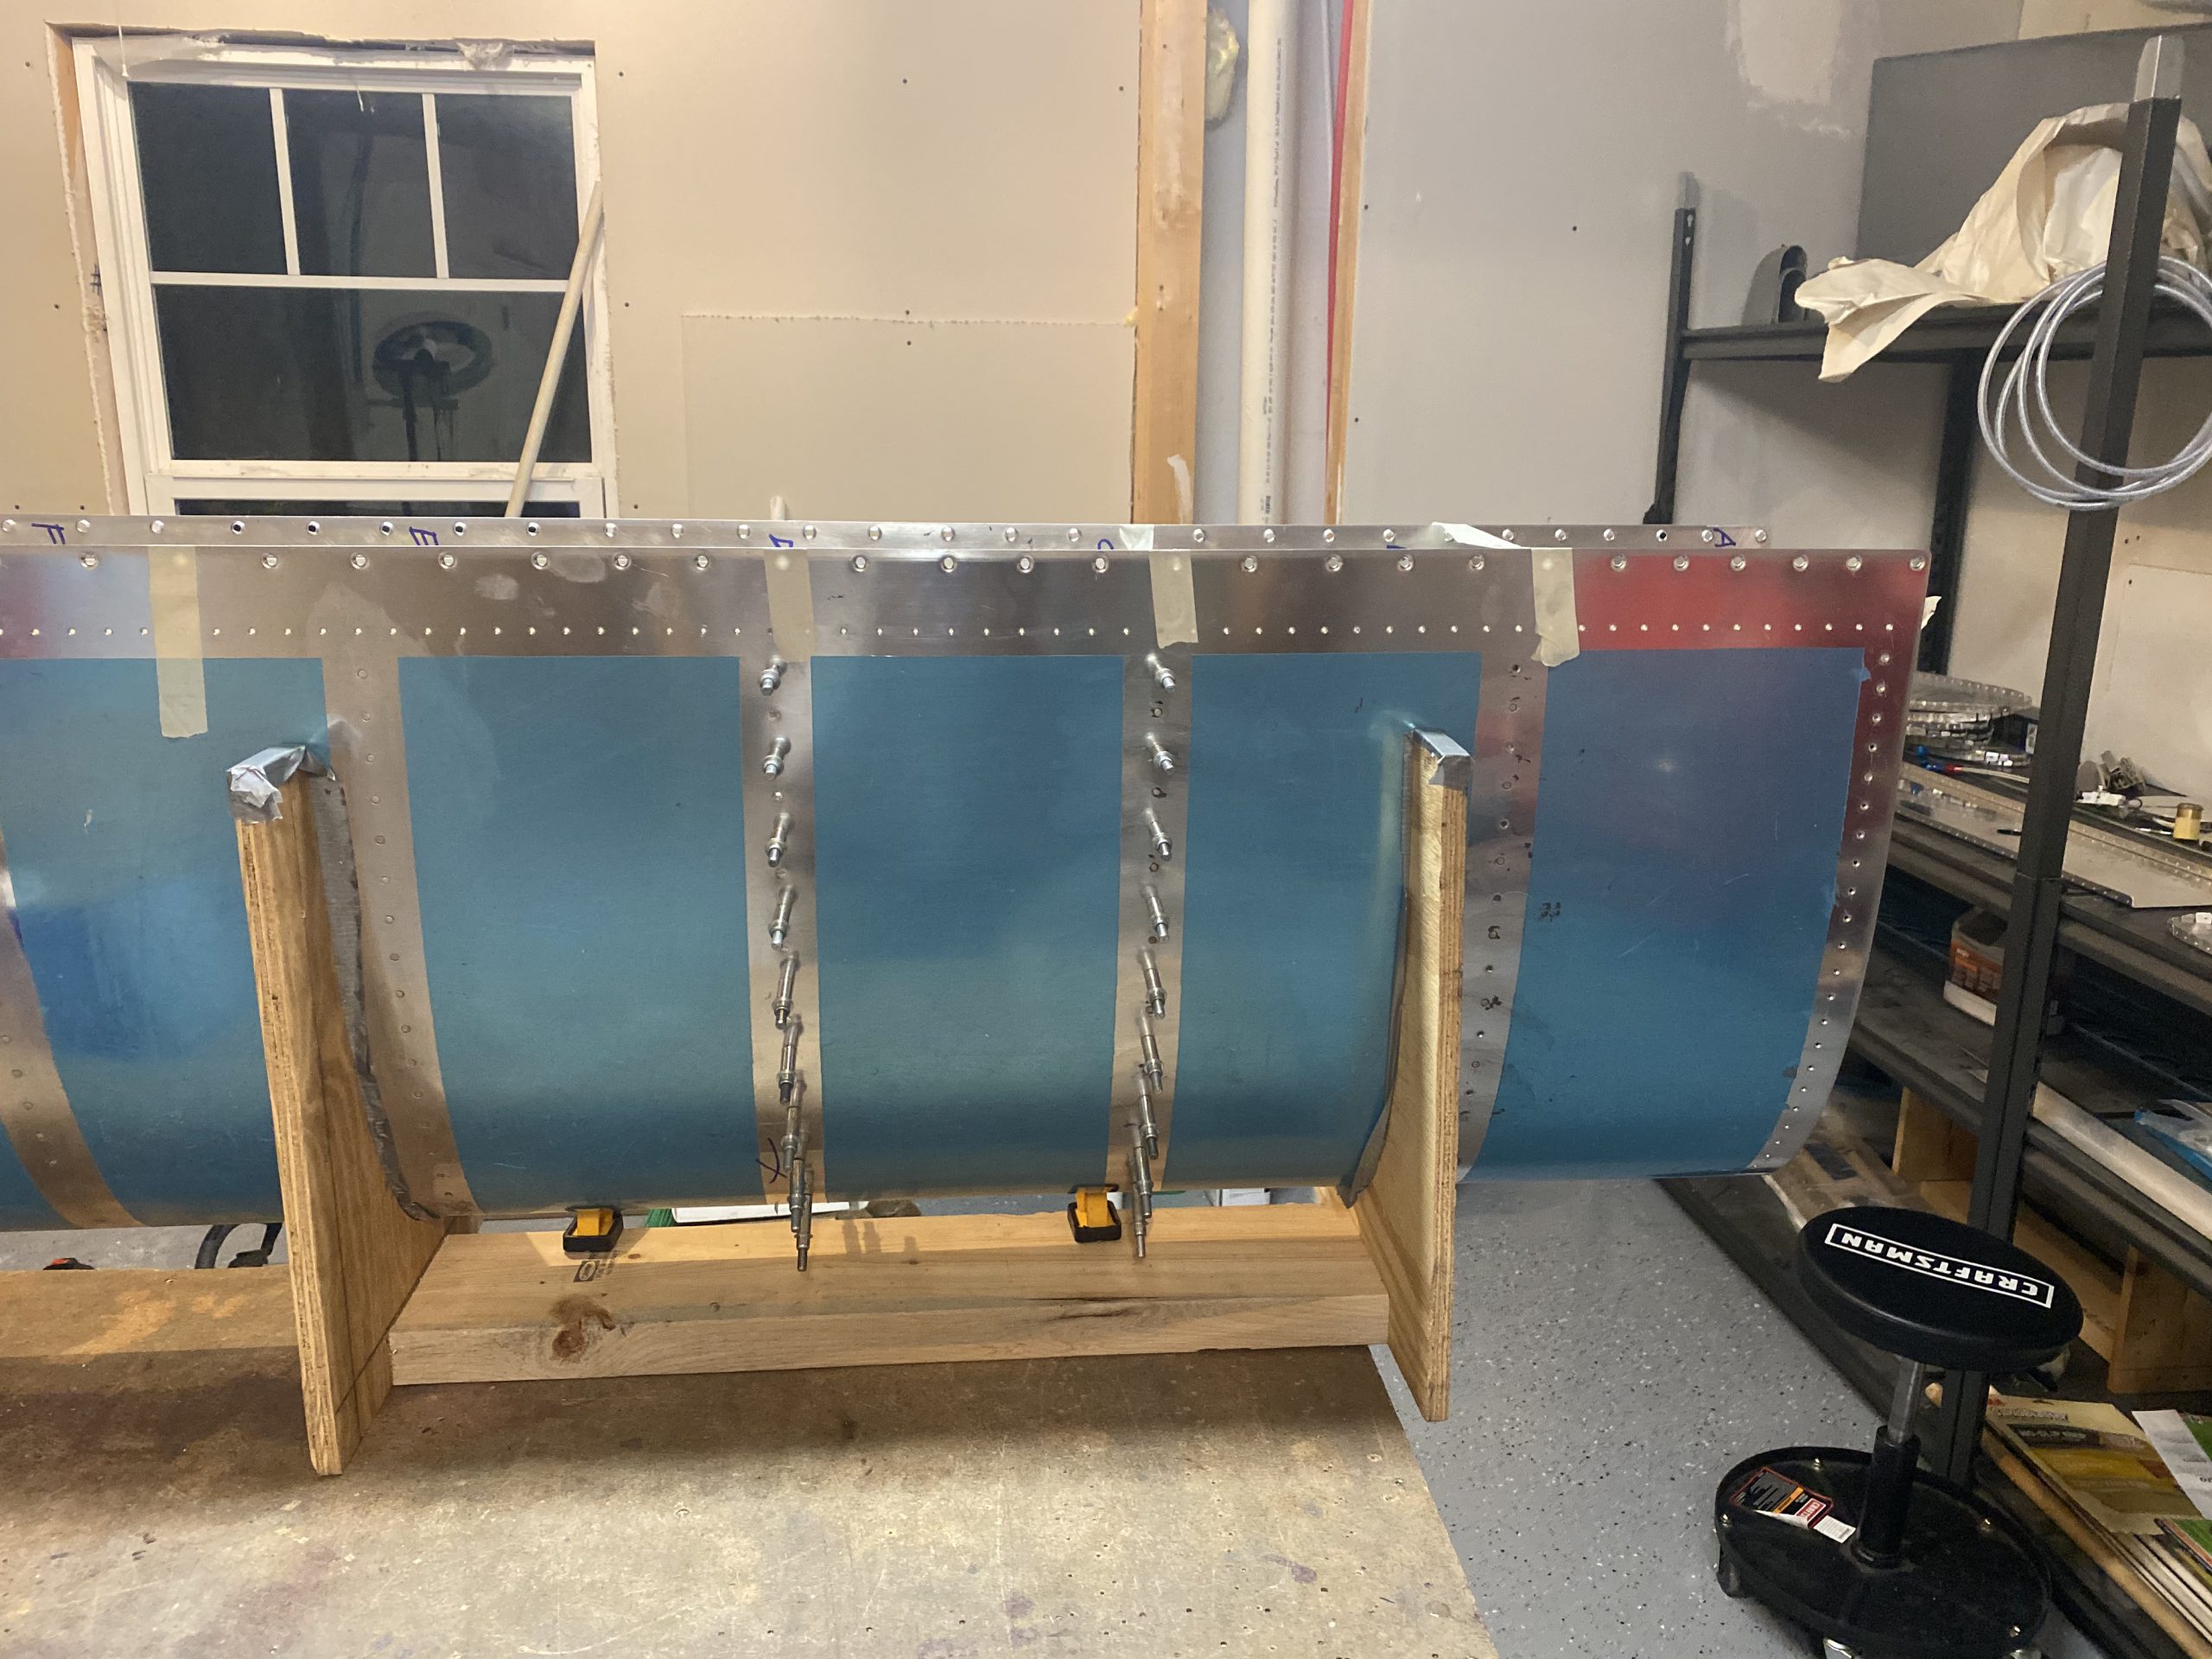
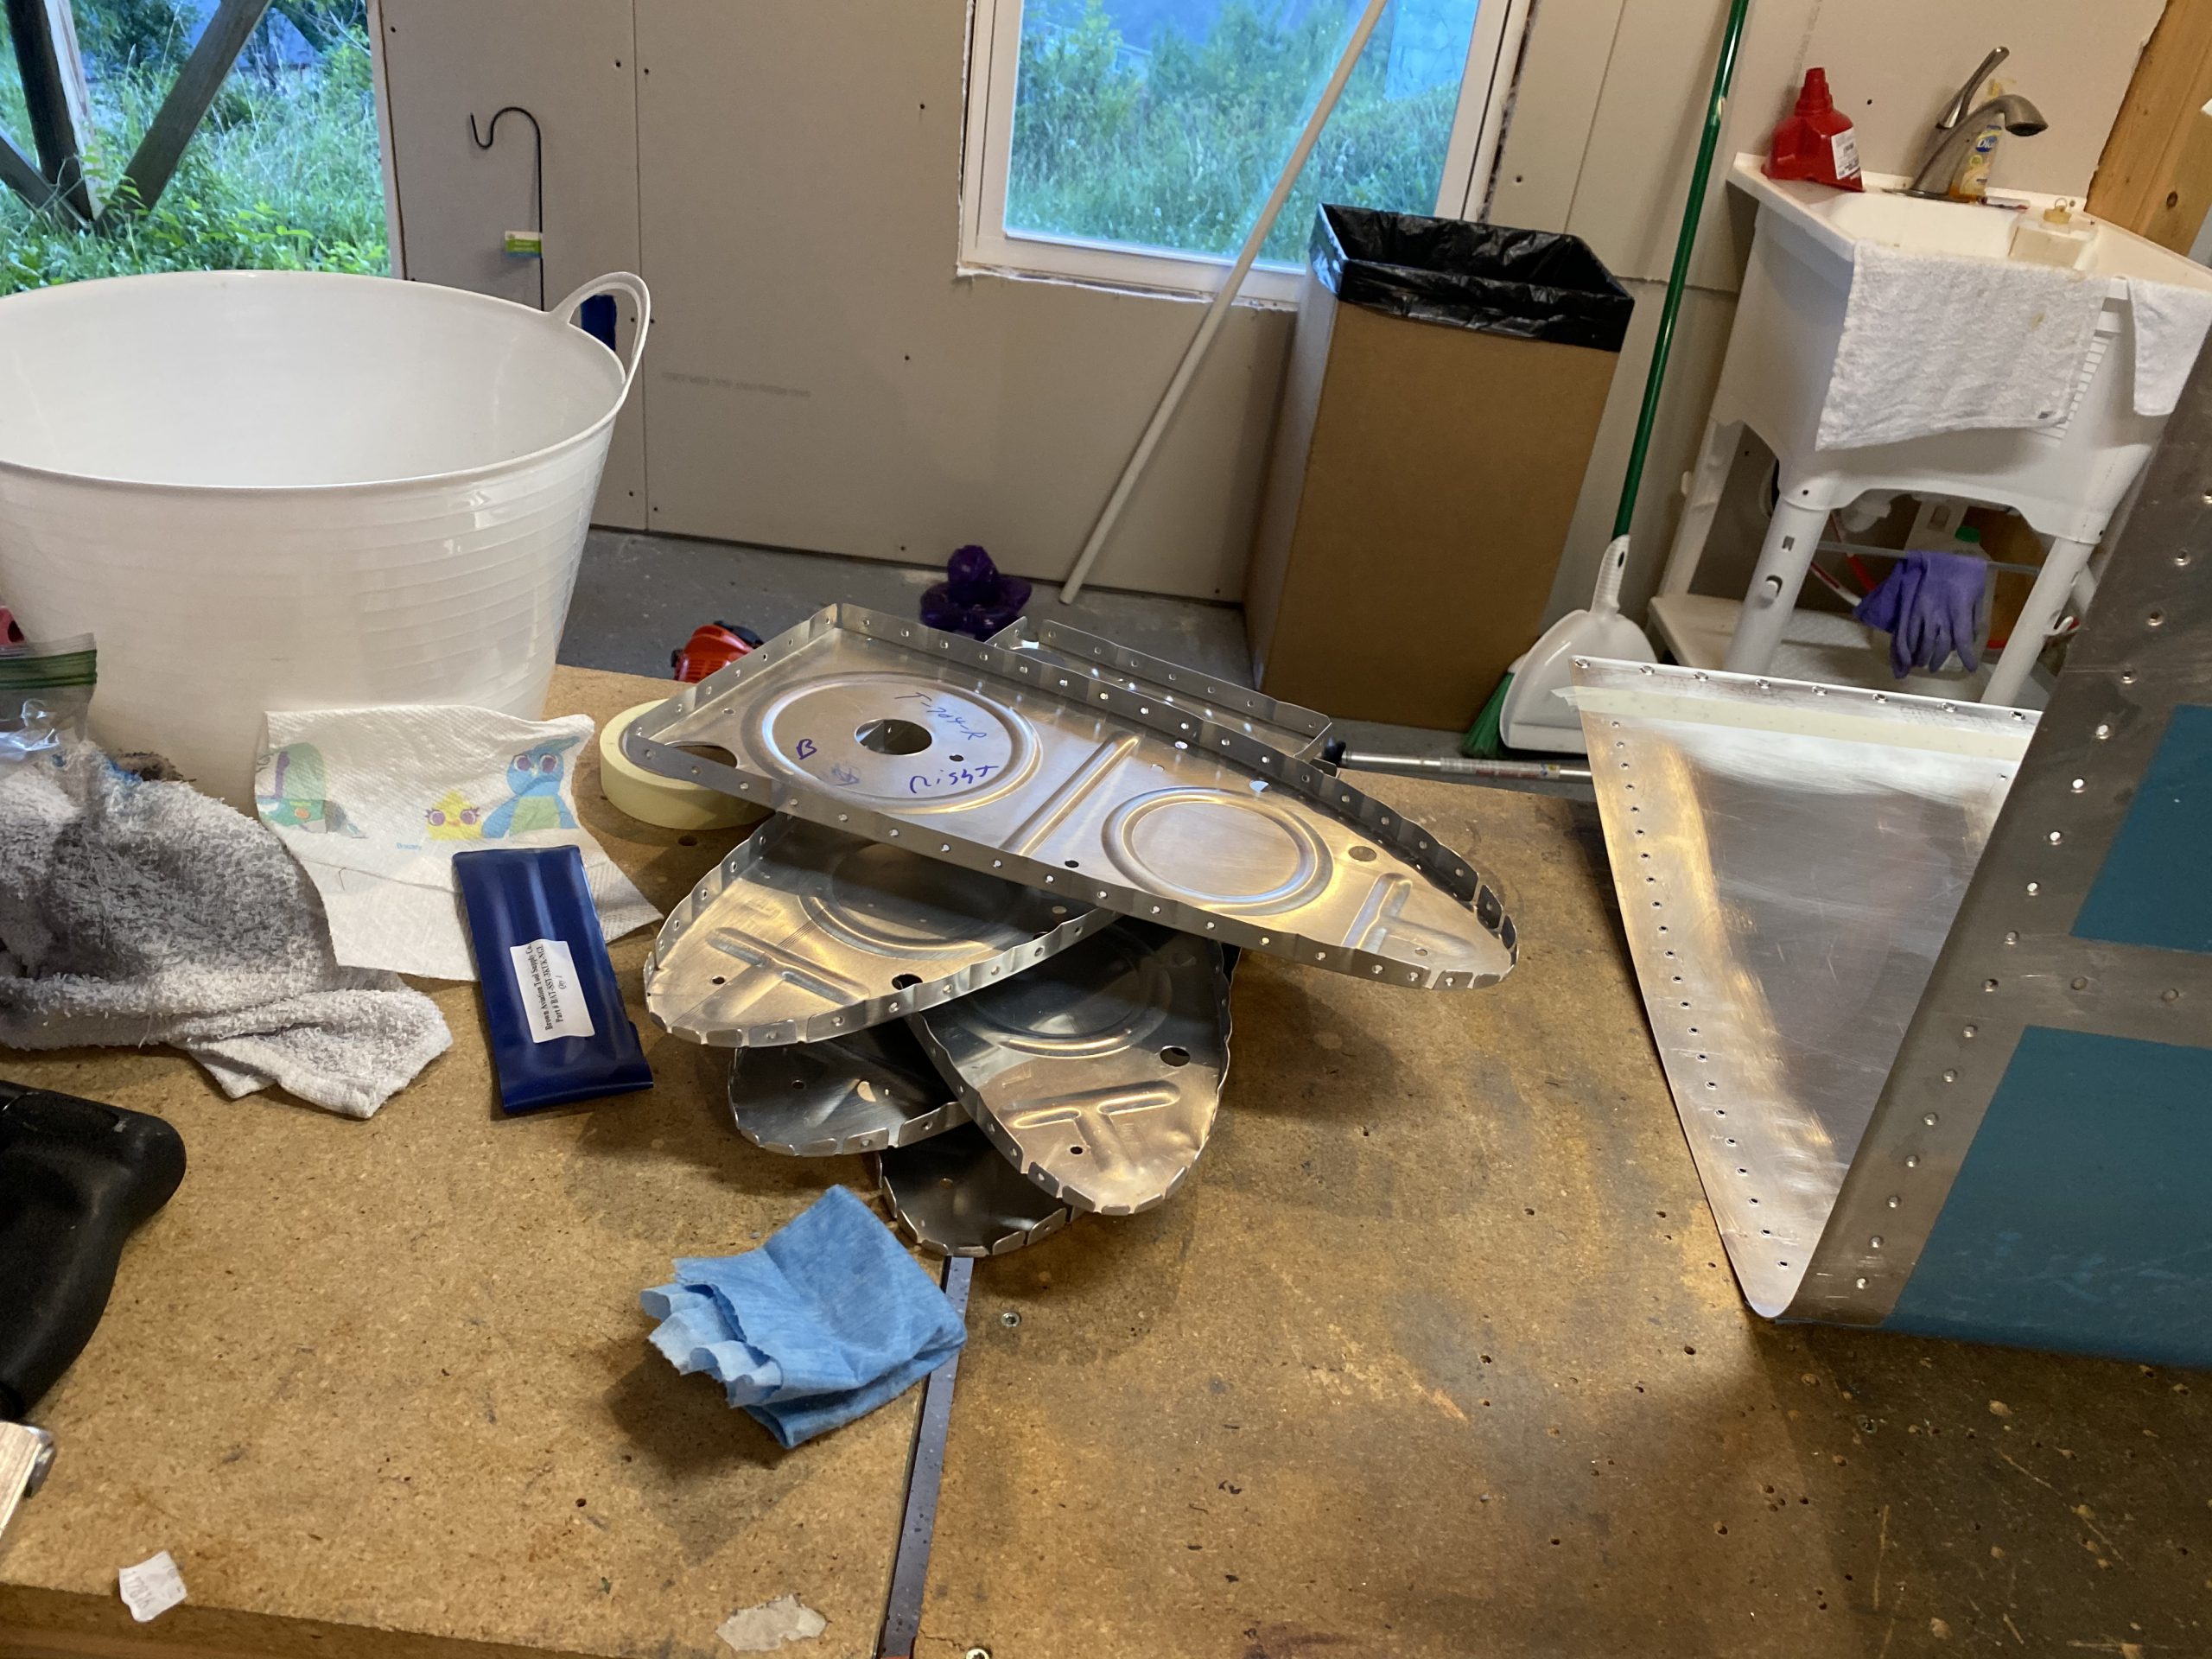
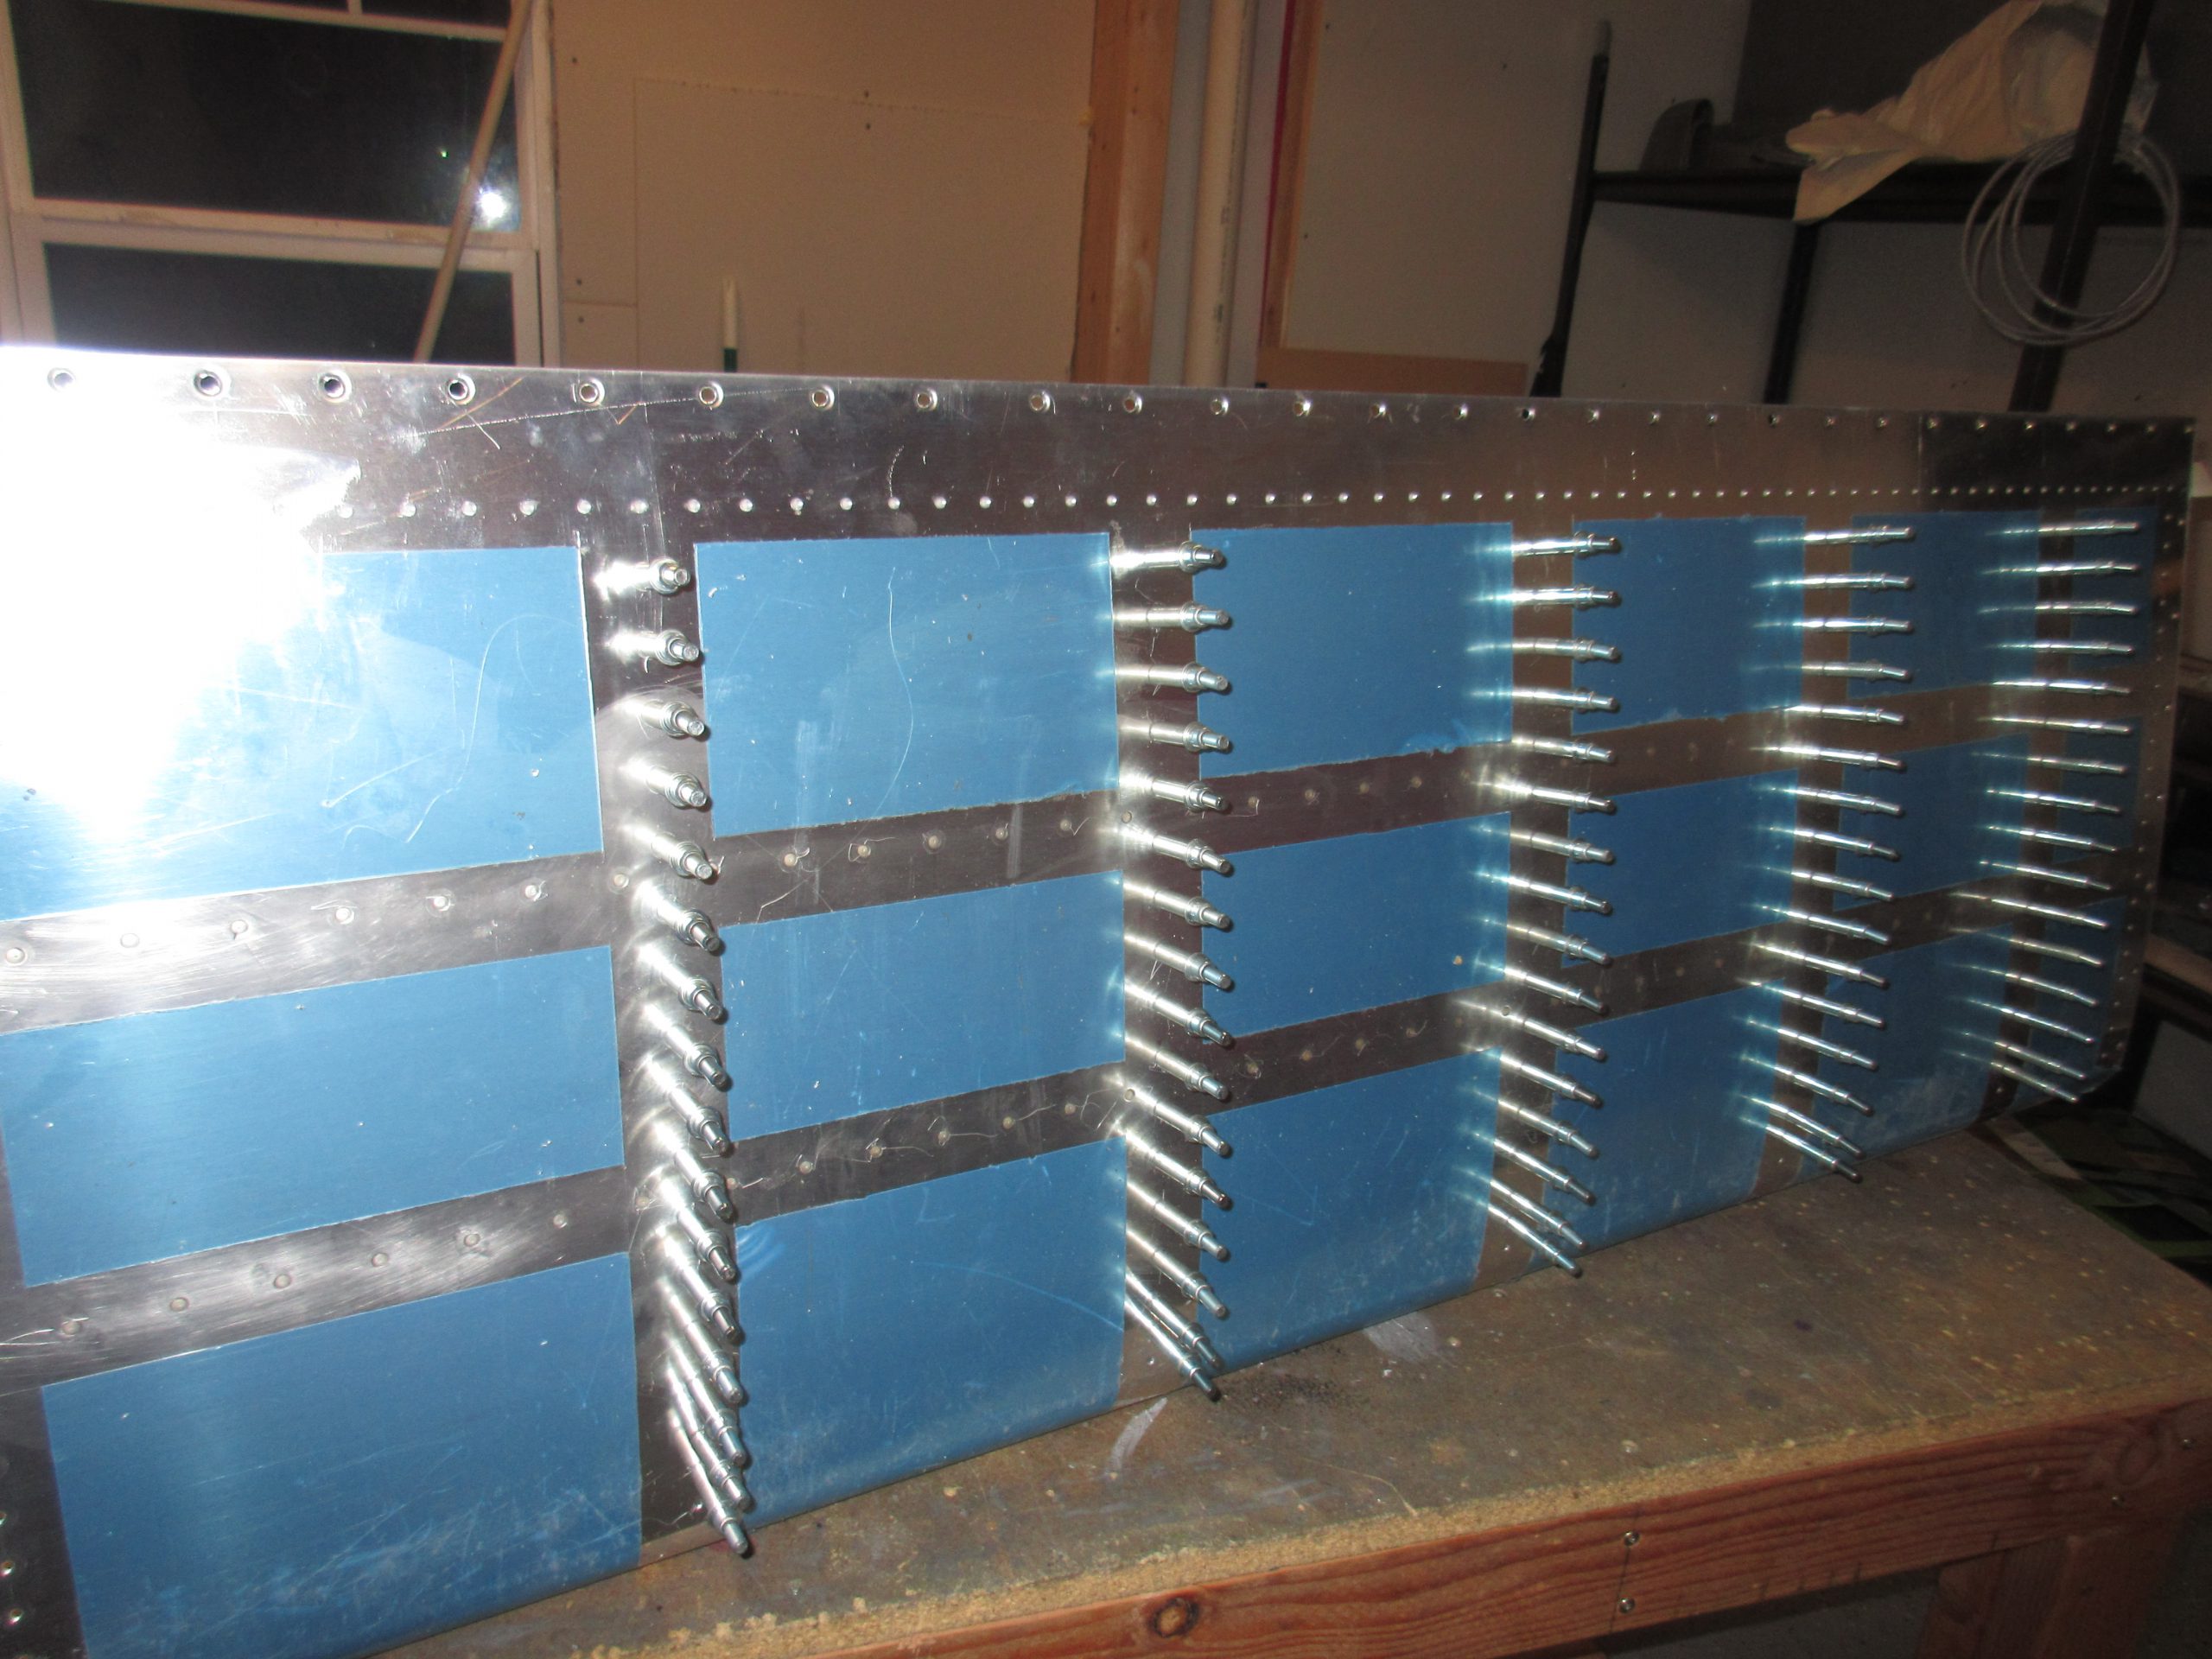
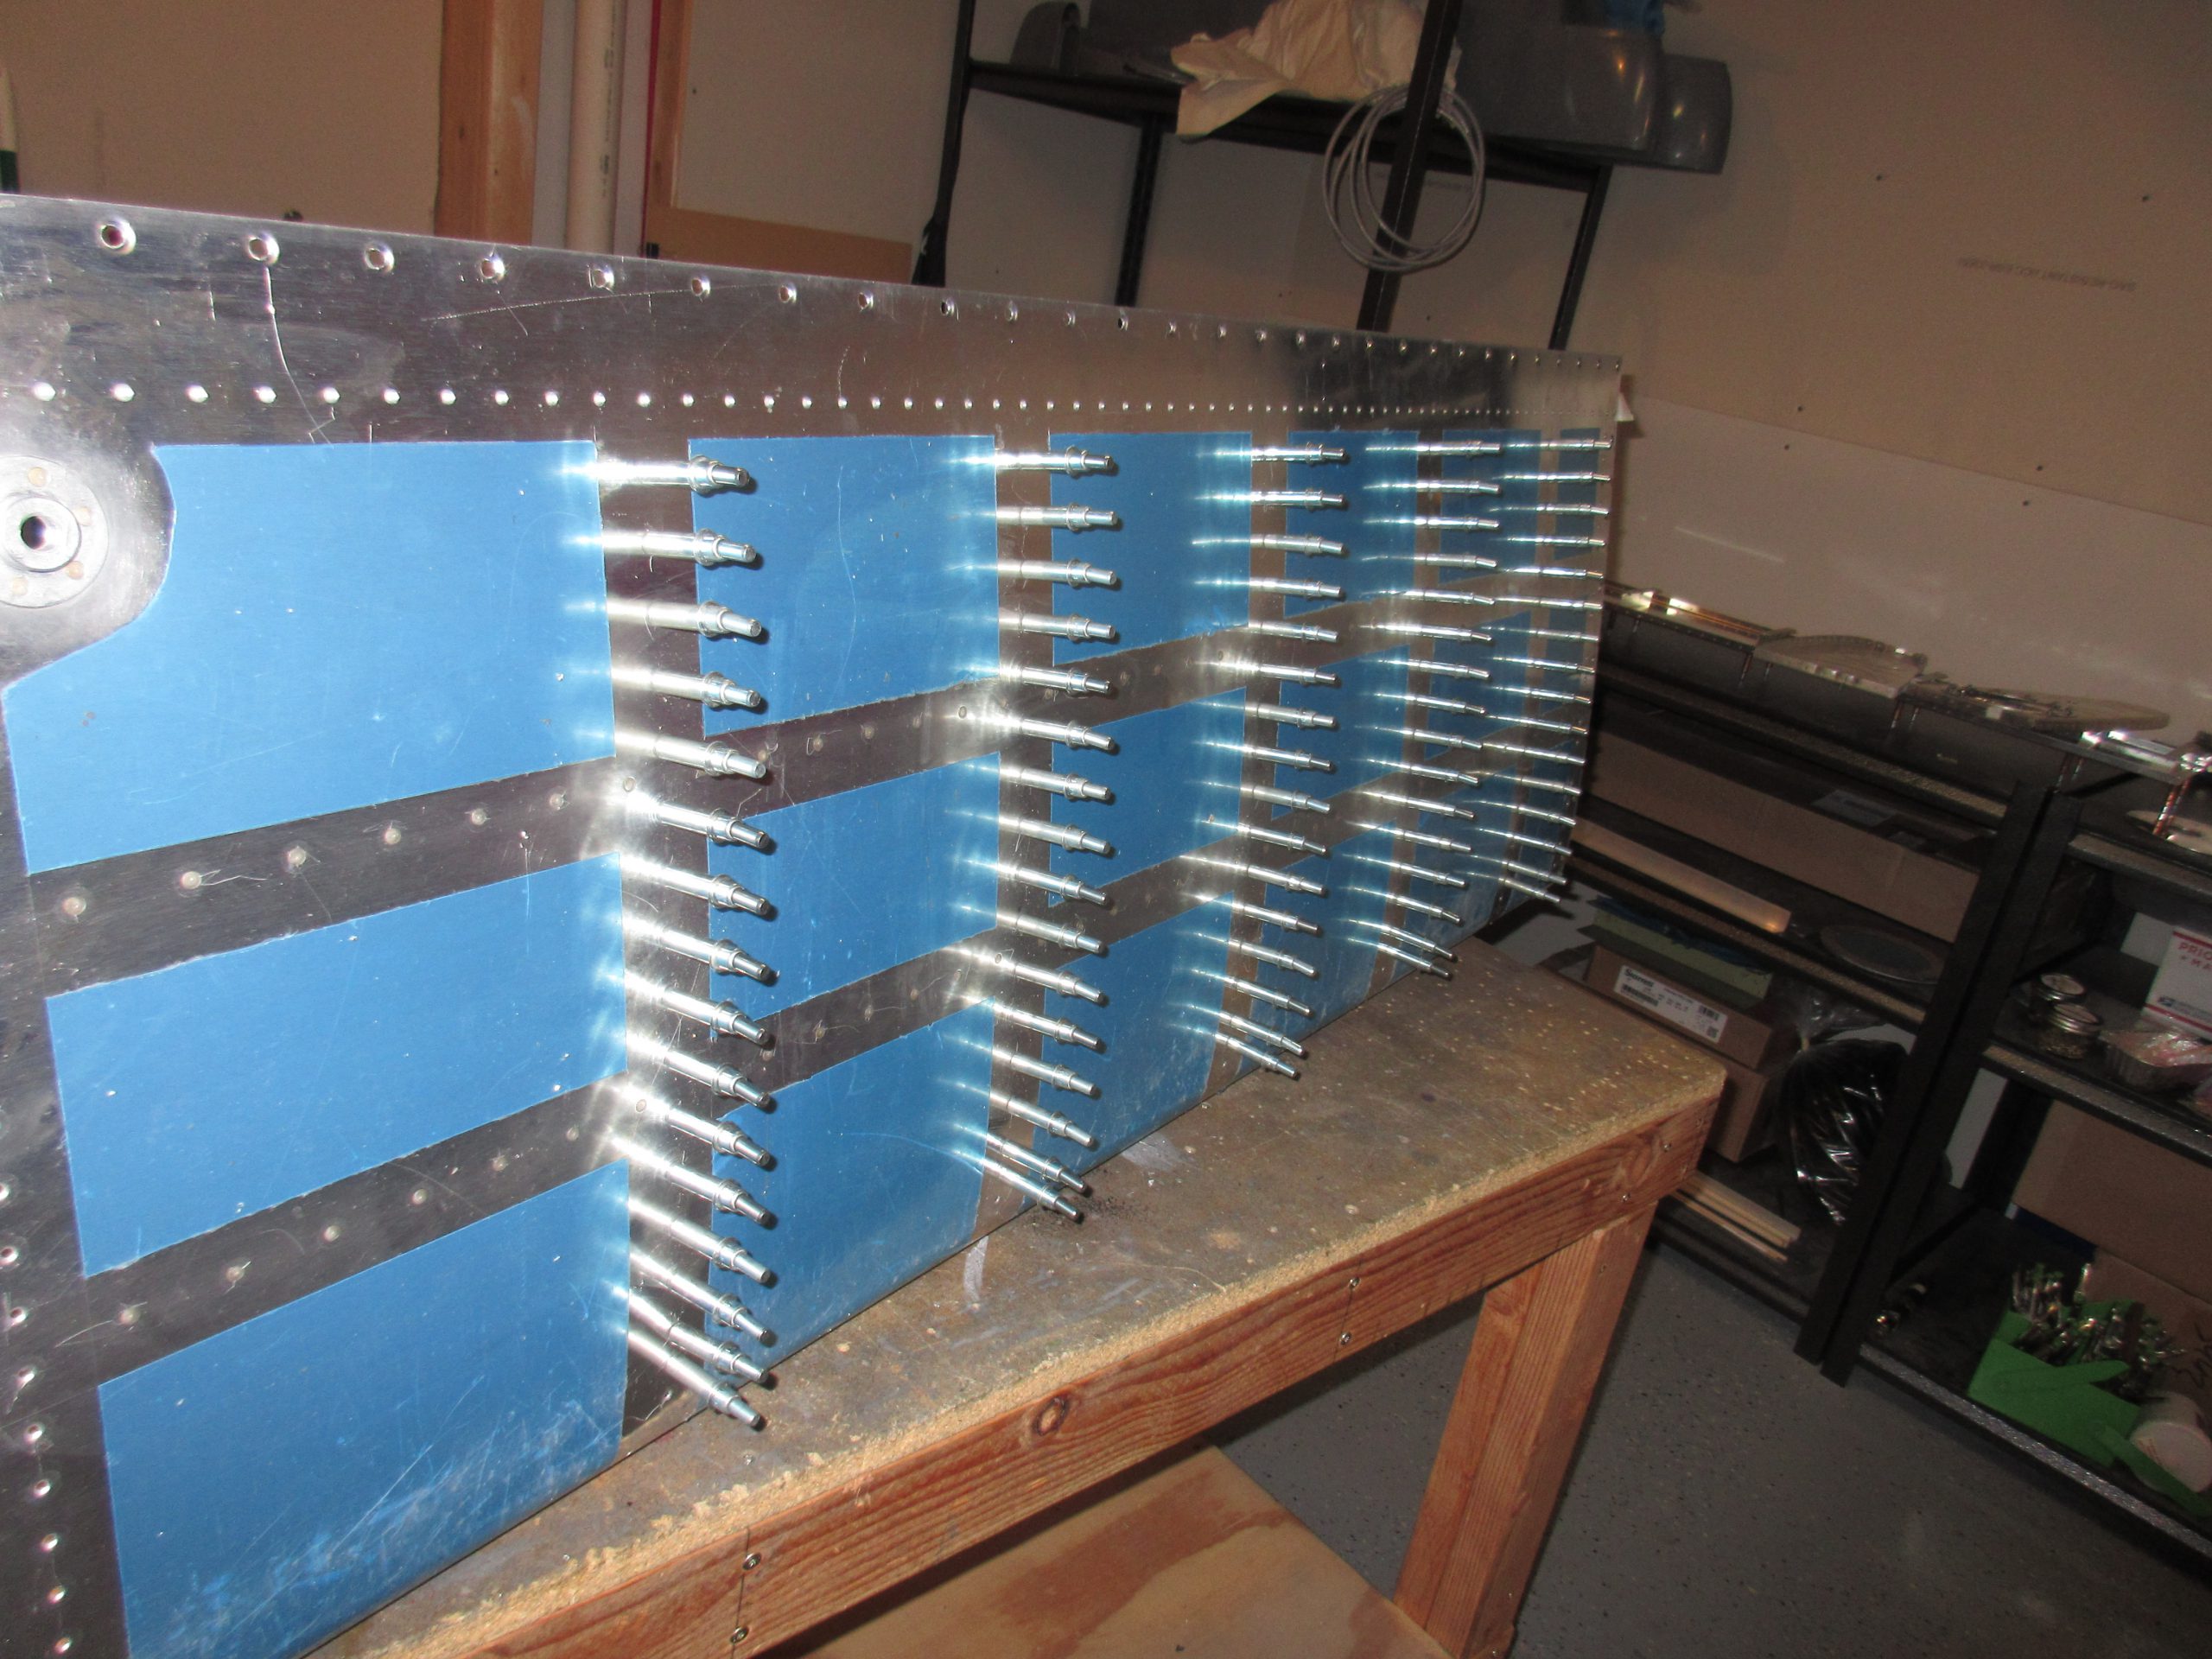
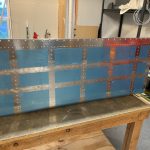
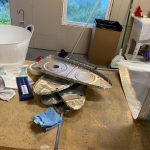
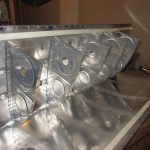
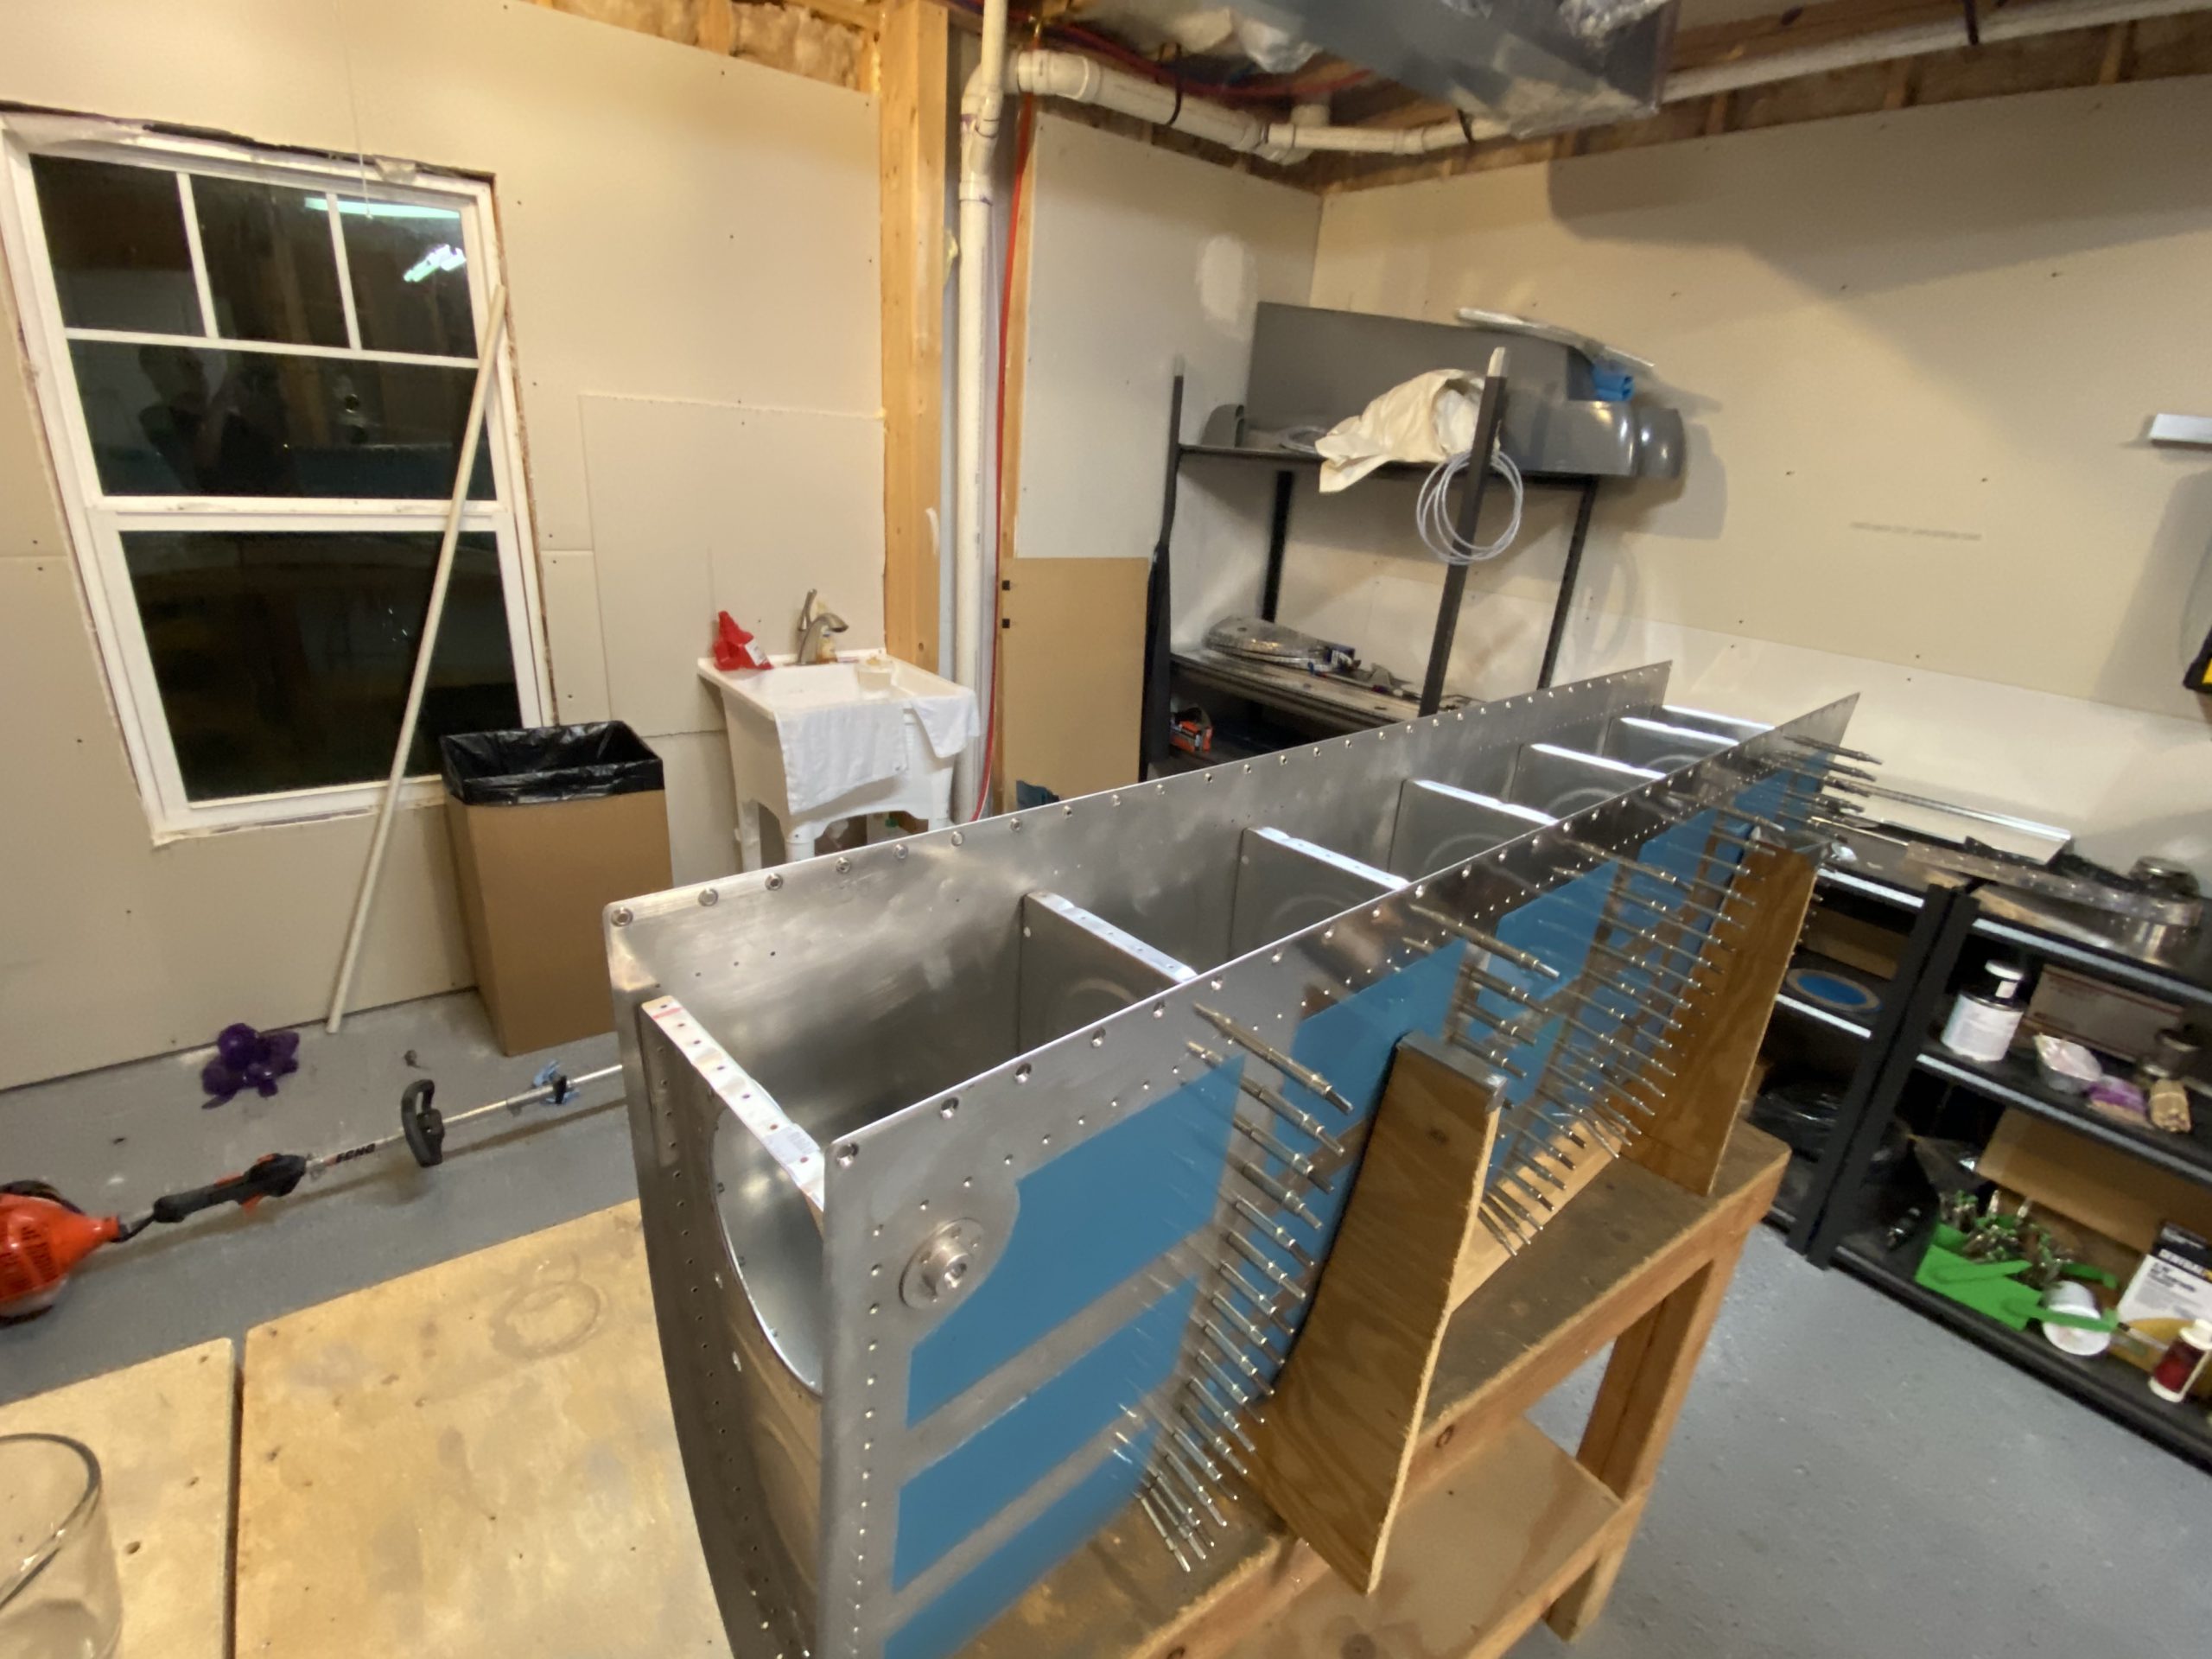
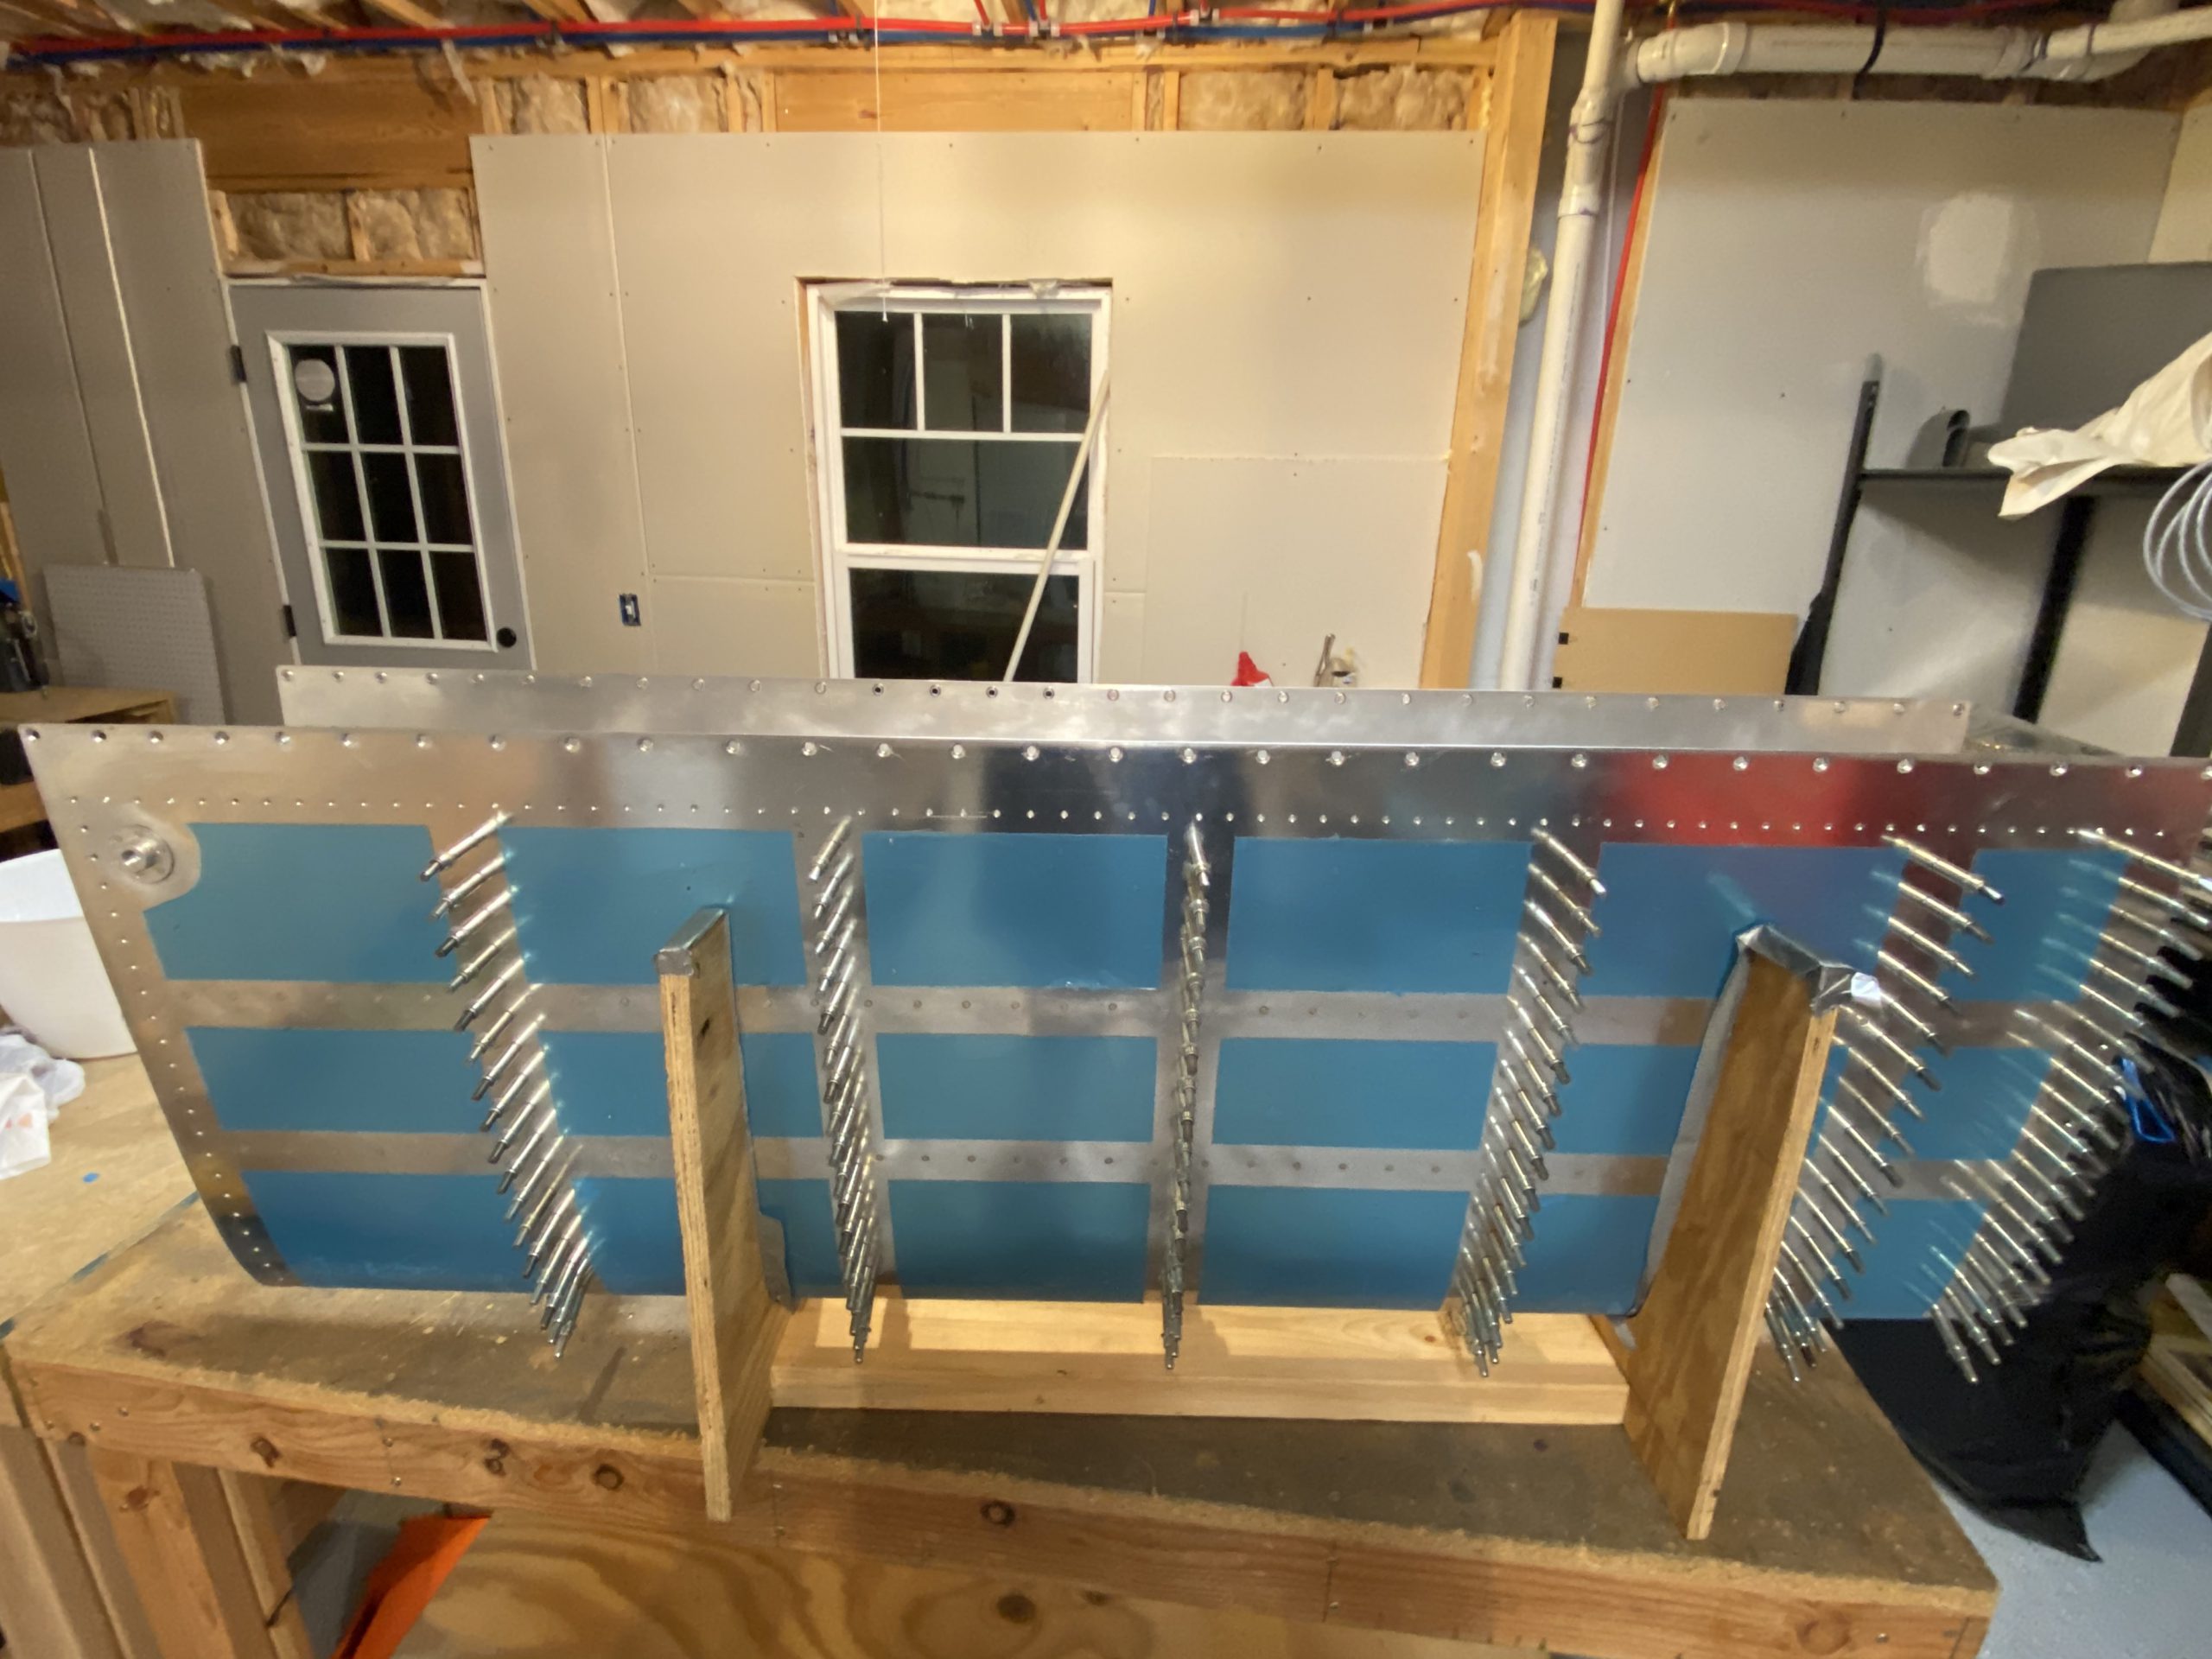
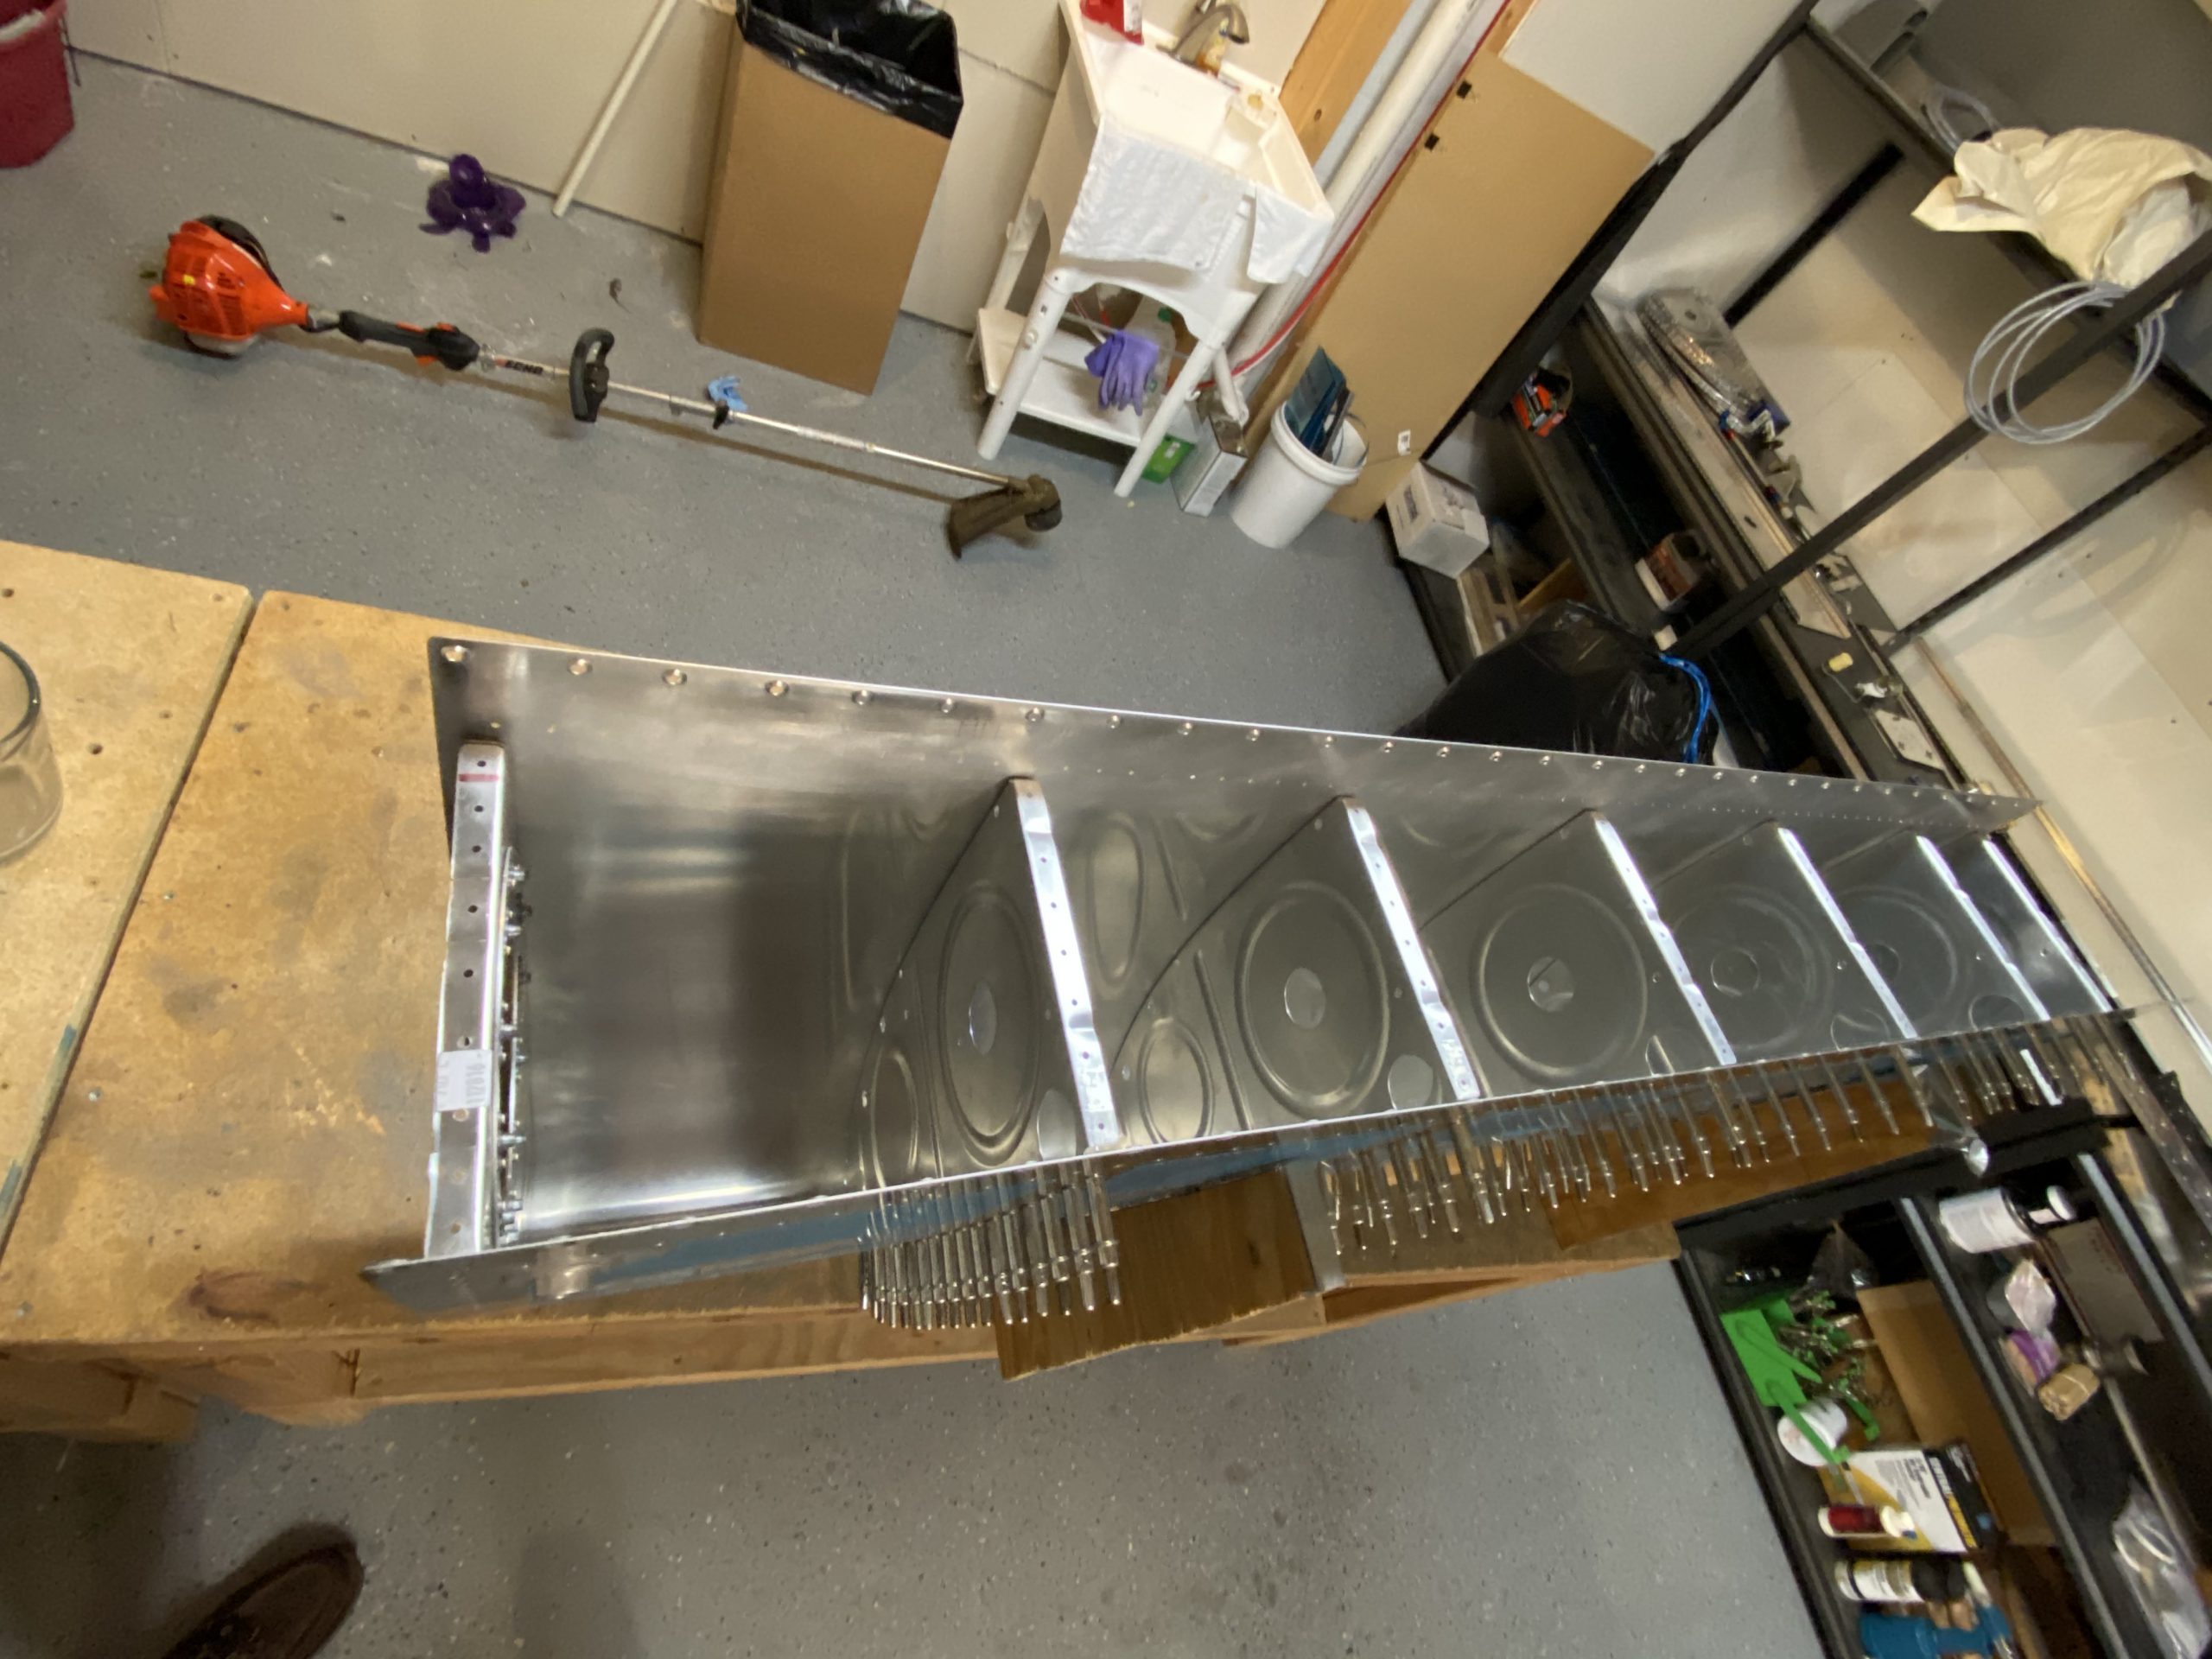
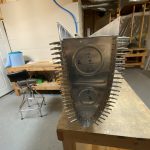
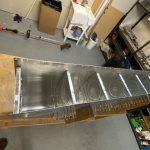
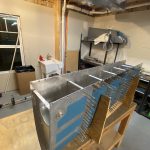
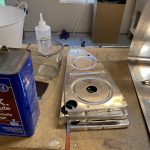
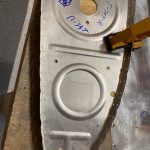
Some good progress tonight! I have the right tank ready for its baffle!  I received my second quart kit of sealant from Van’s today which was timed just perfectly.  I don’t have a whole lot of sealing work left on this tank at this point. I was able to get the access plate finished up, sealed on as well as the capacitive sending plates.  Here’s a time lapse of the work tonight.

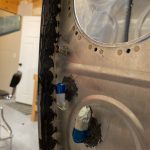
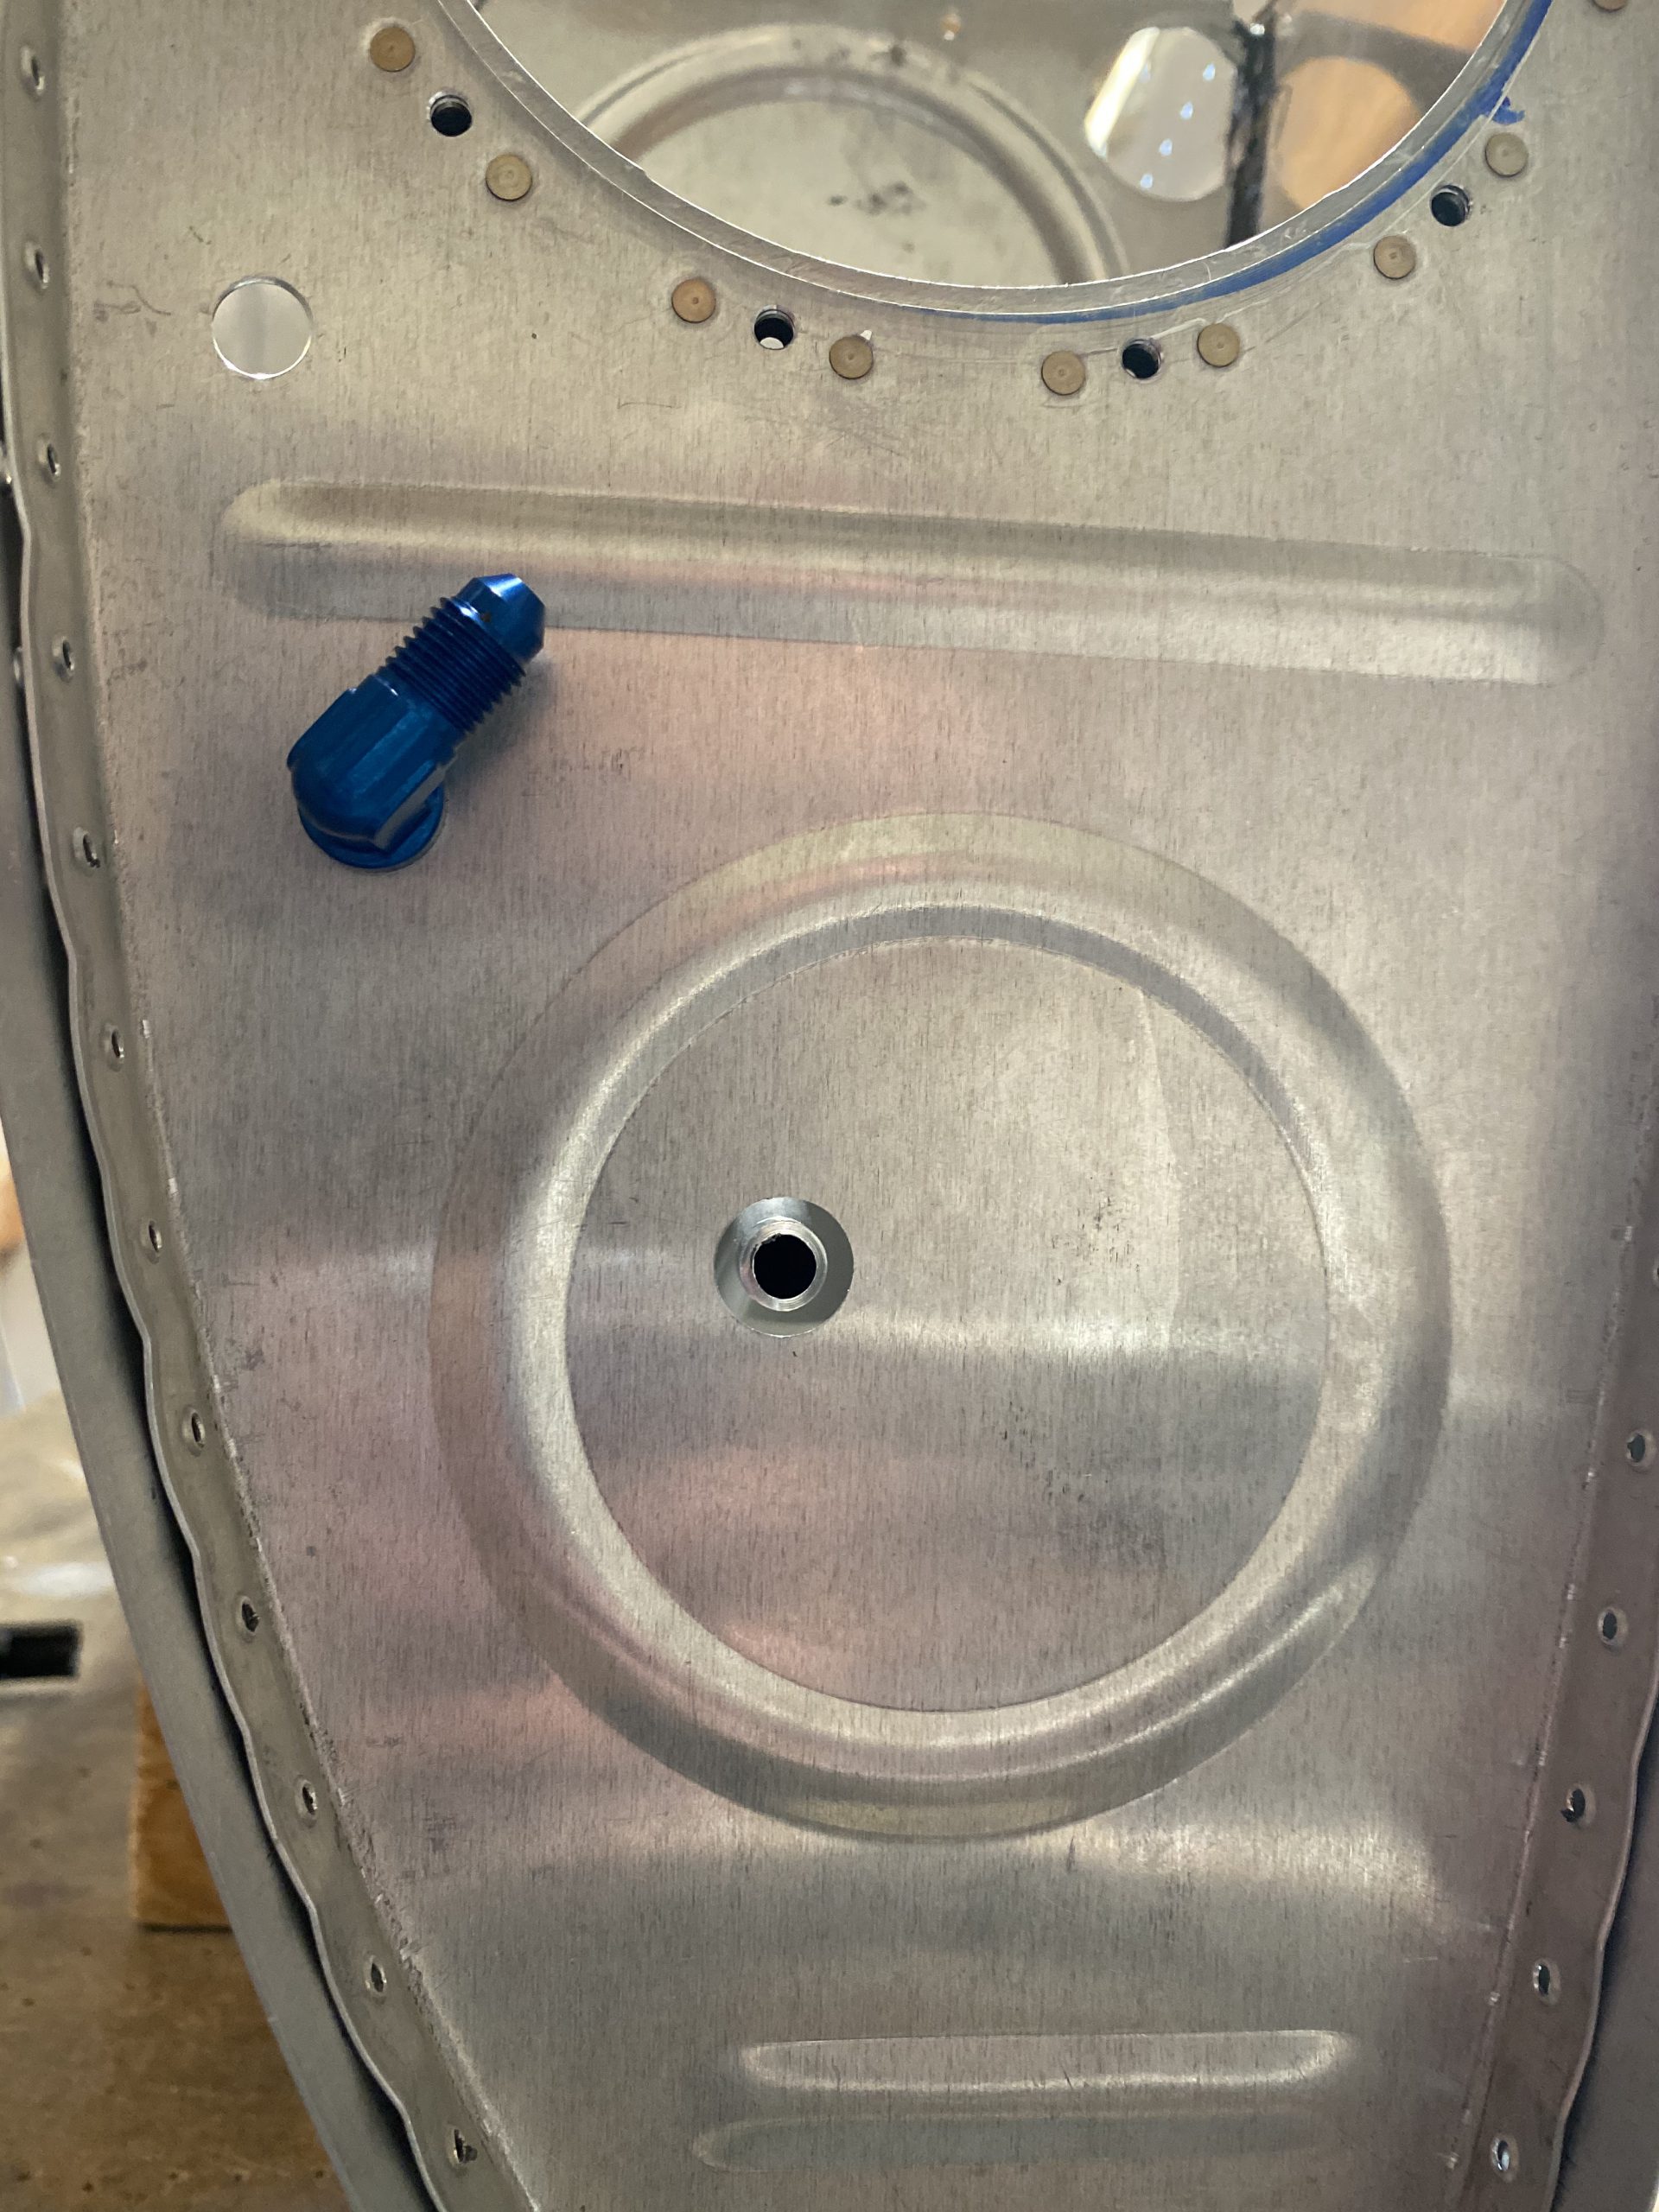
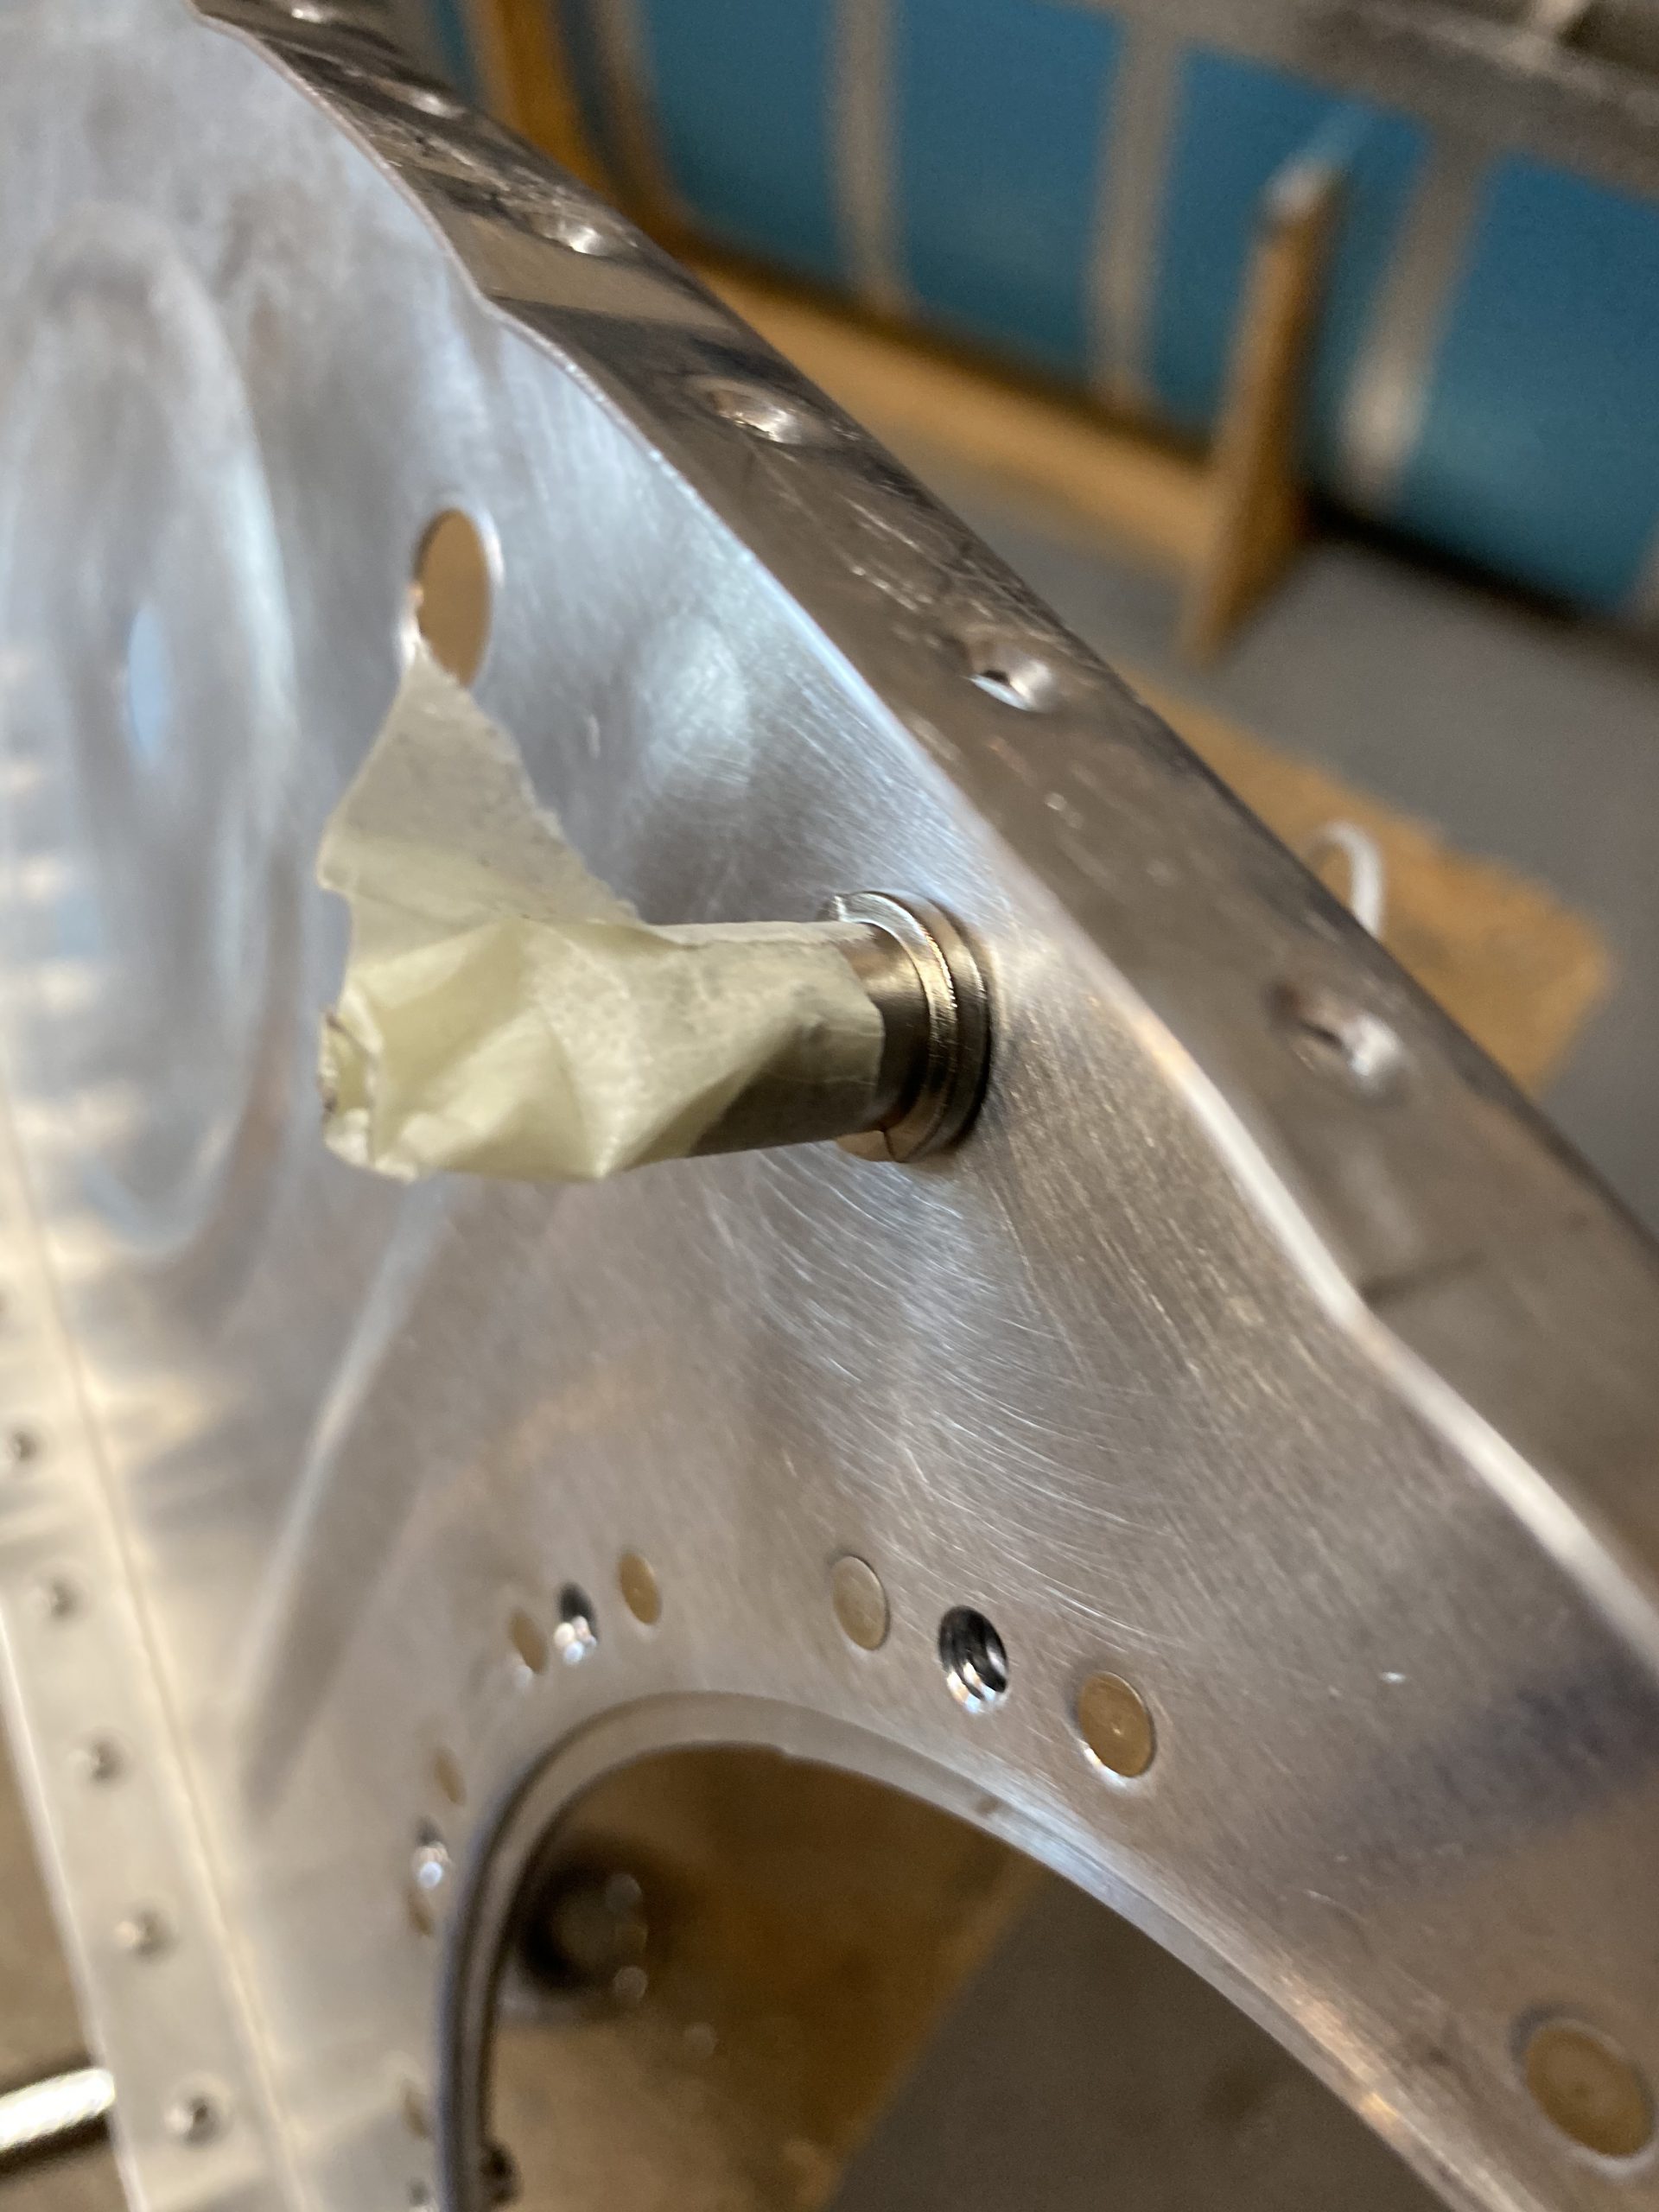
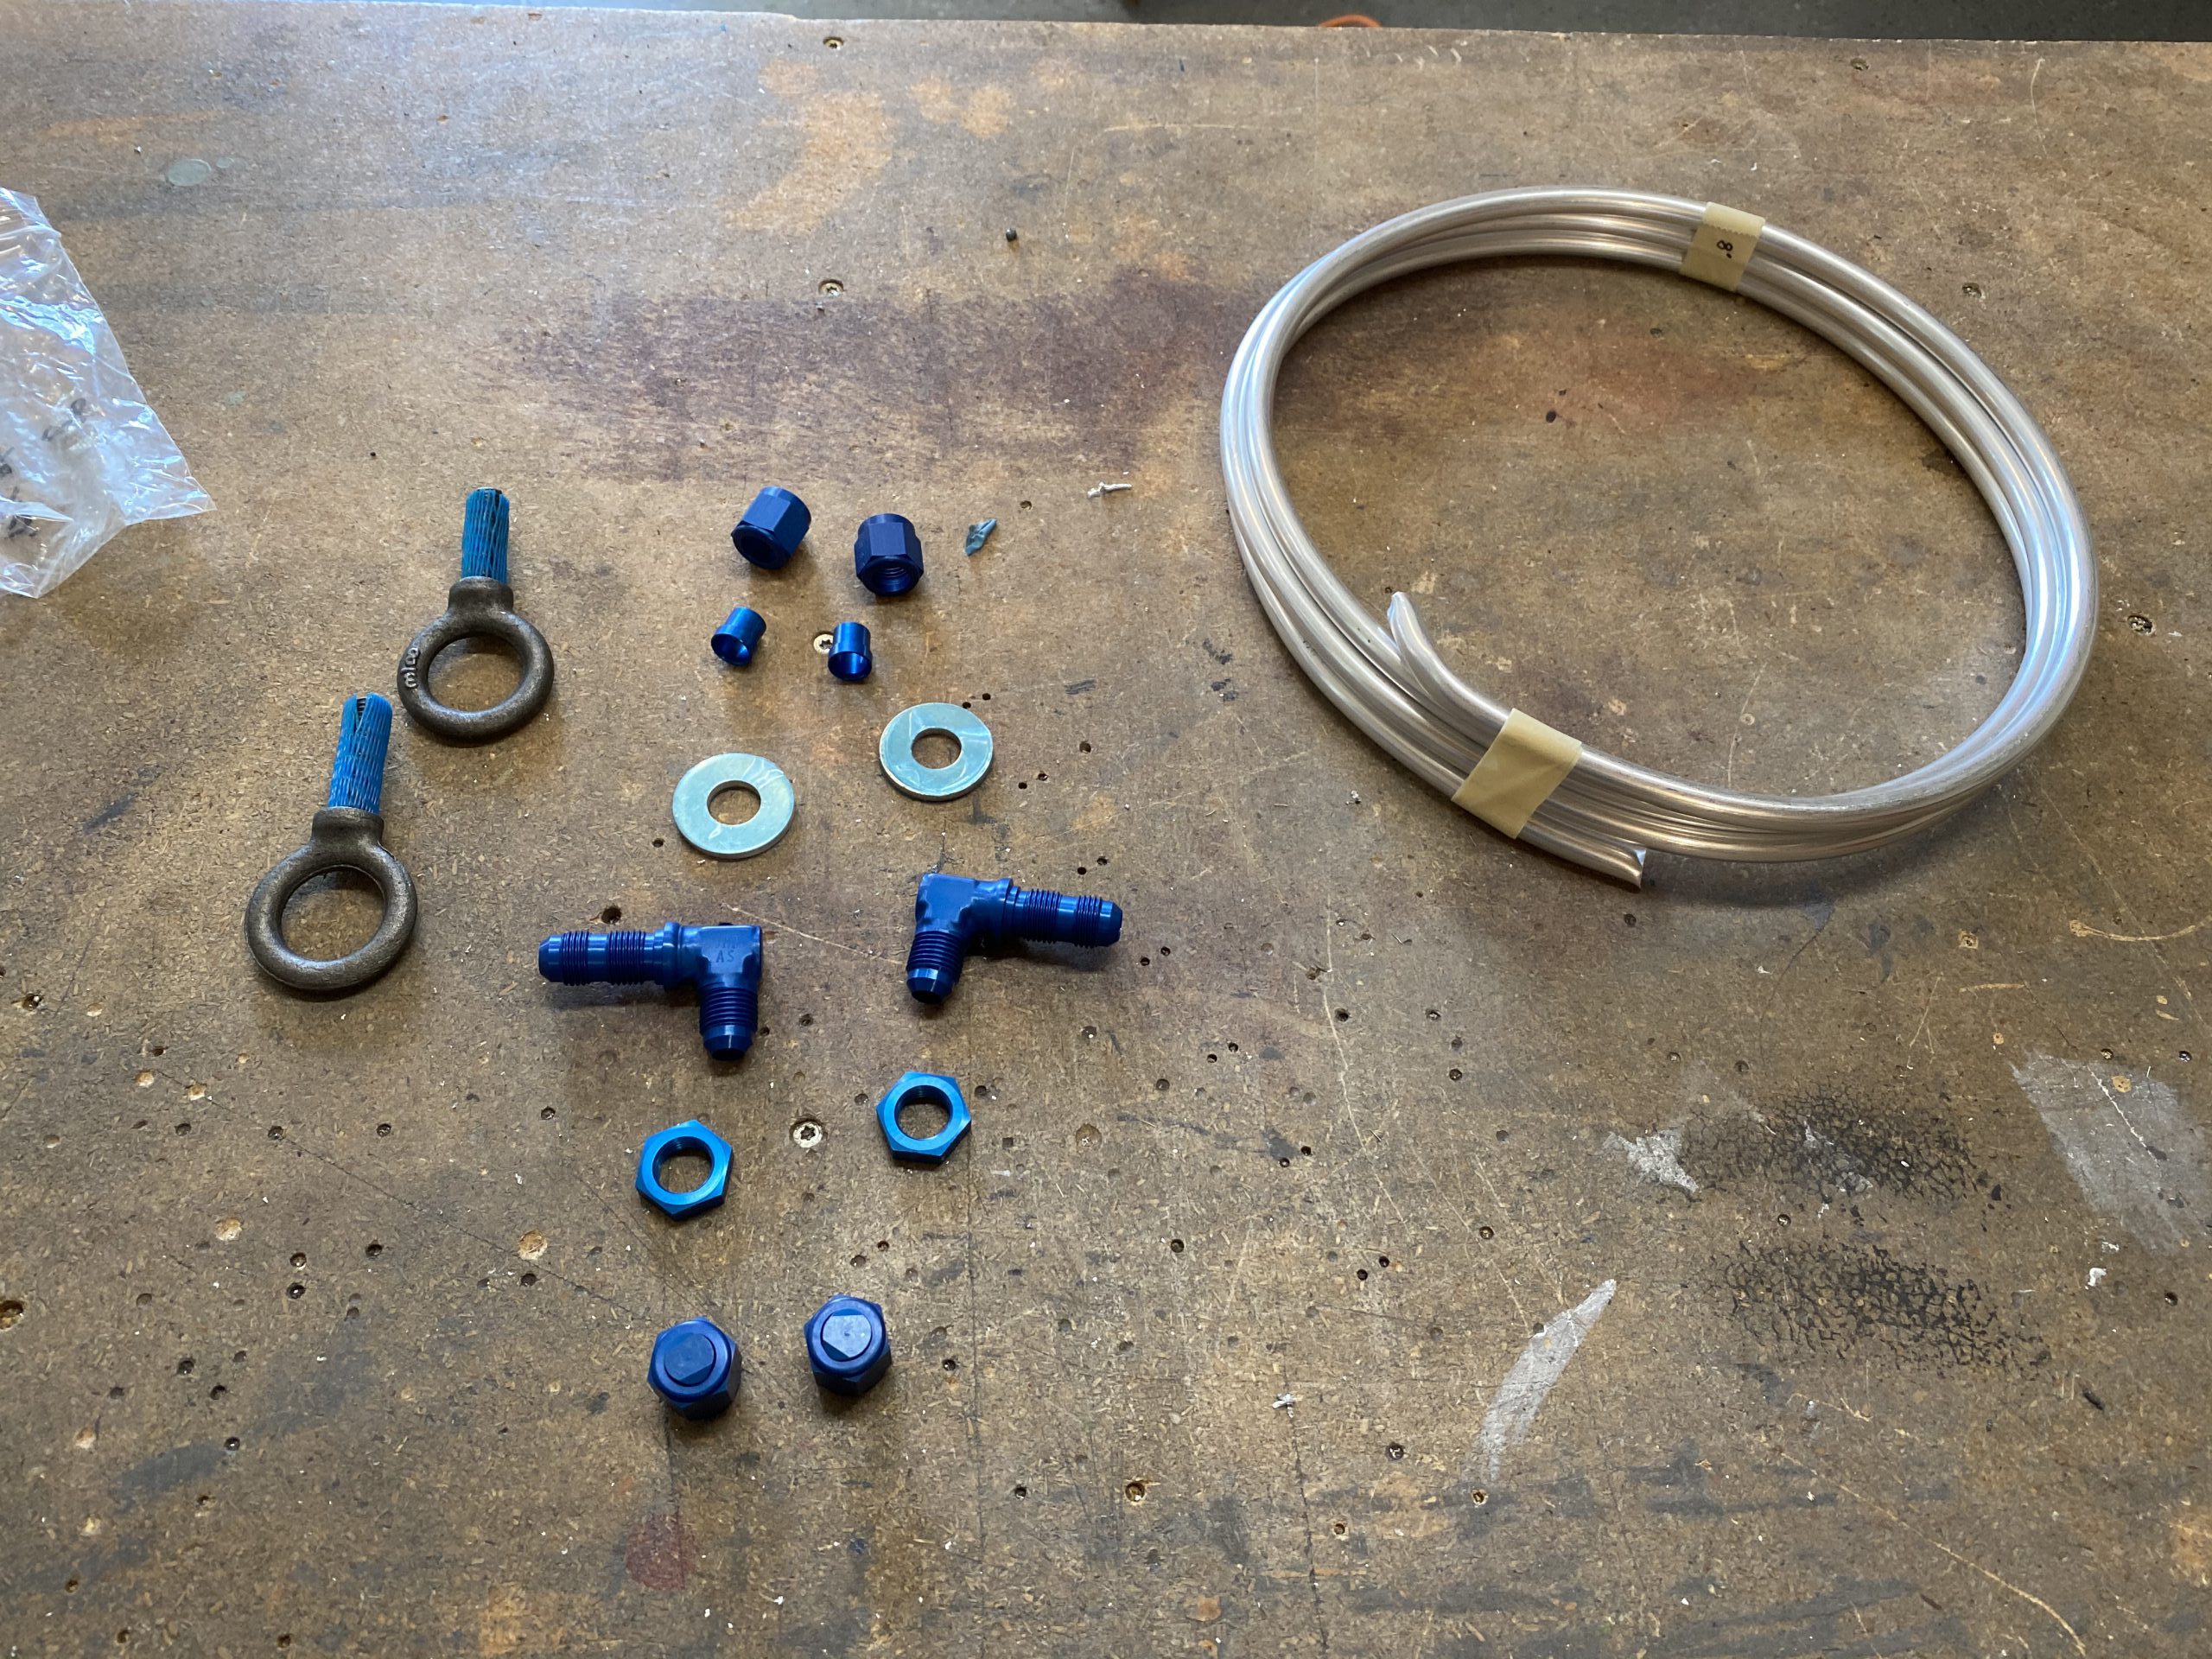
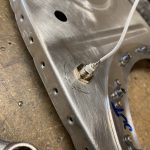
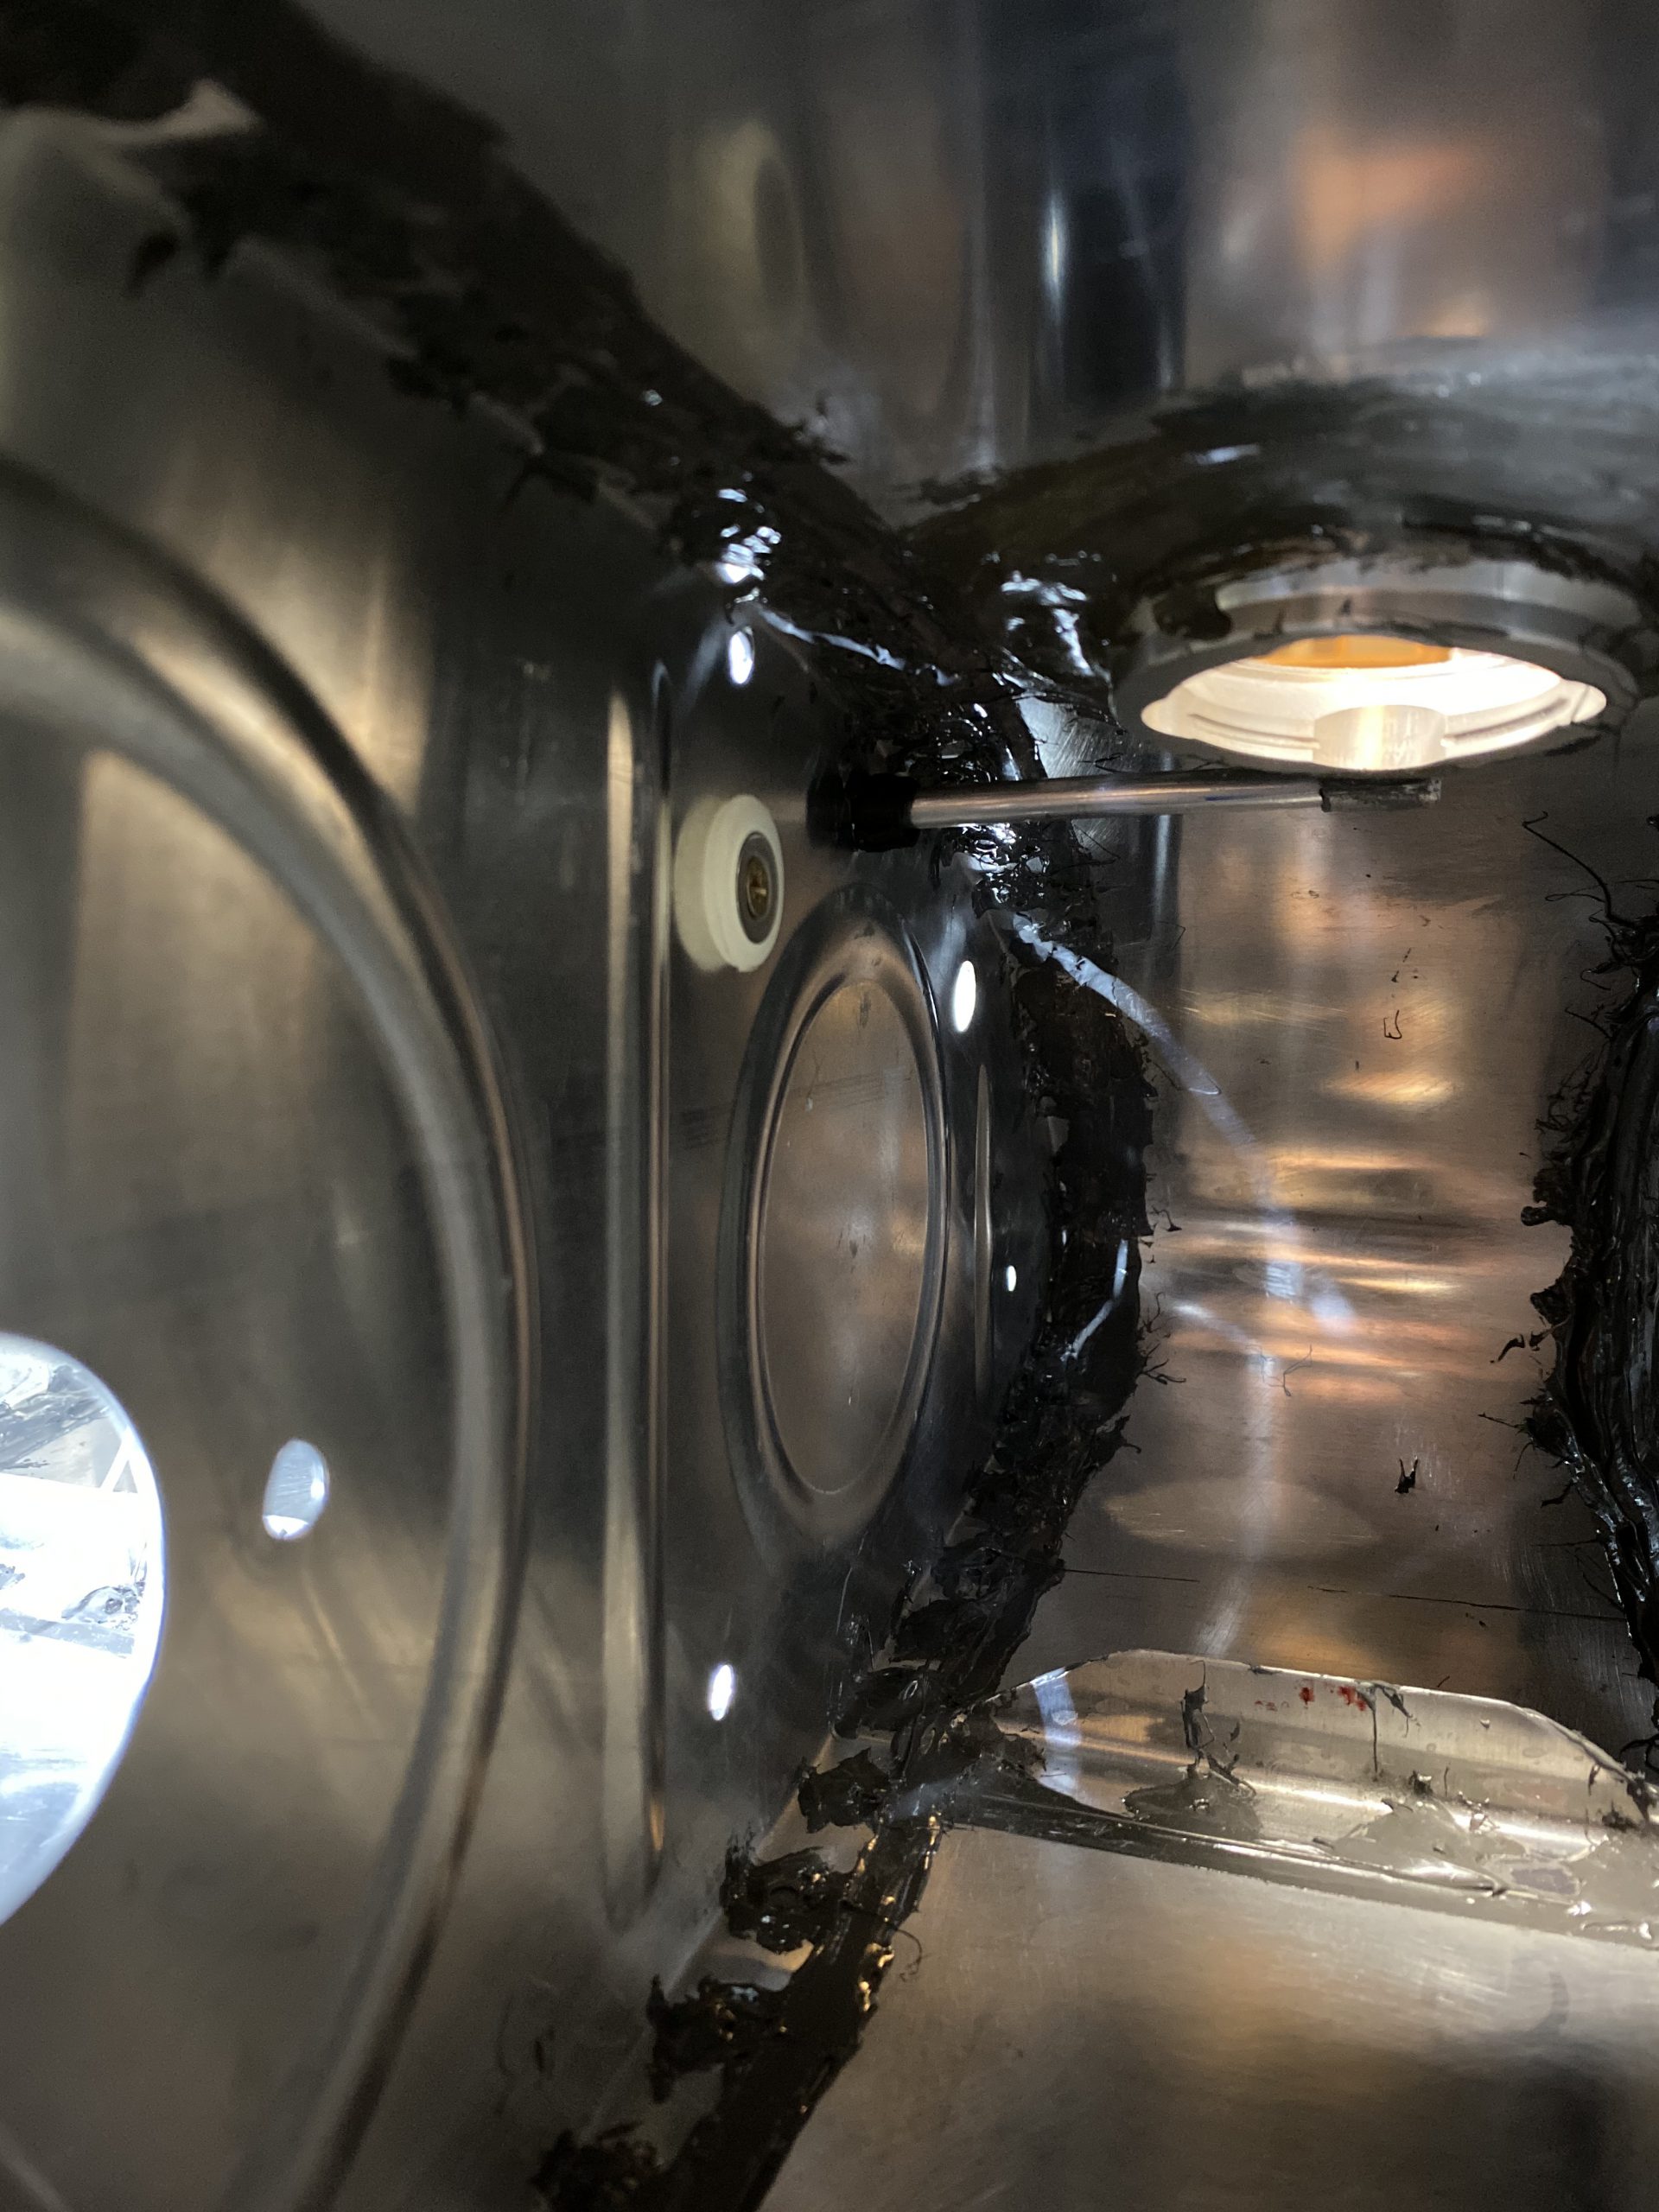
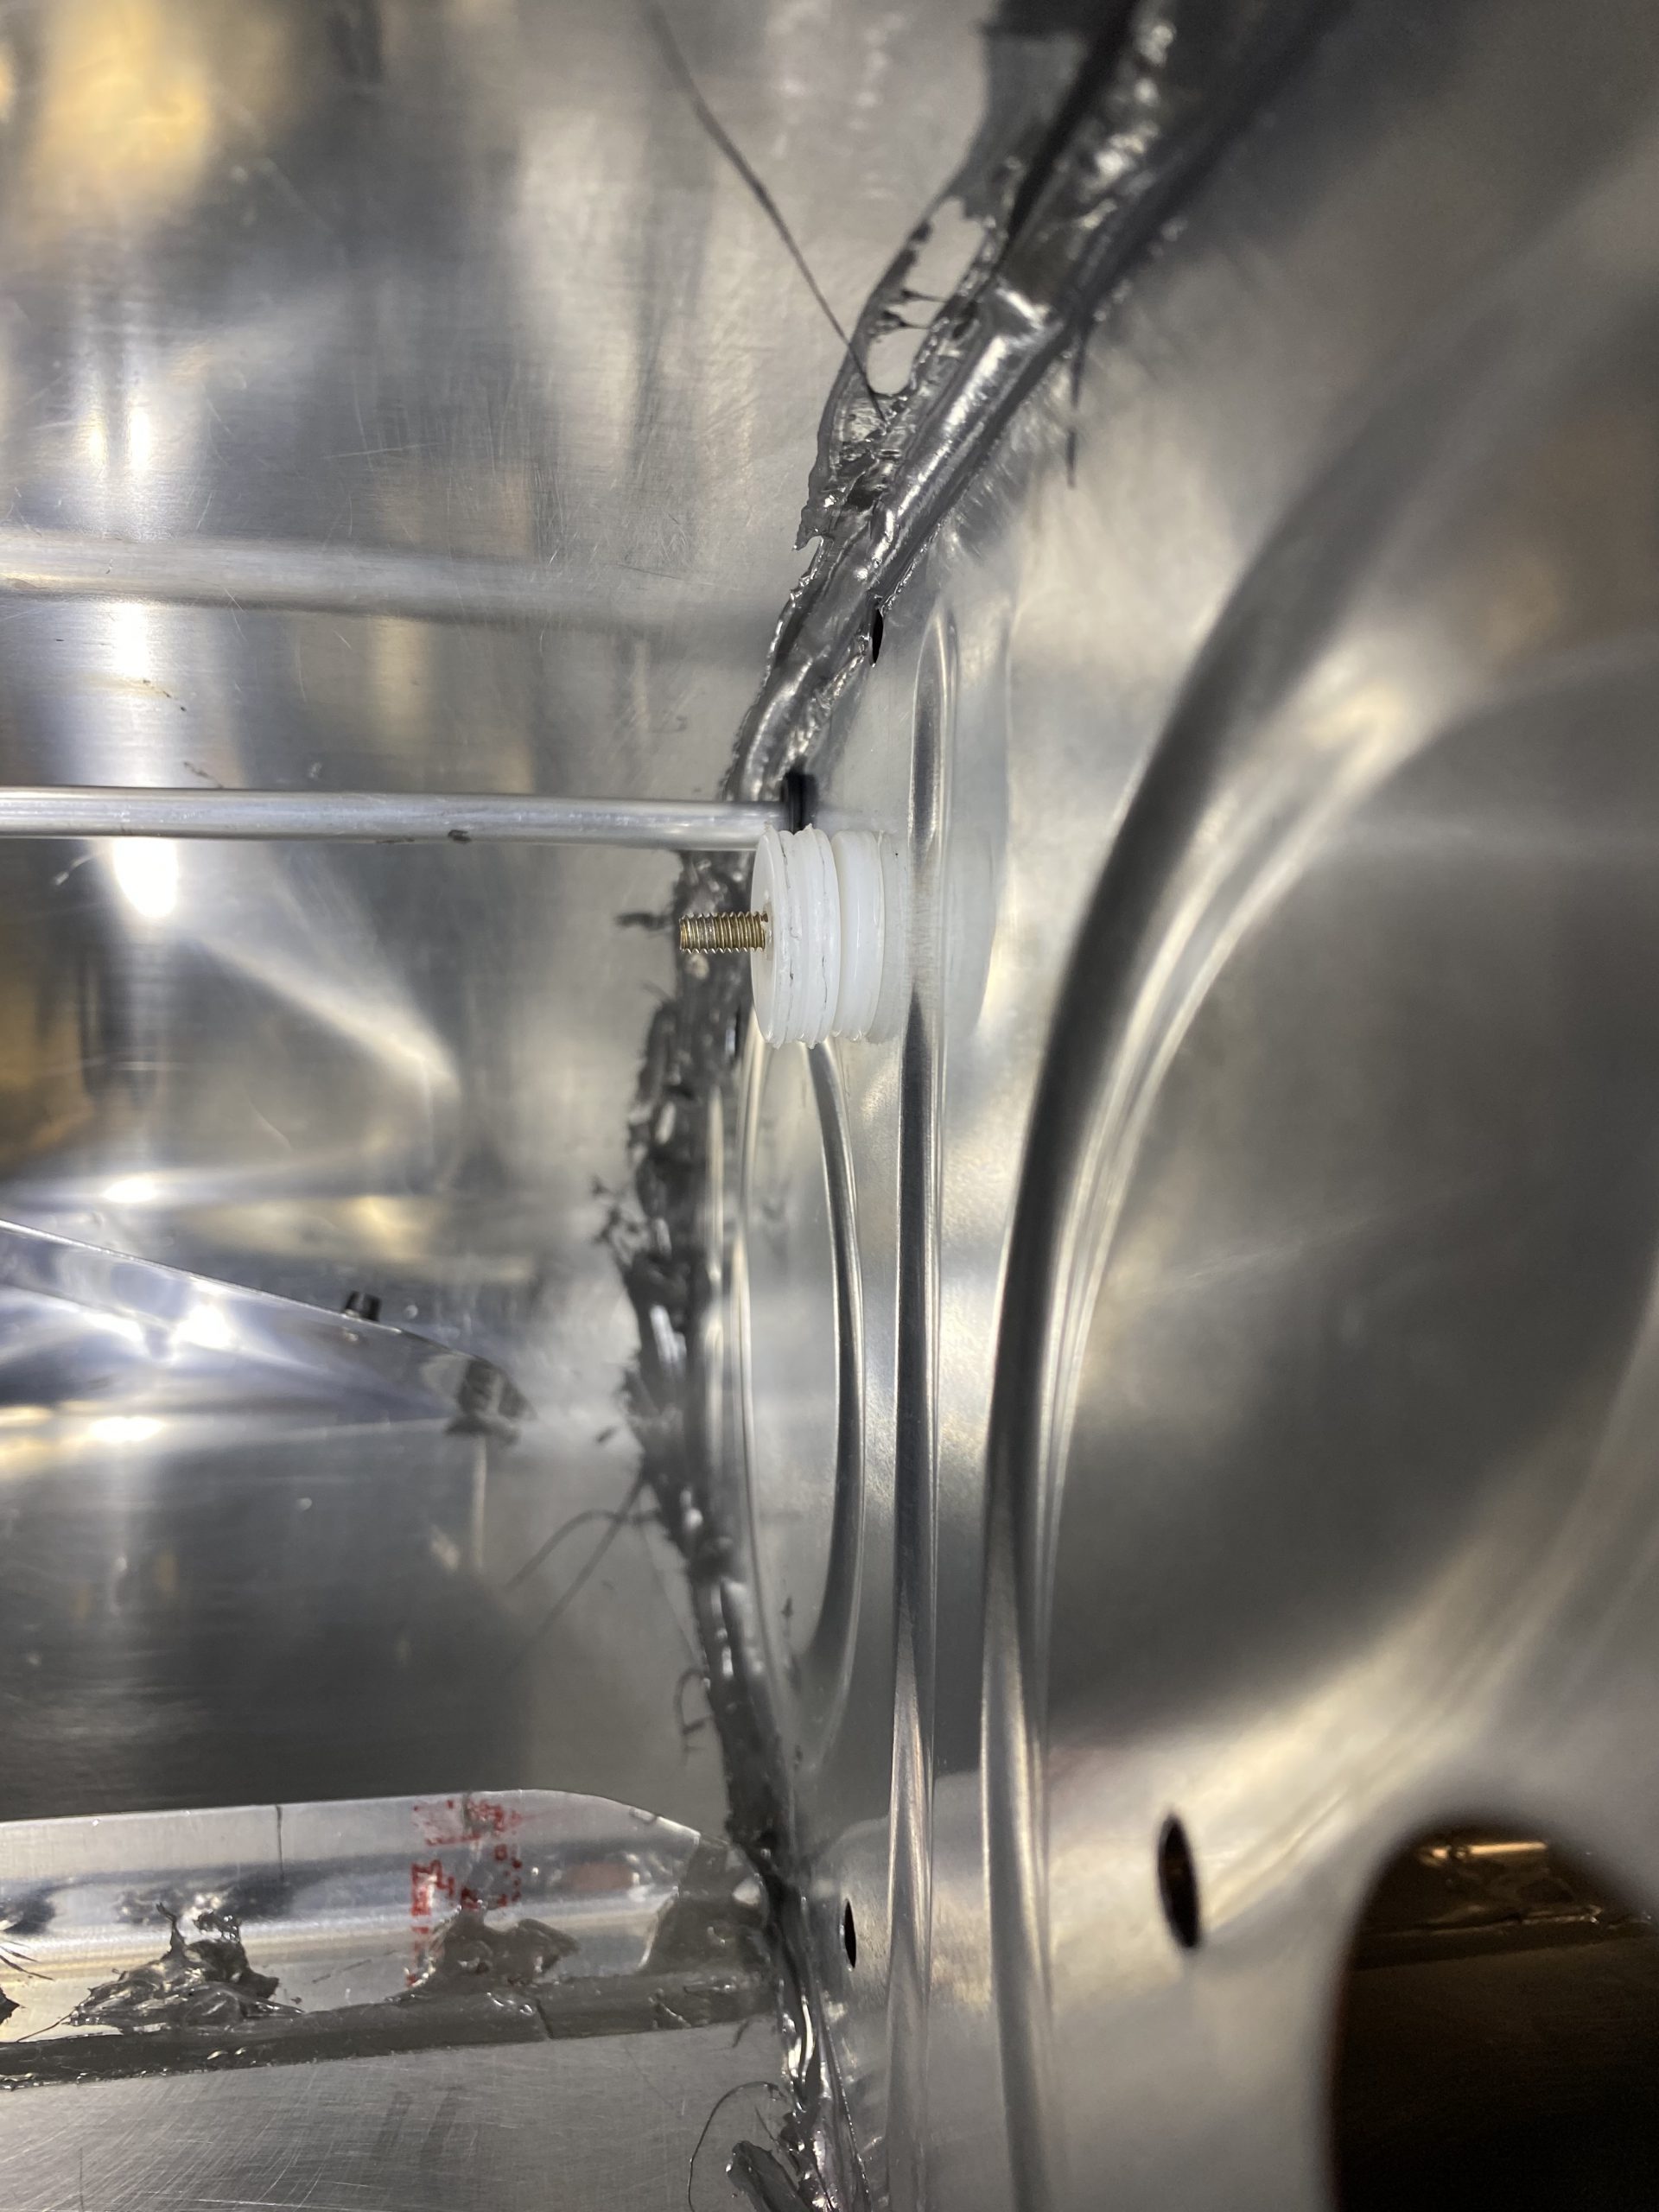
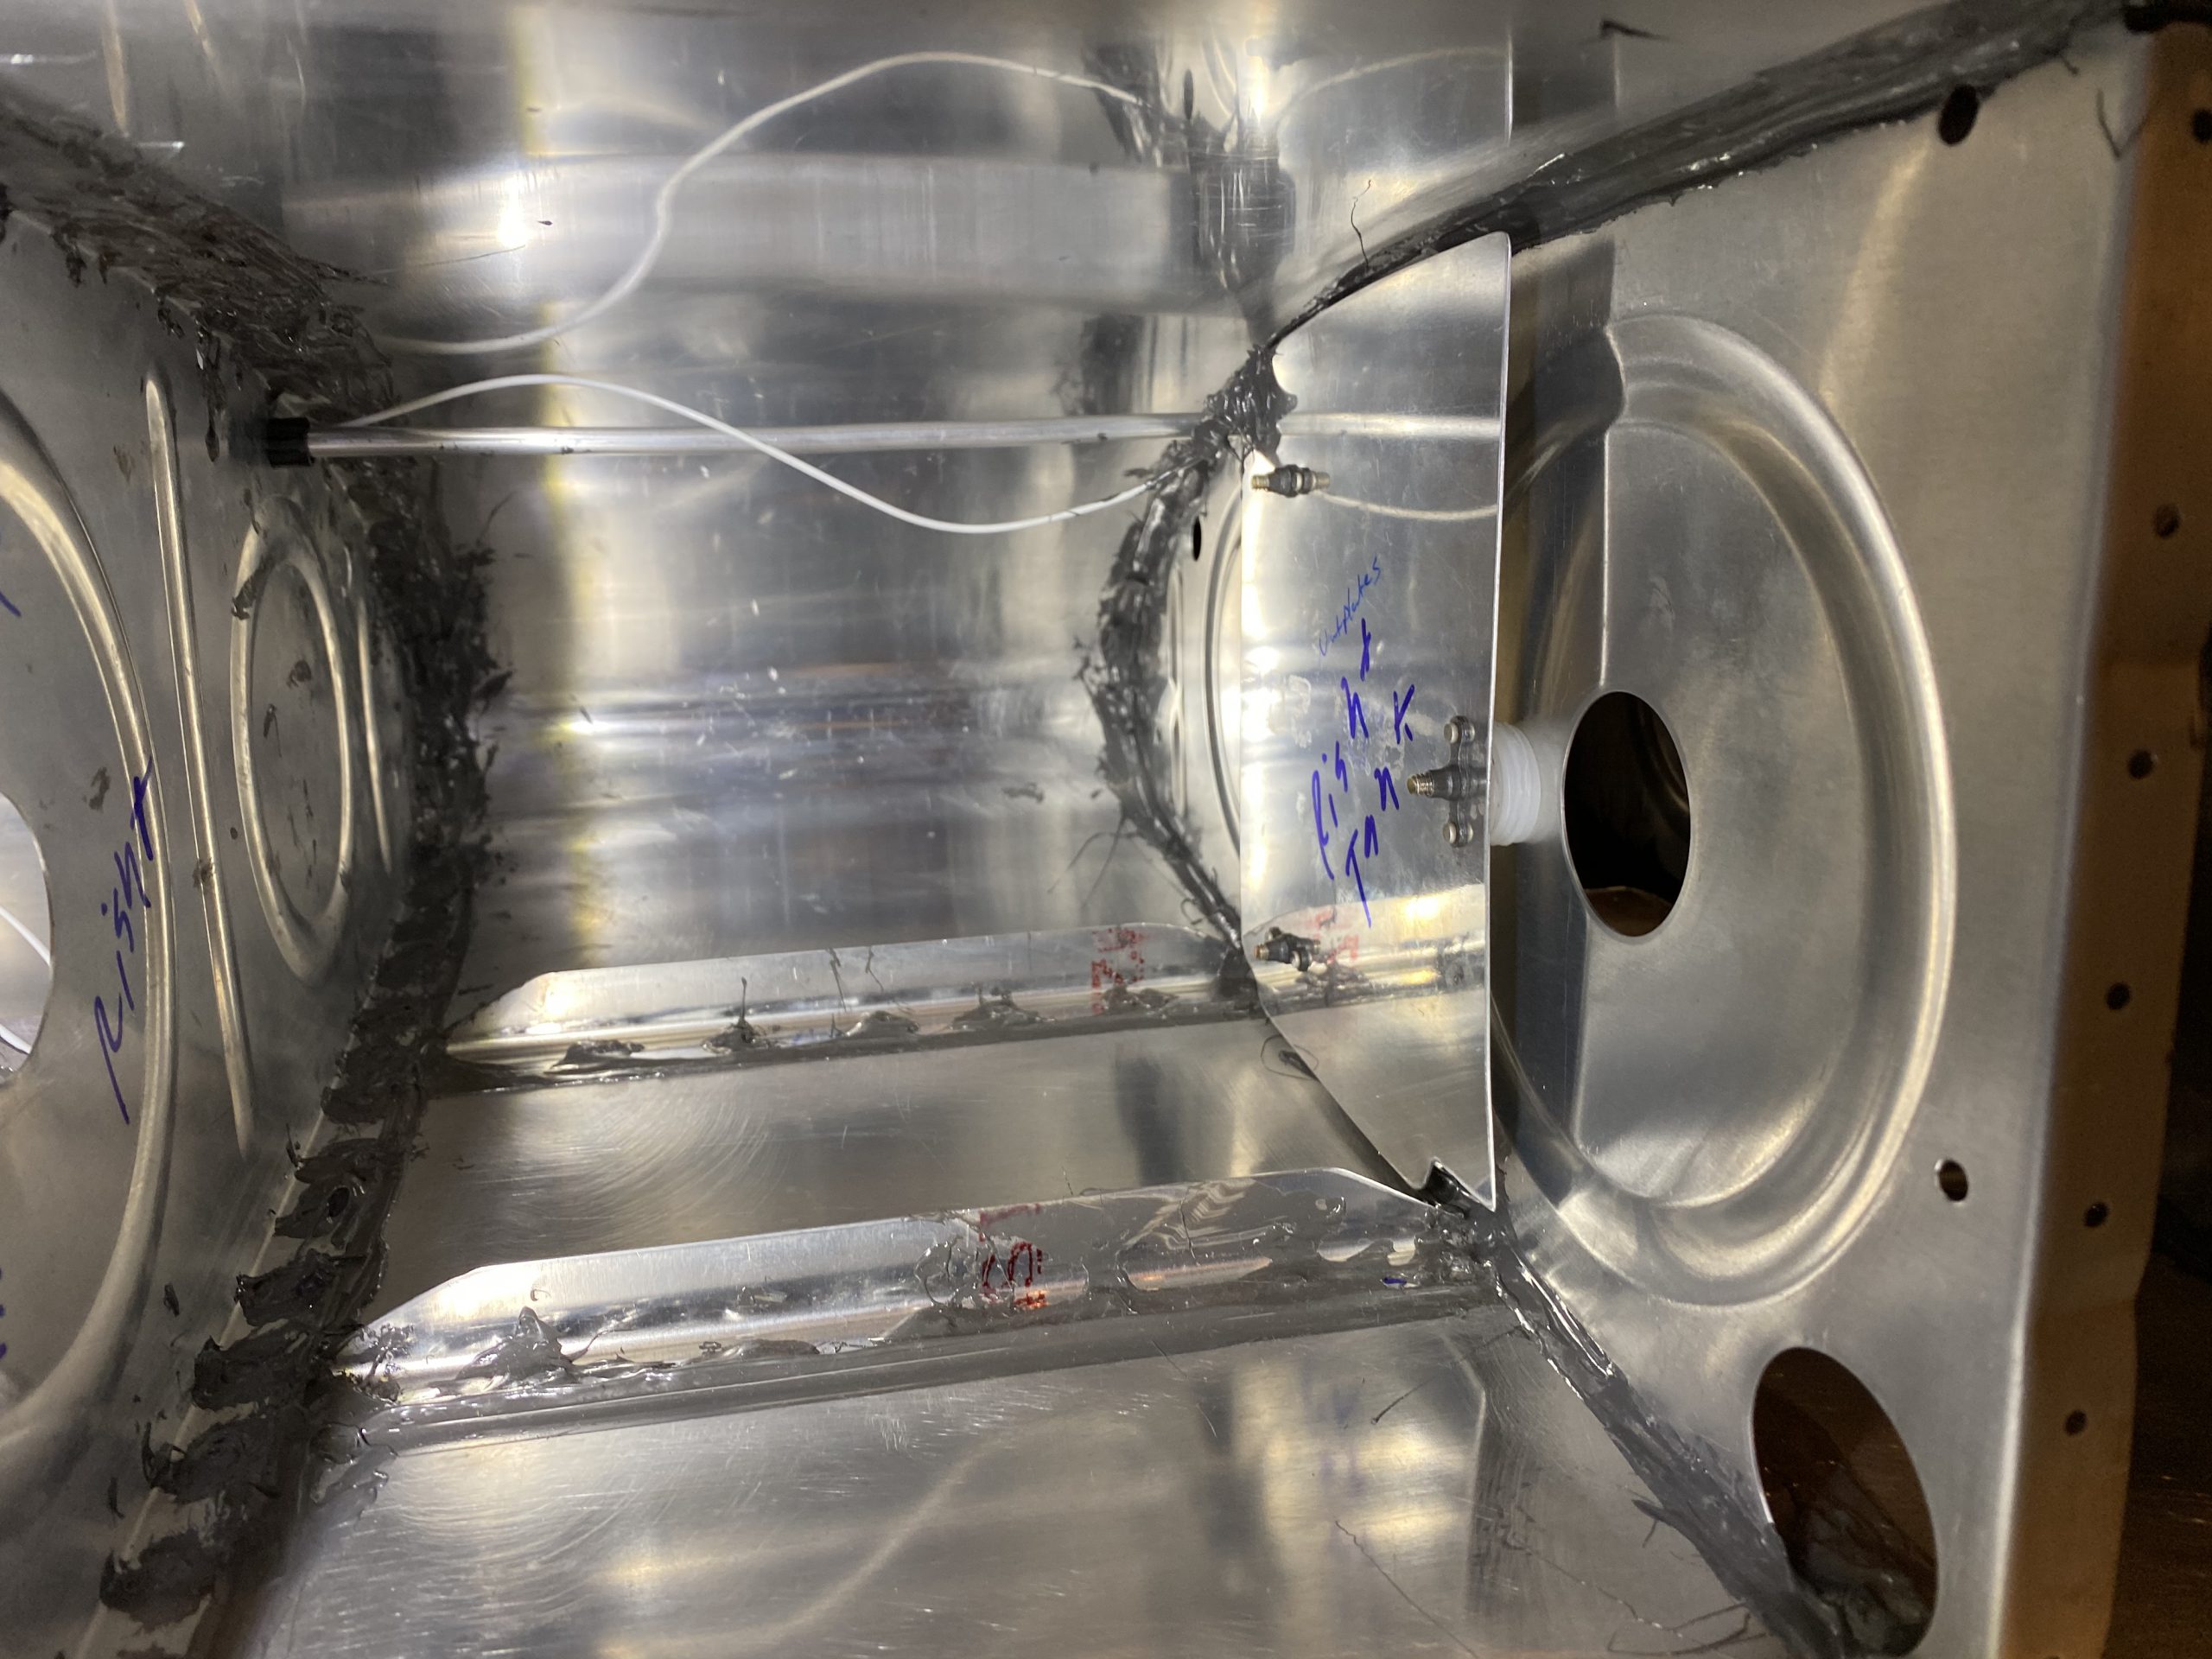
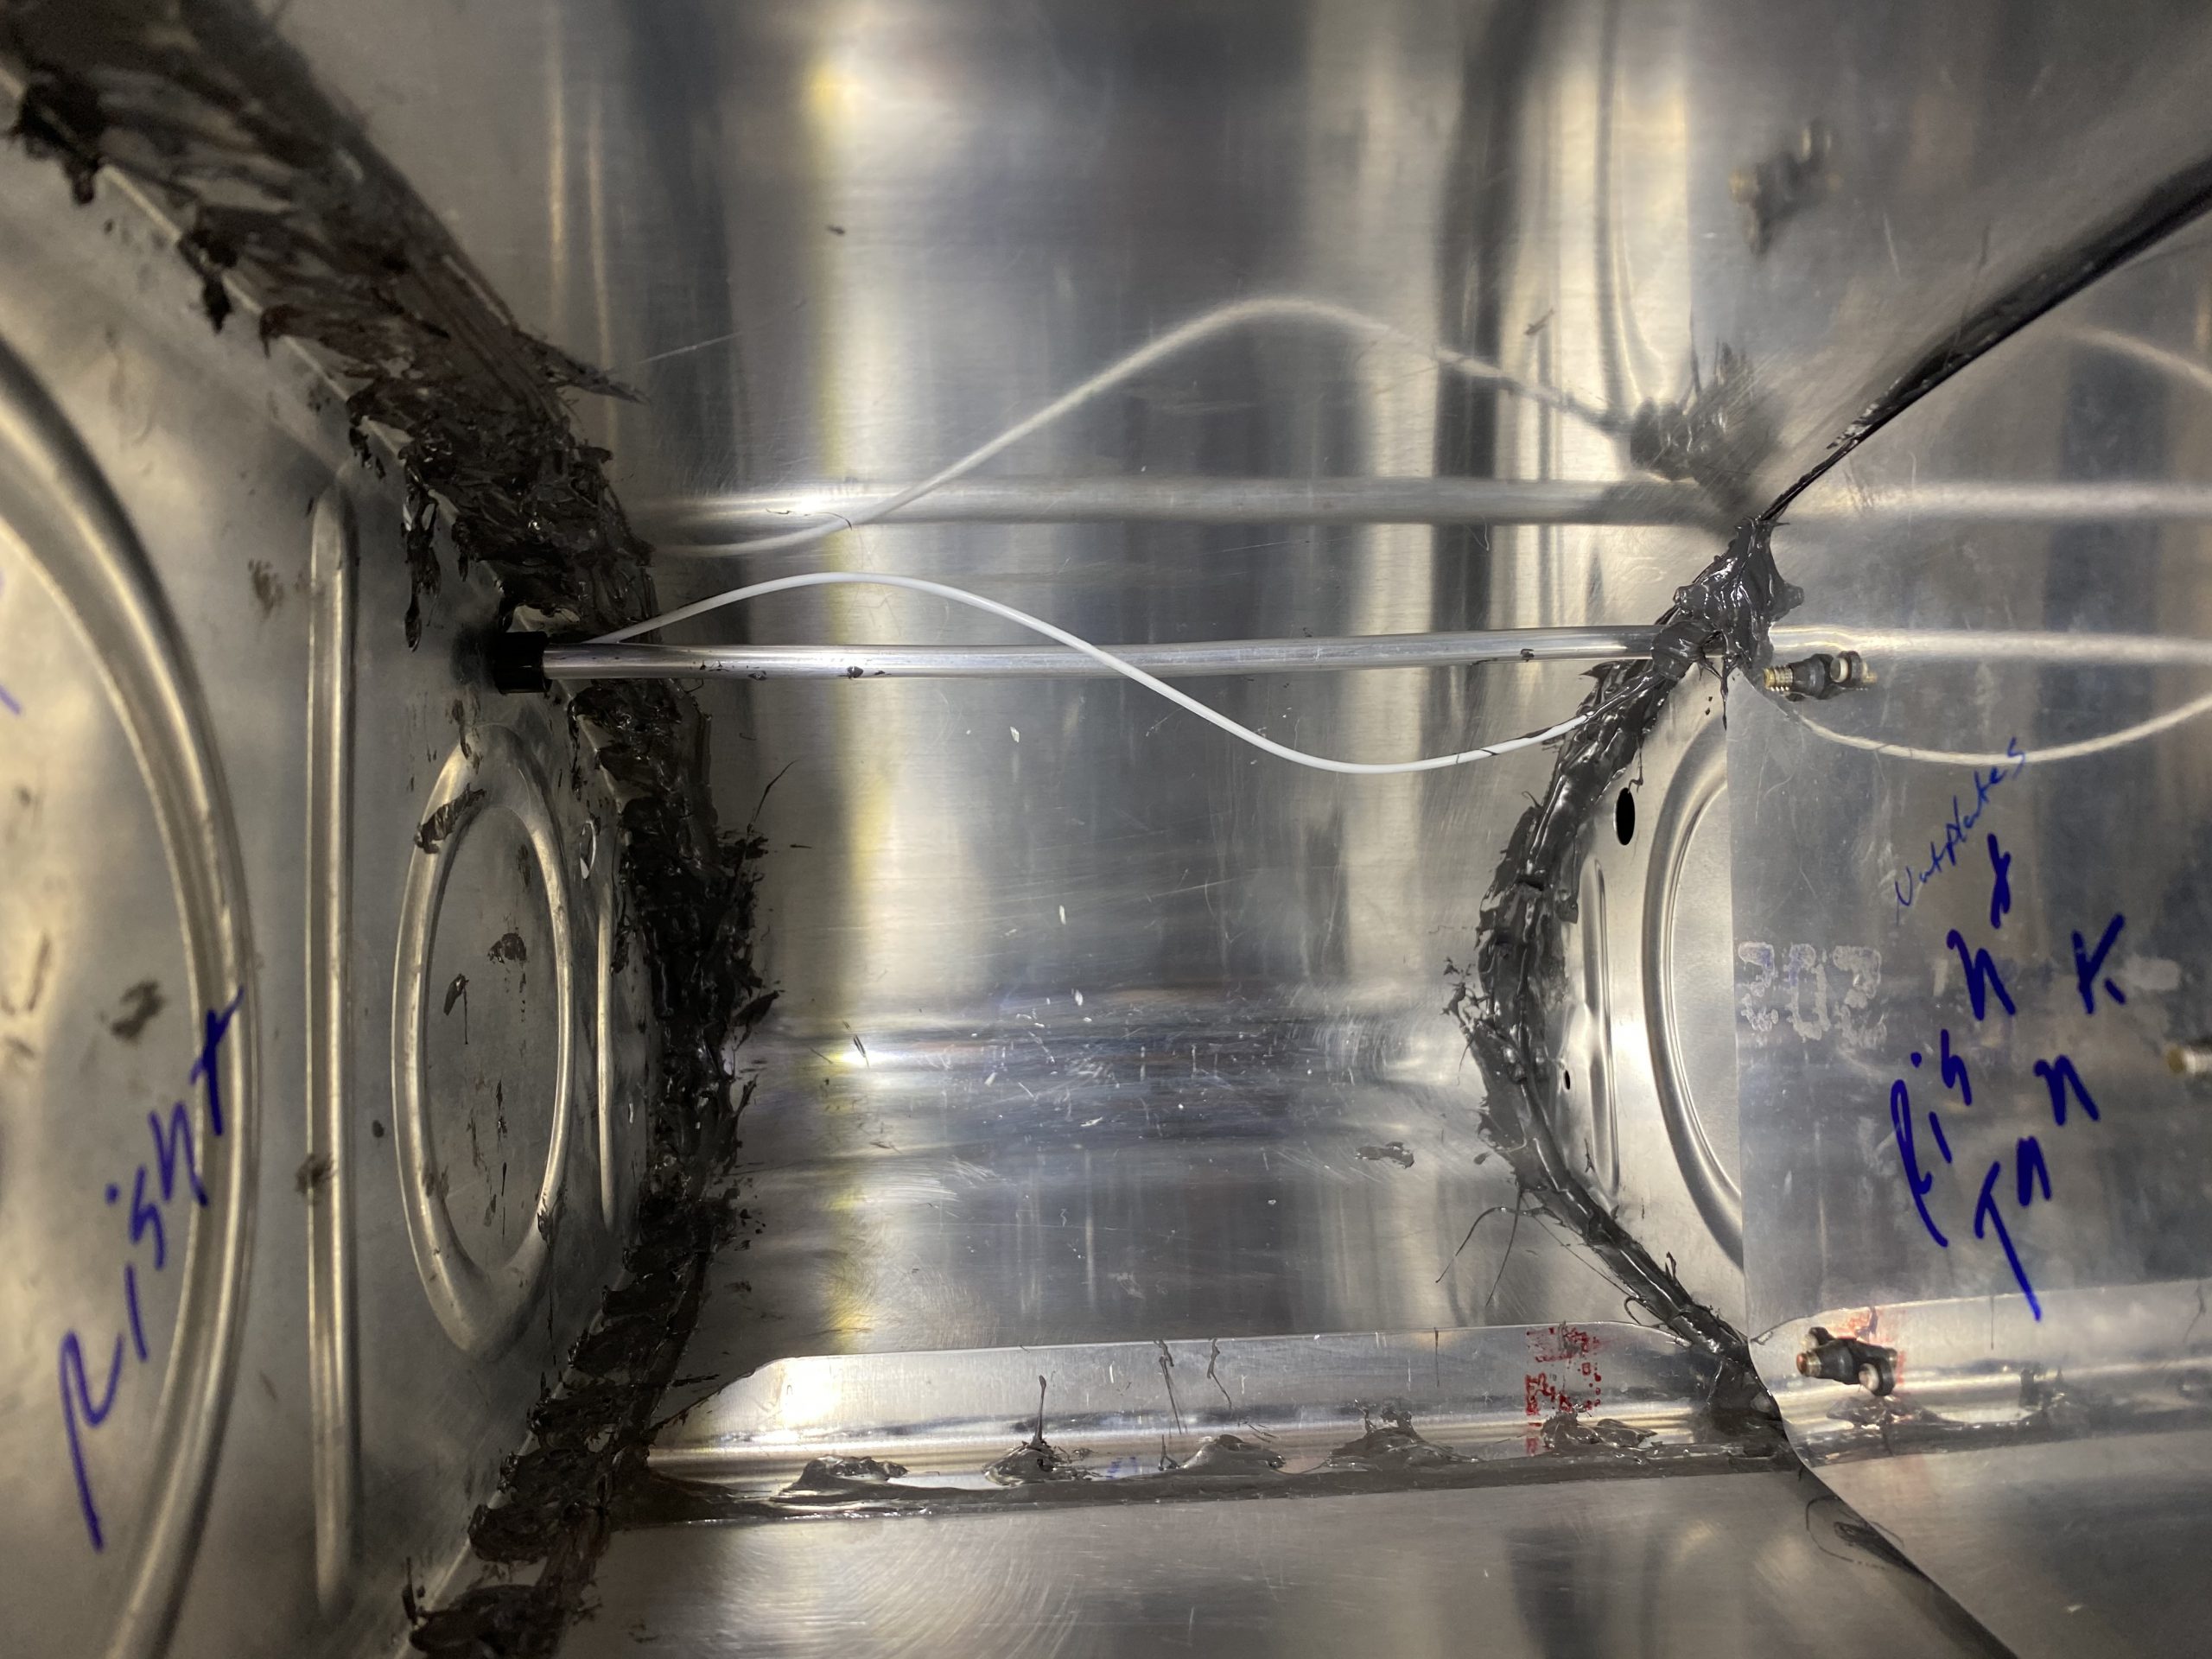
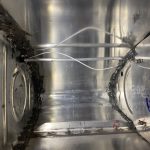
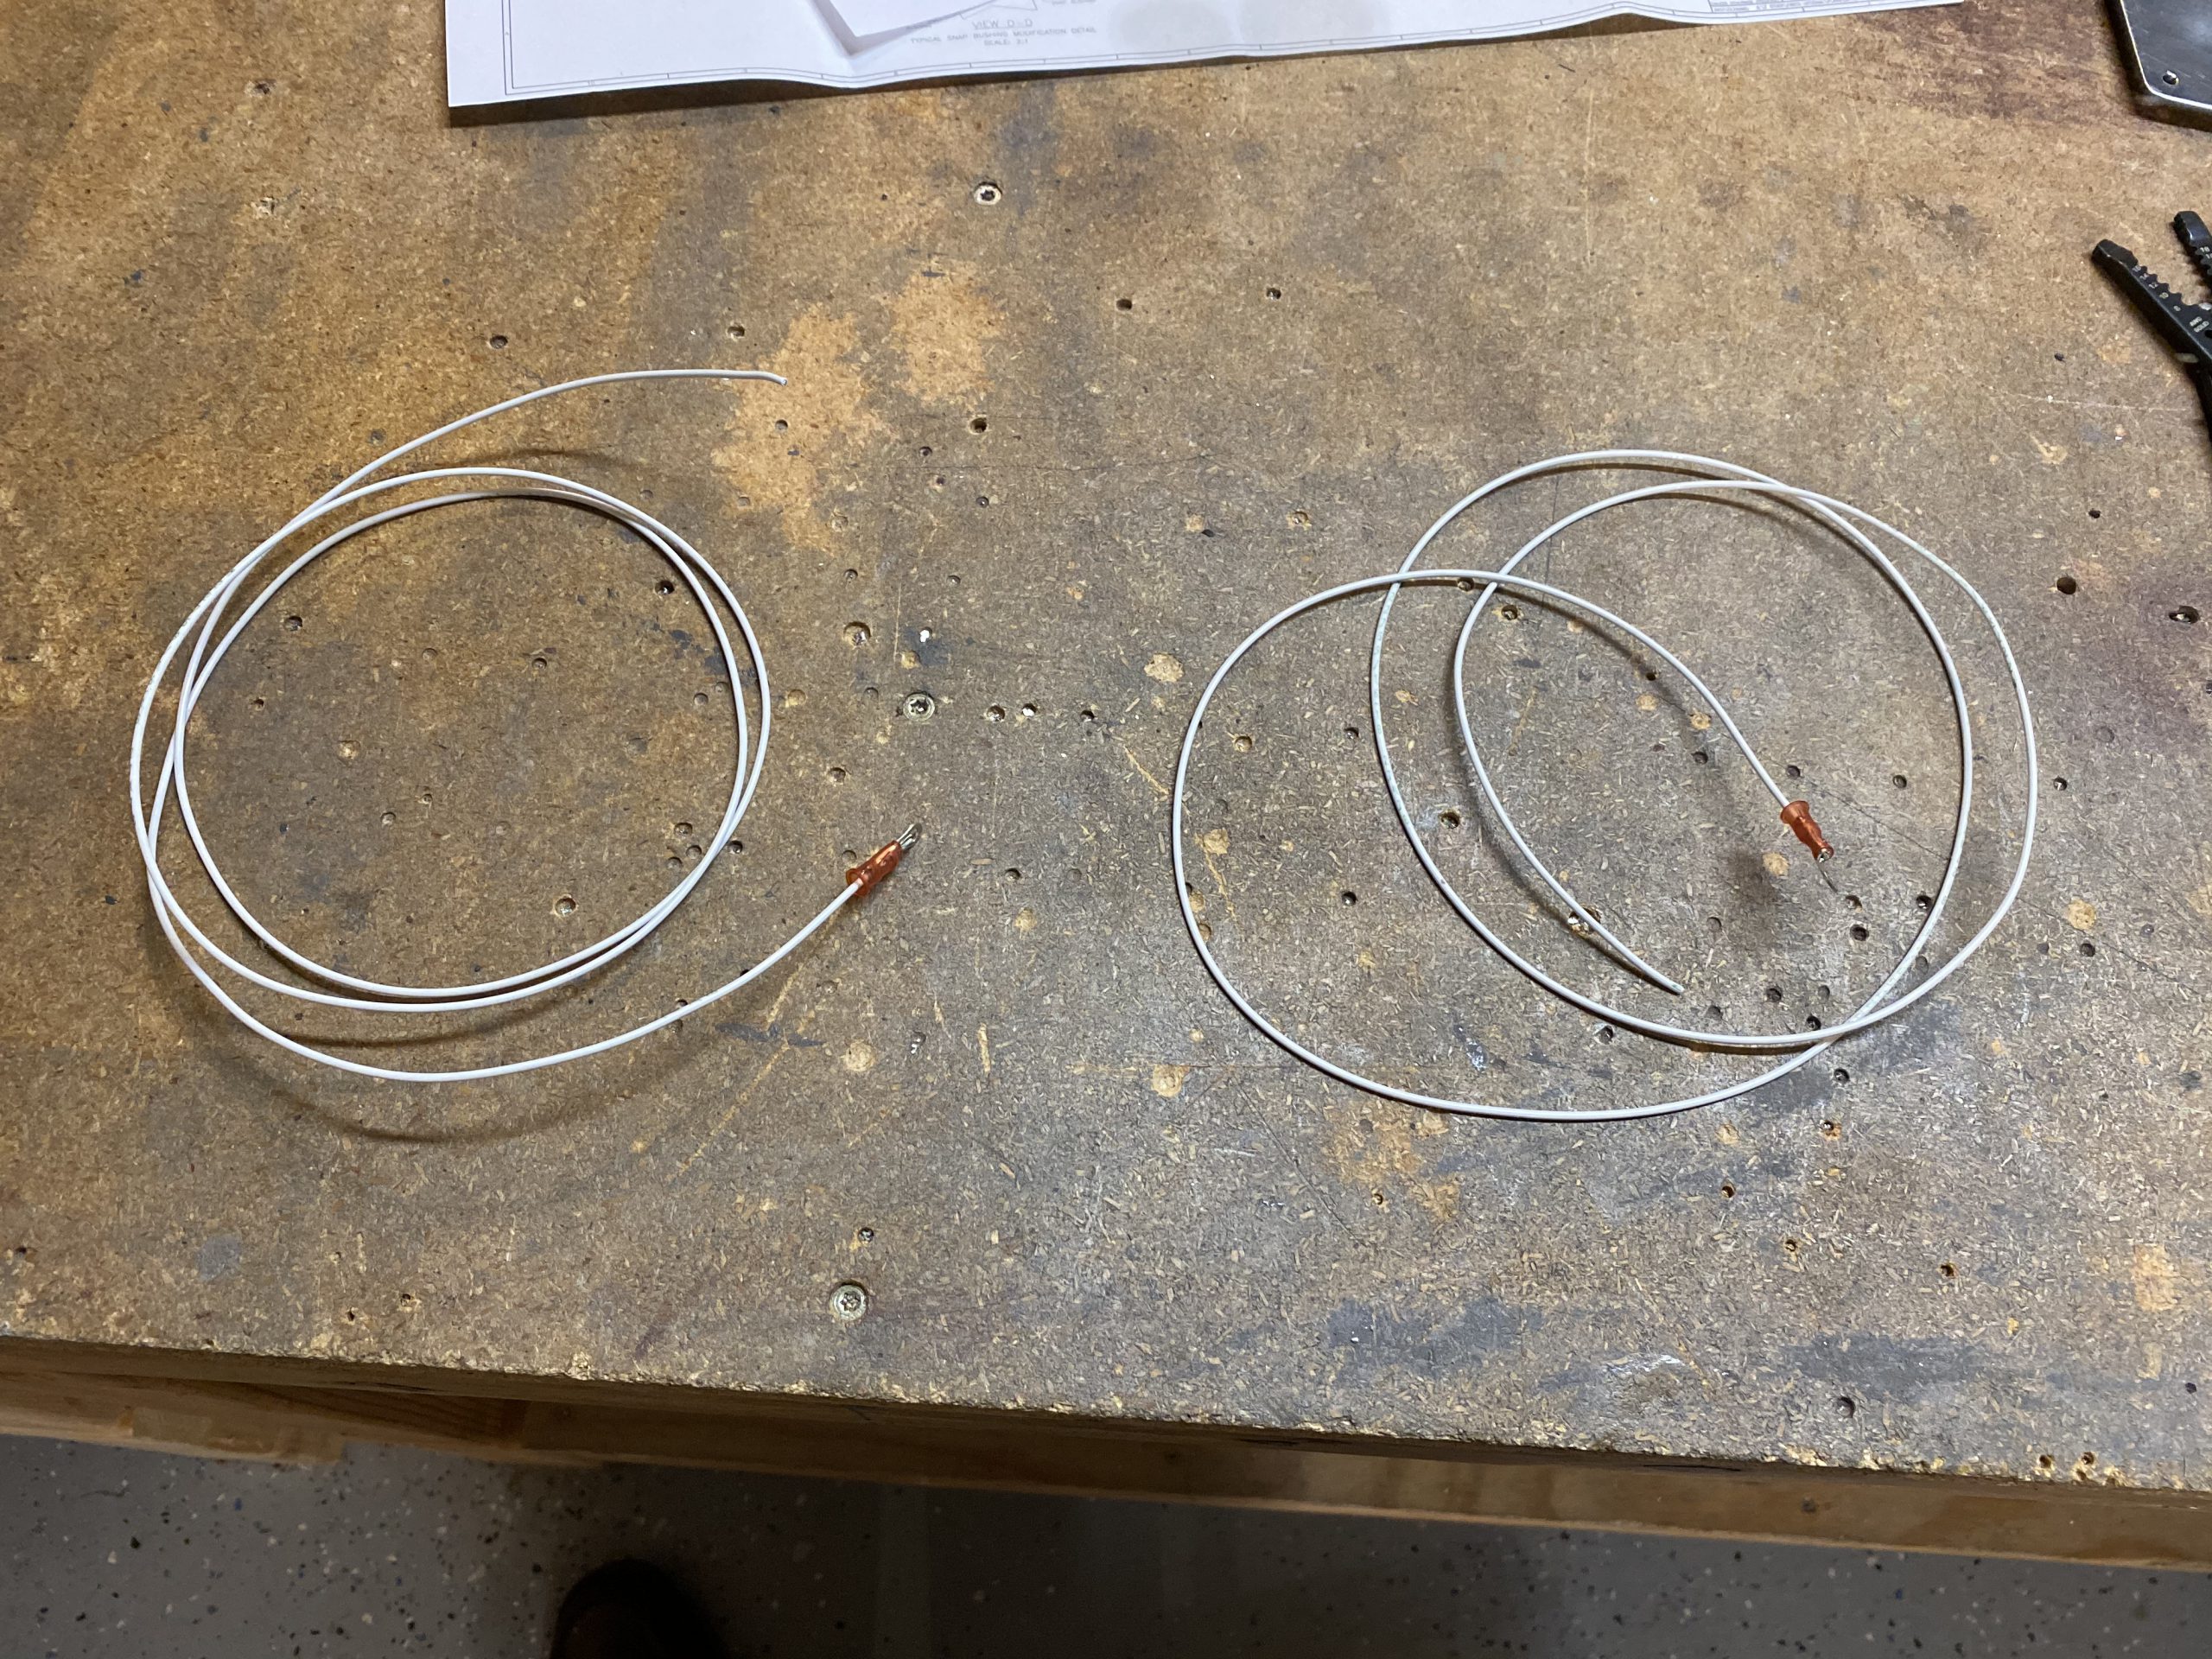
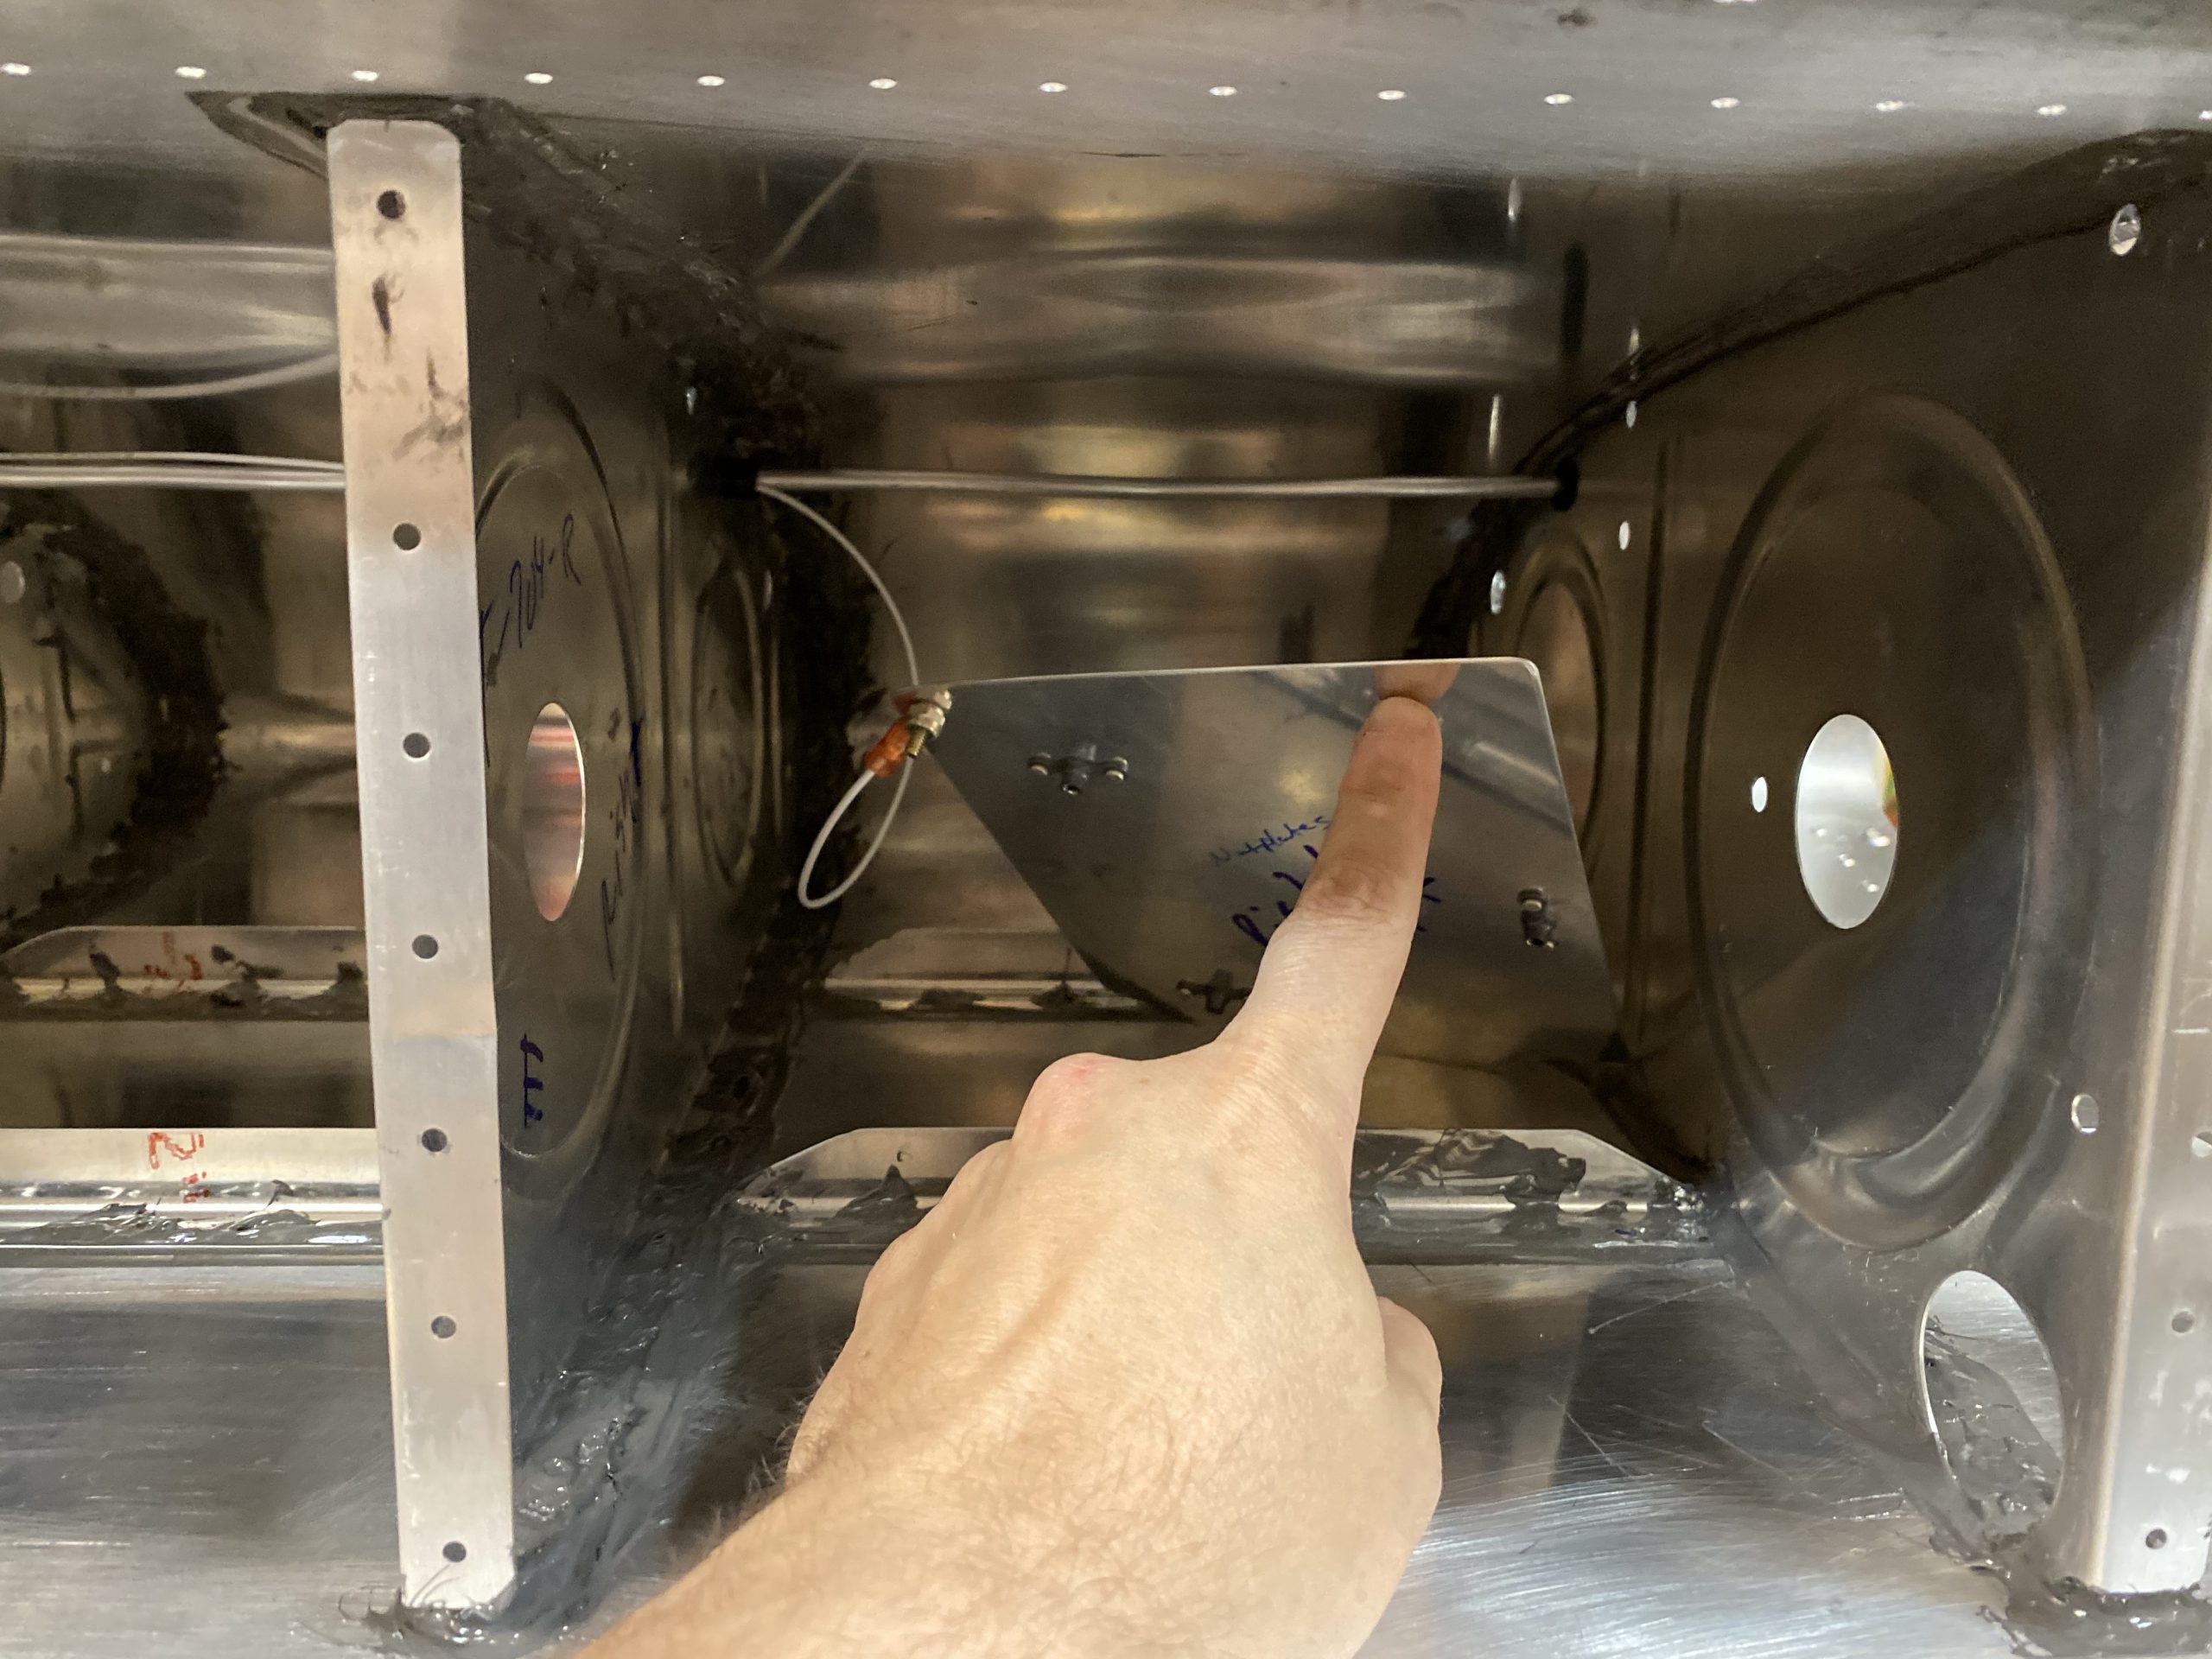
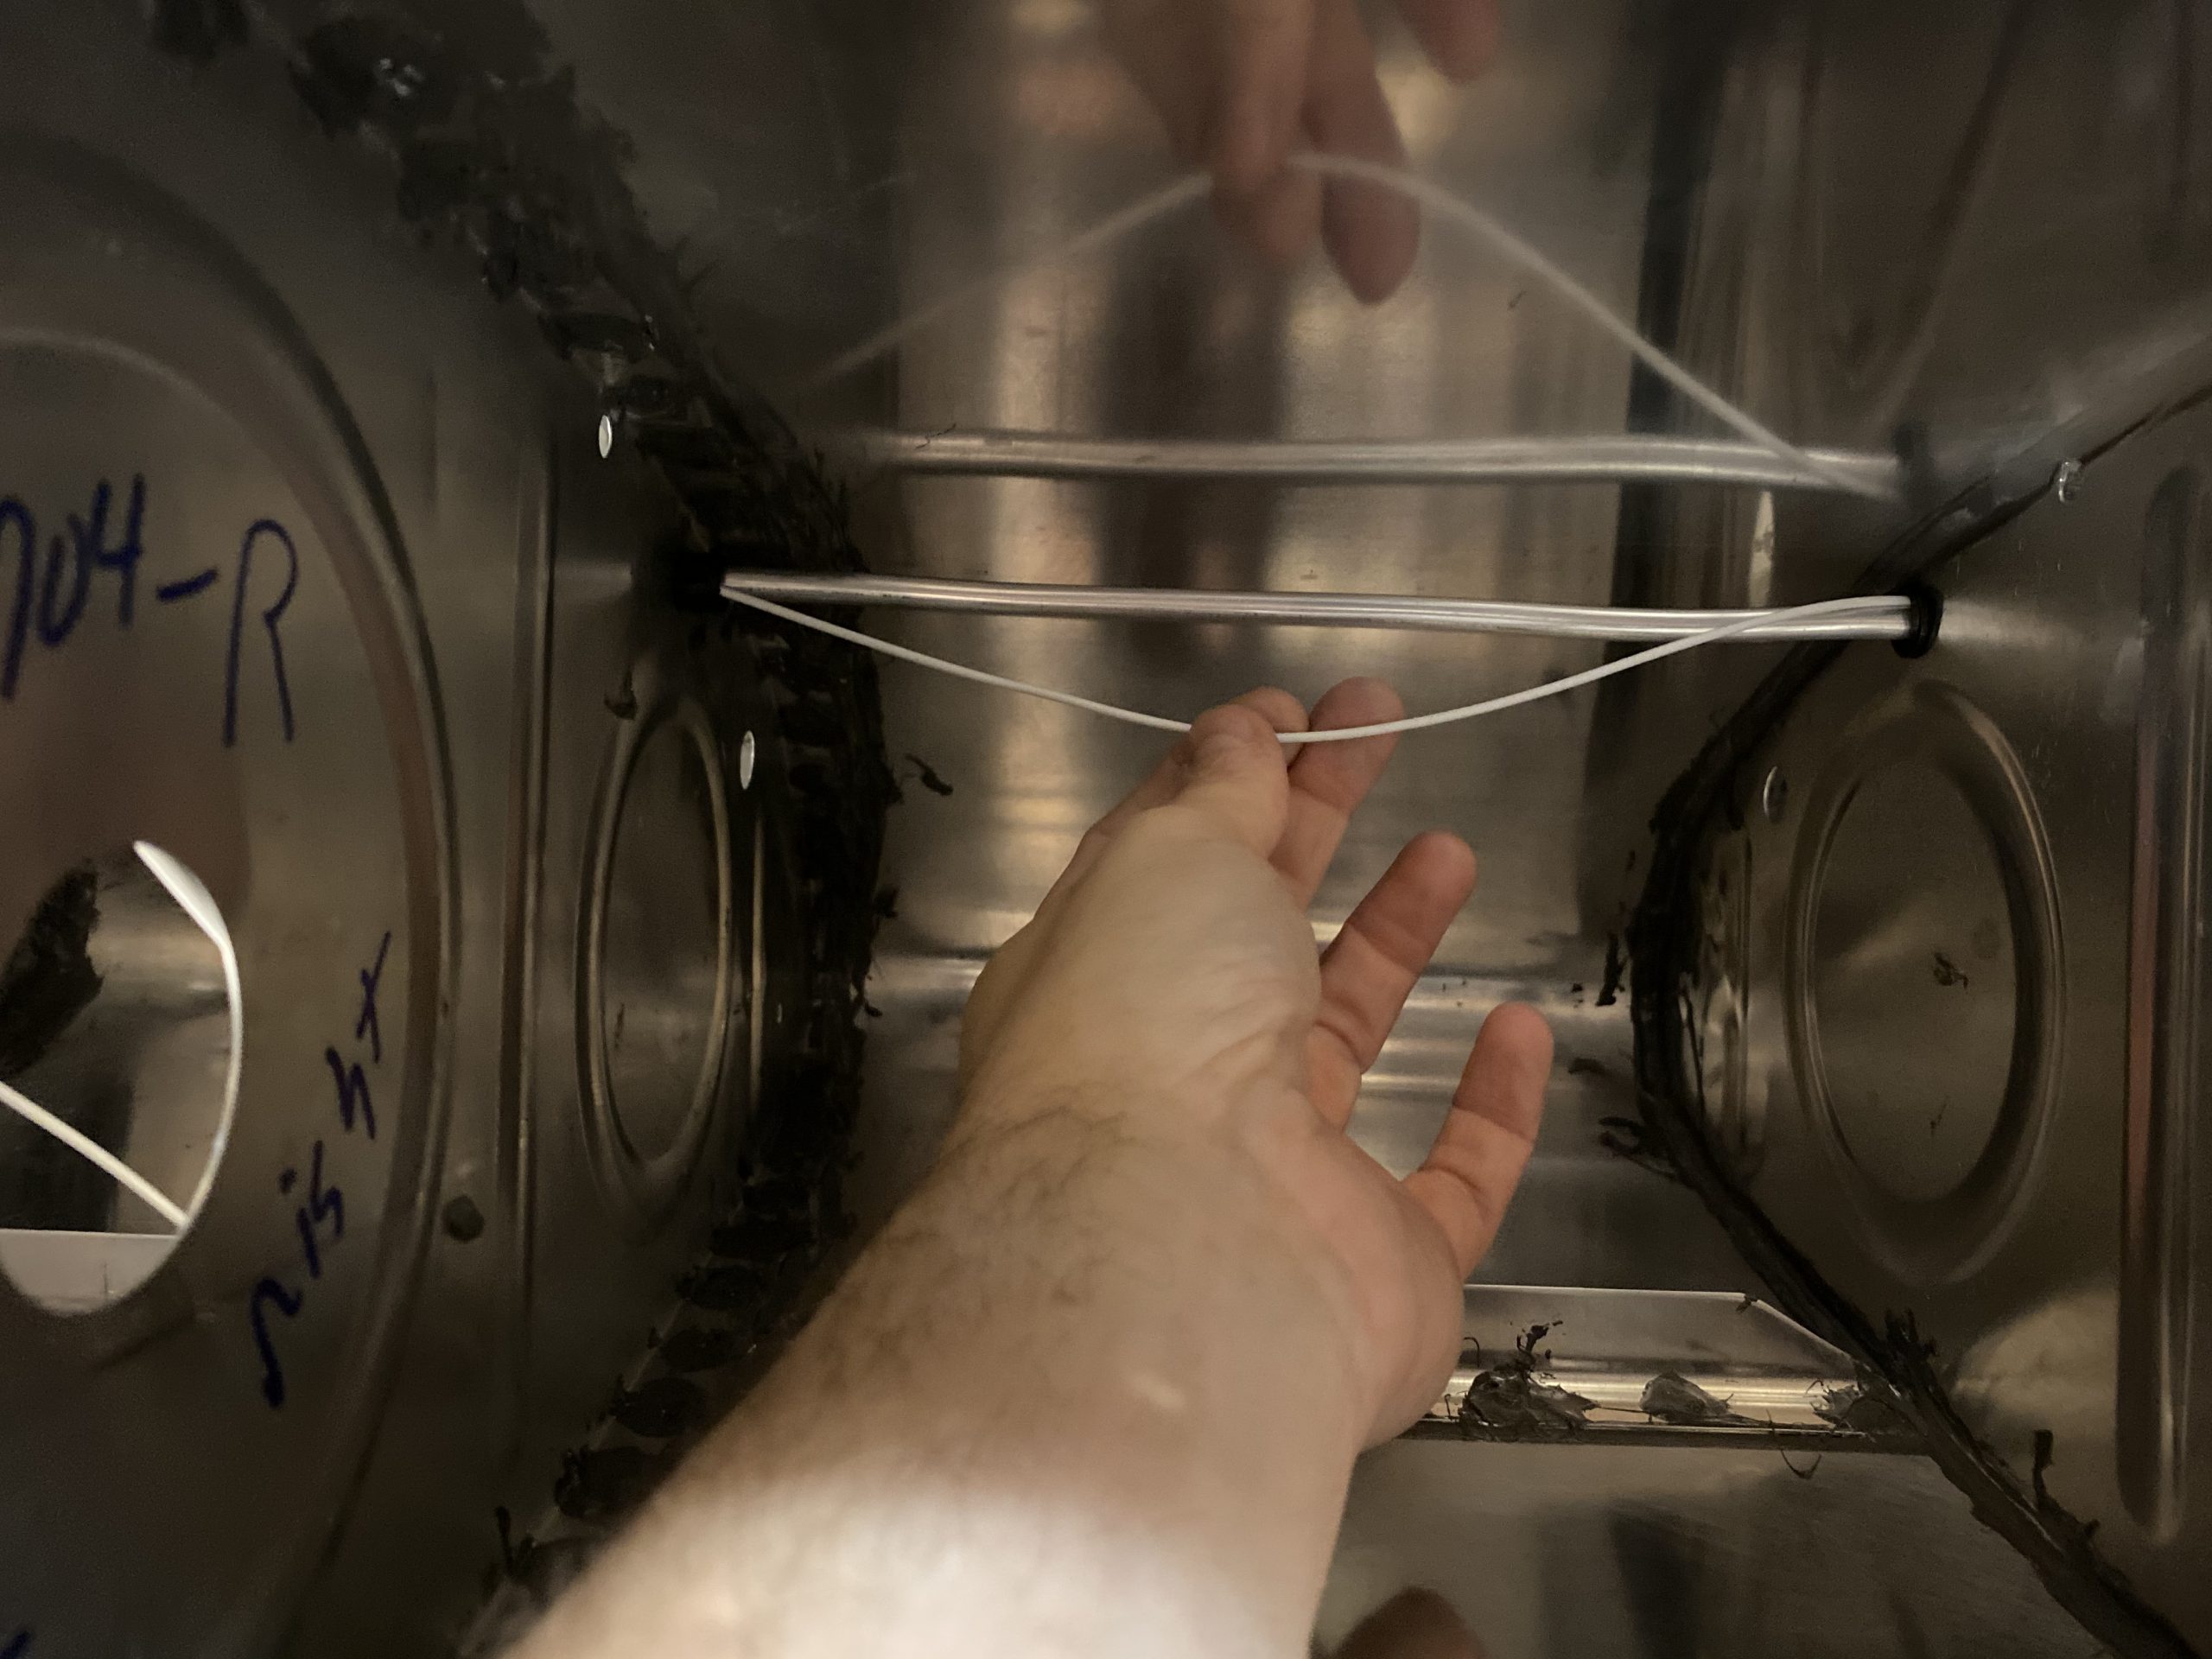
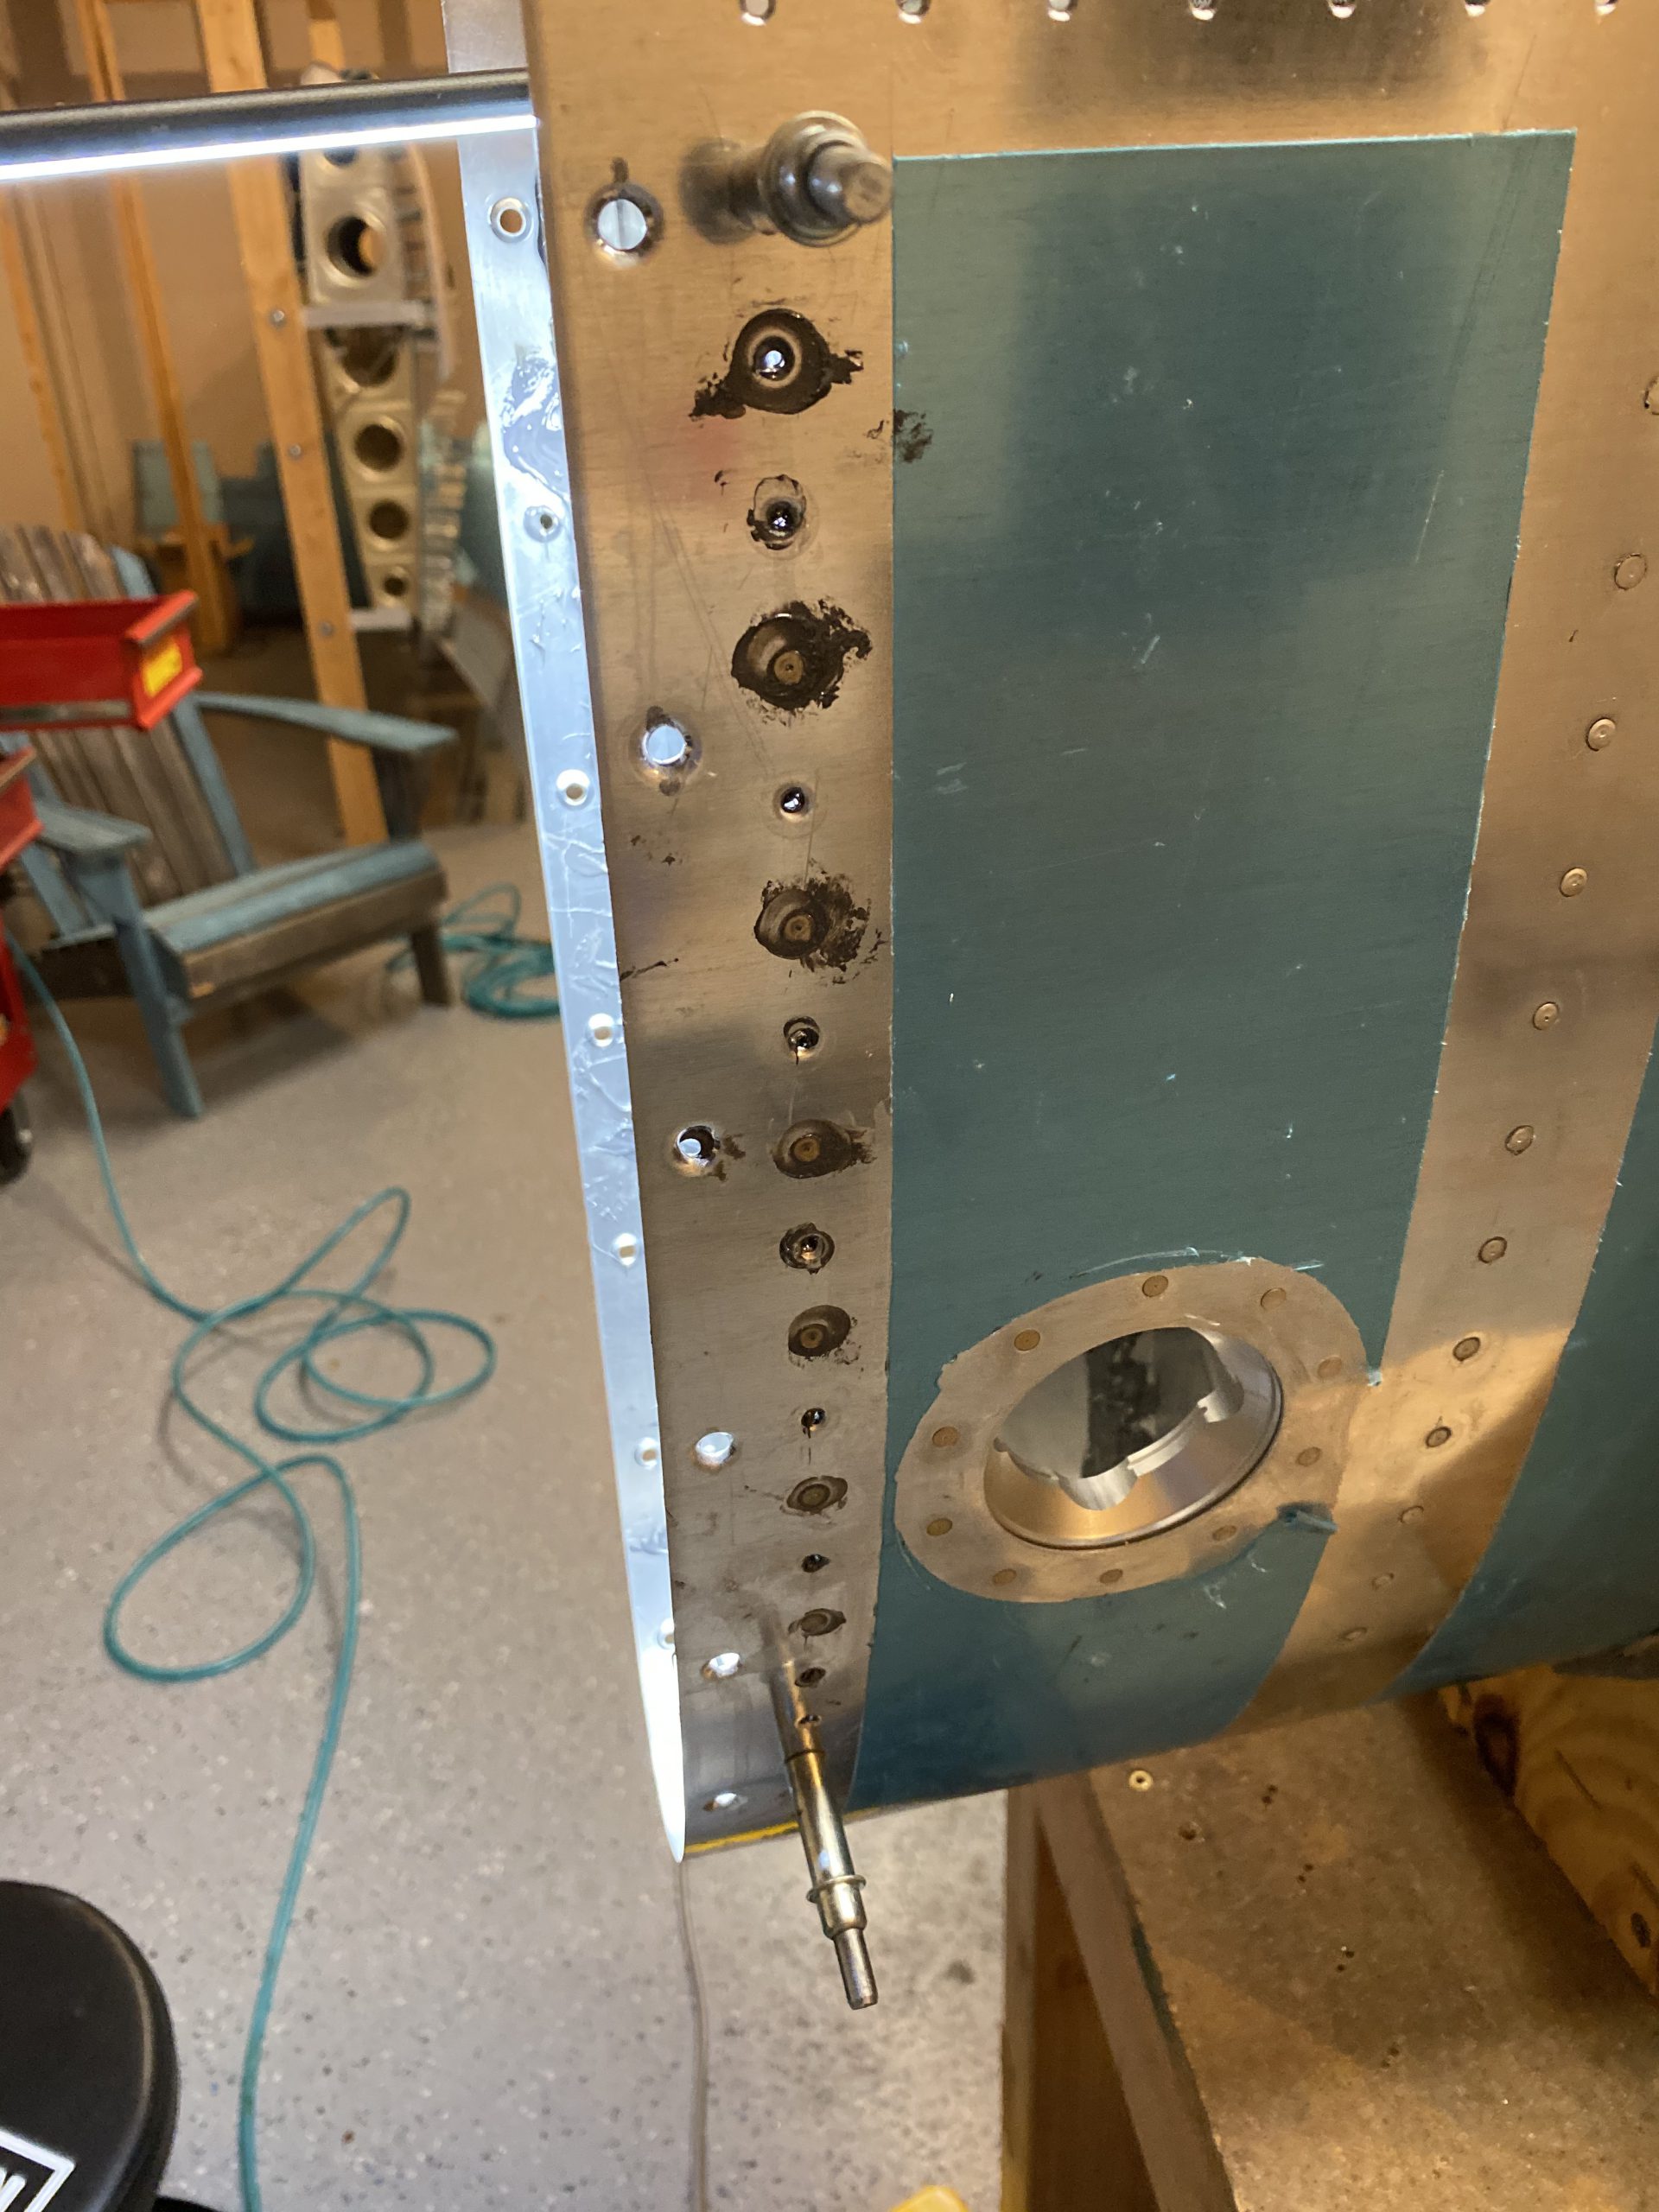
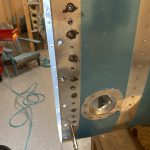
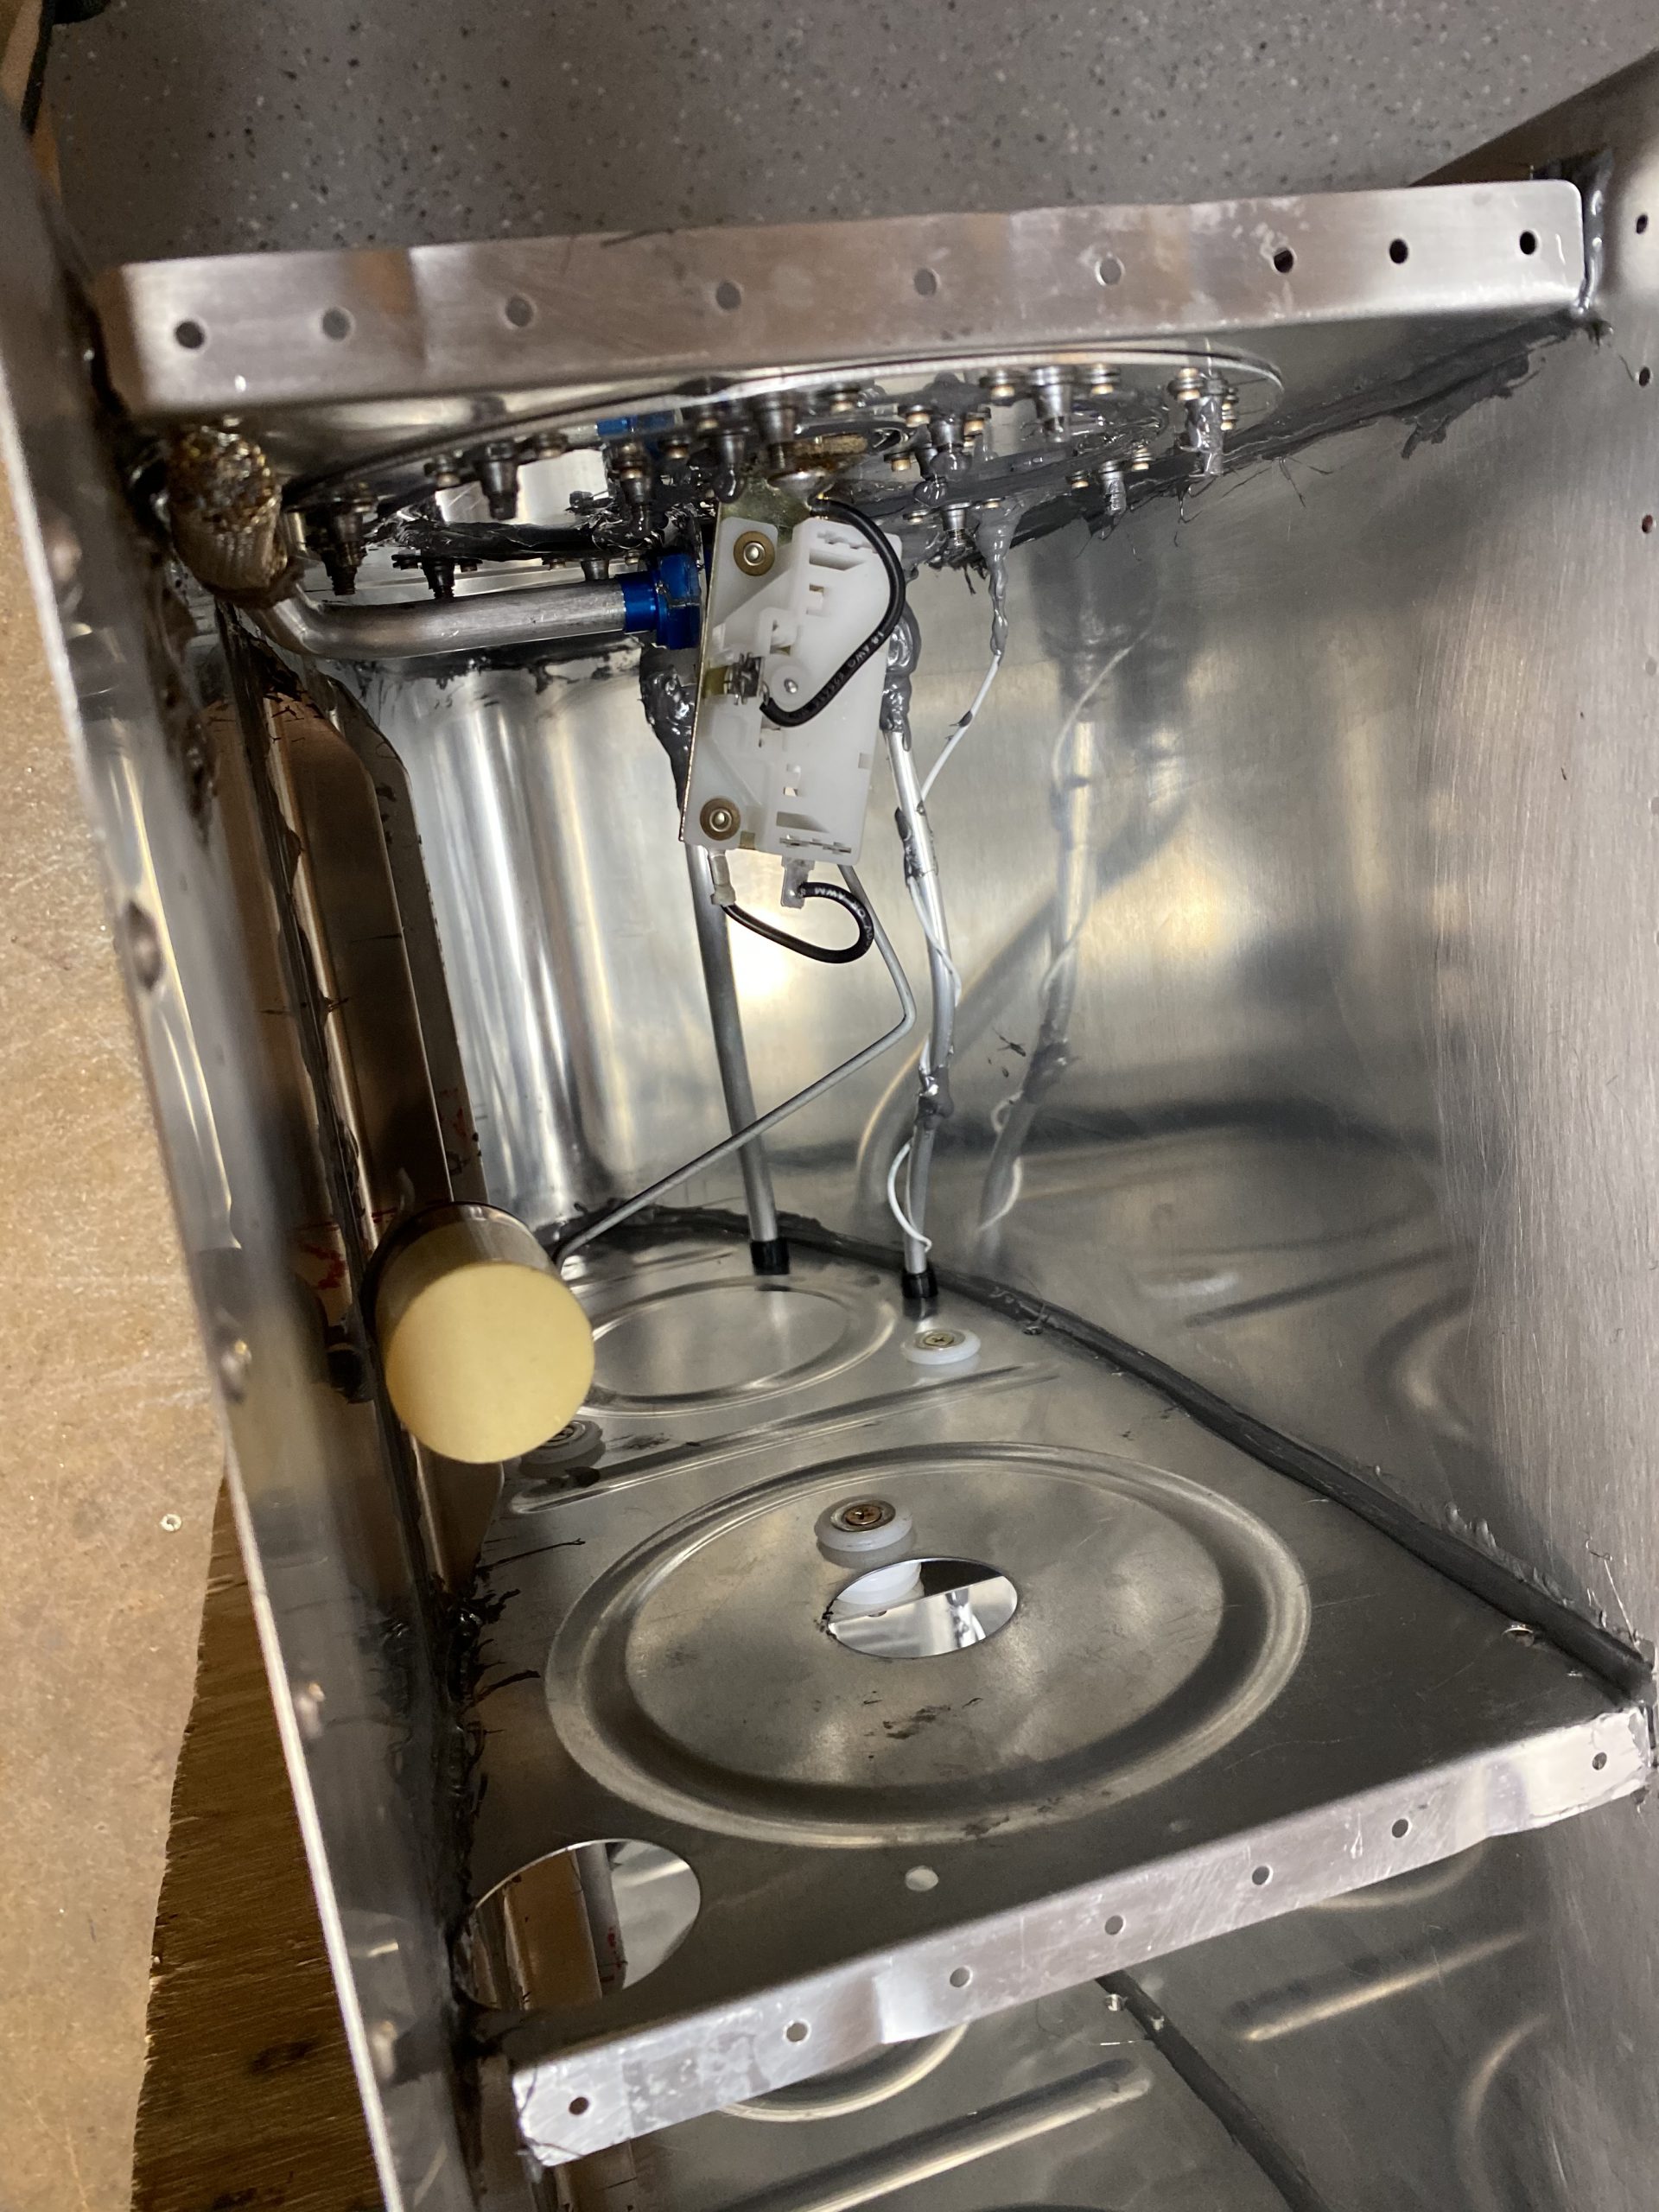
Like I mentioned, I got my new quart of sealant in, and figured it was time to get this tank ready for its baffle, or rather a water leak test first. I went ahead and torqued the nuts for the vent tube and return line fittings while I had good access.  I needed to do a little bit of wiring on the capacitive senders before I got everything gooped up with sealant.  I still needed to run the wire from the BNC connector to the inboard plate and connect it to the wire from the outboard plate and seal it up.  So, I fished the wire through the bushing, trimmed it back and wrapped it around the vent tube.  Then I stripped the wire and crimped it into a ring terminal so it would connect to the inboard plate.

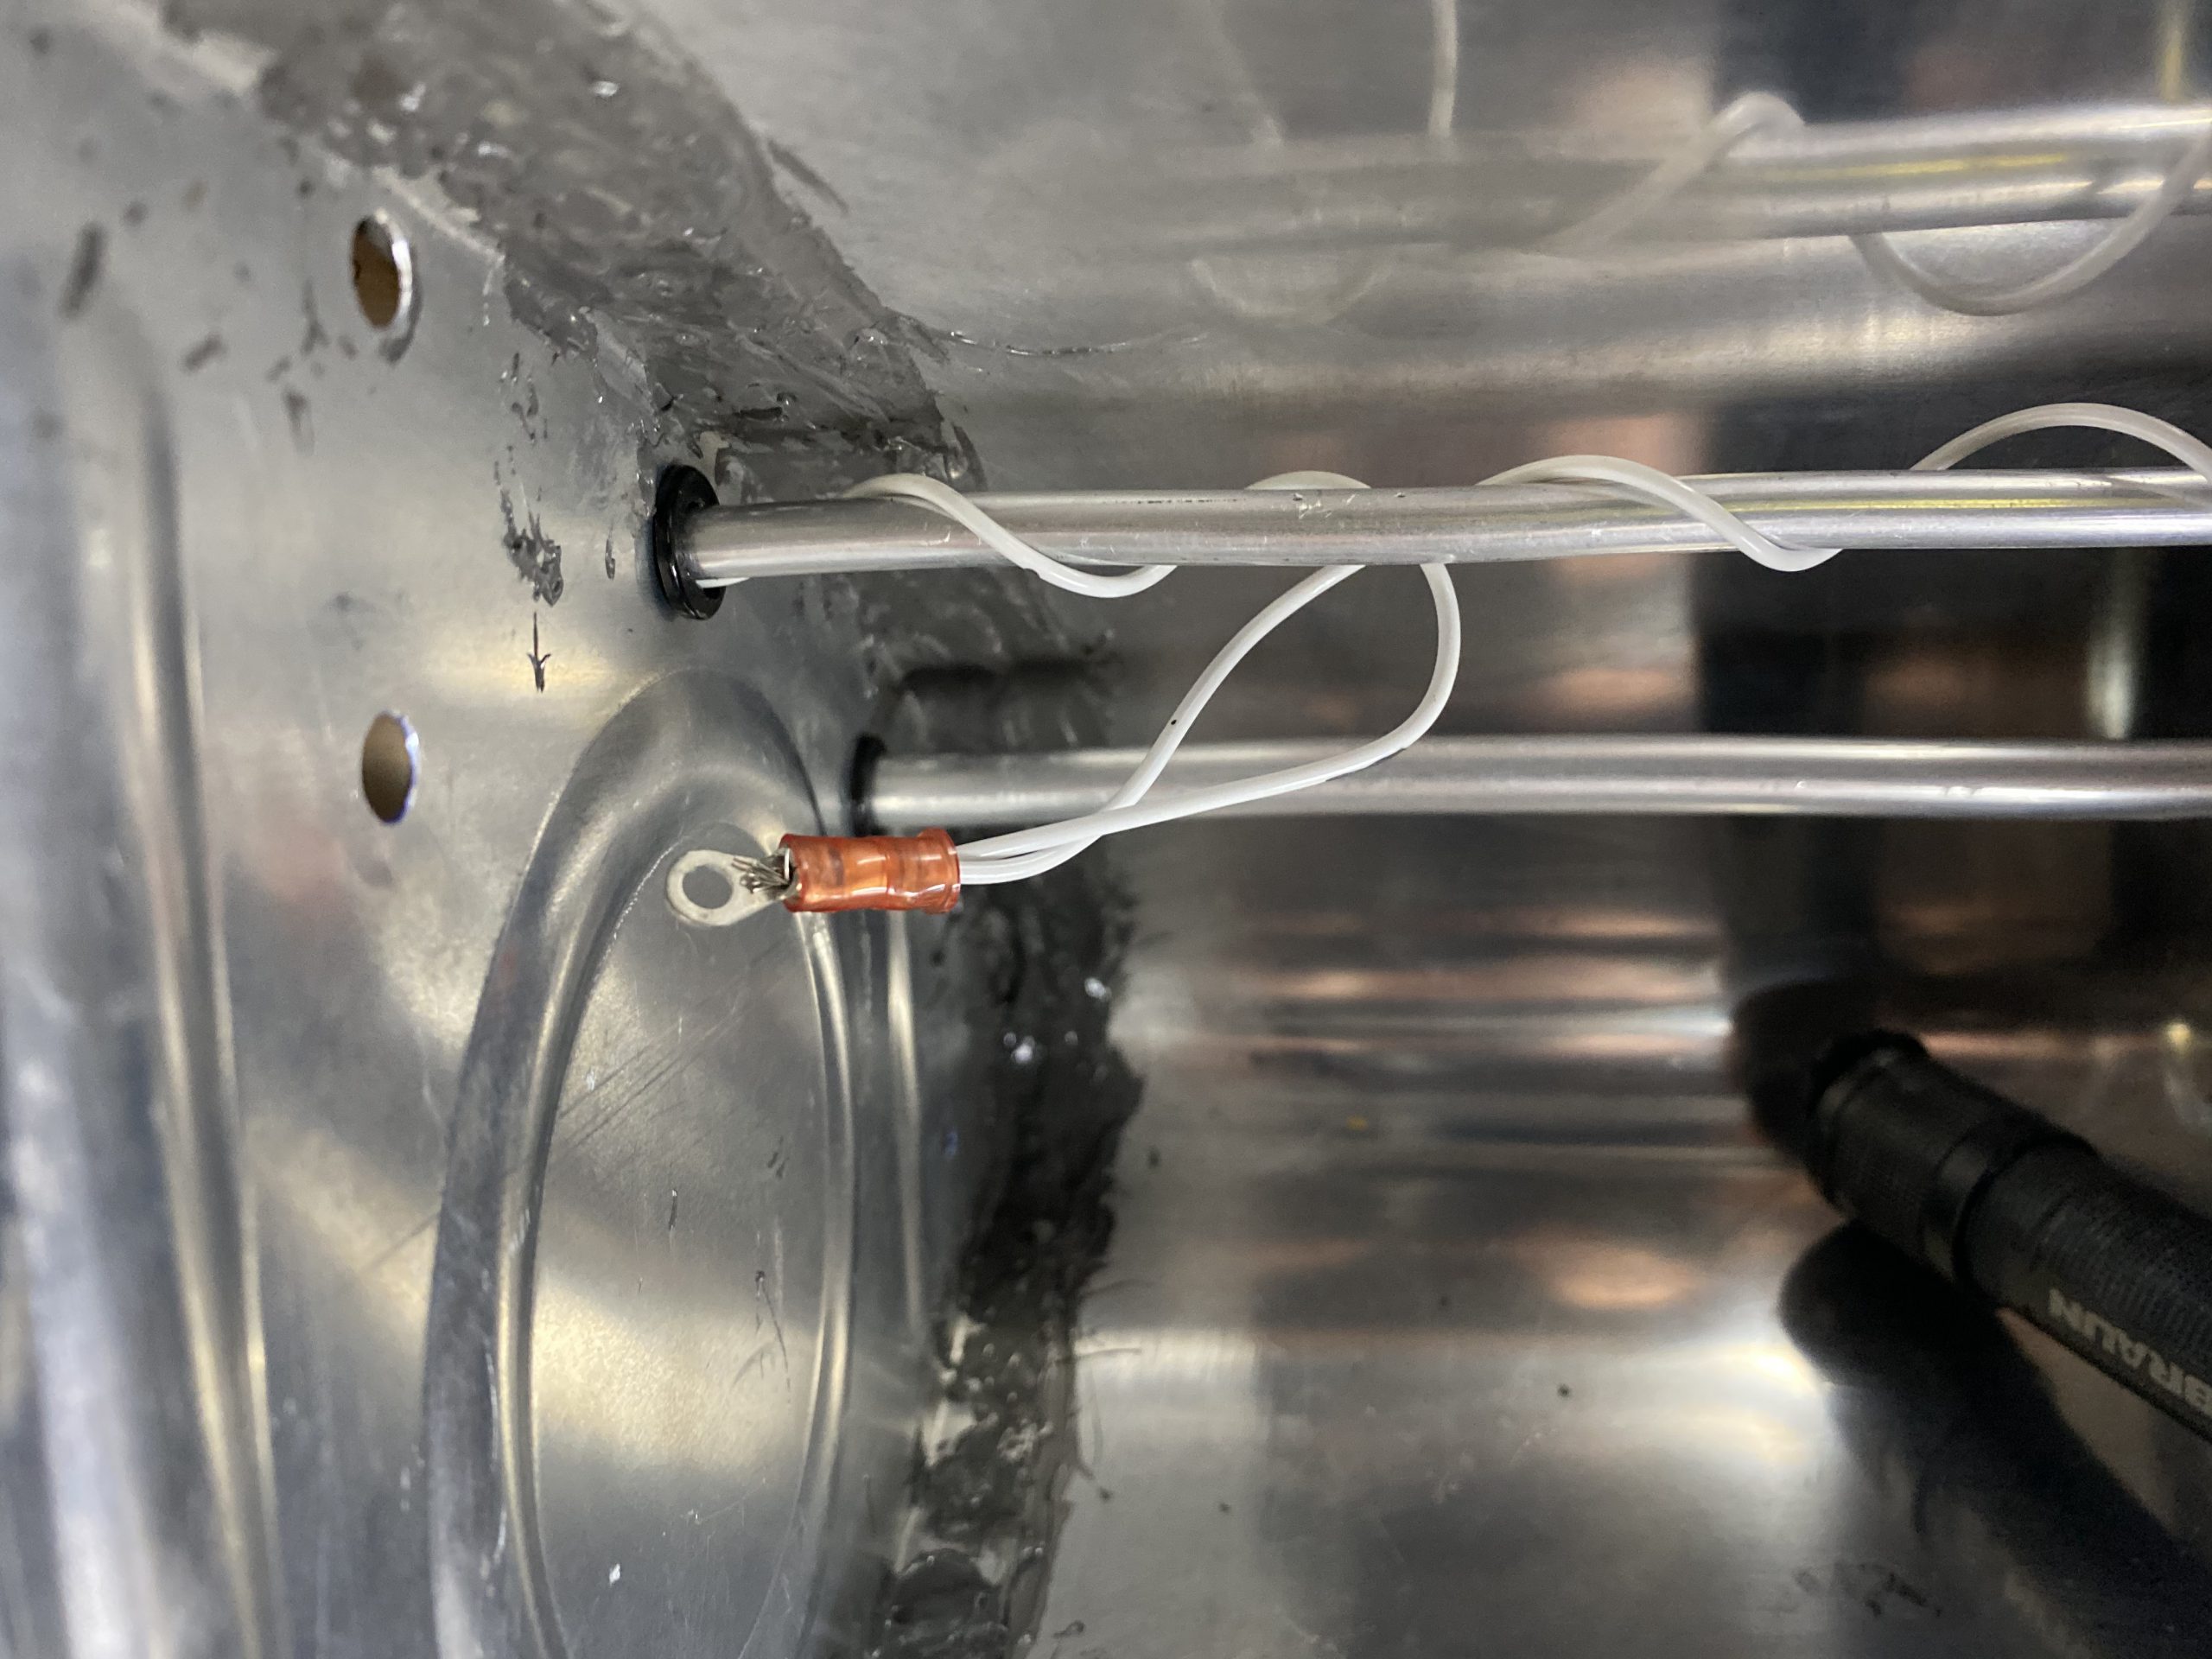
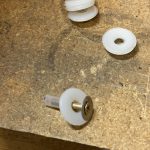
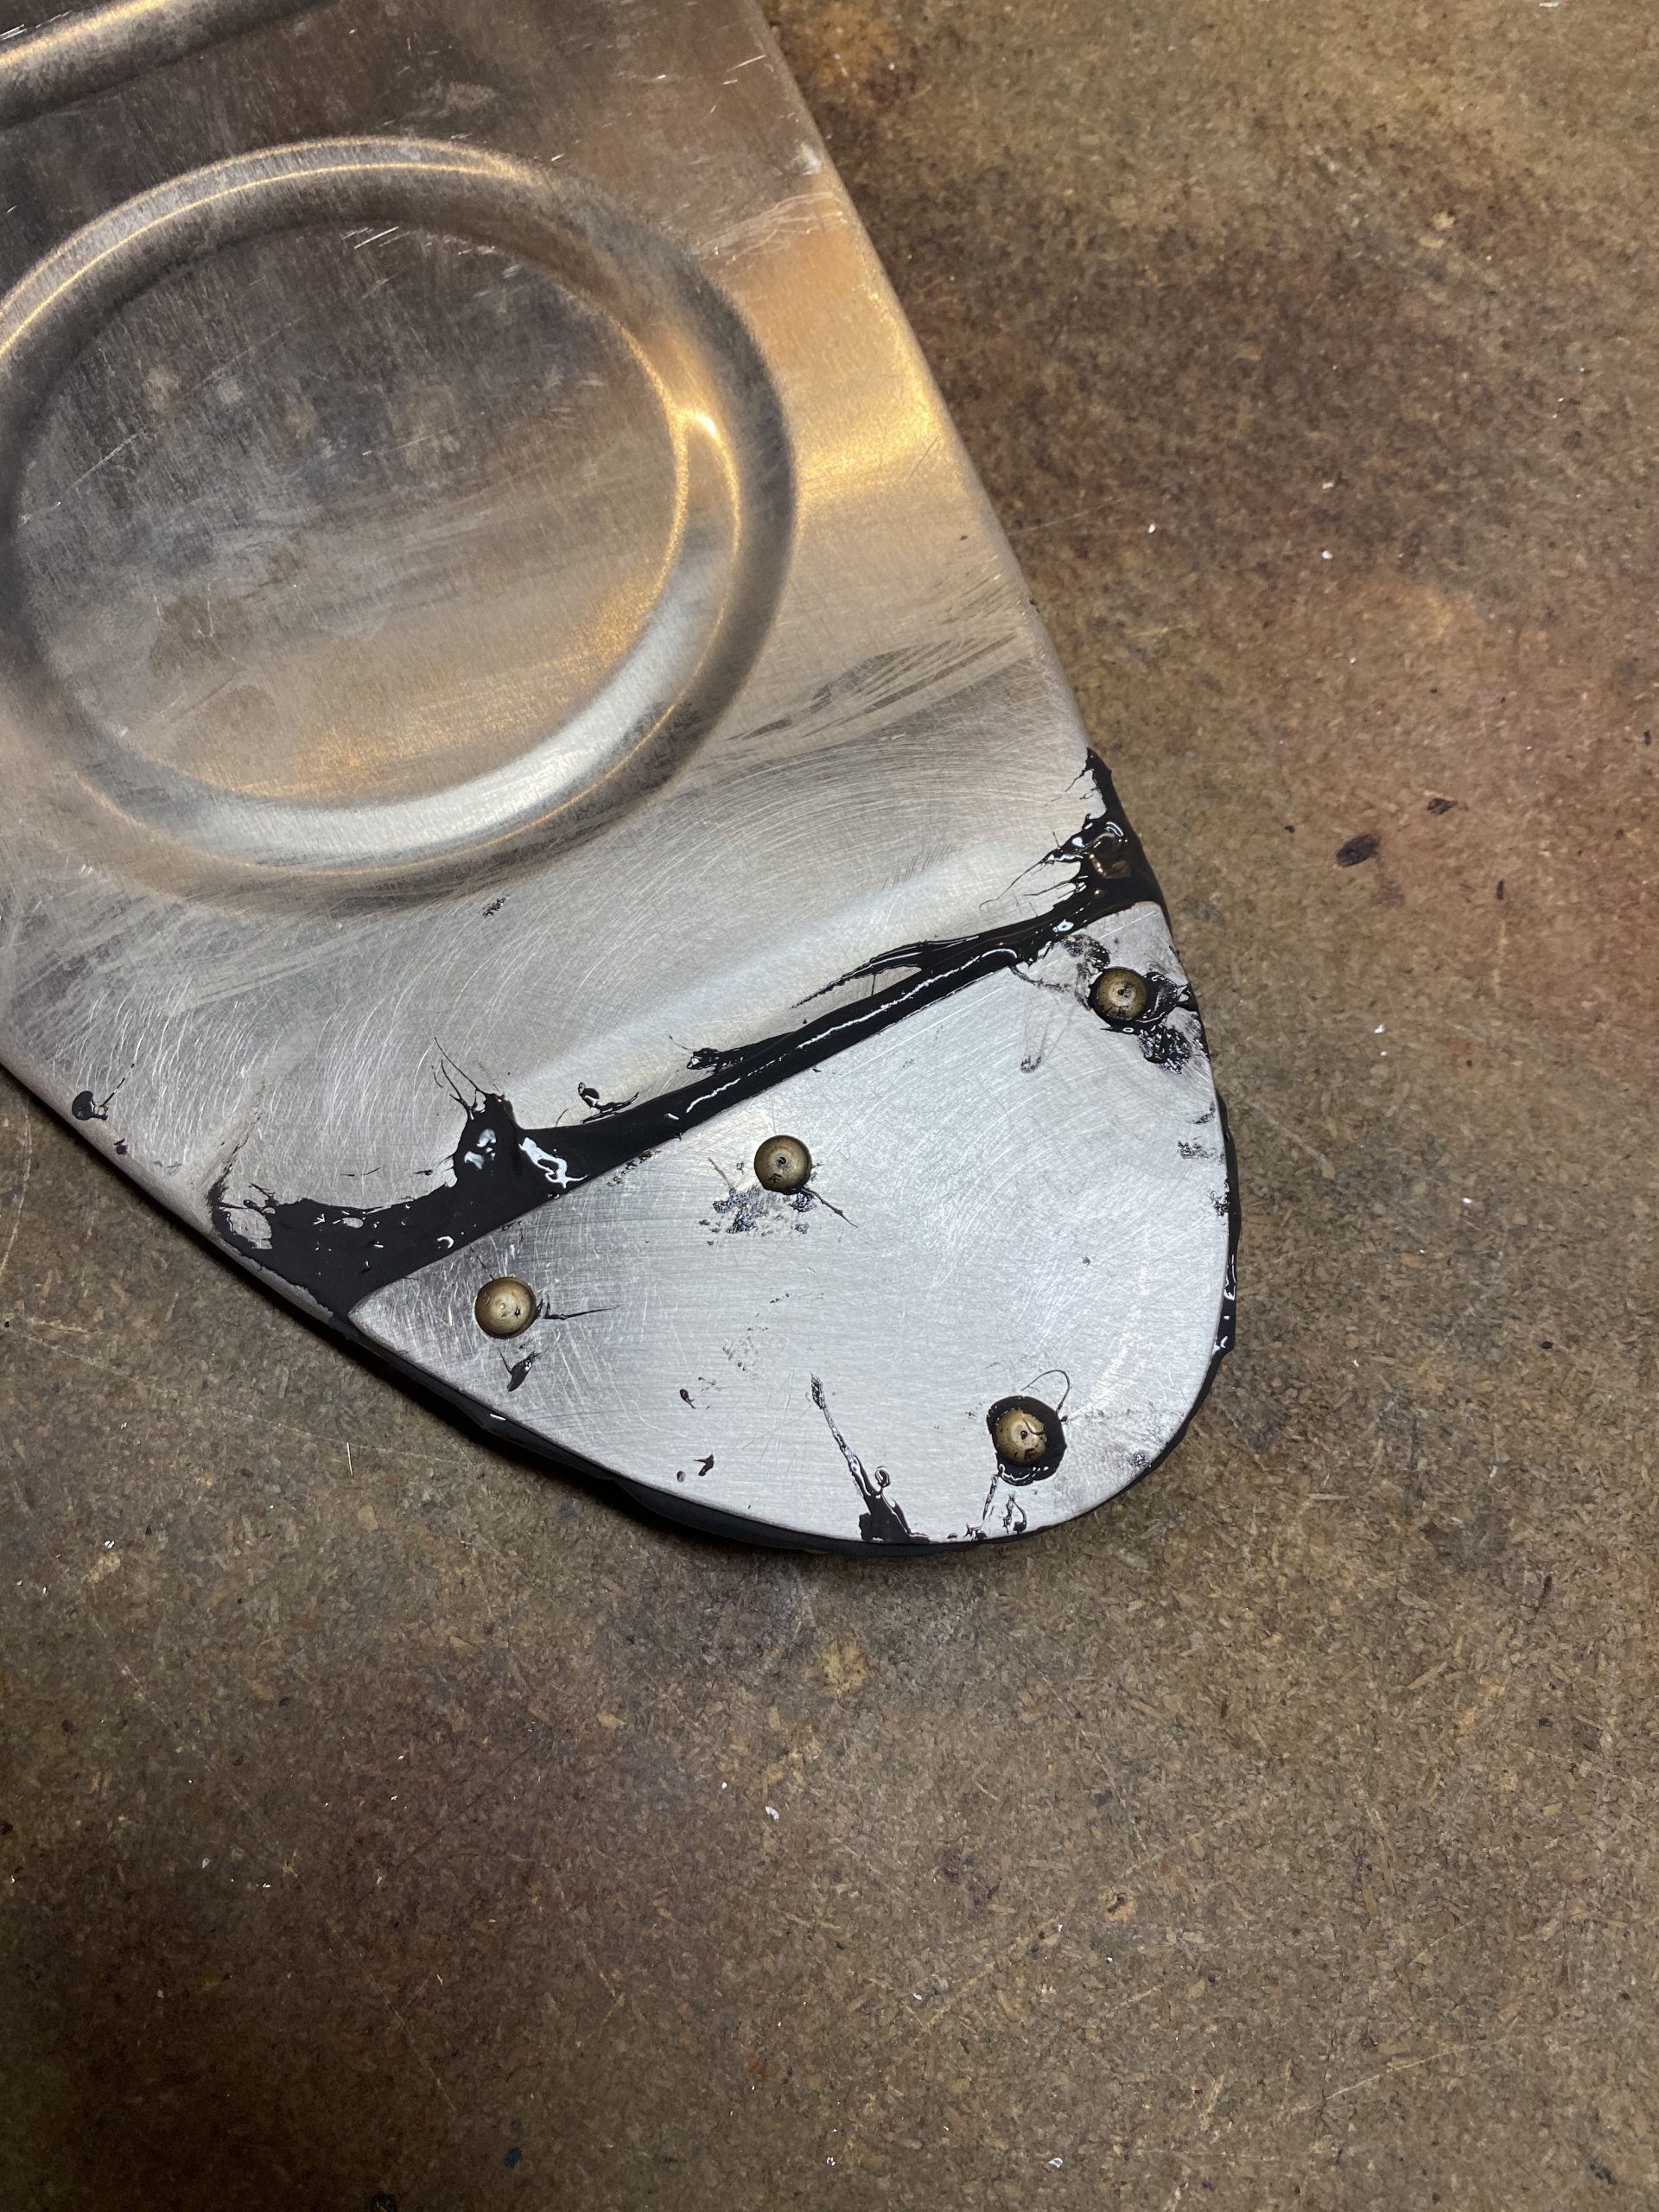
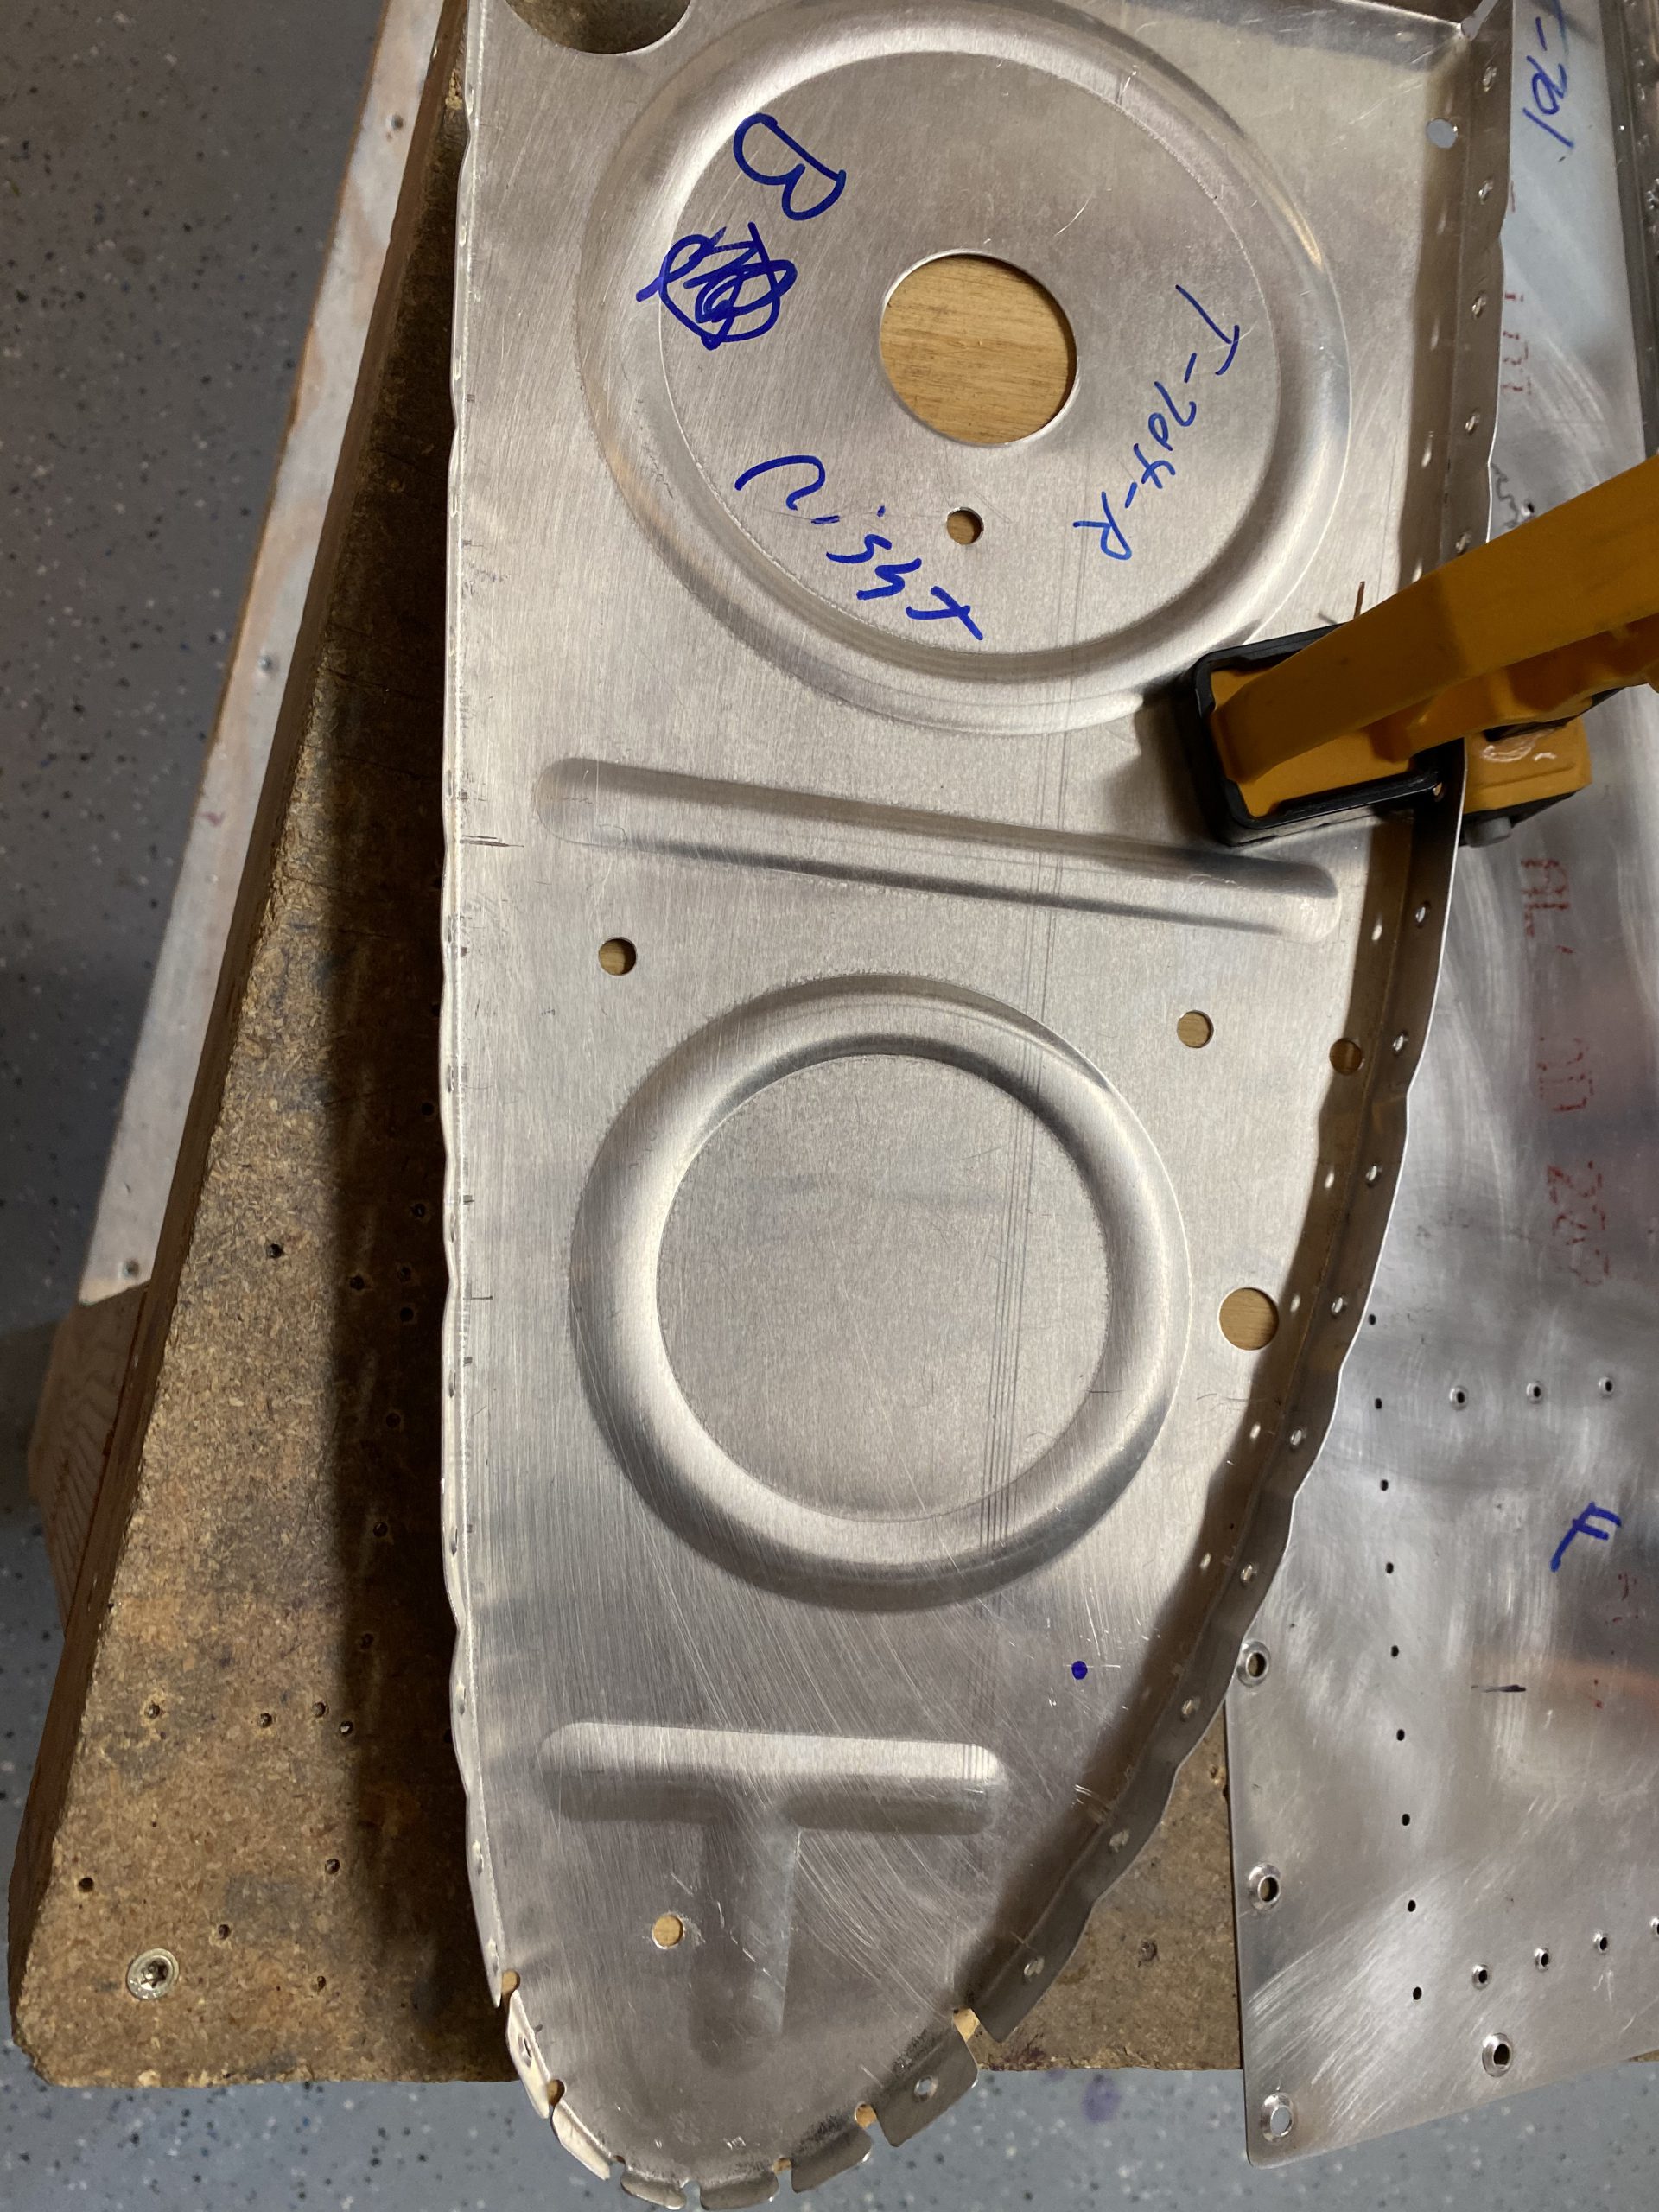
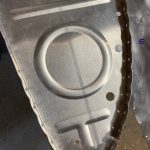
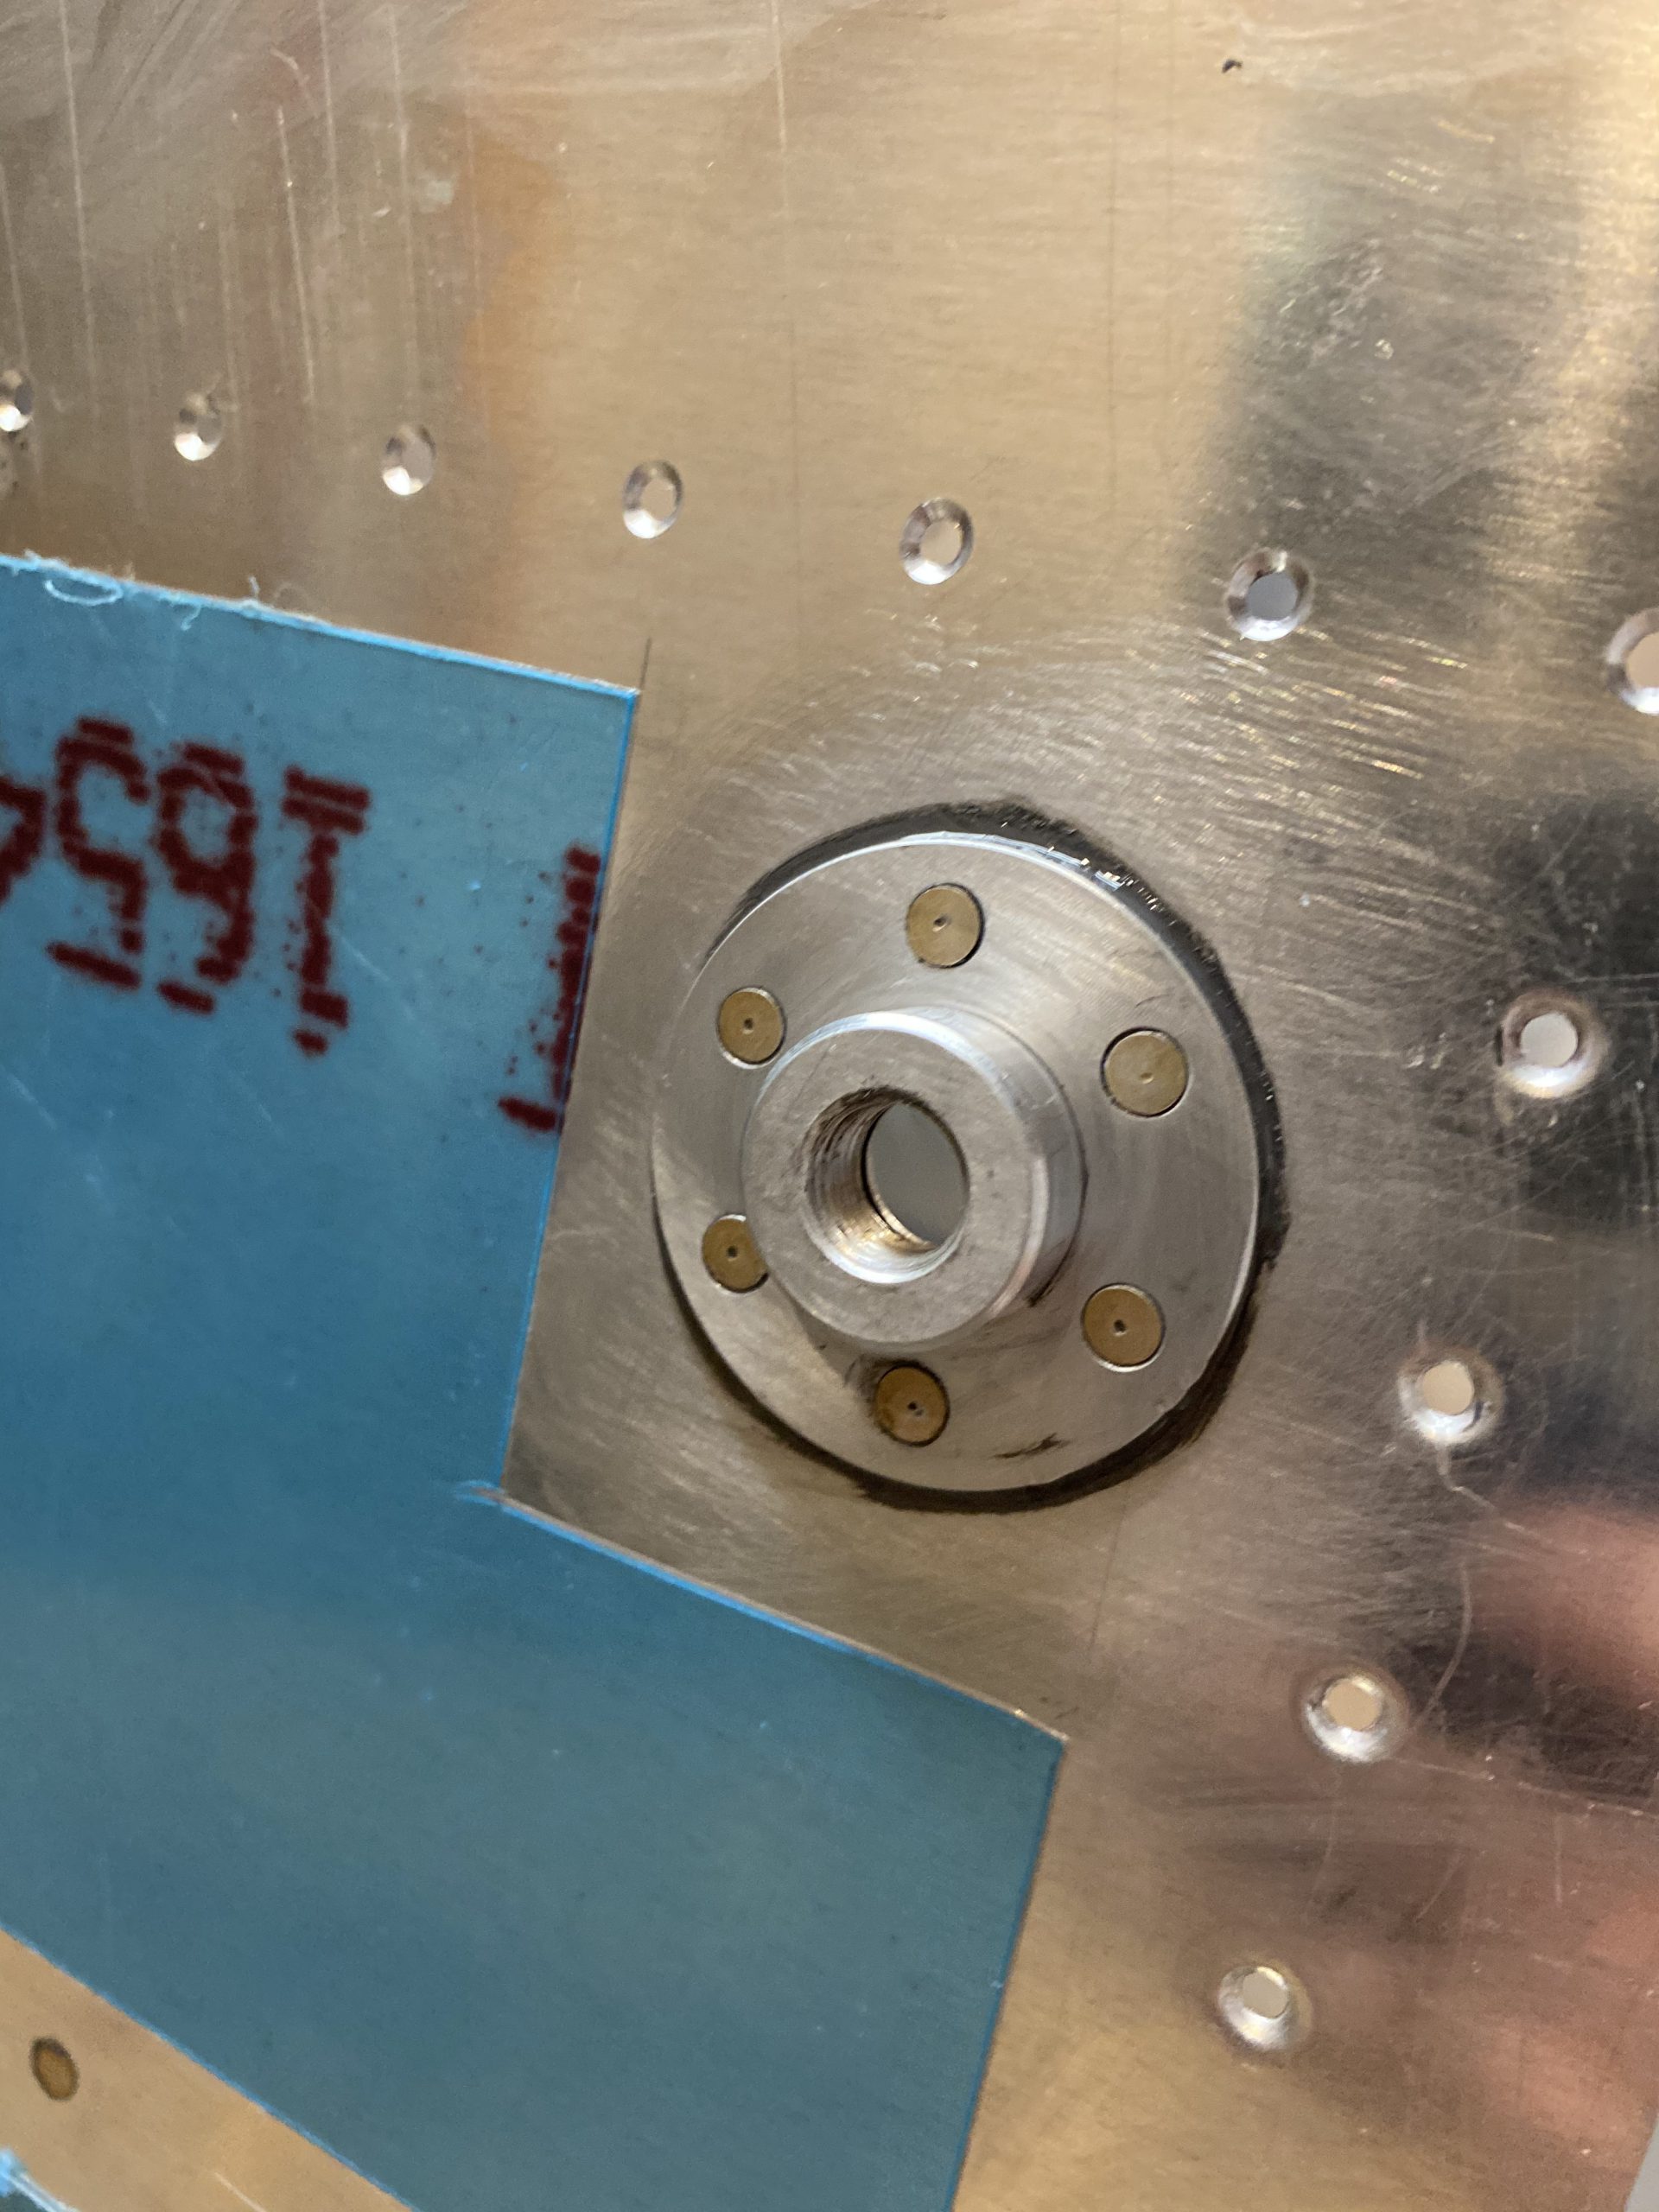
Then I inserted the plate into the right orientation, and put the screw, washer ring terminal and nut in their locations and cranked them down.  I did position the wiring a bit better so its out of the way, but still easy to access for the sealant.  I’ll dob some on it once I get it all mixed up with the rest of the parts.

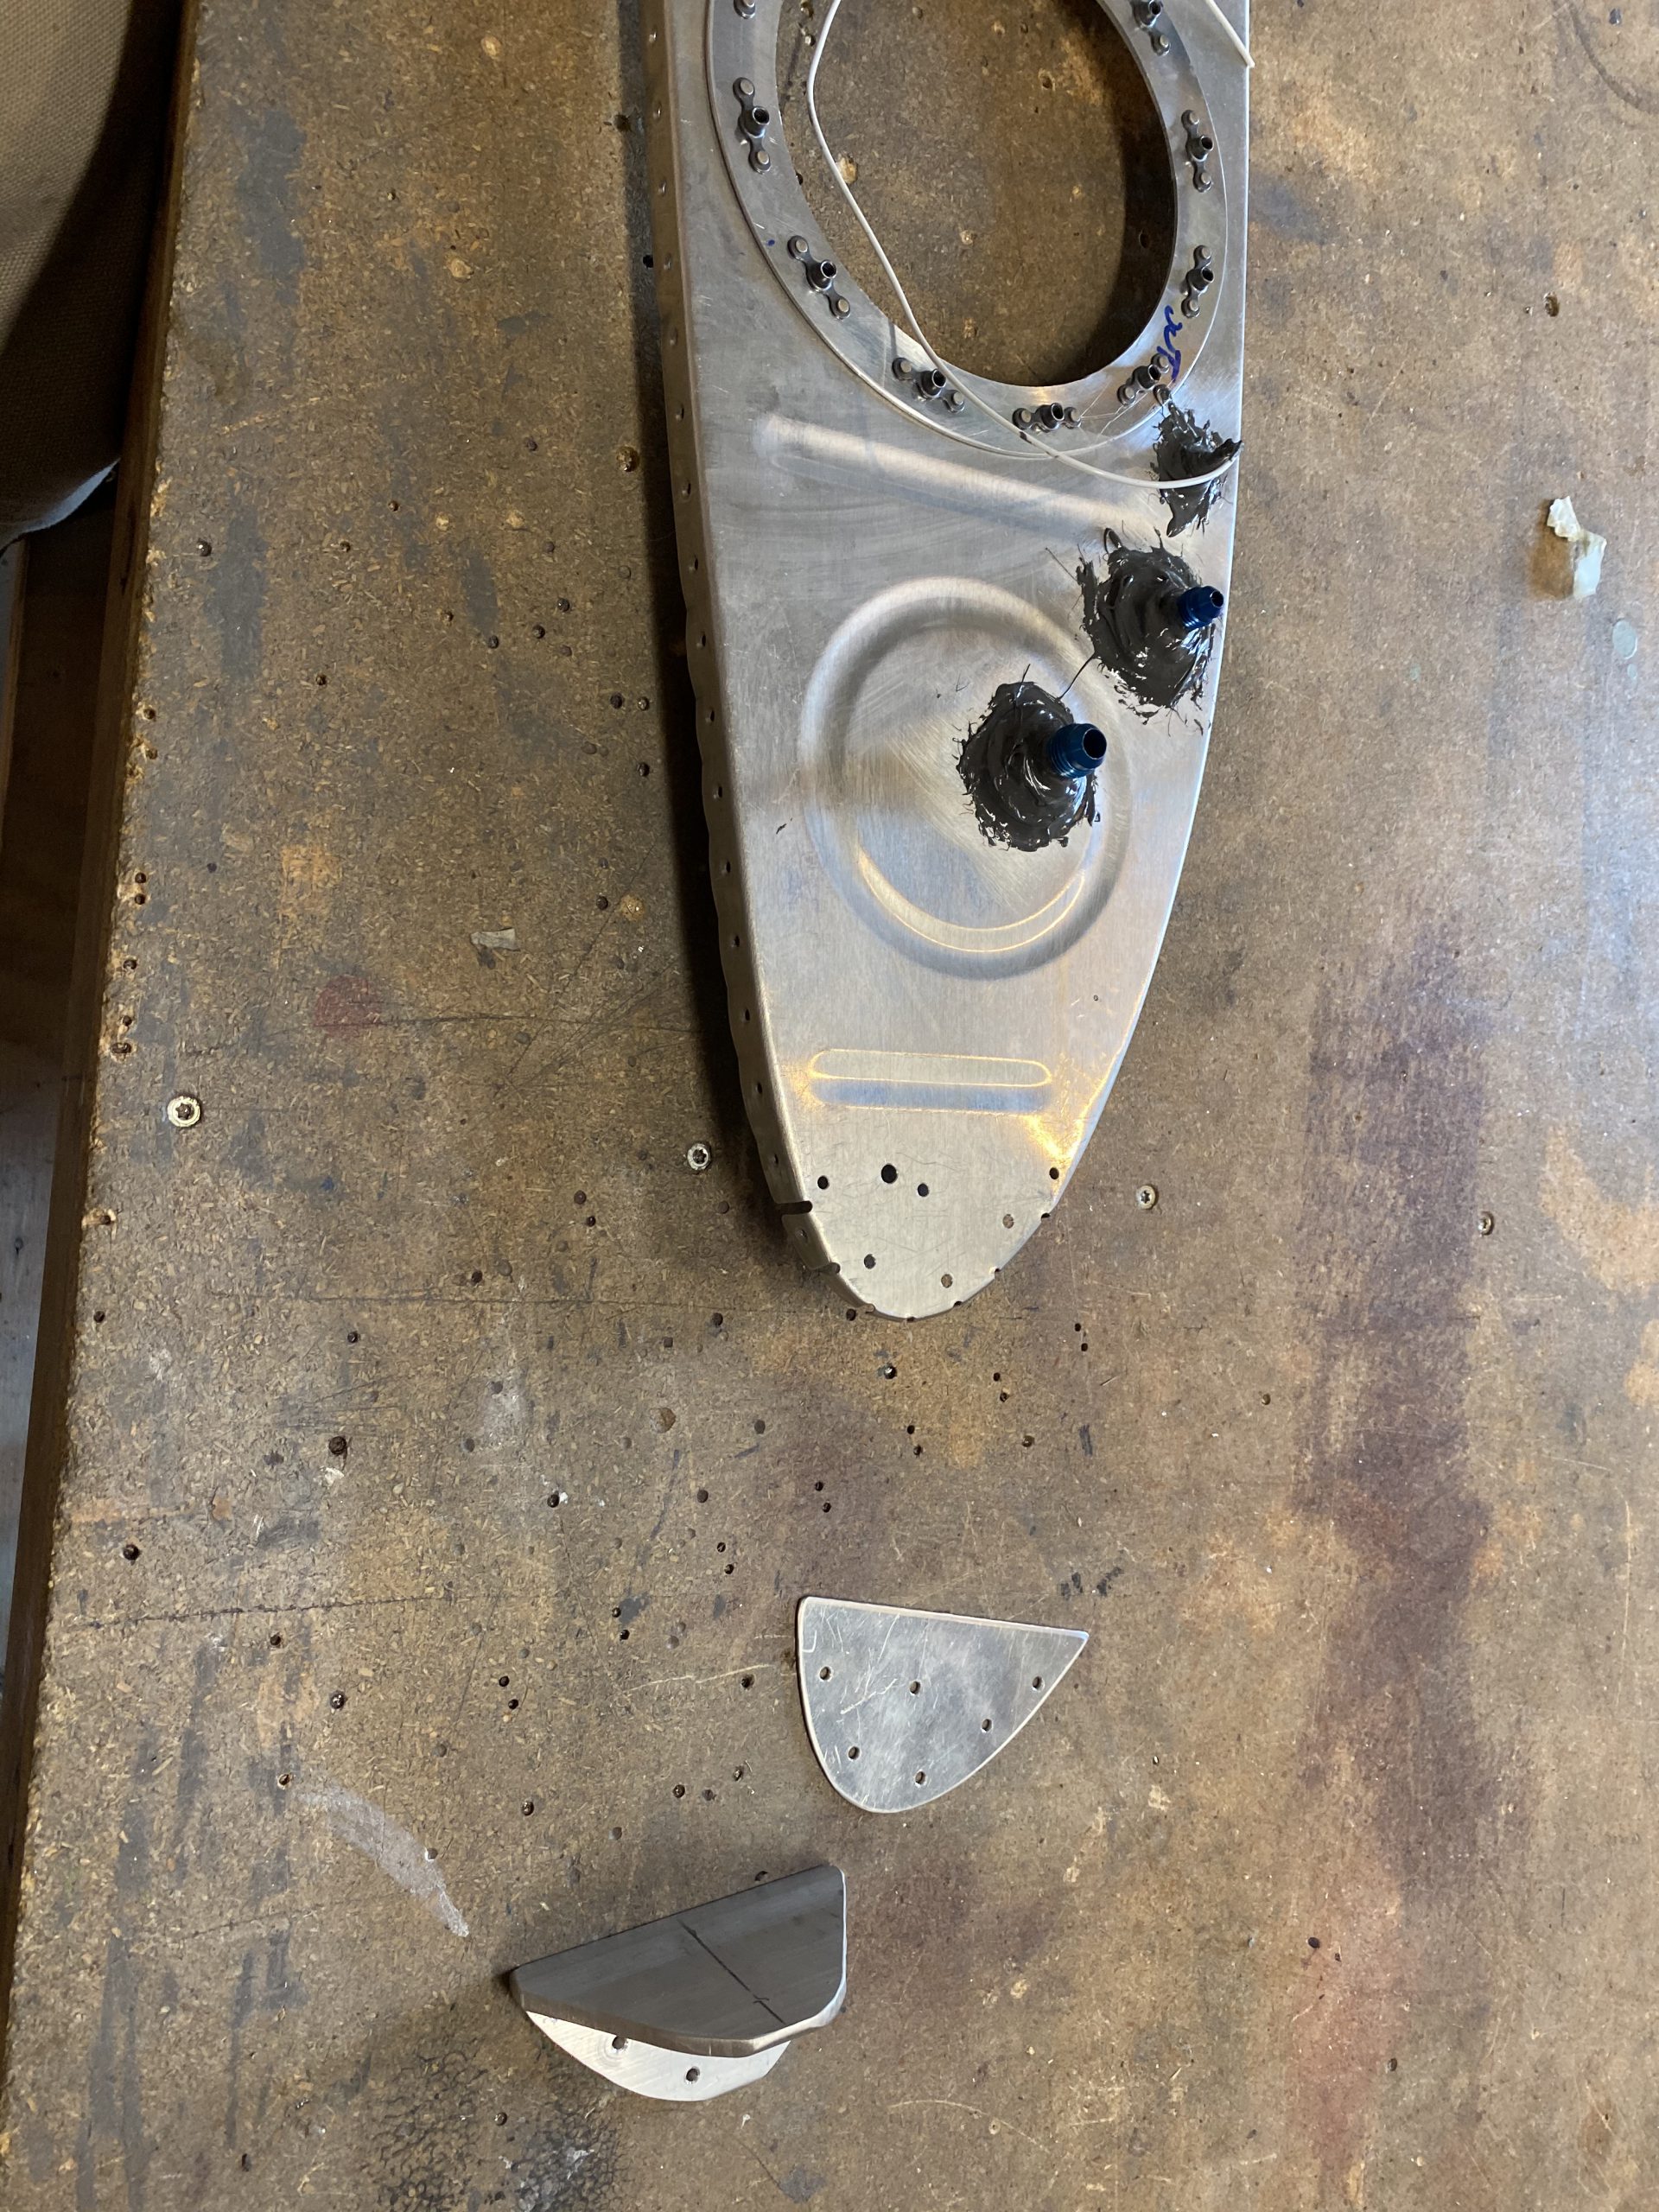
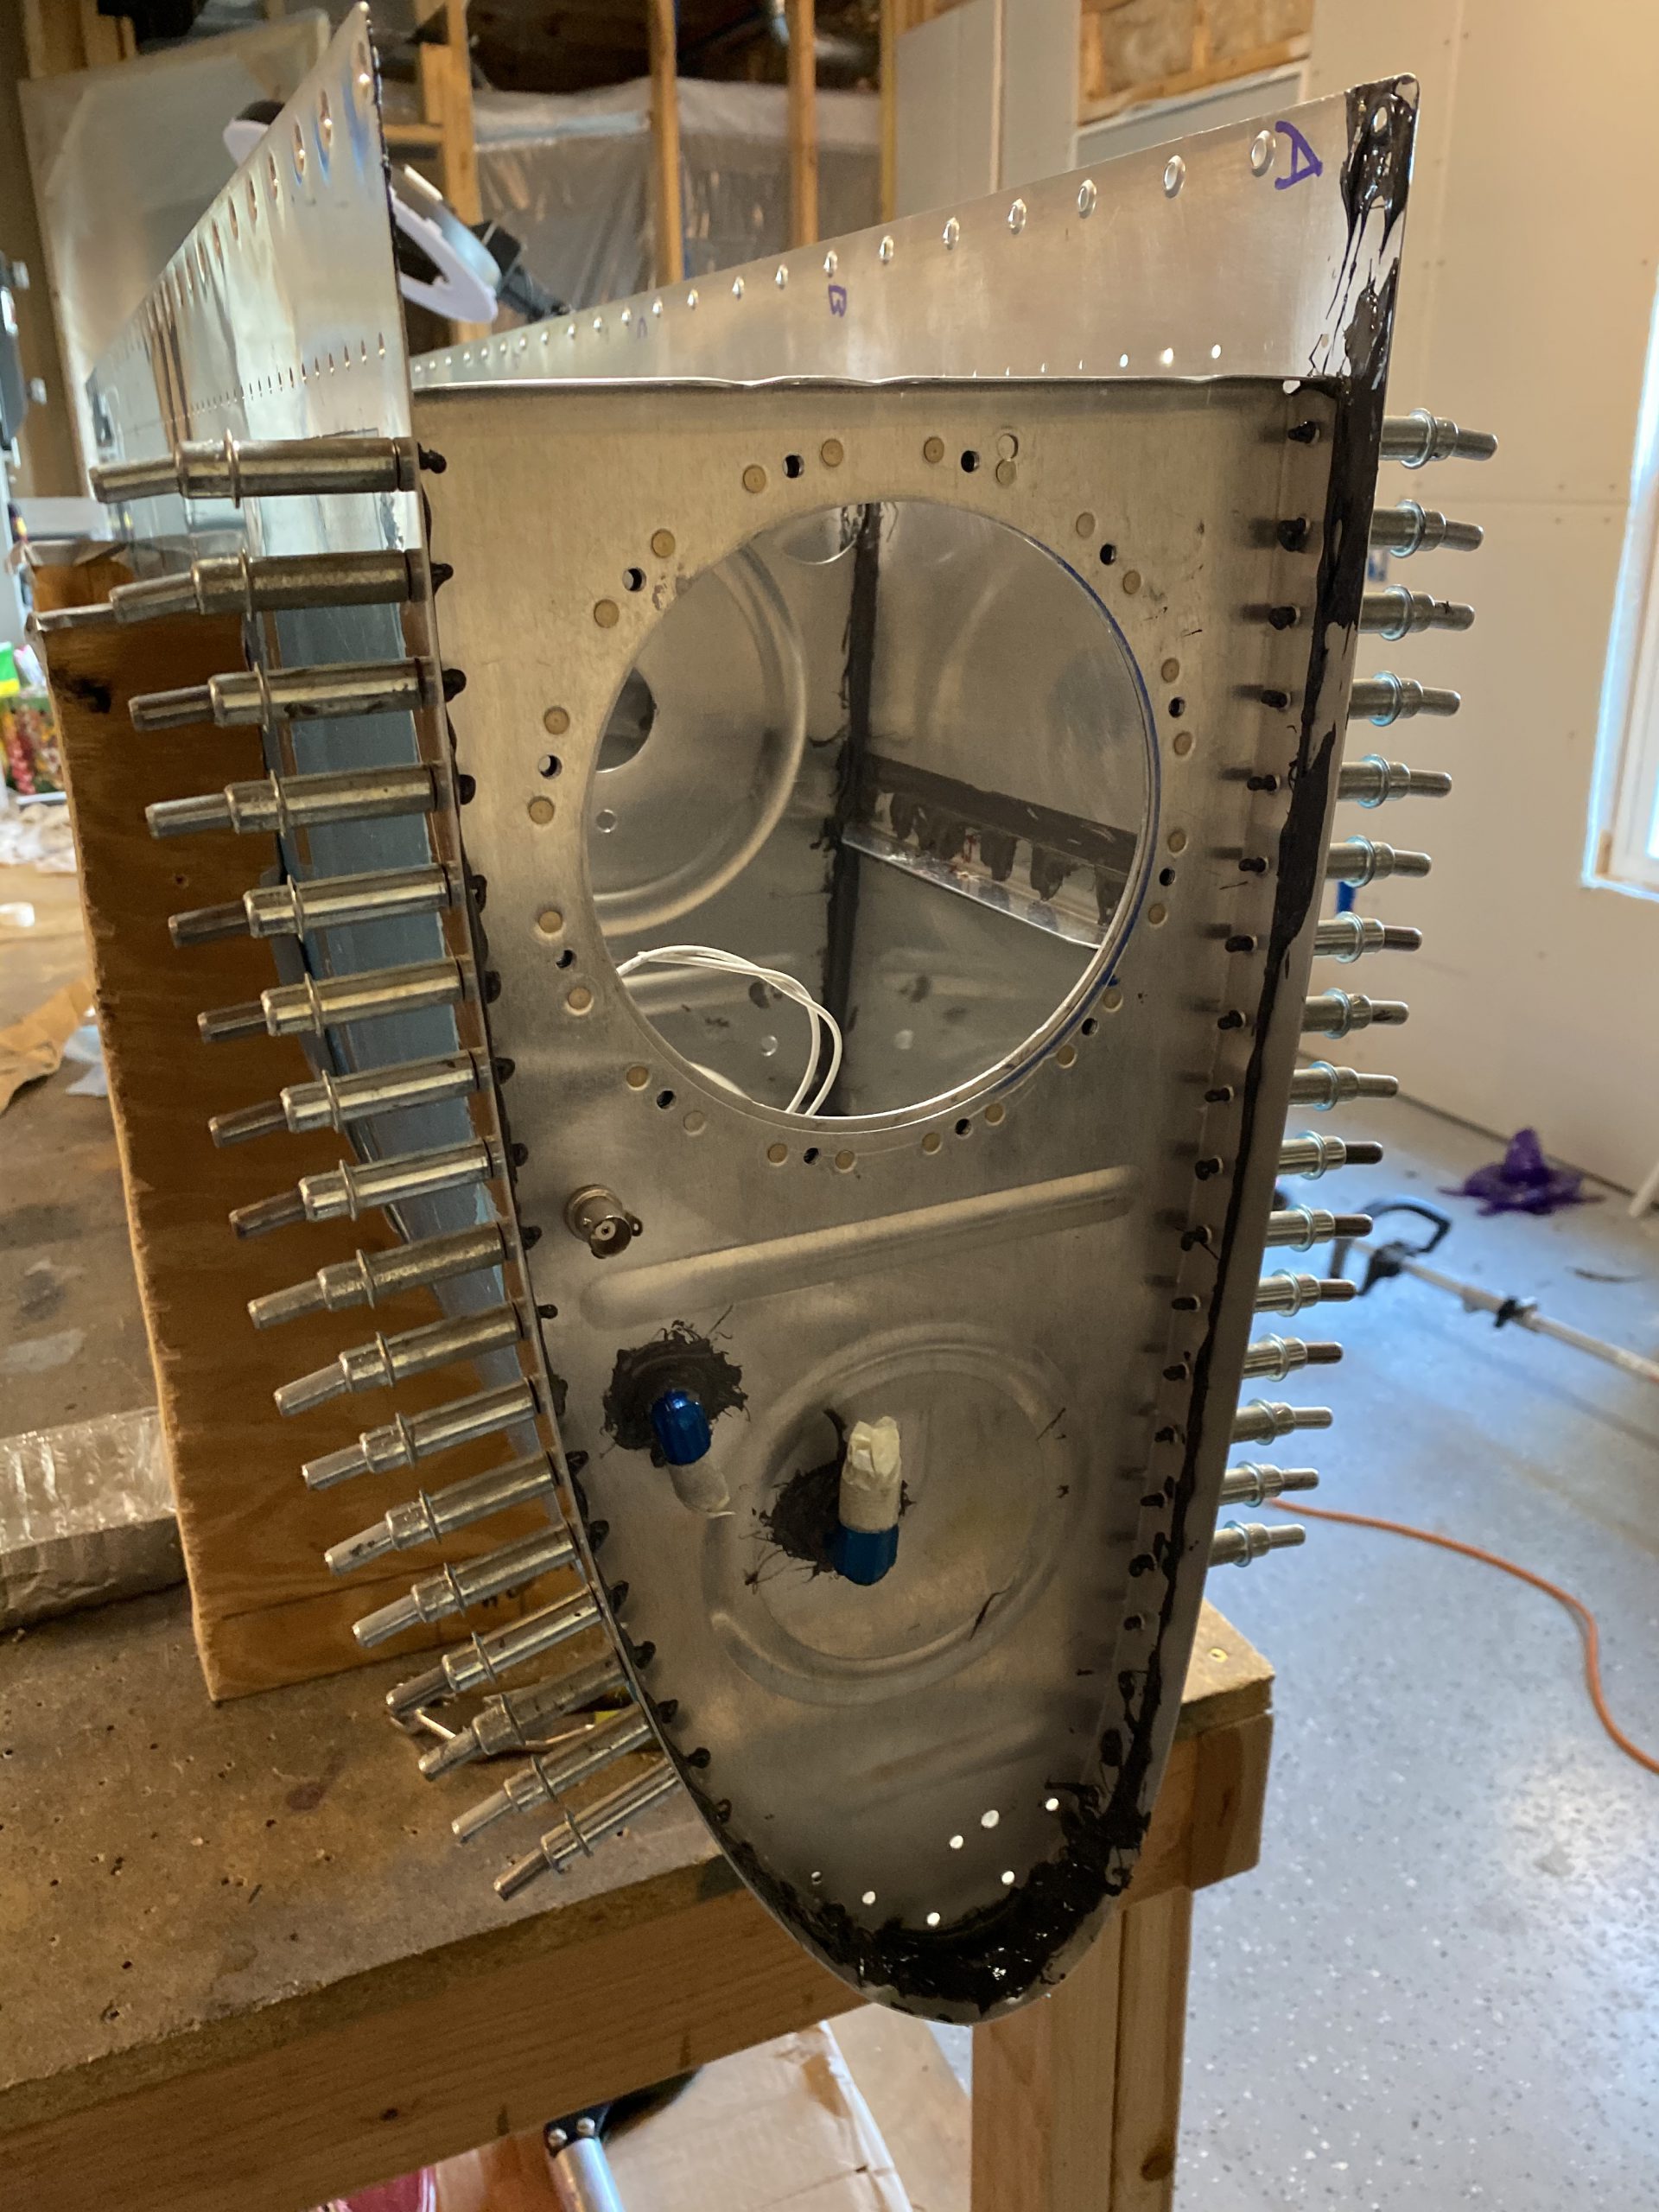
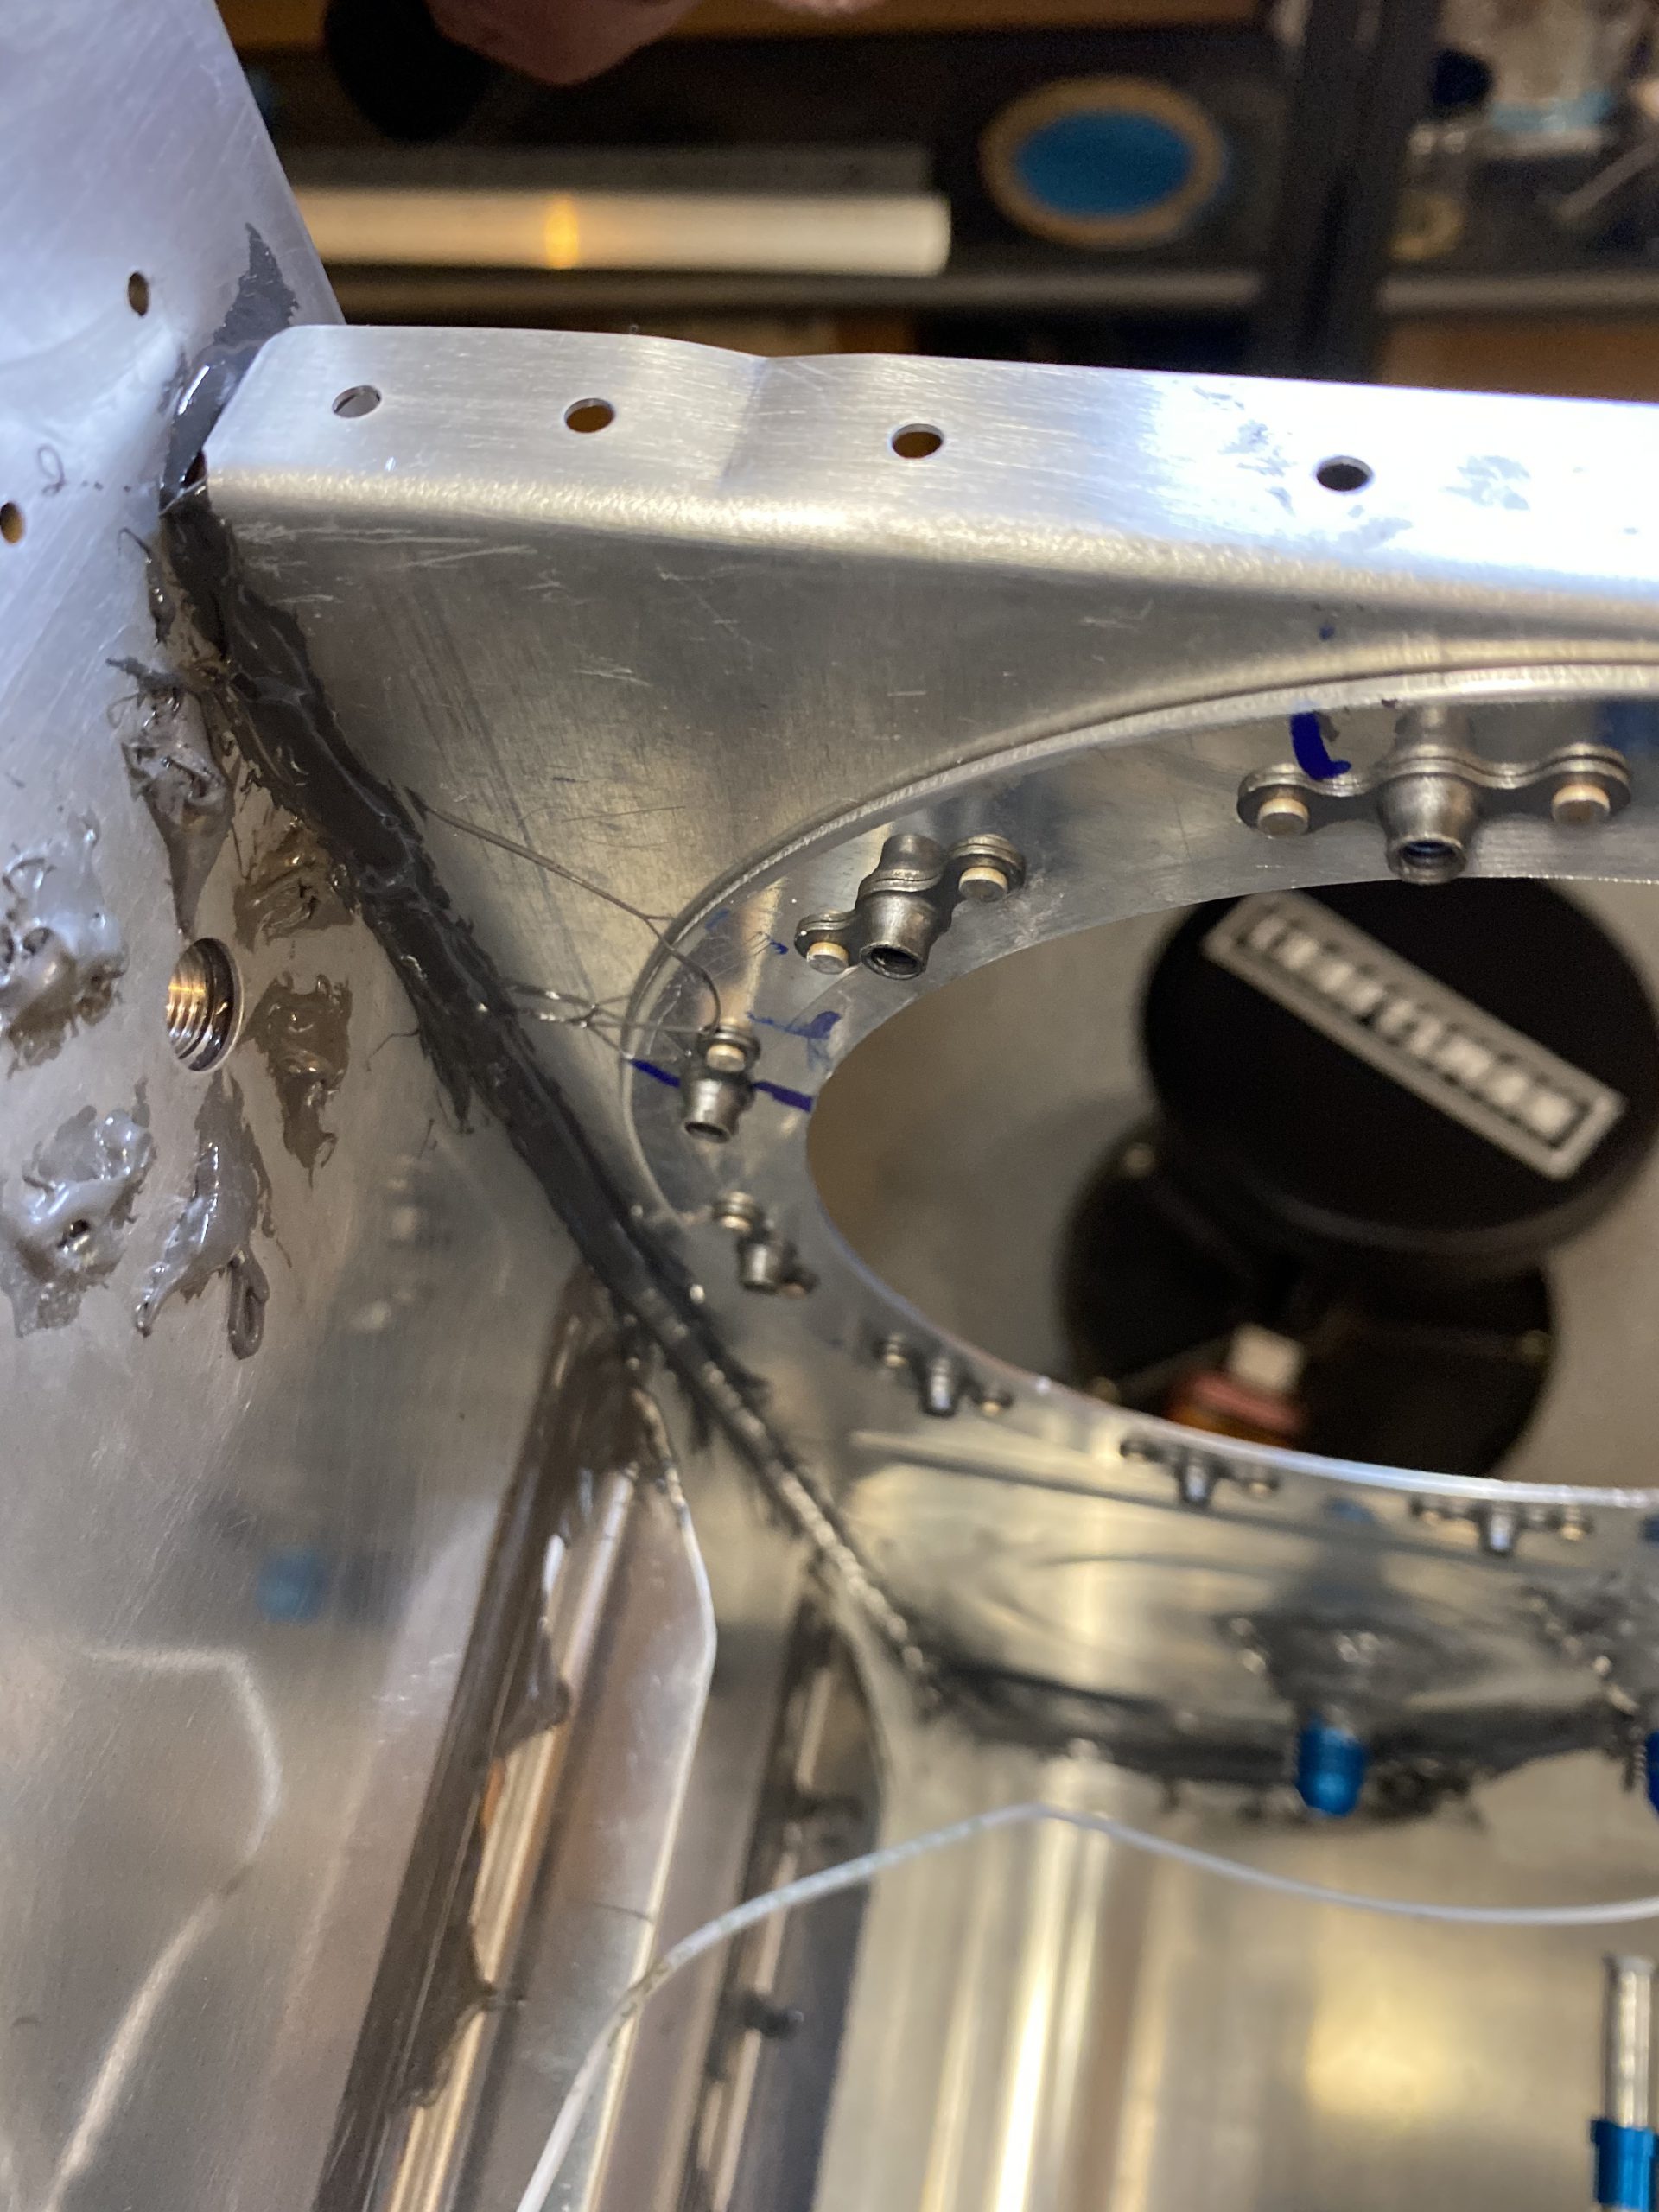
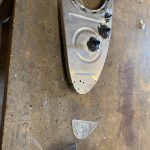
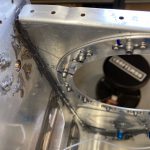
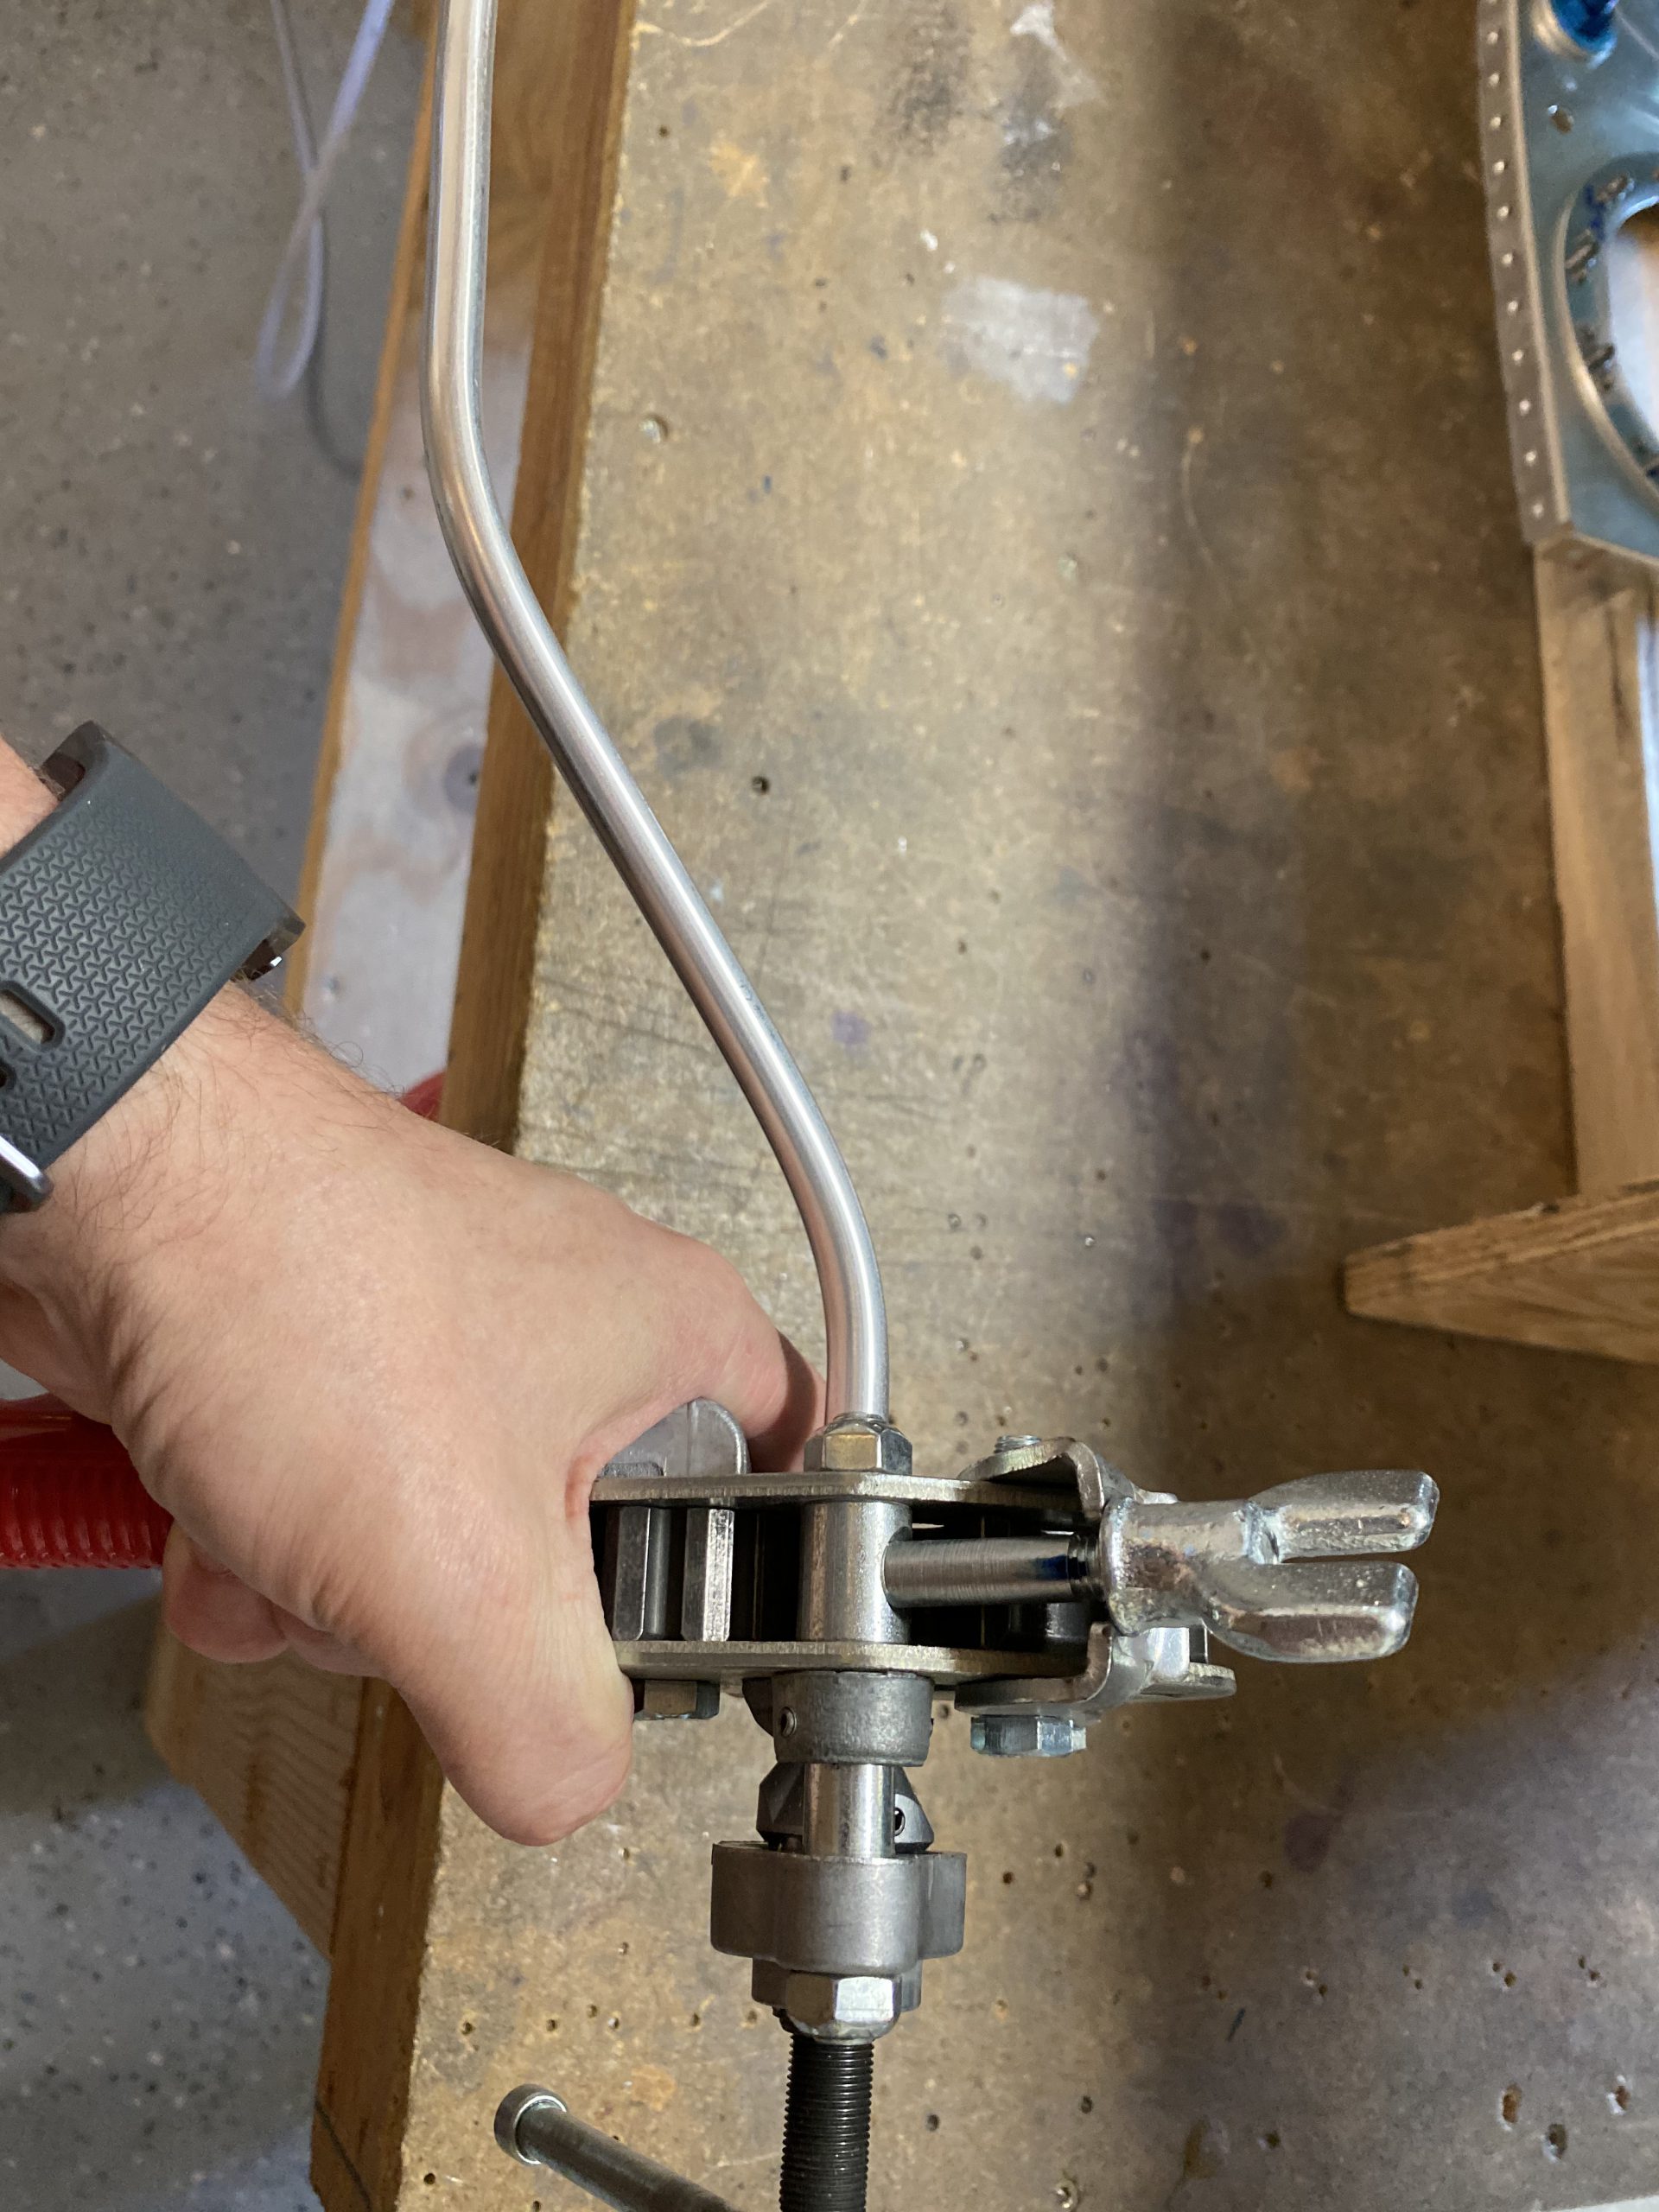
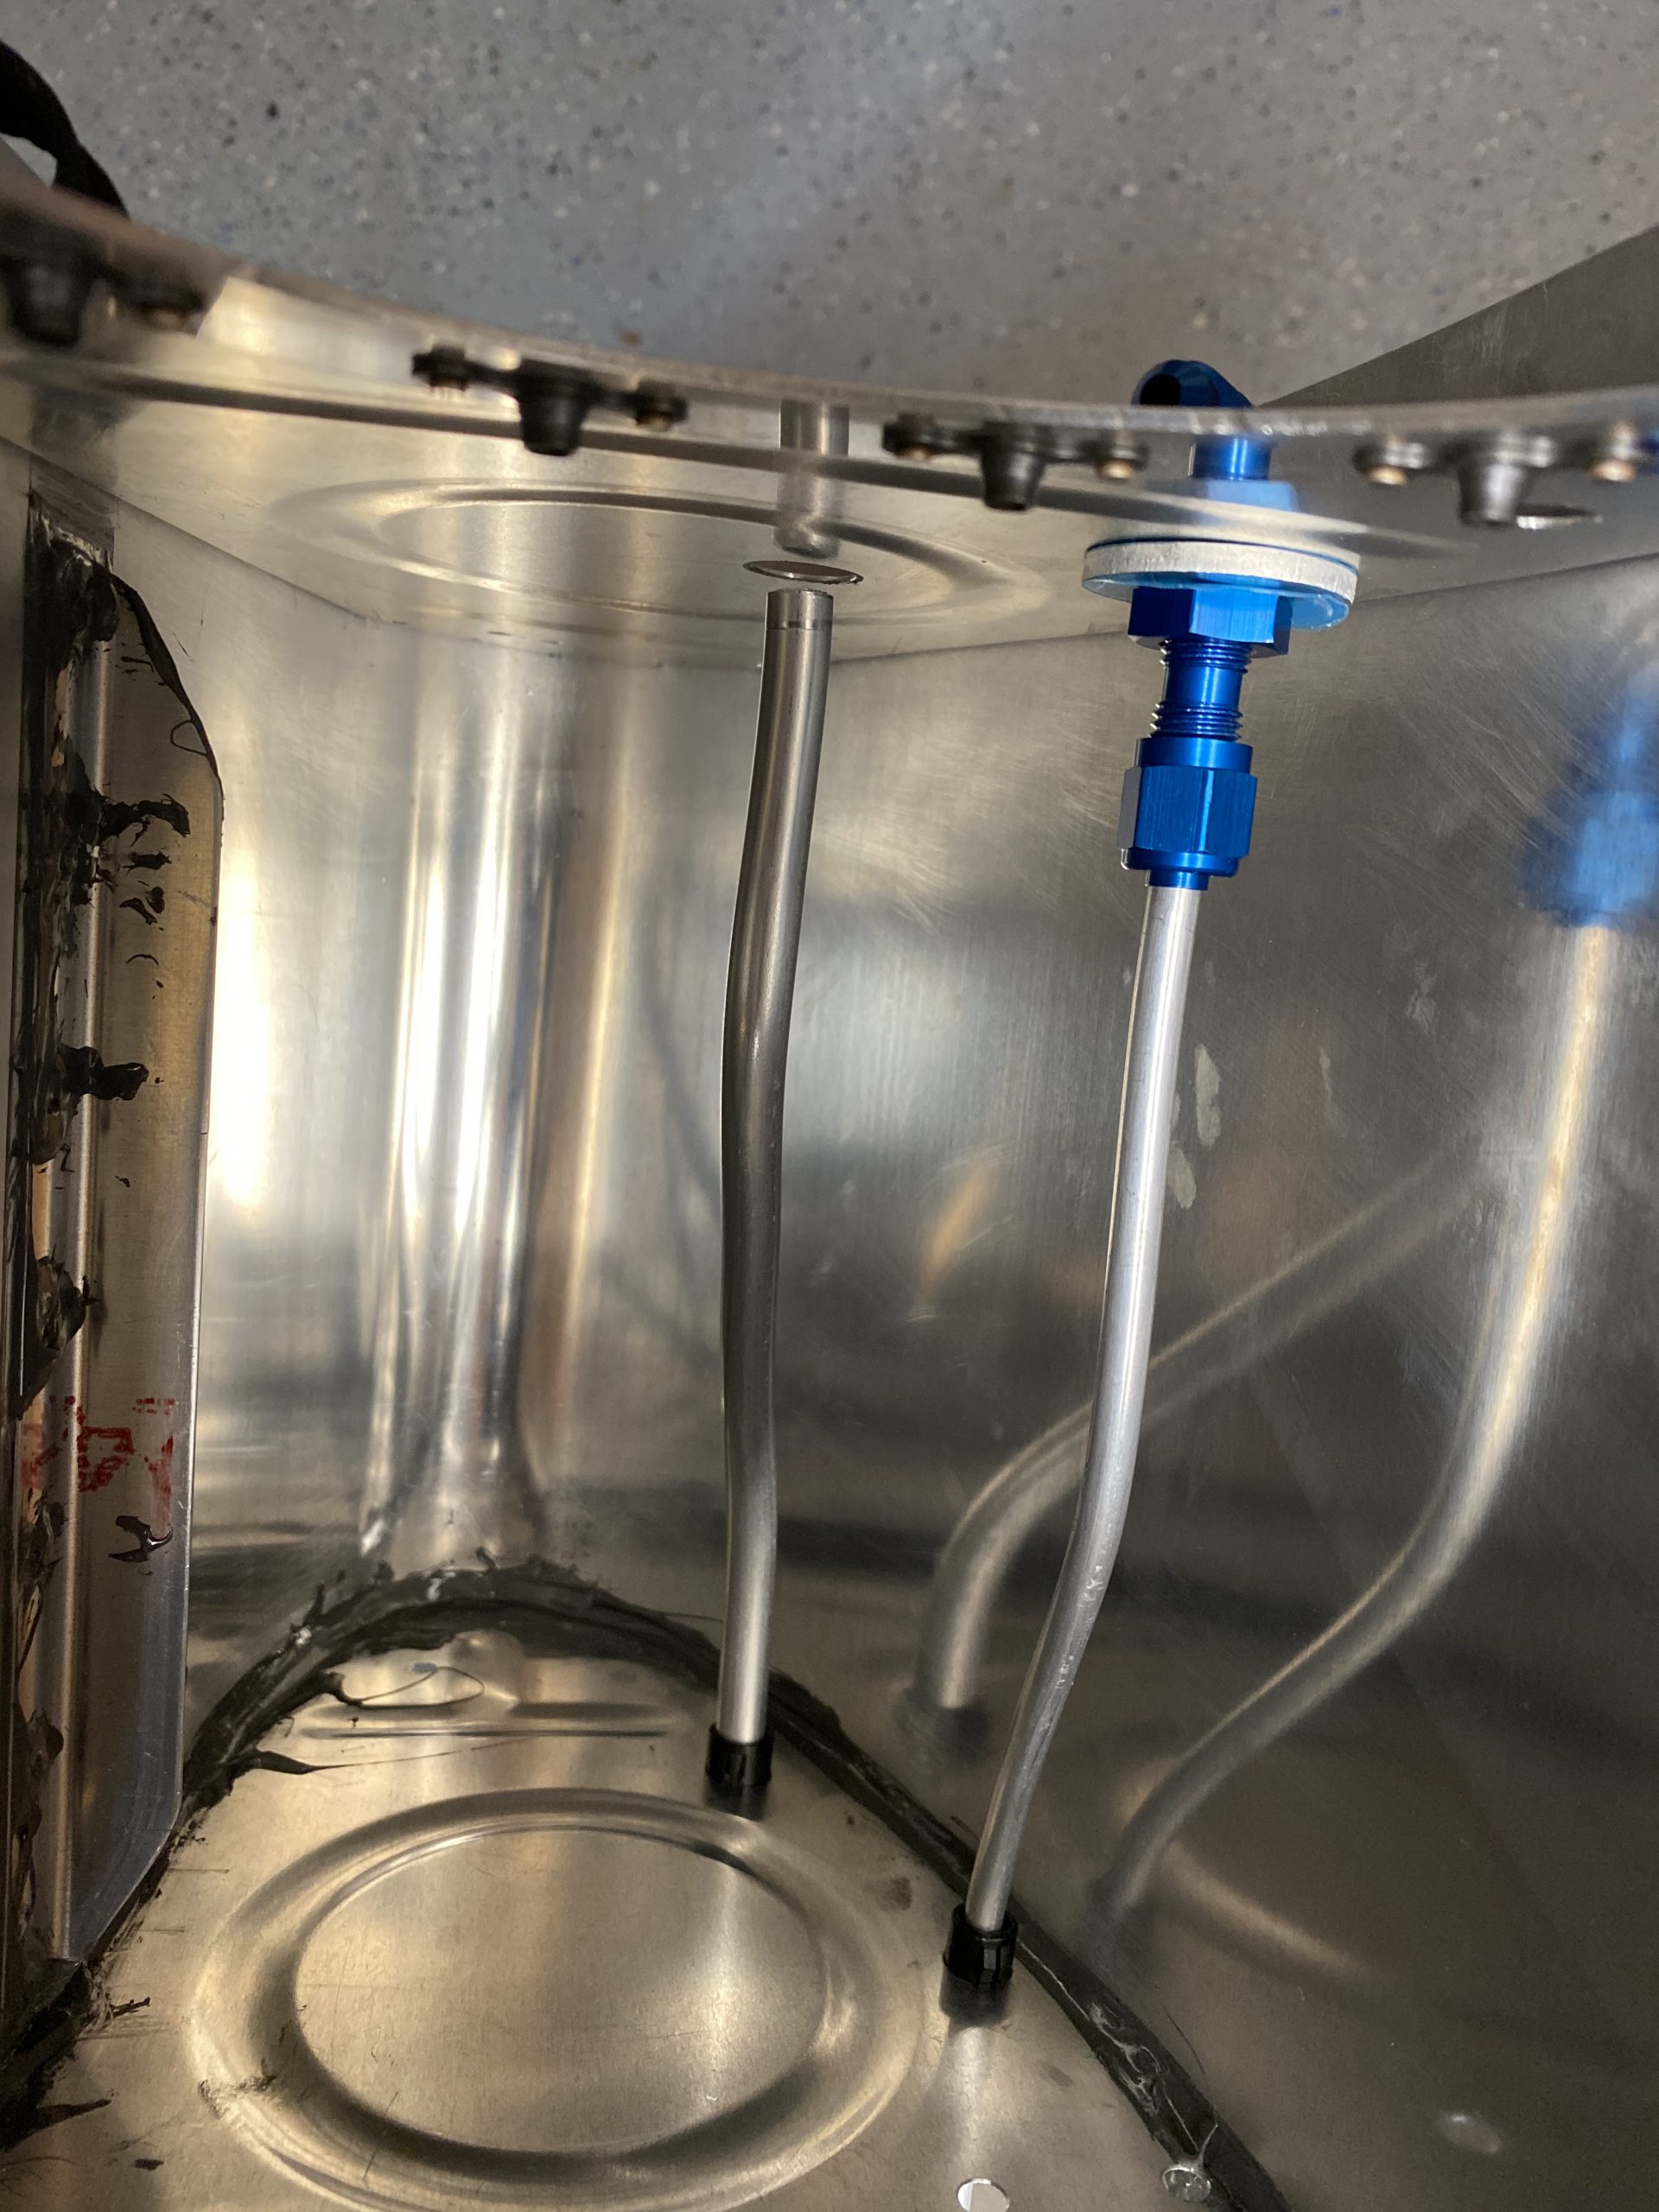
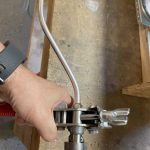
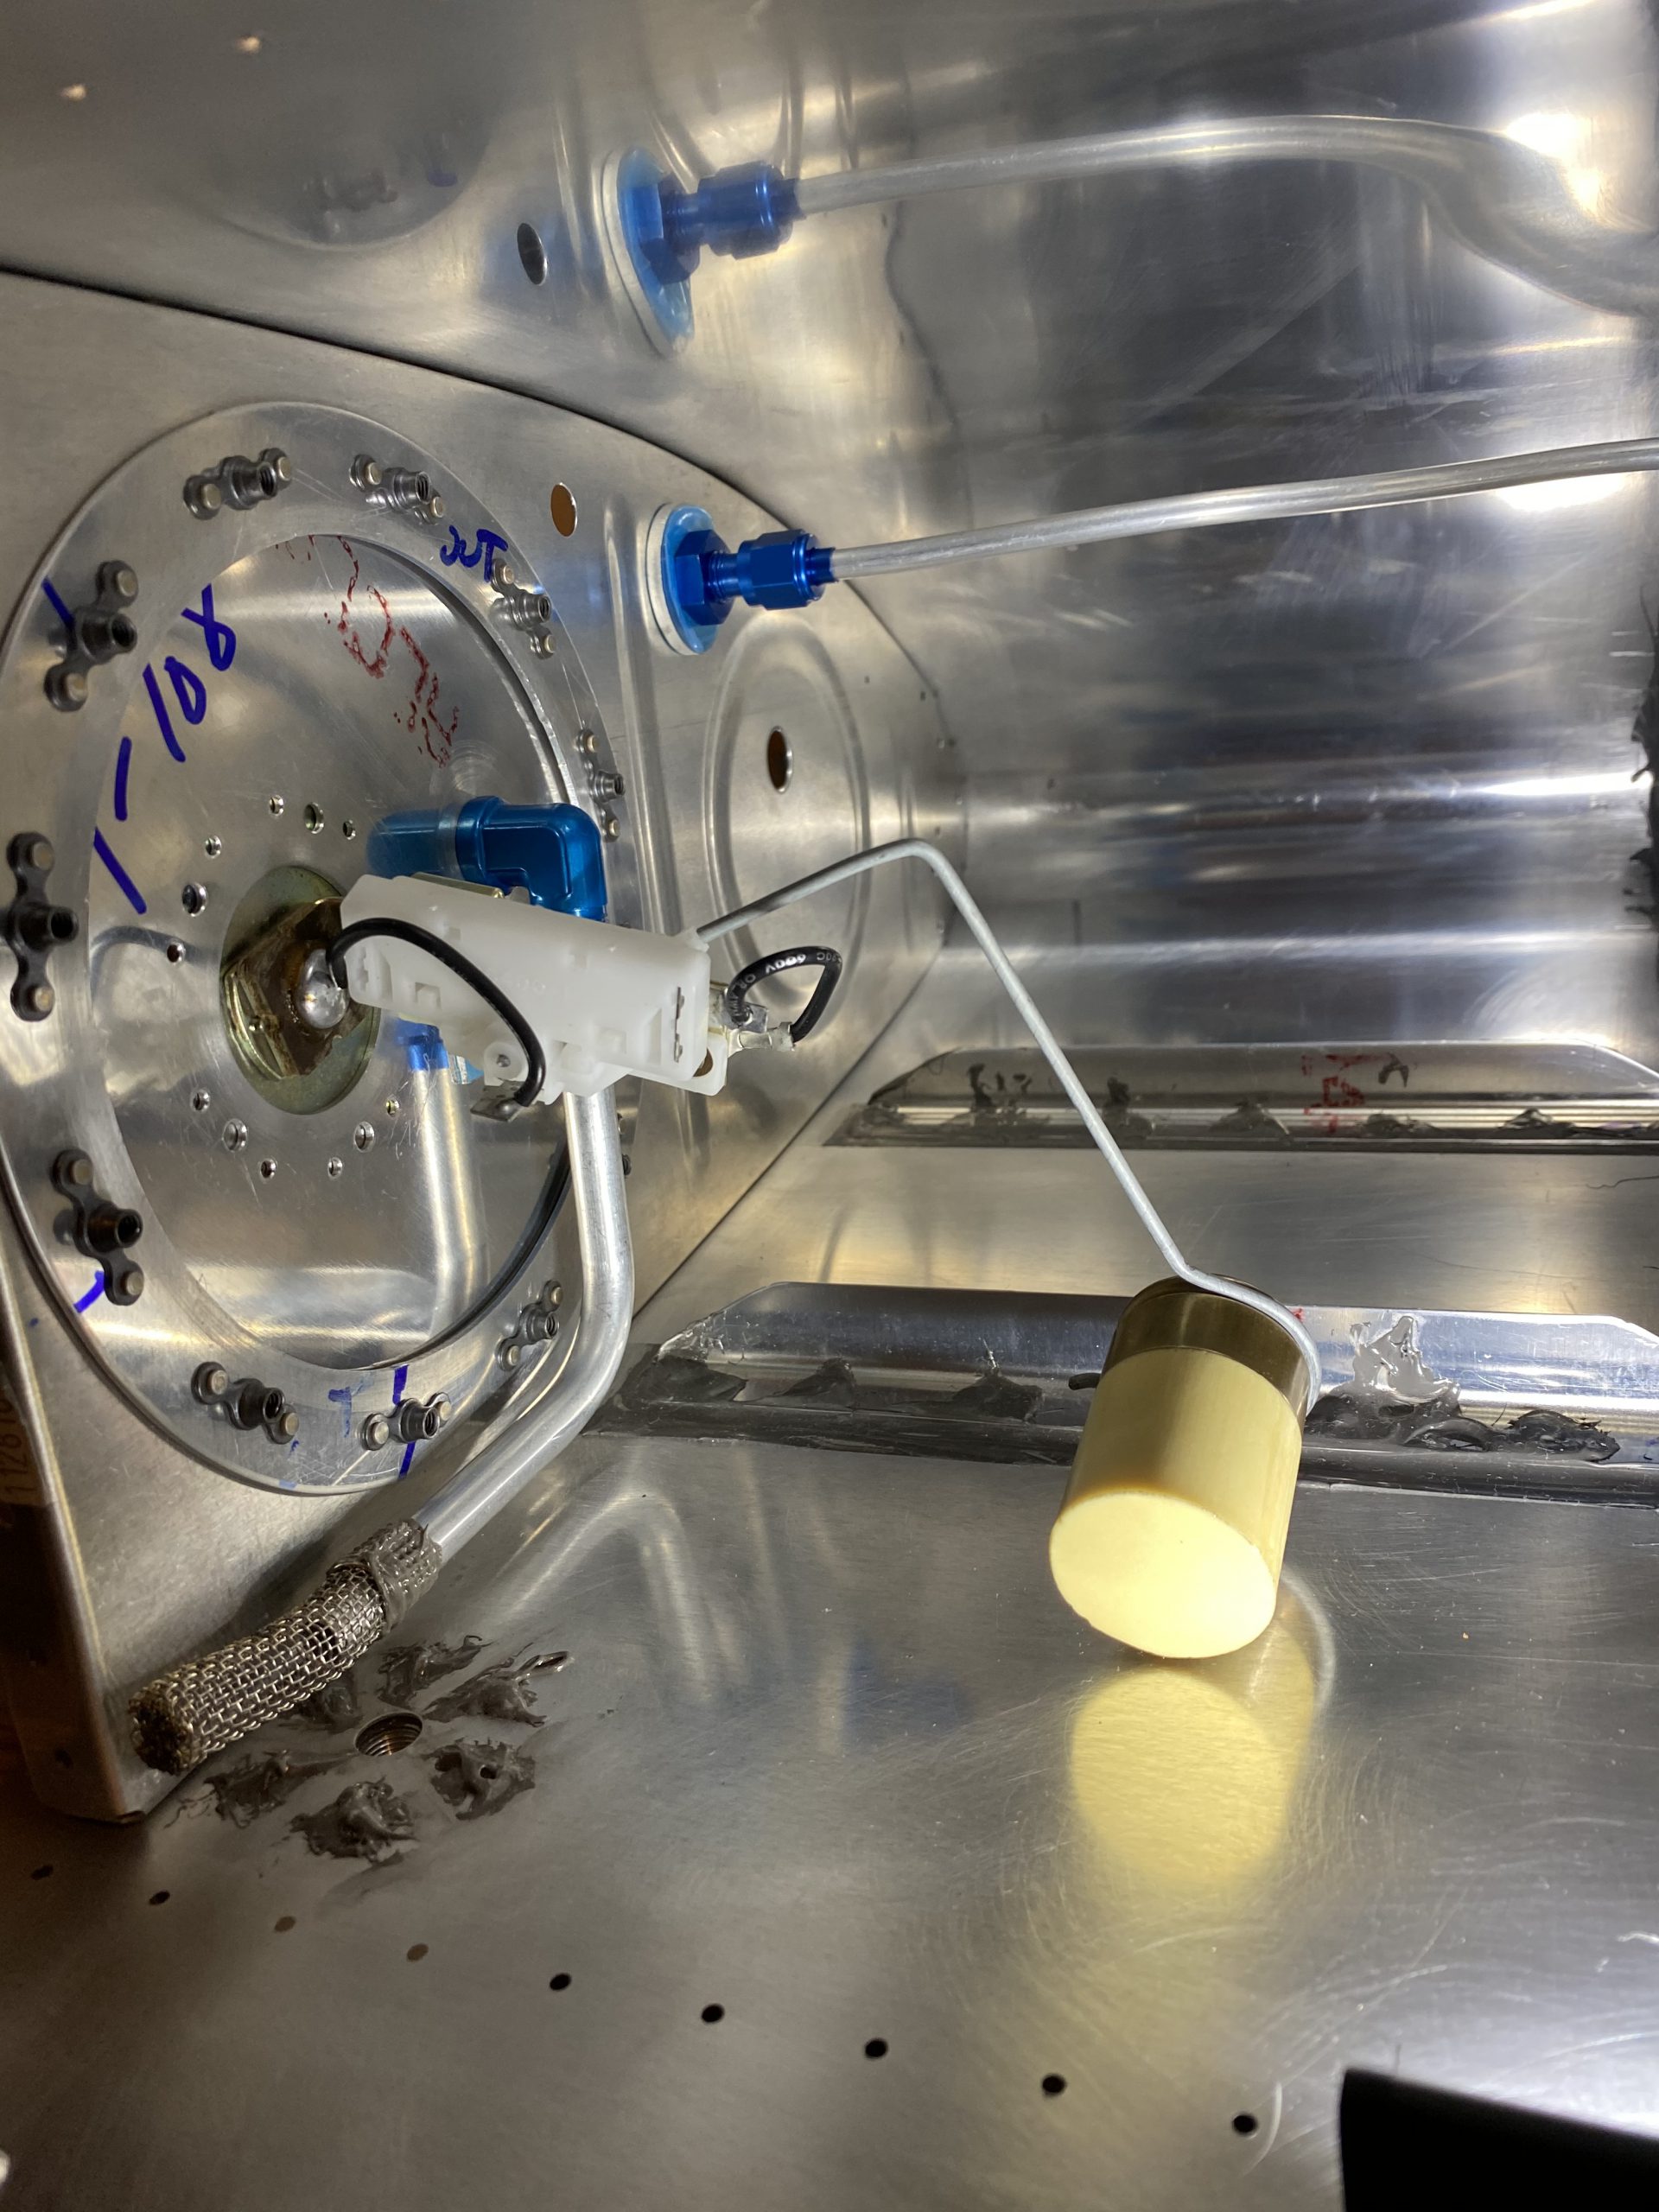
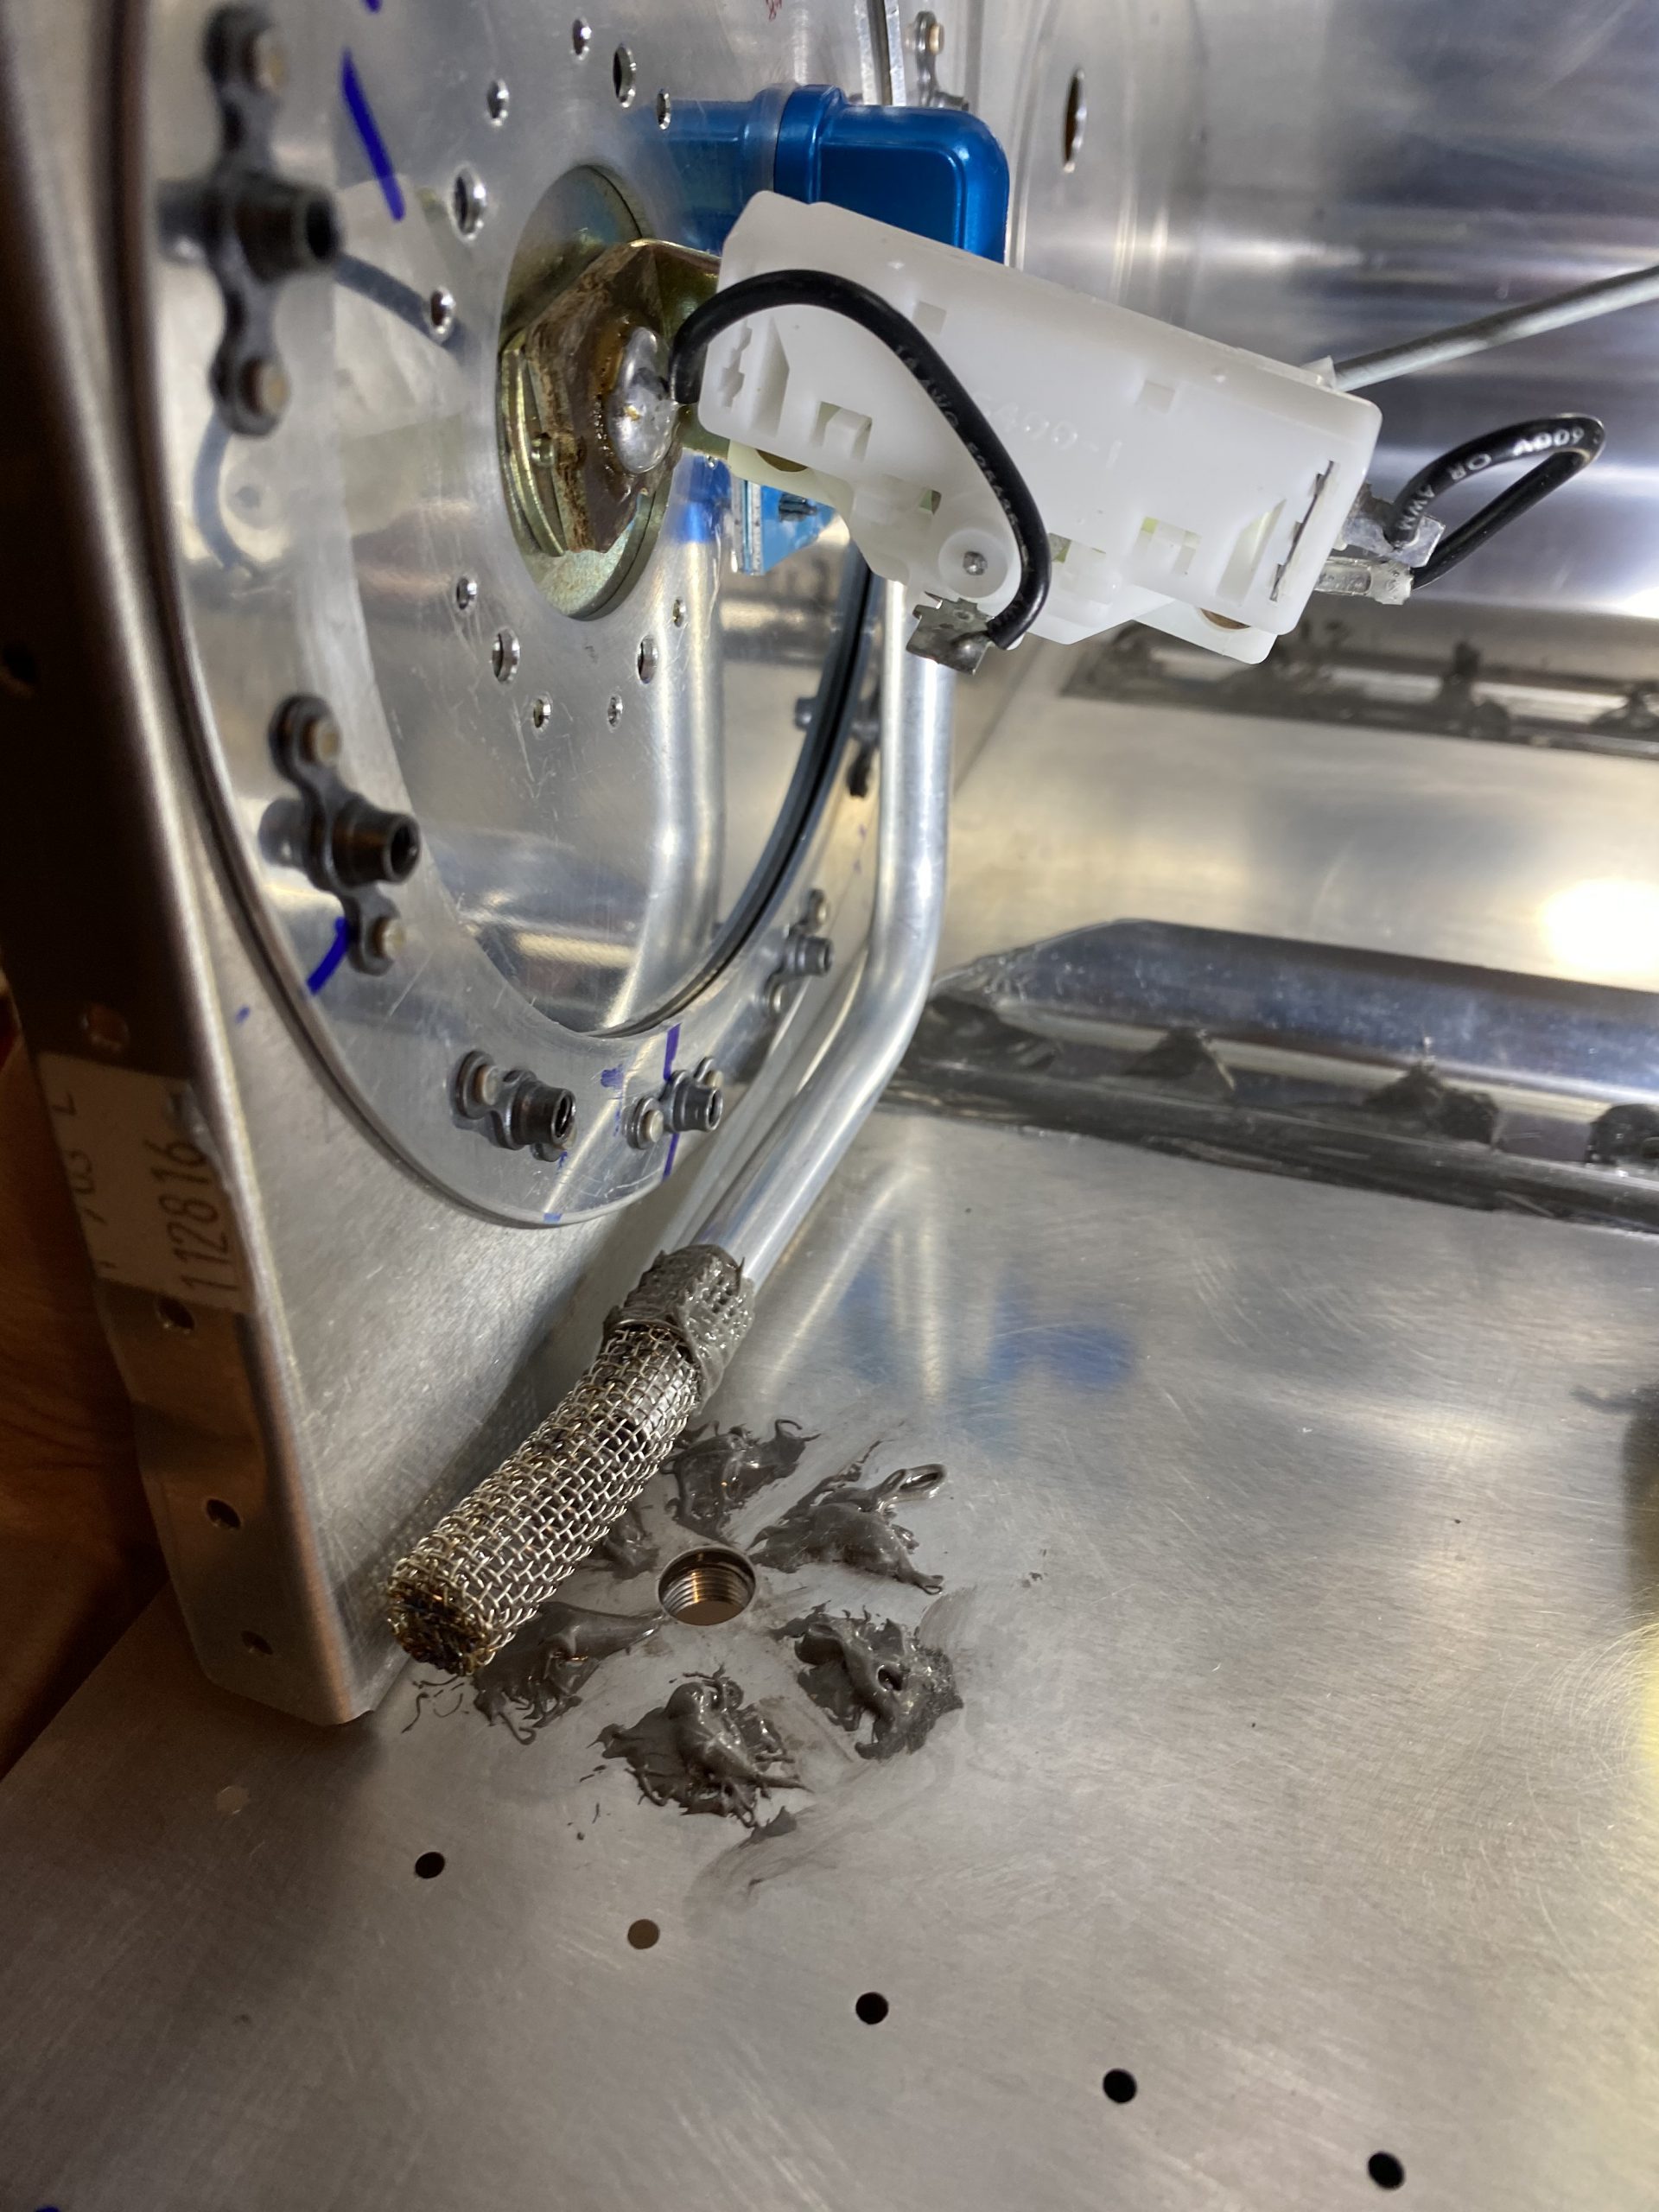
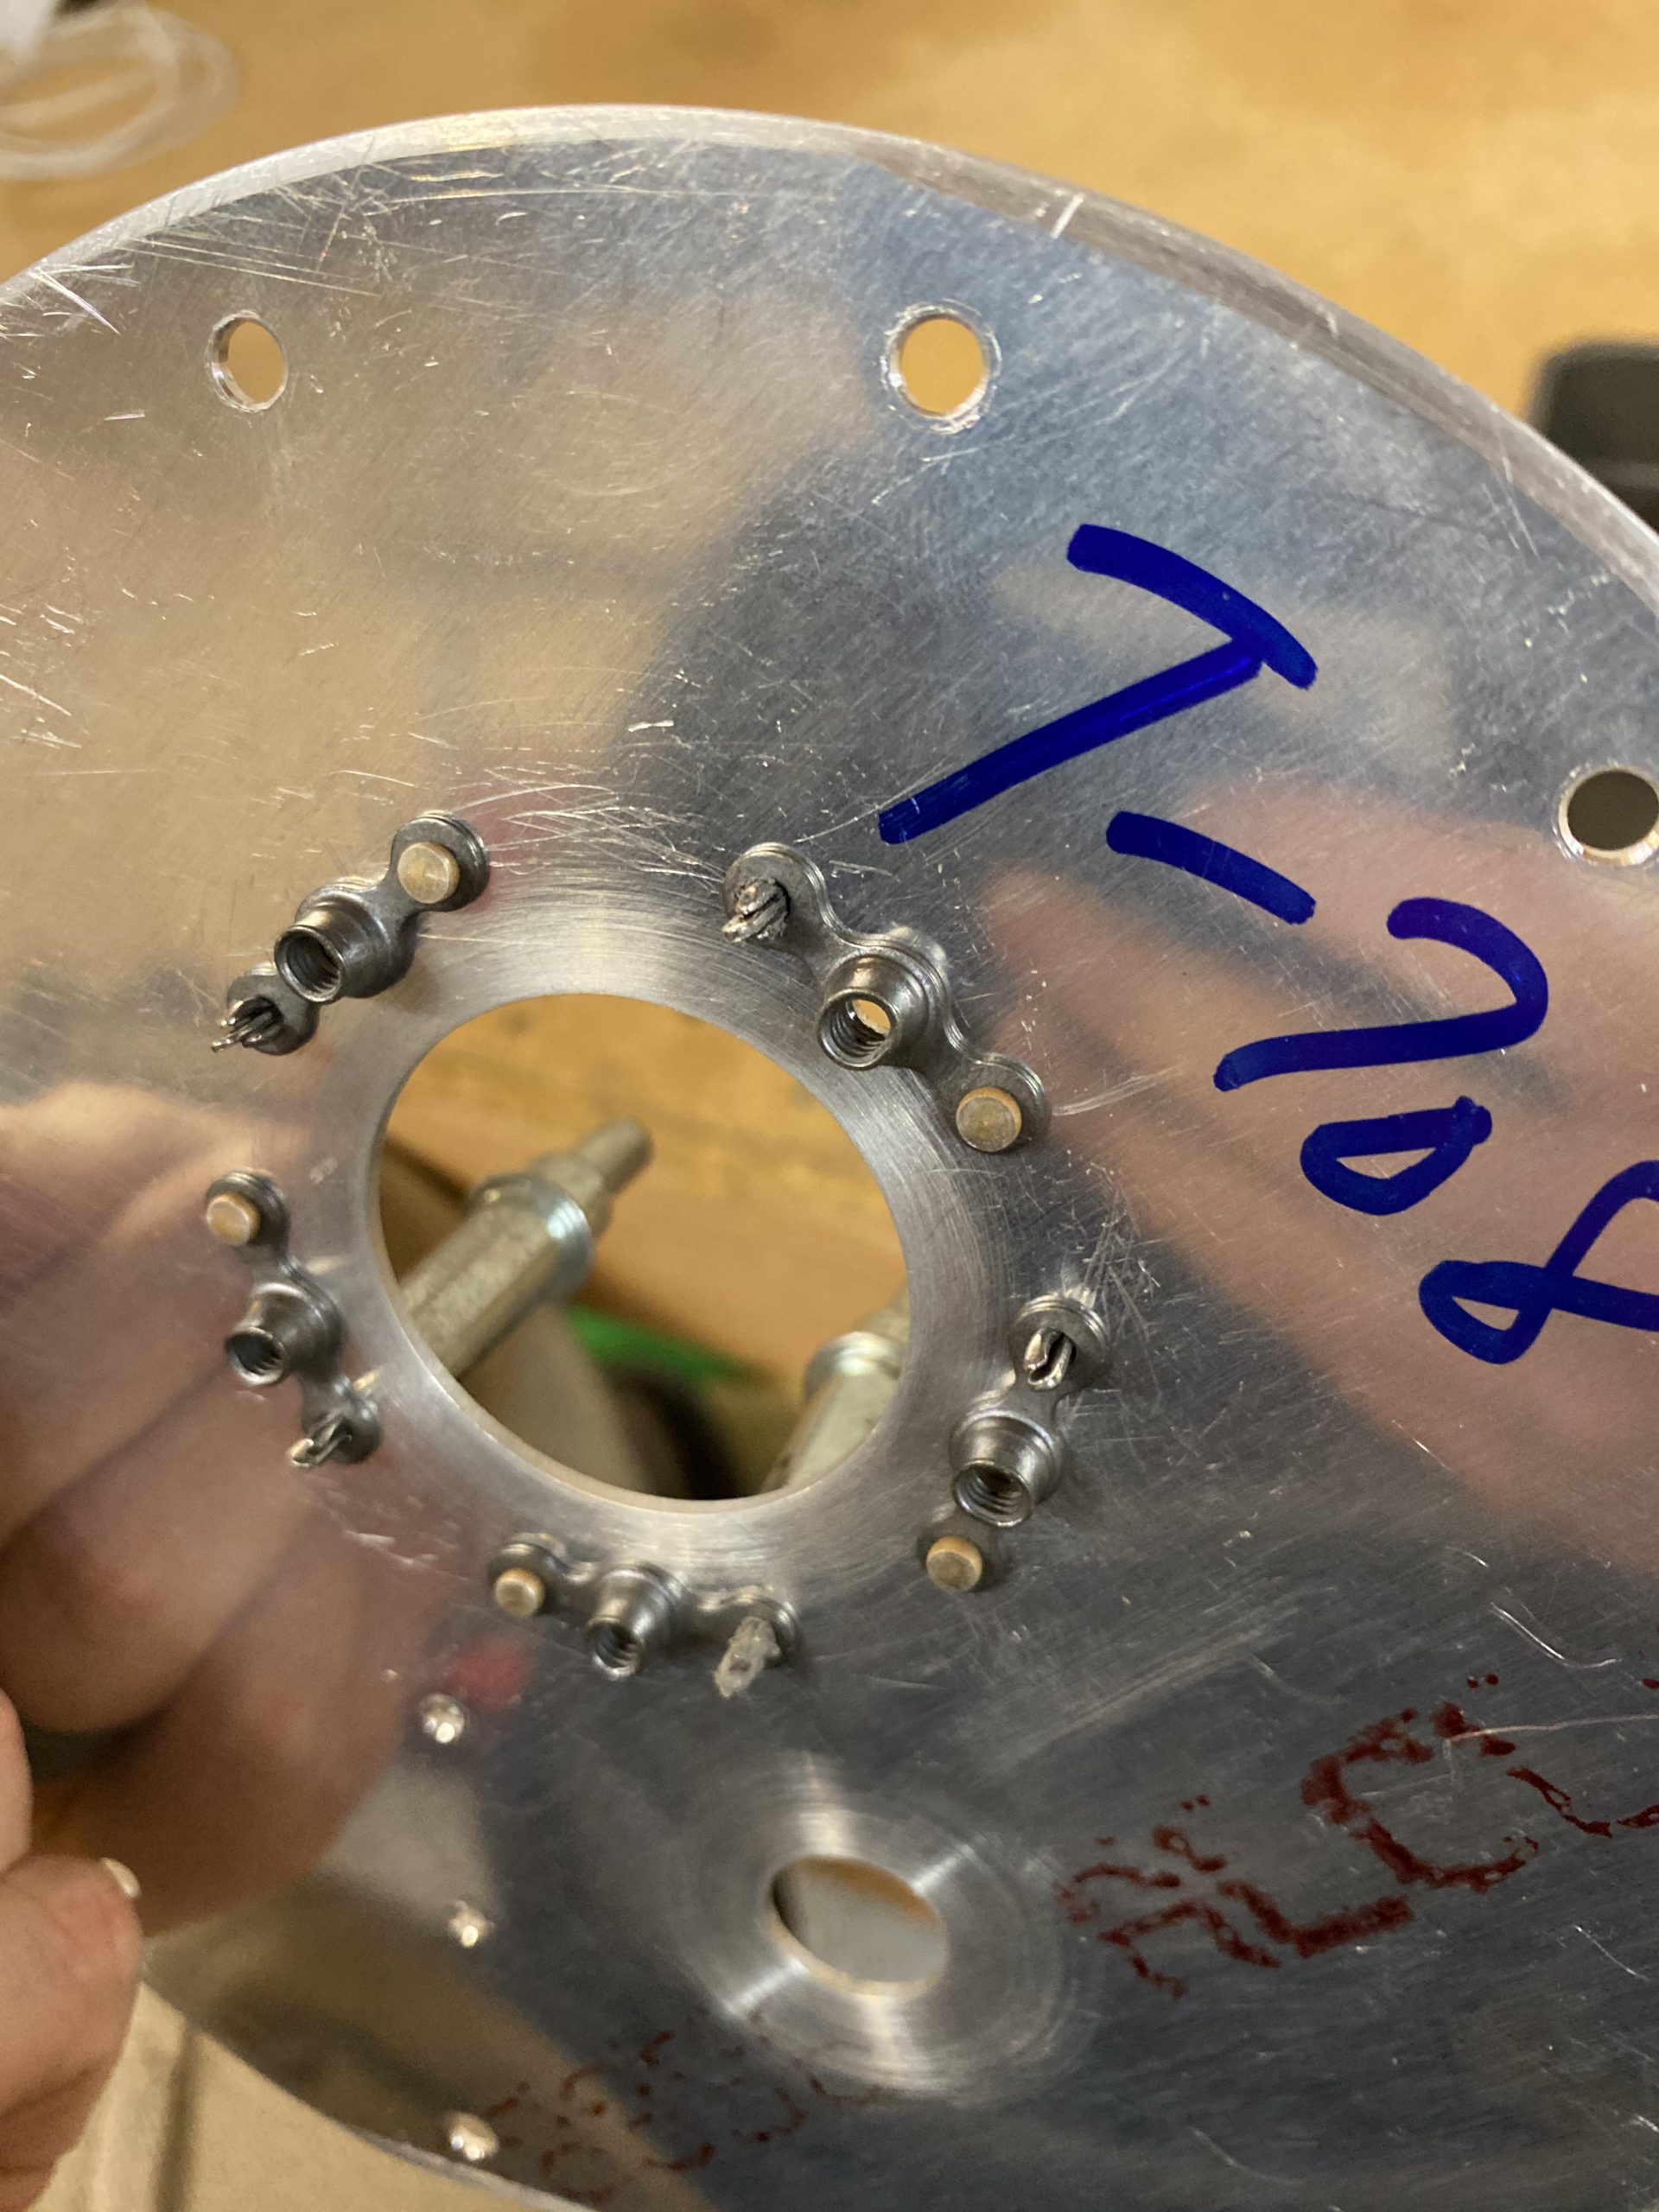
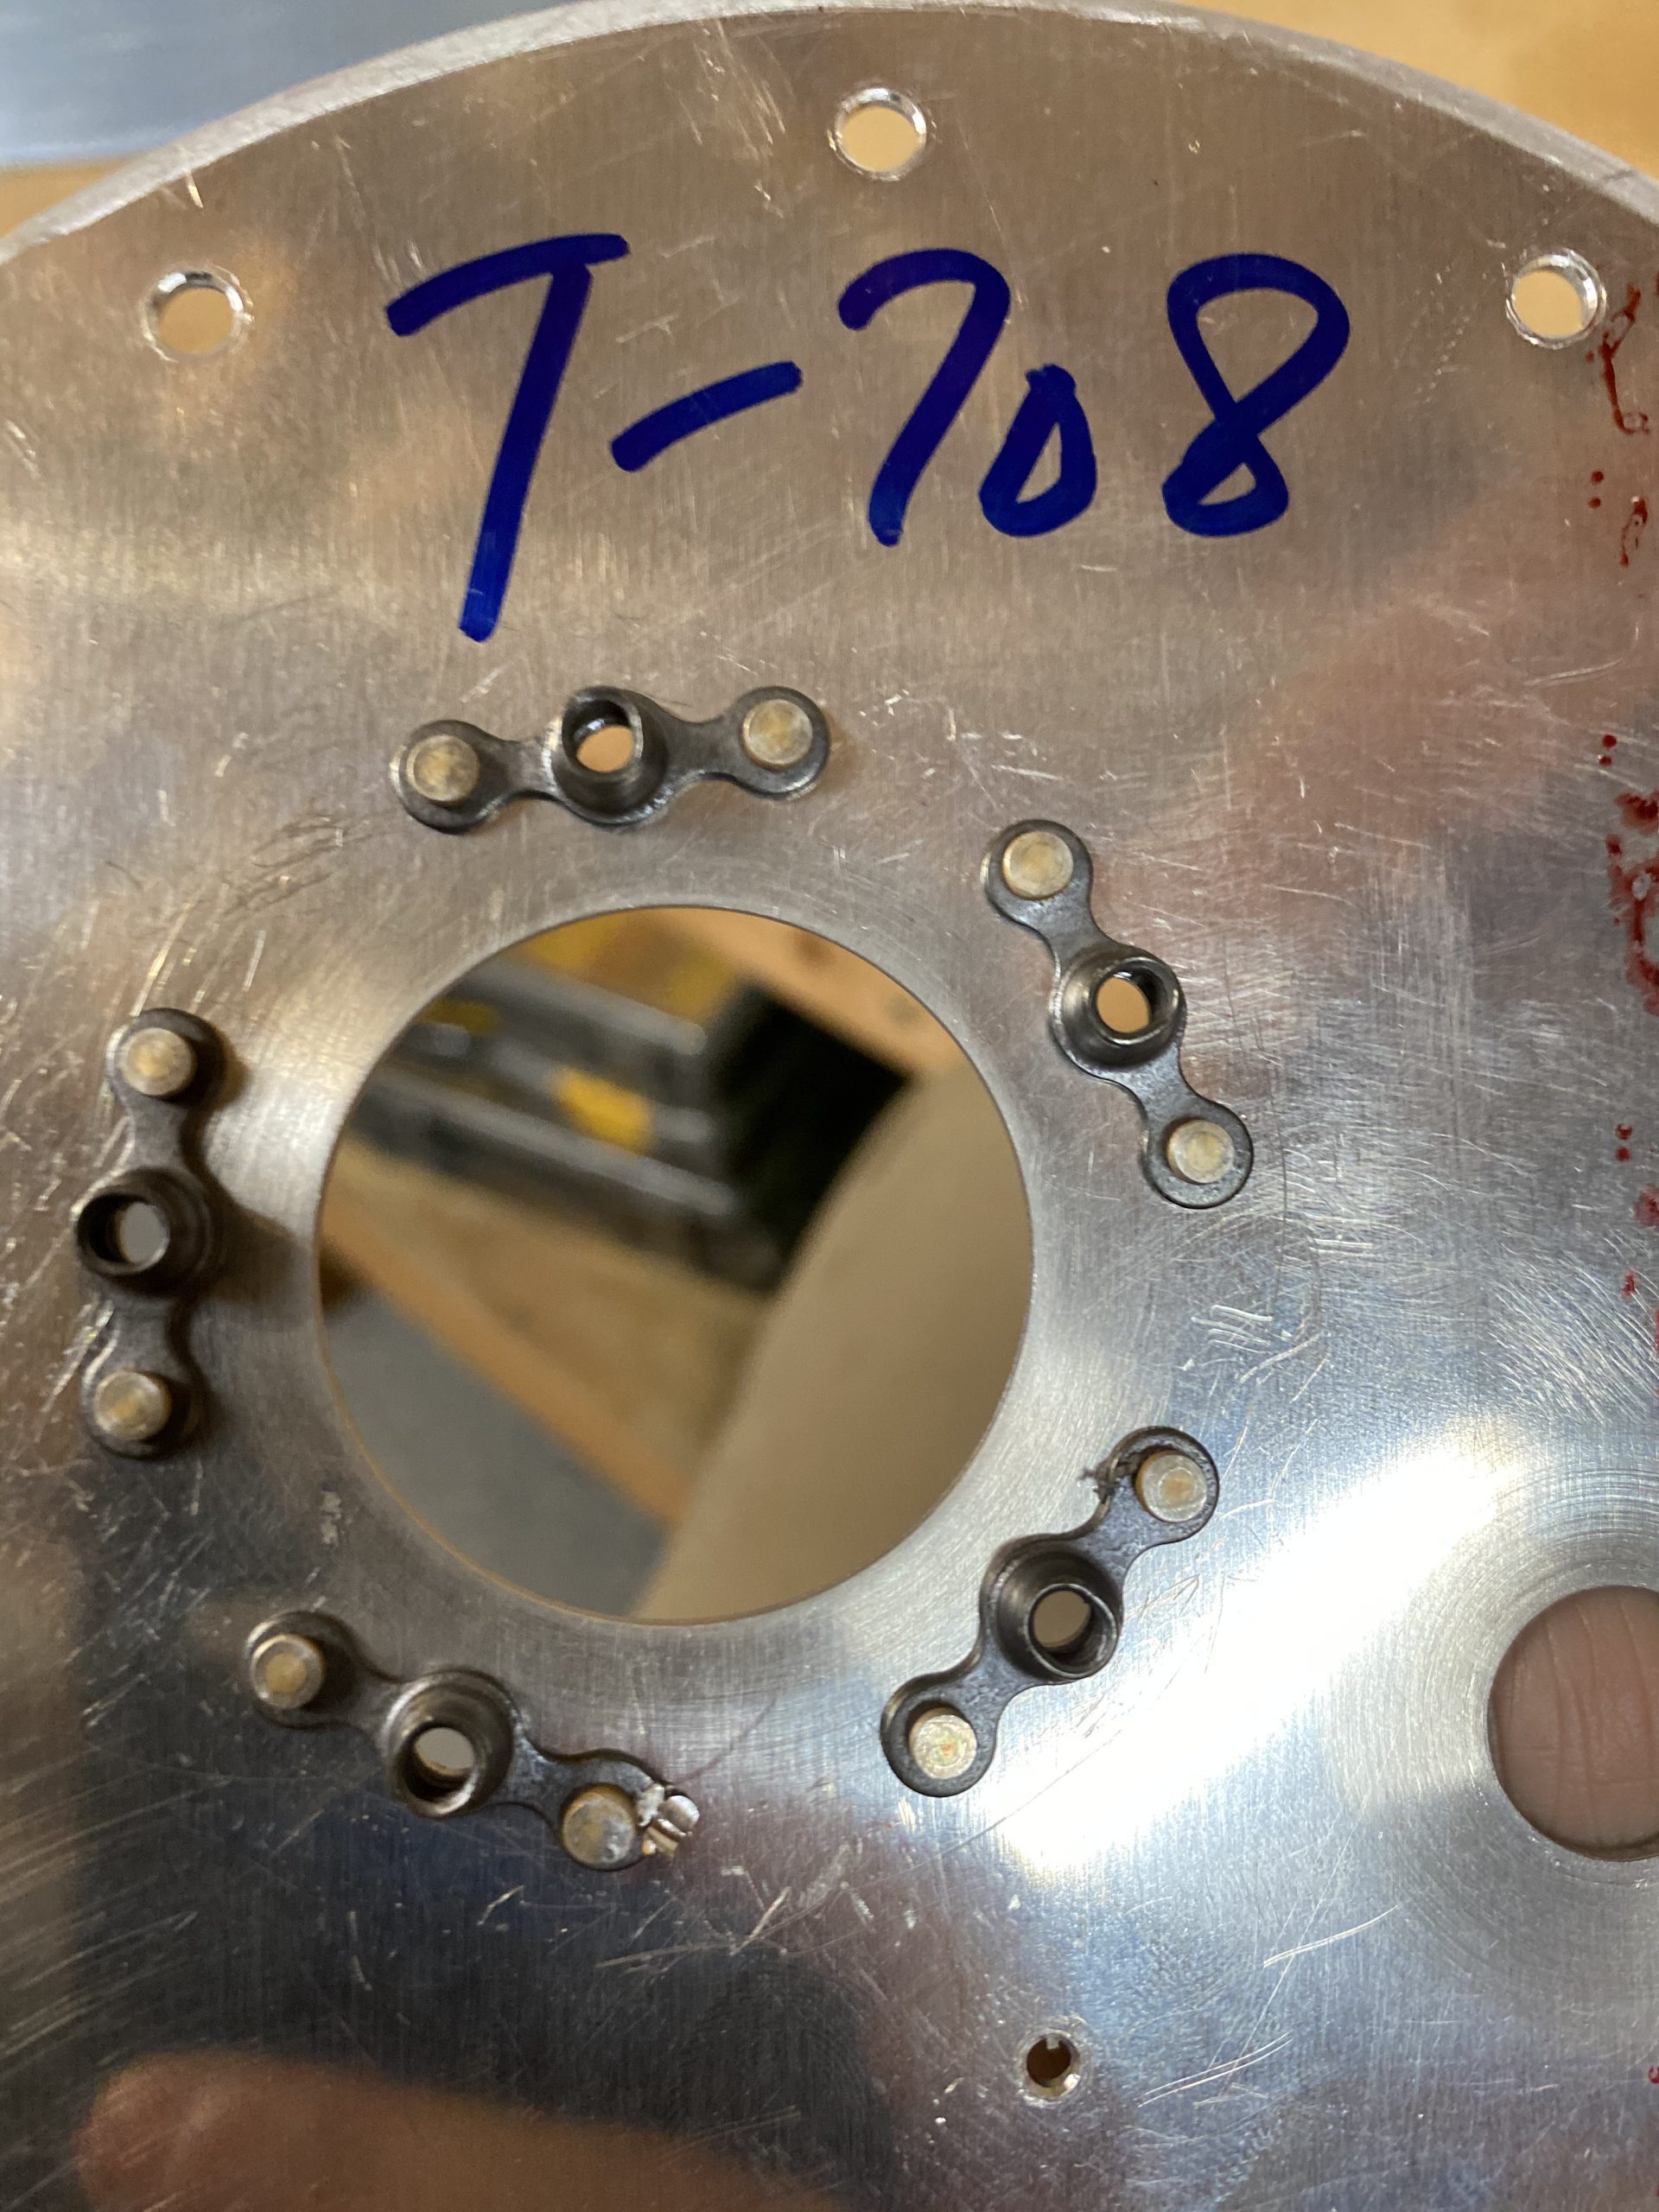
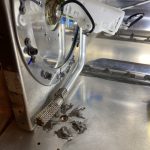
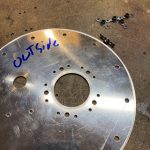
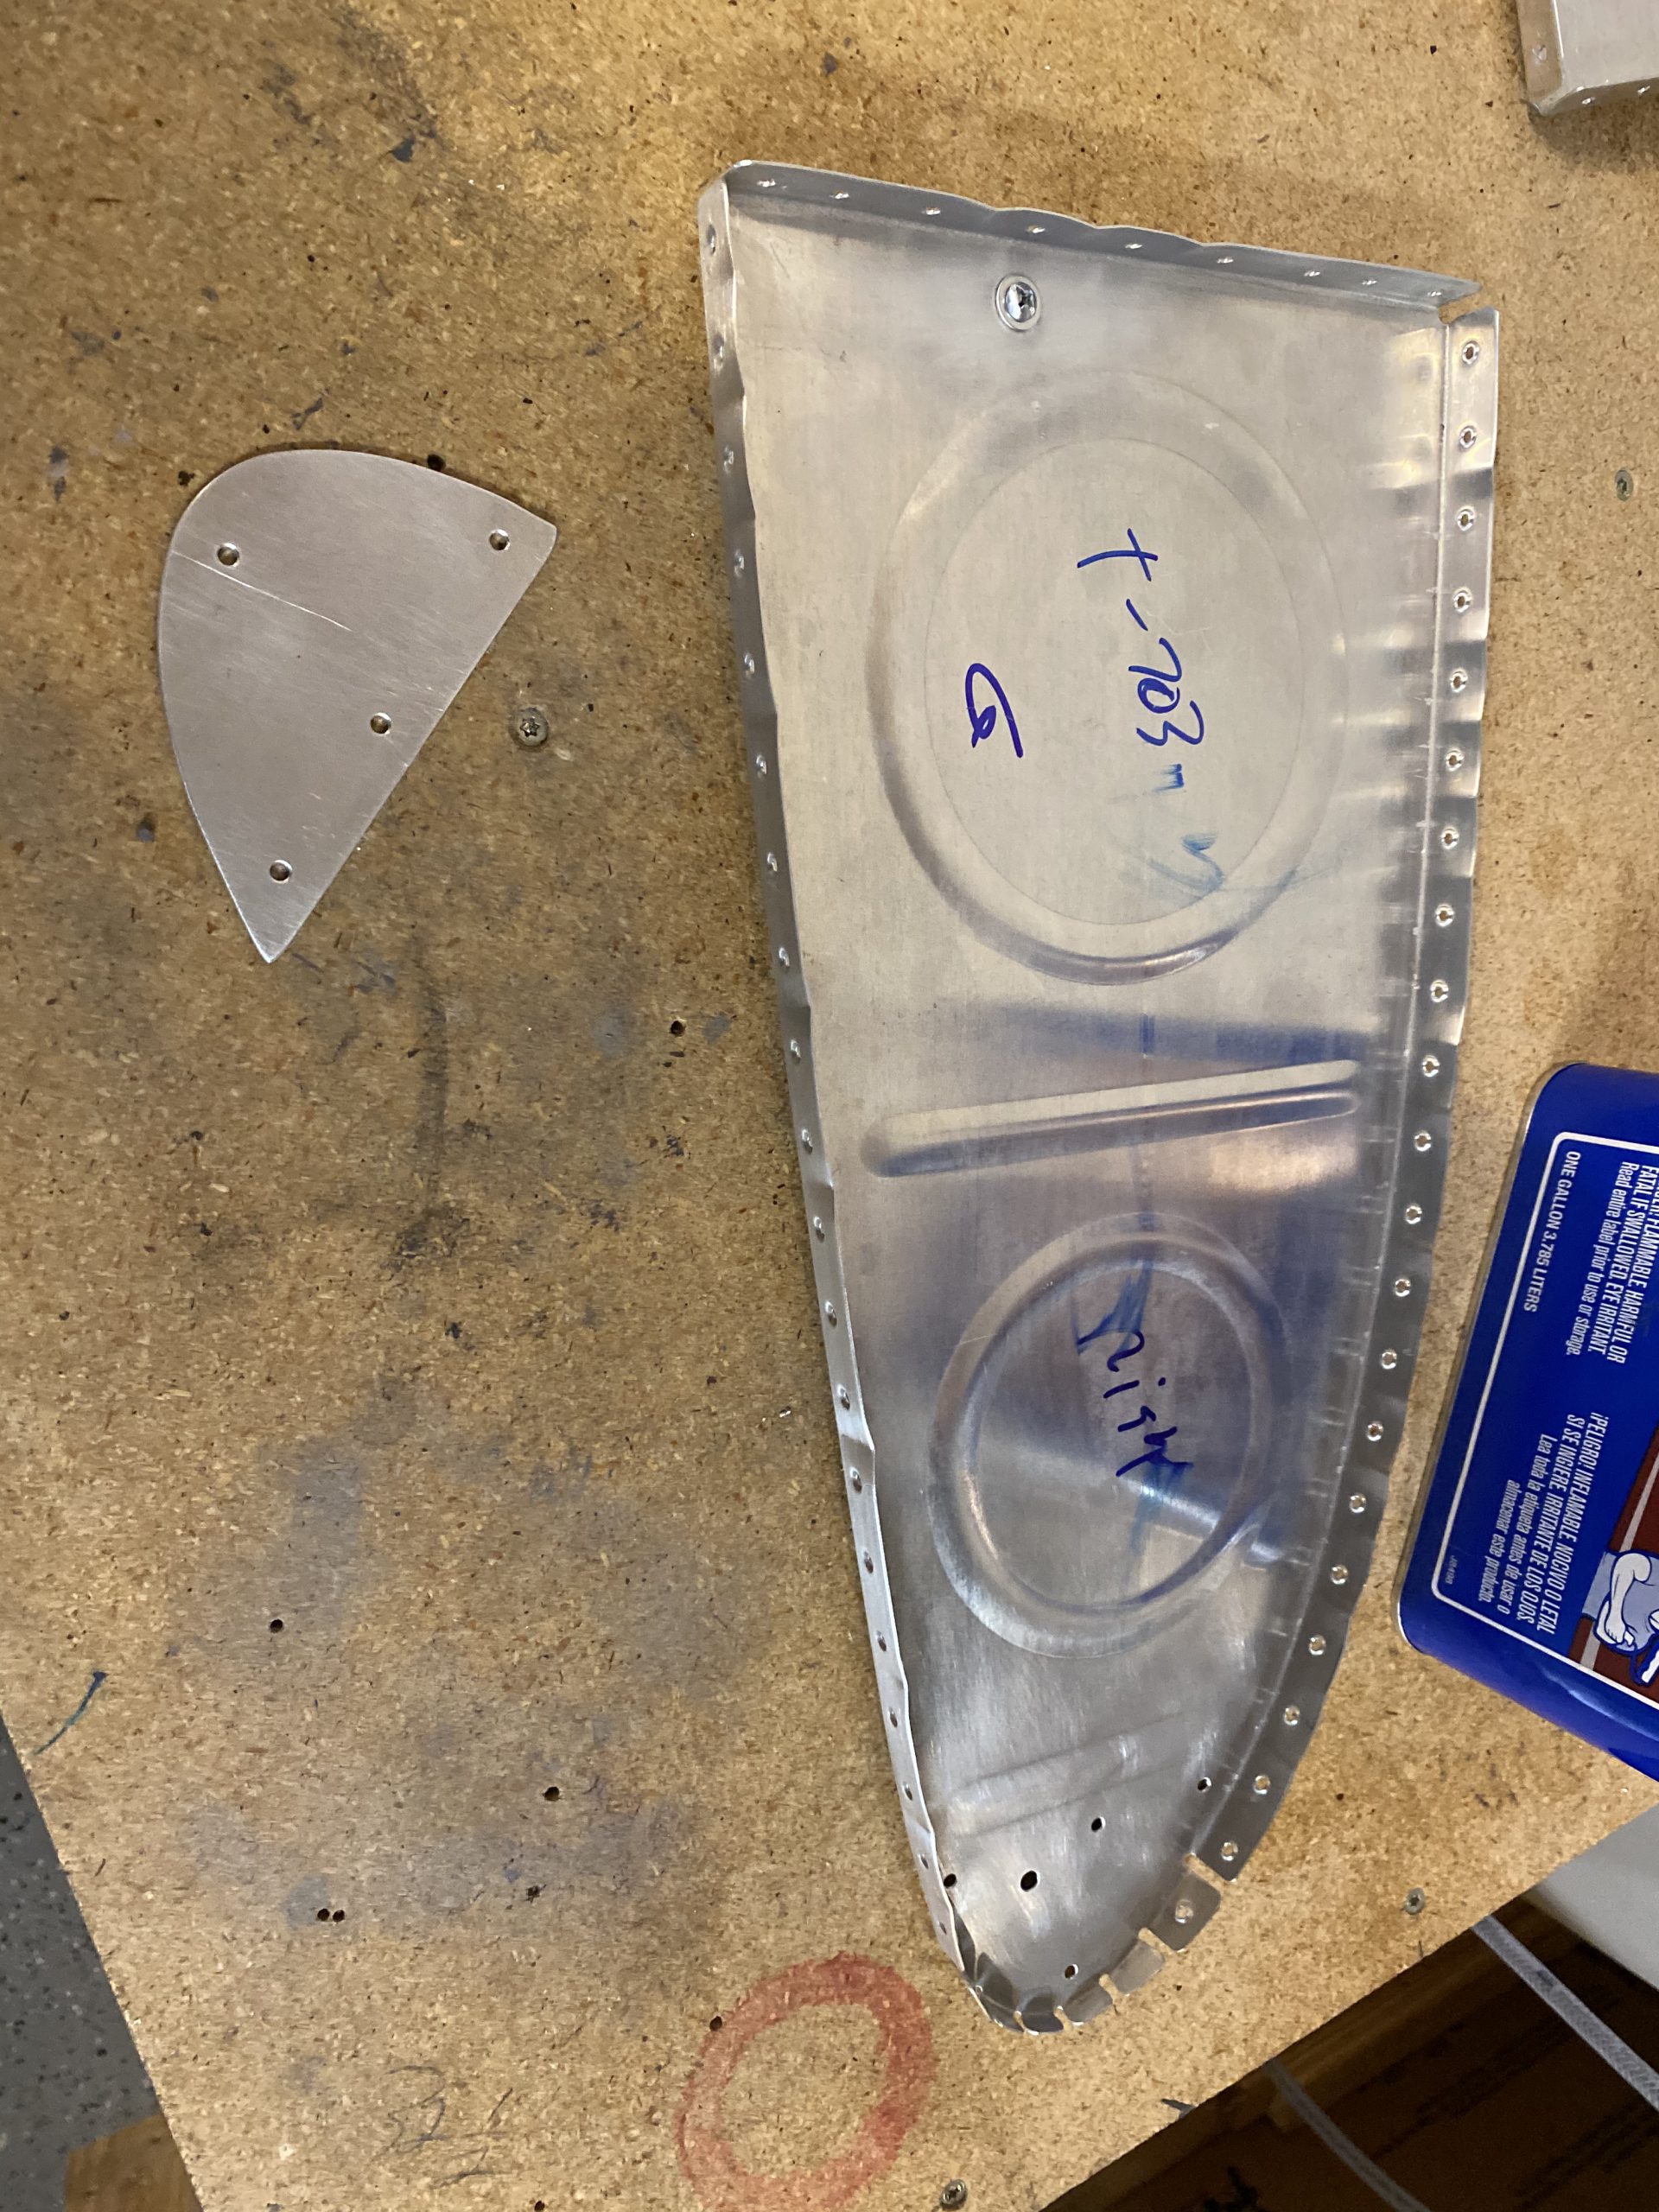
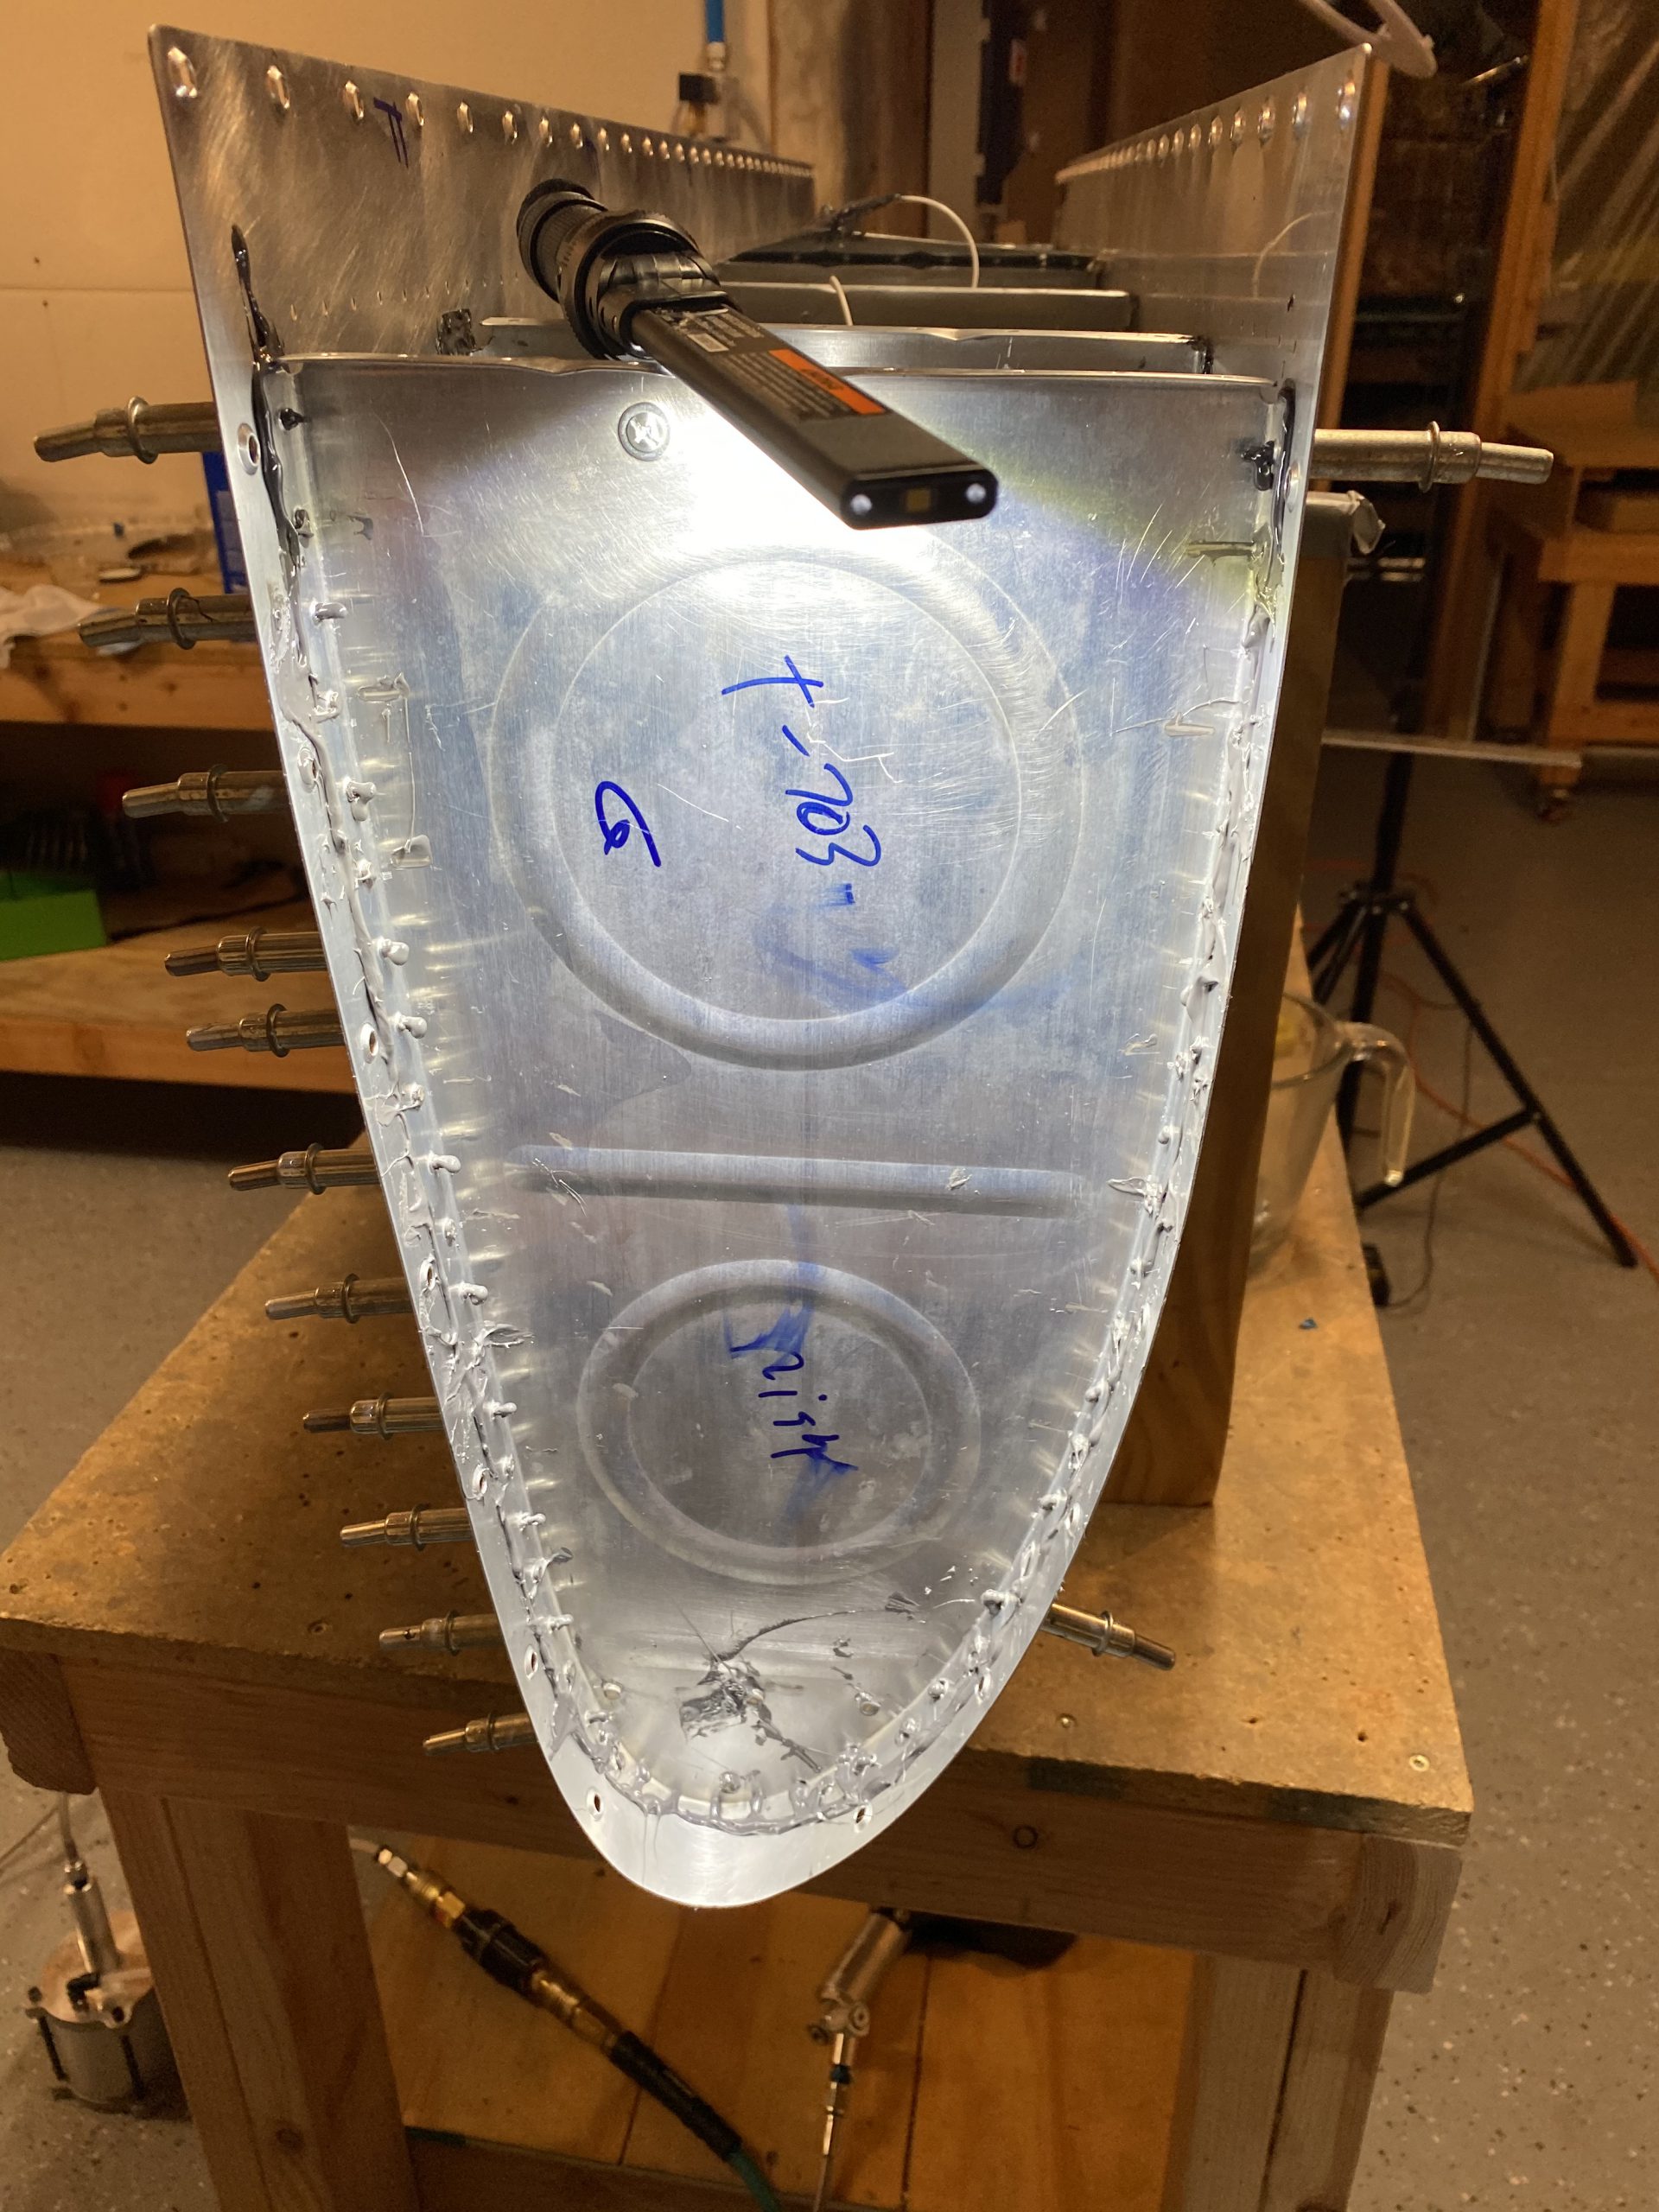
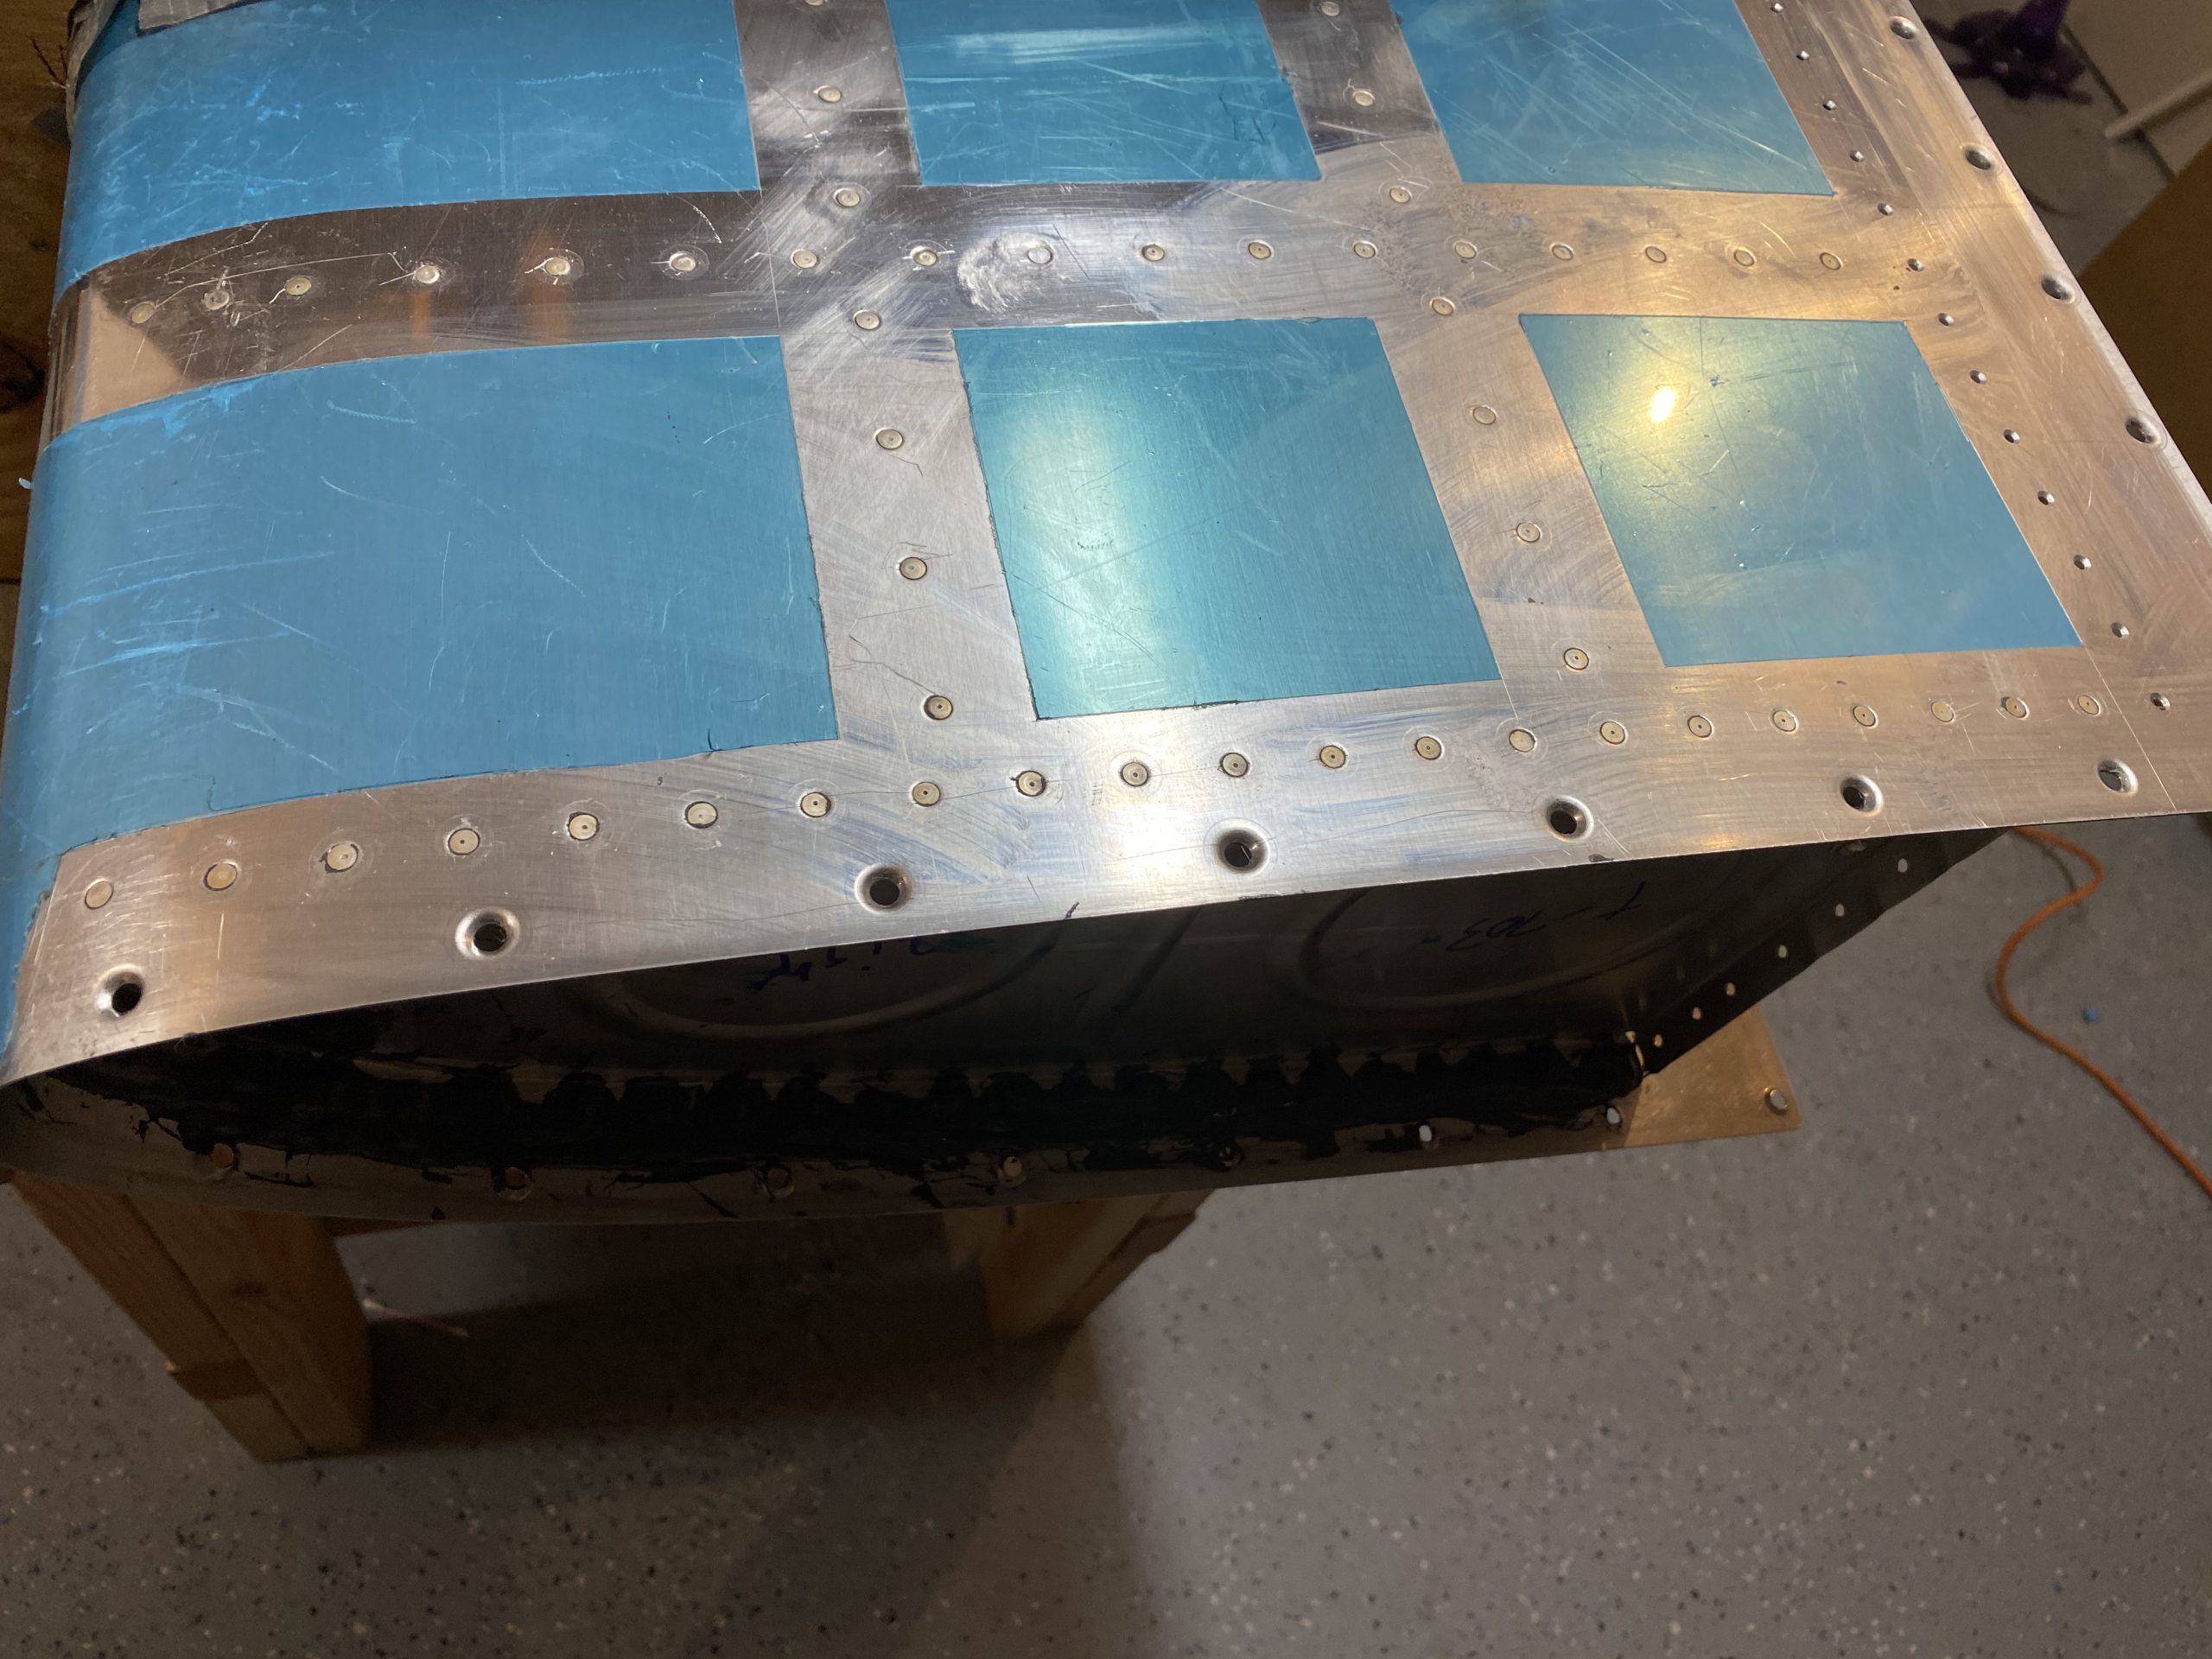
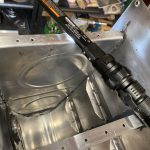
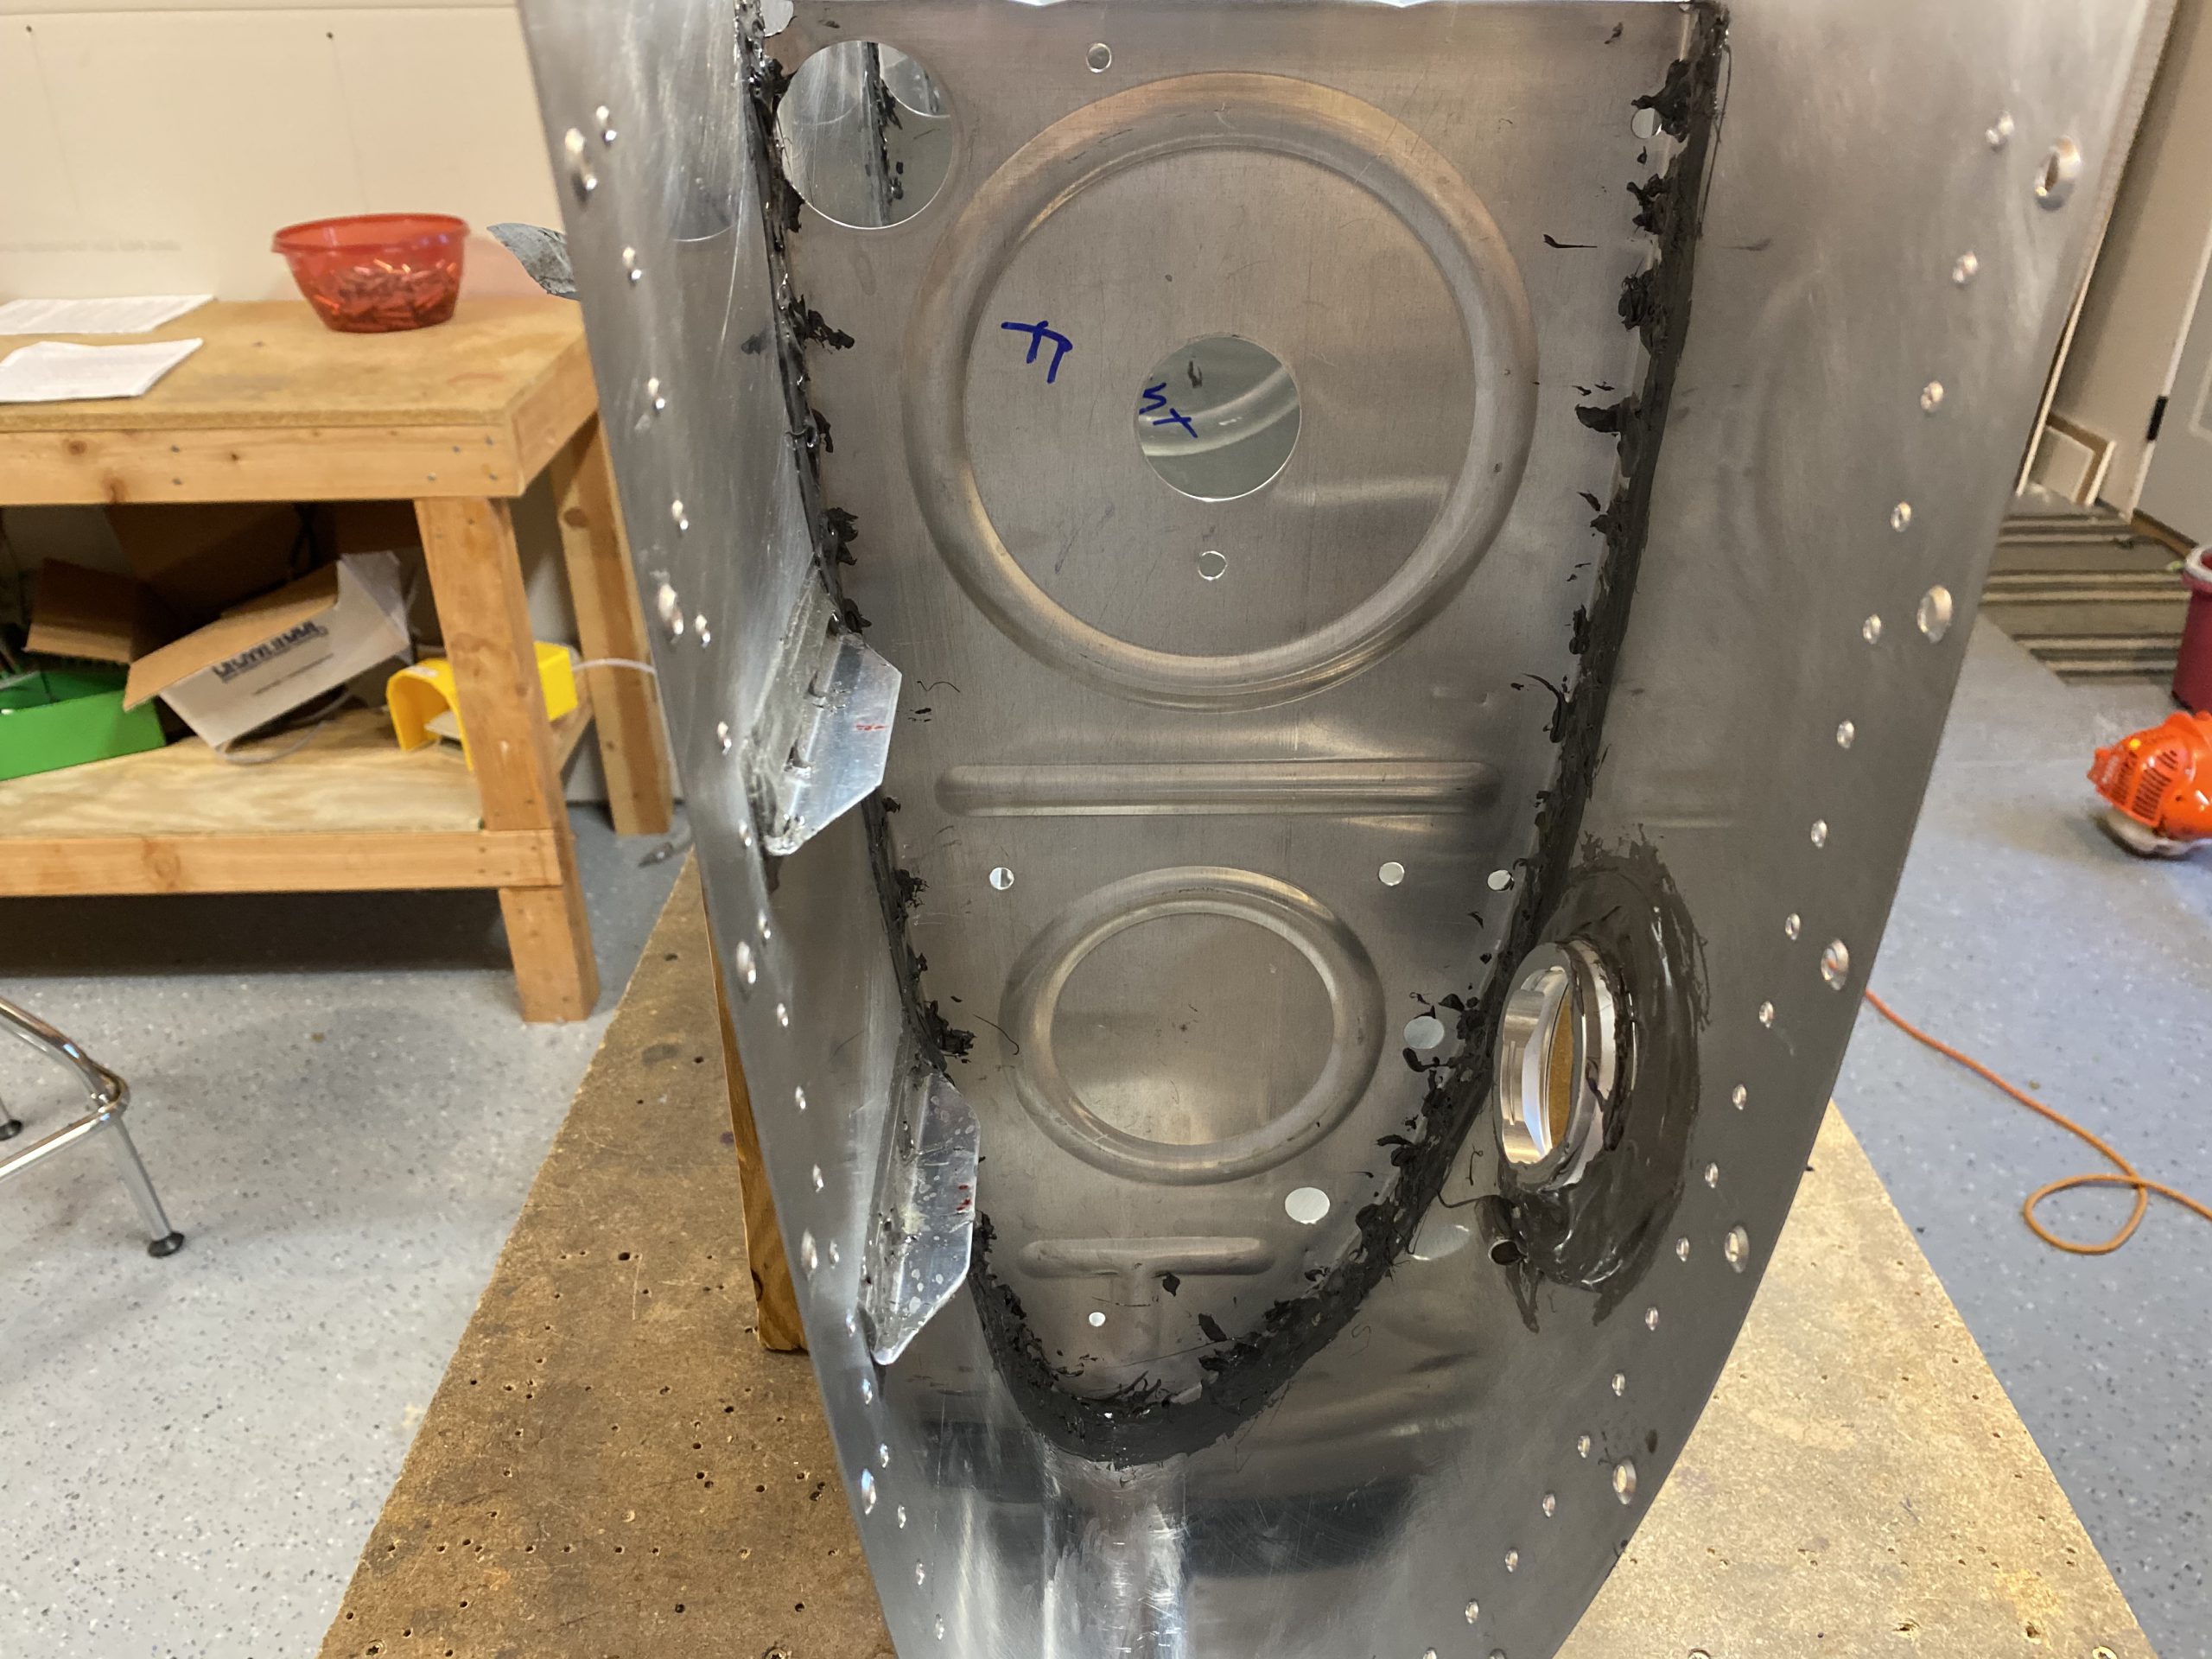
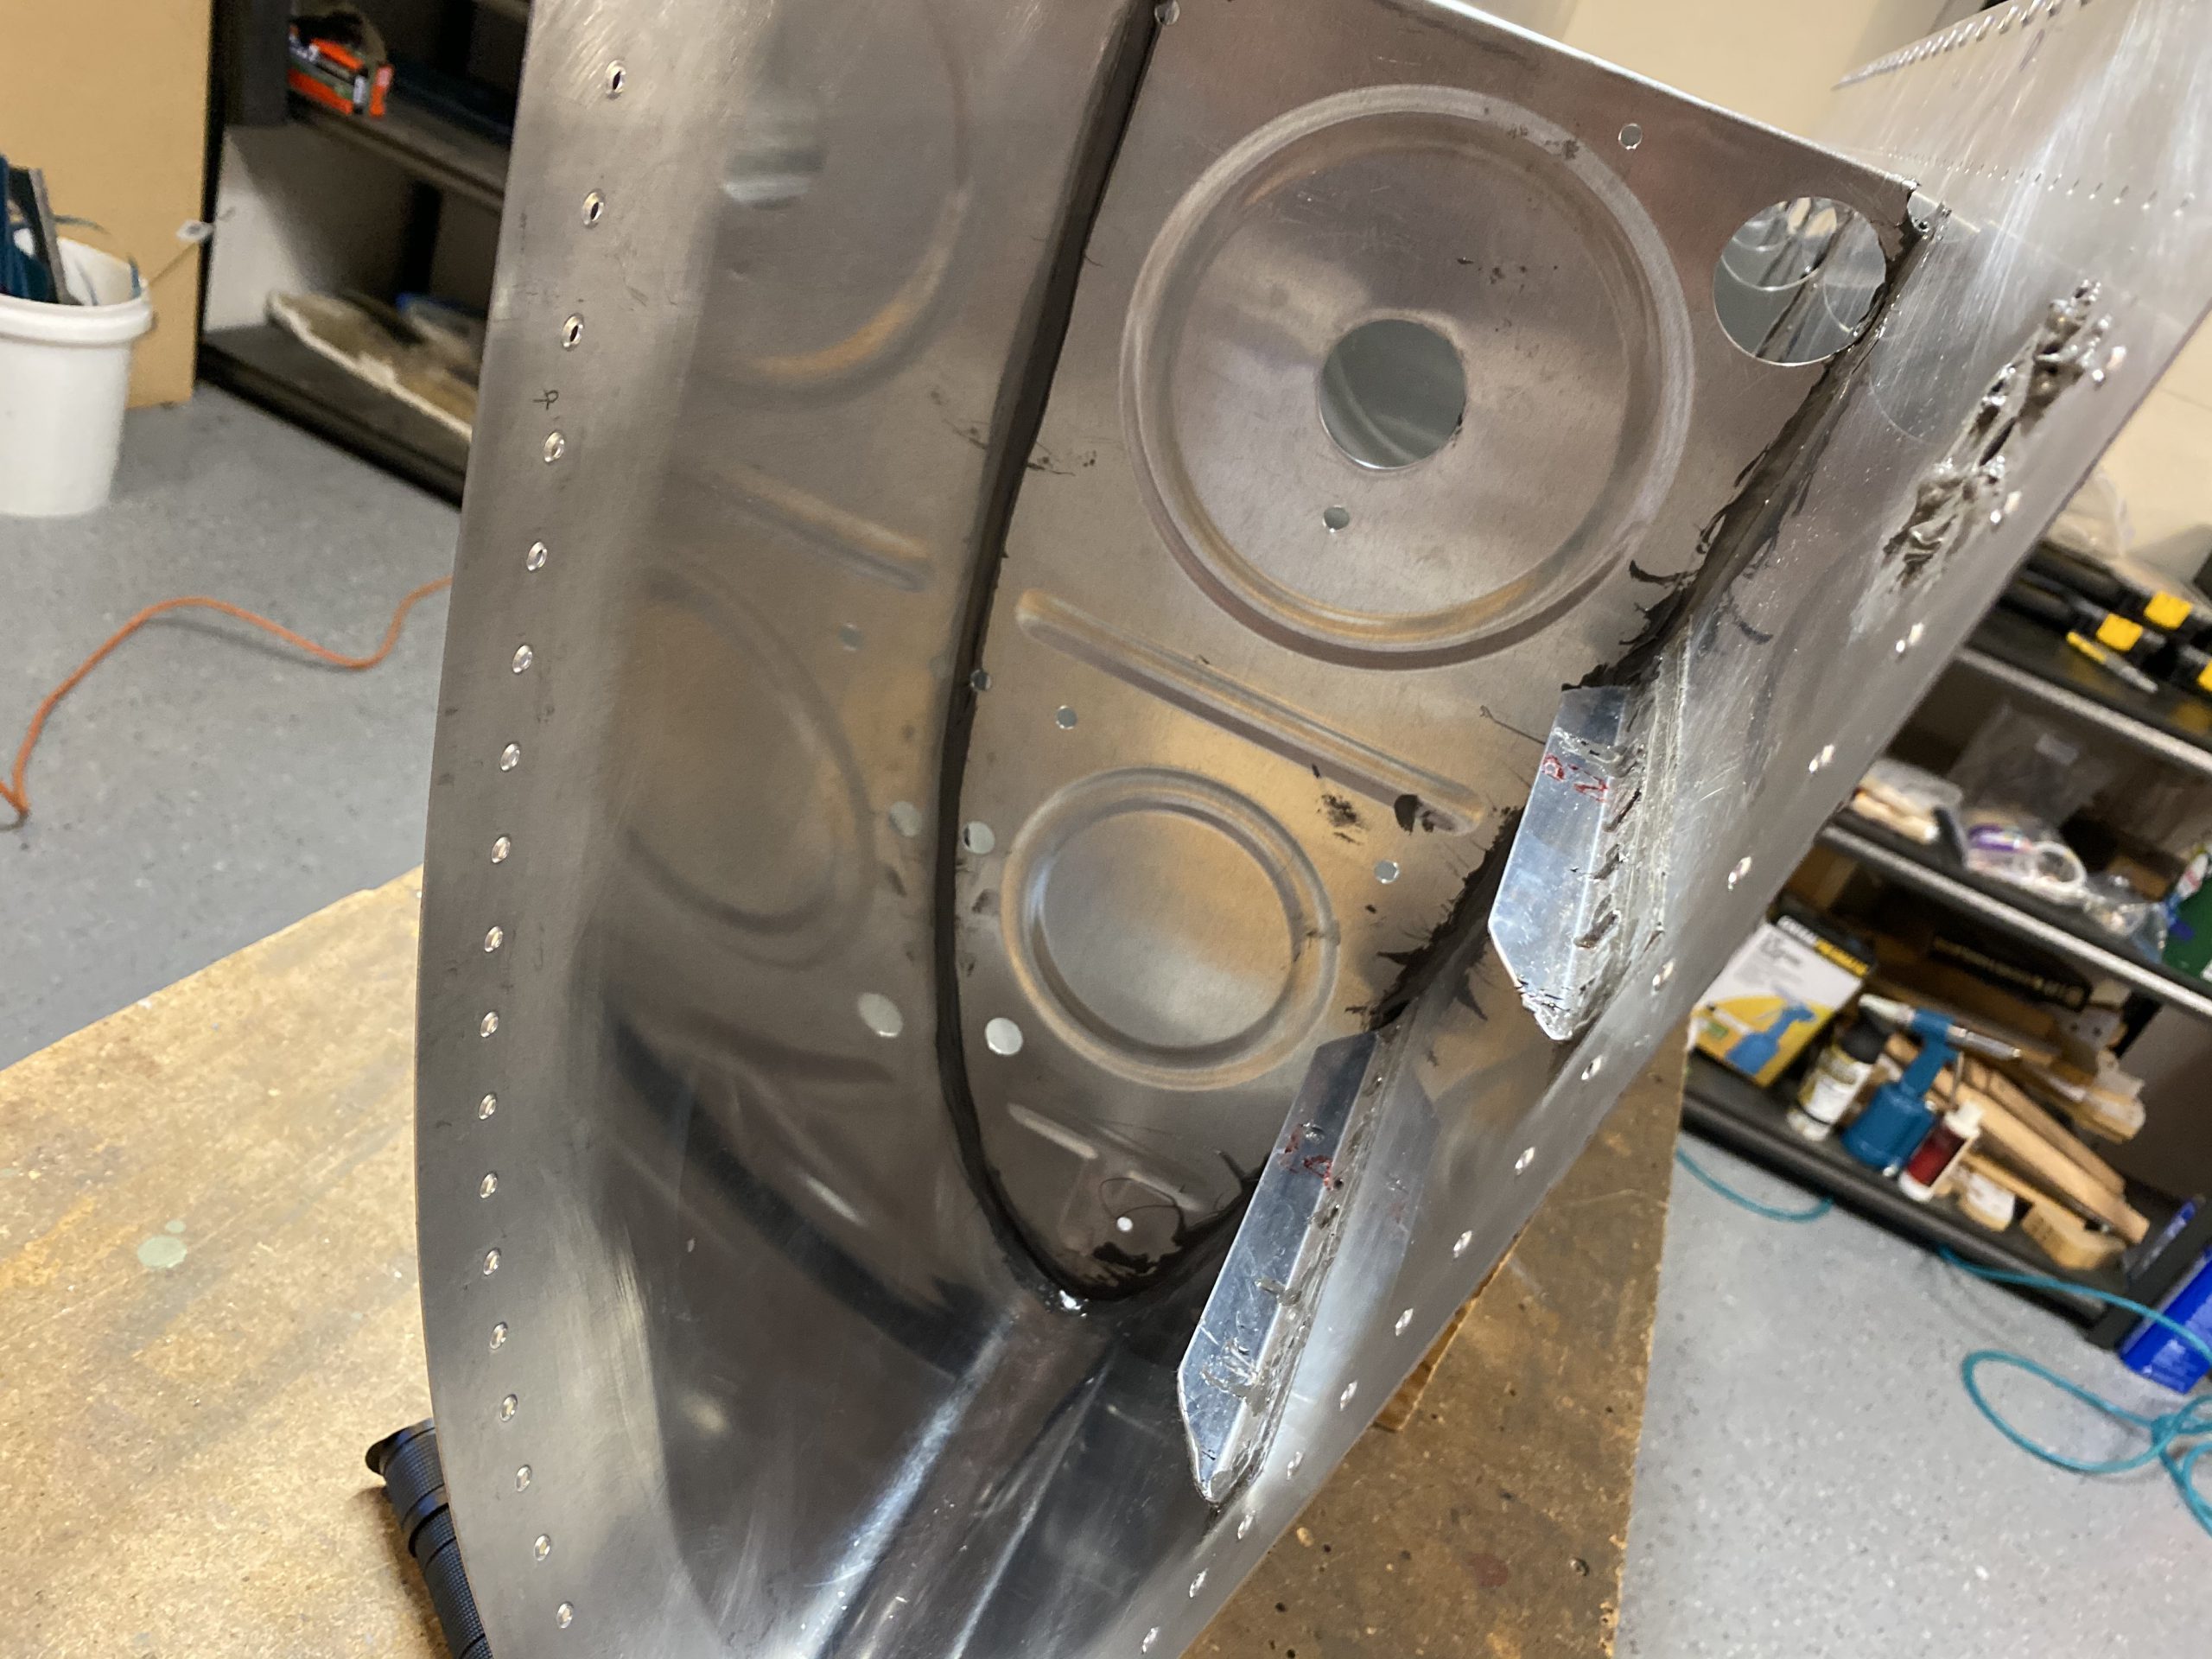
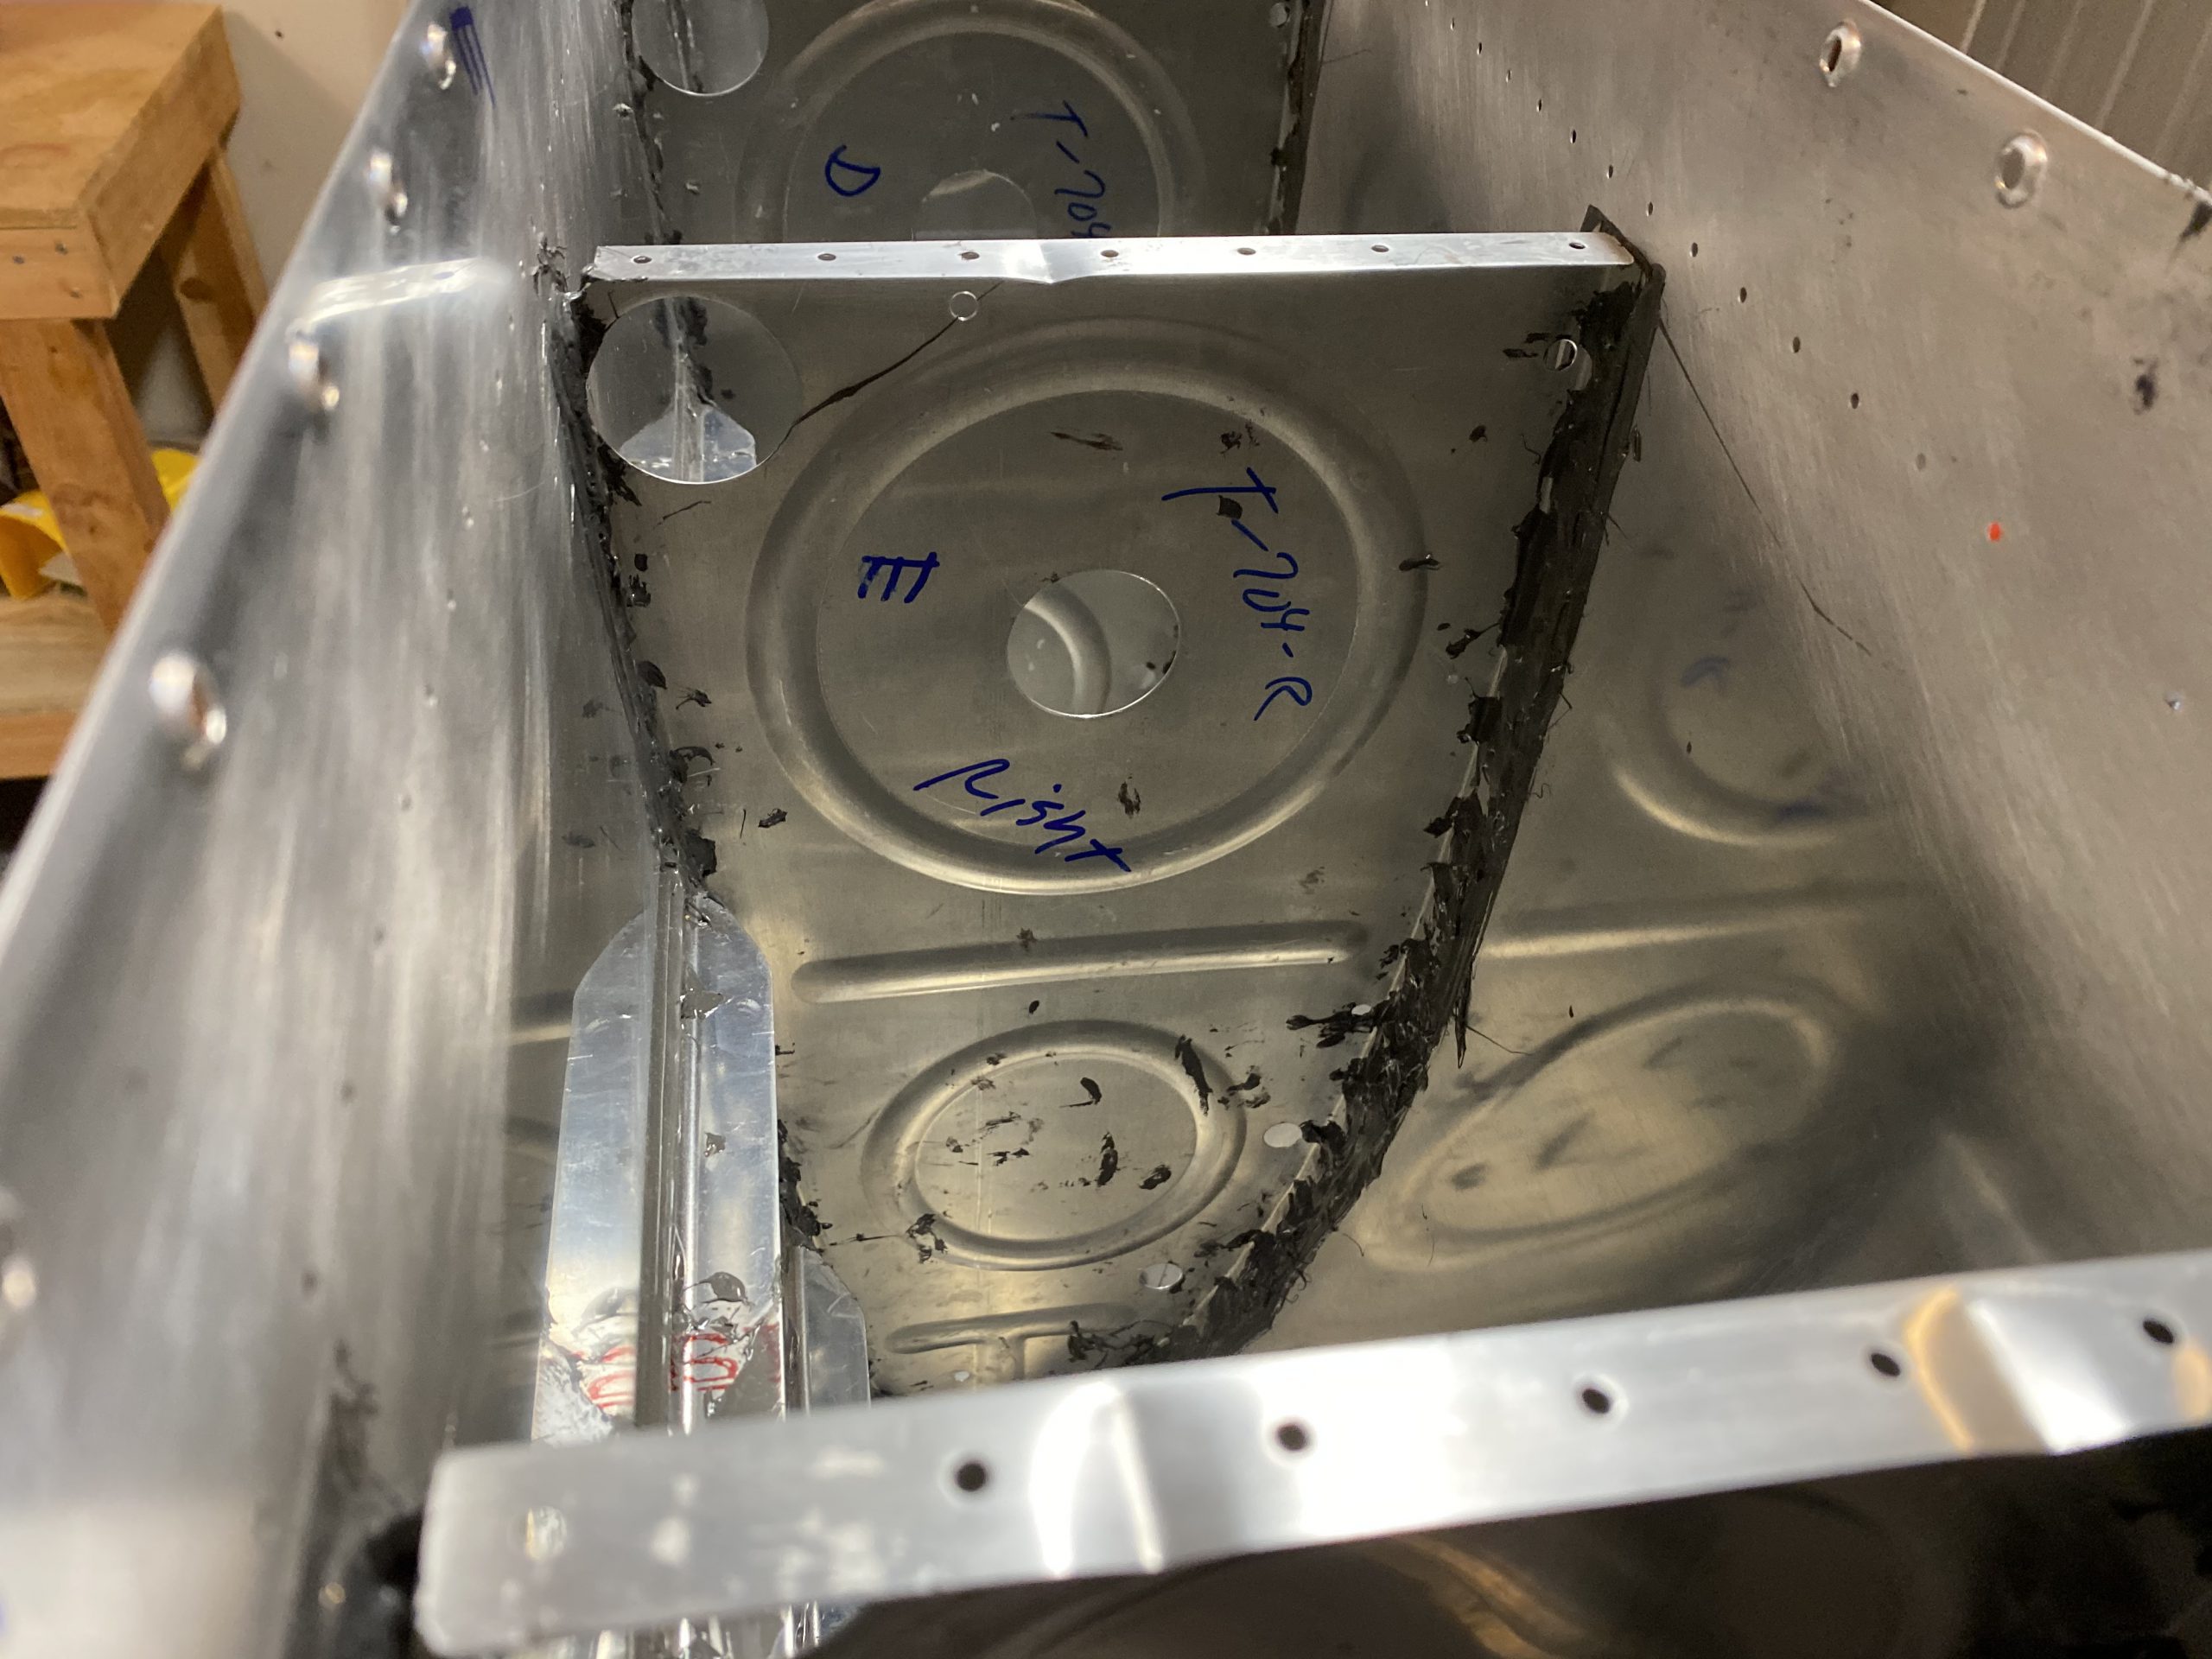
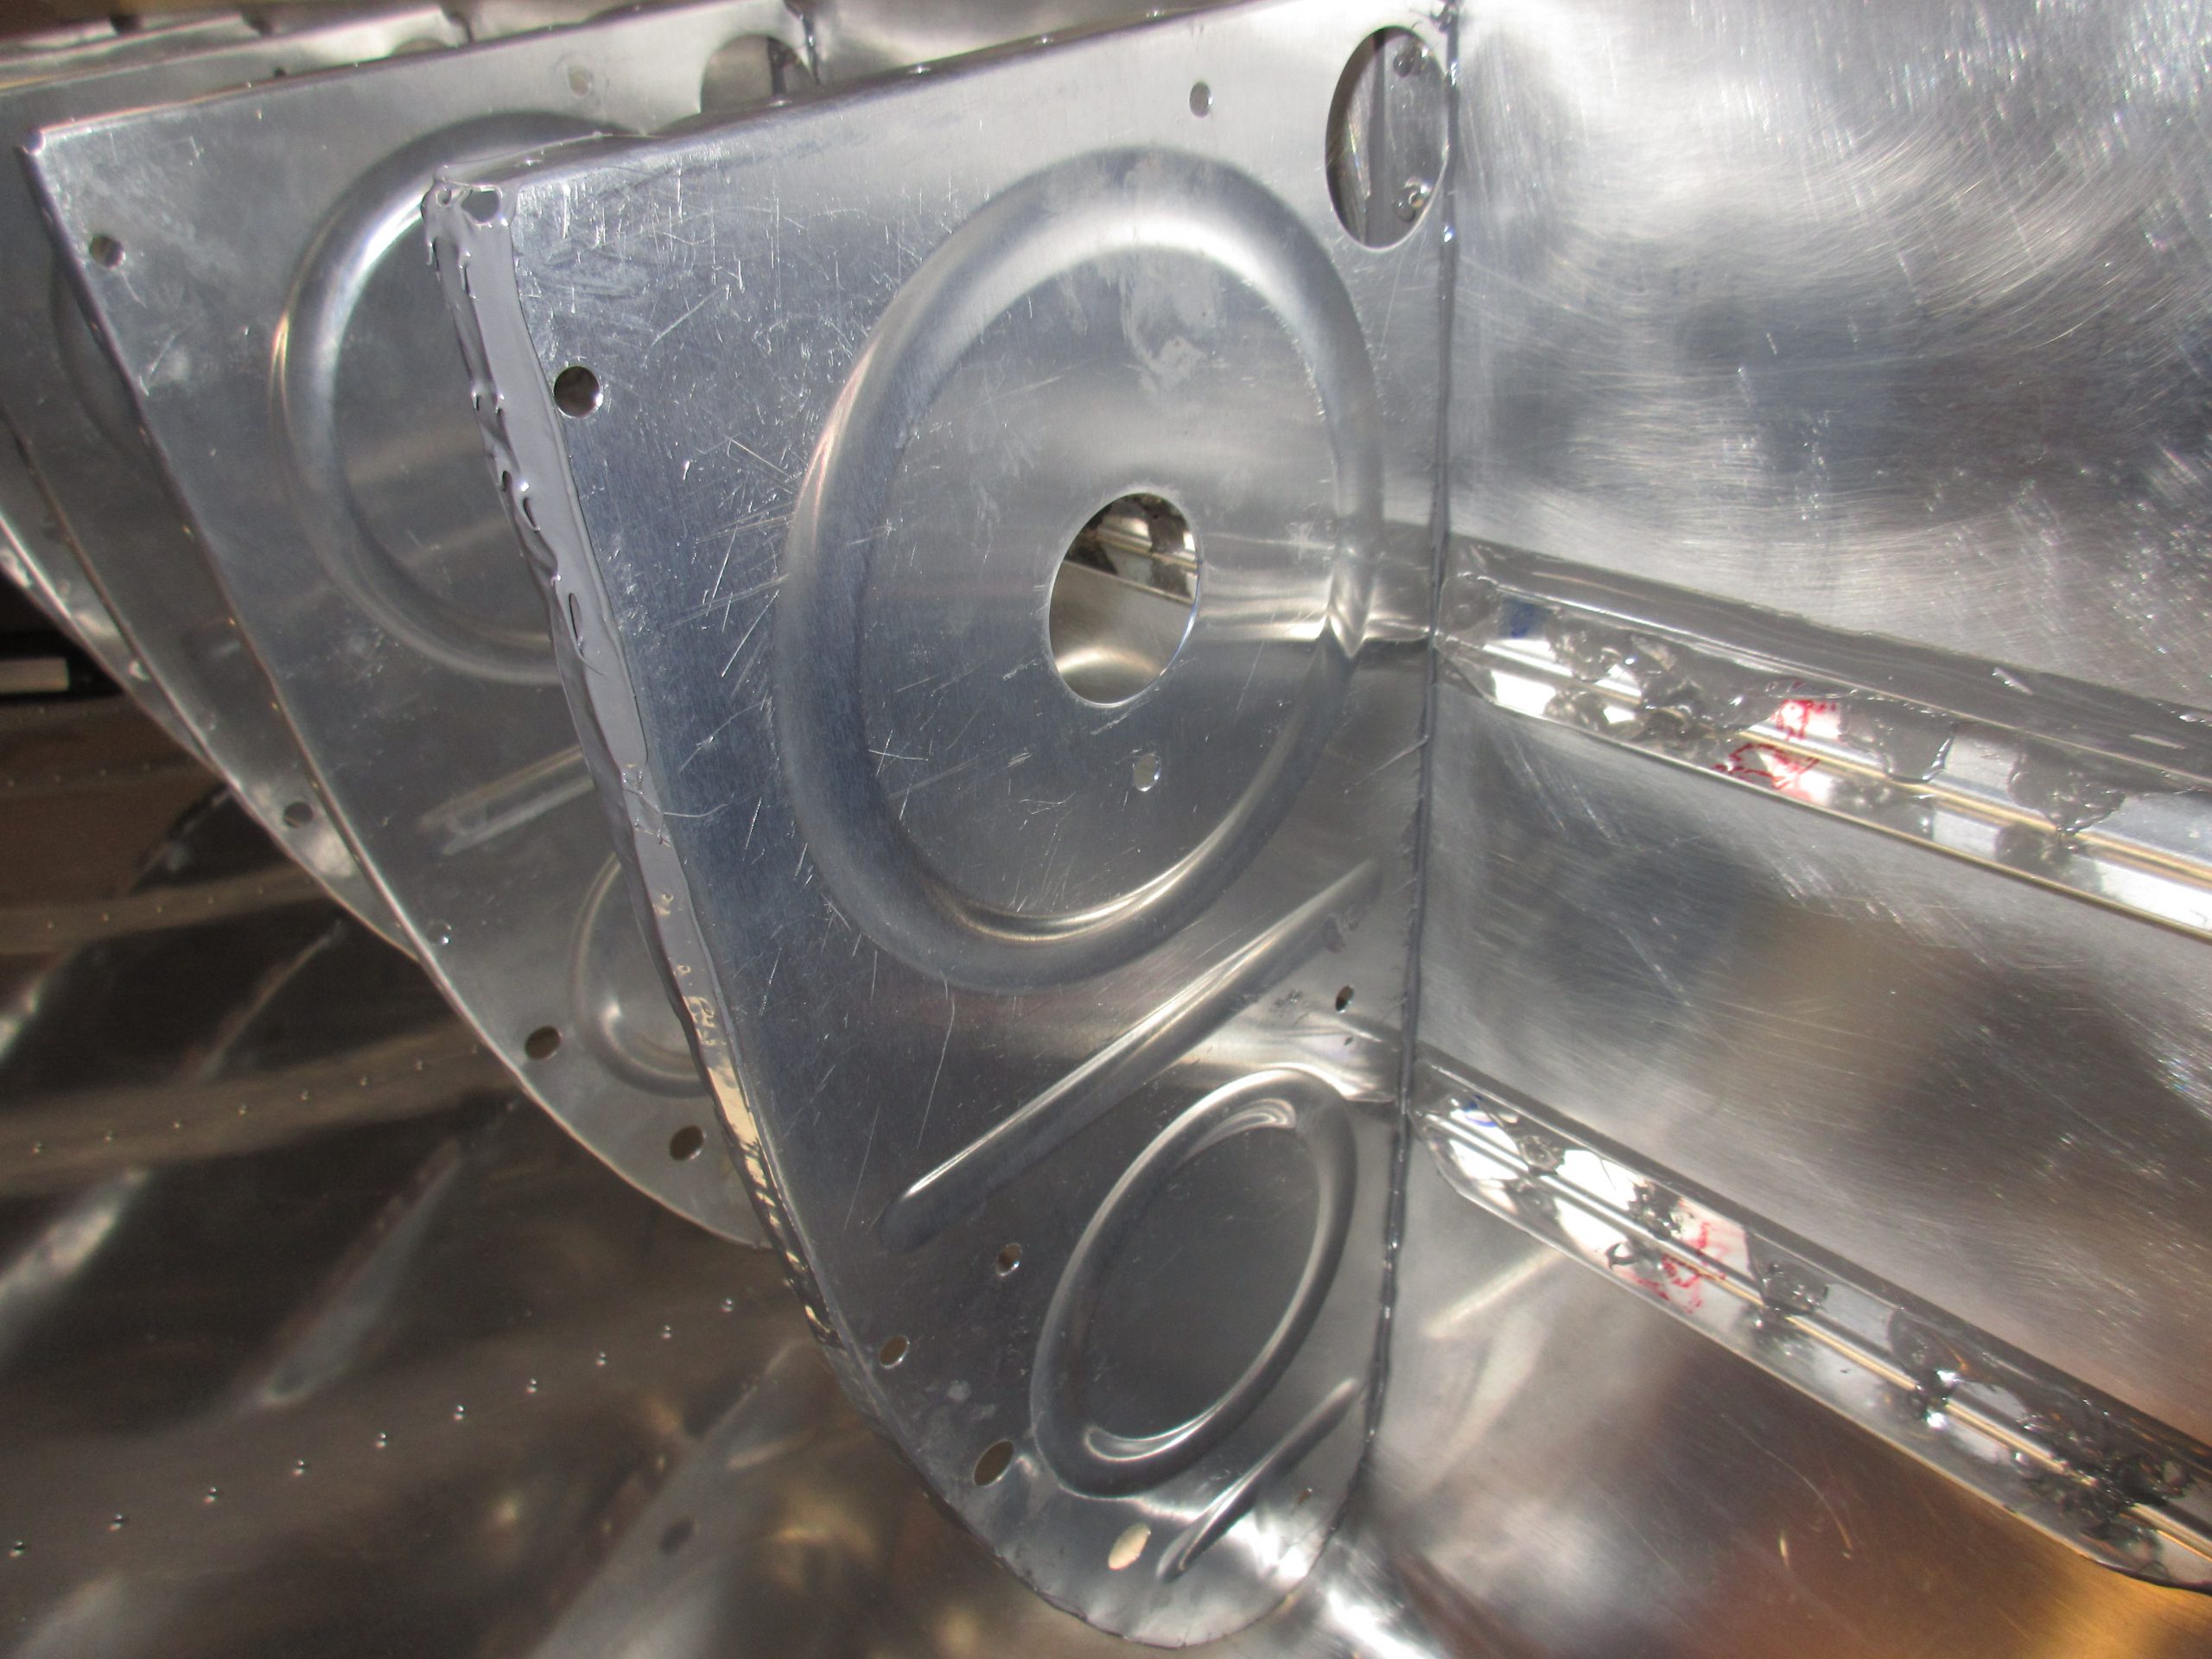
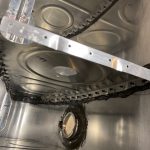
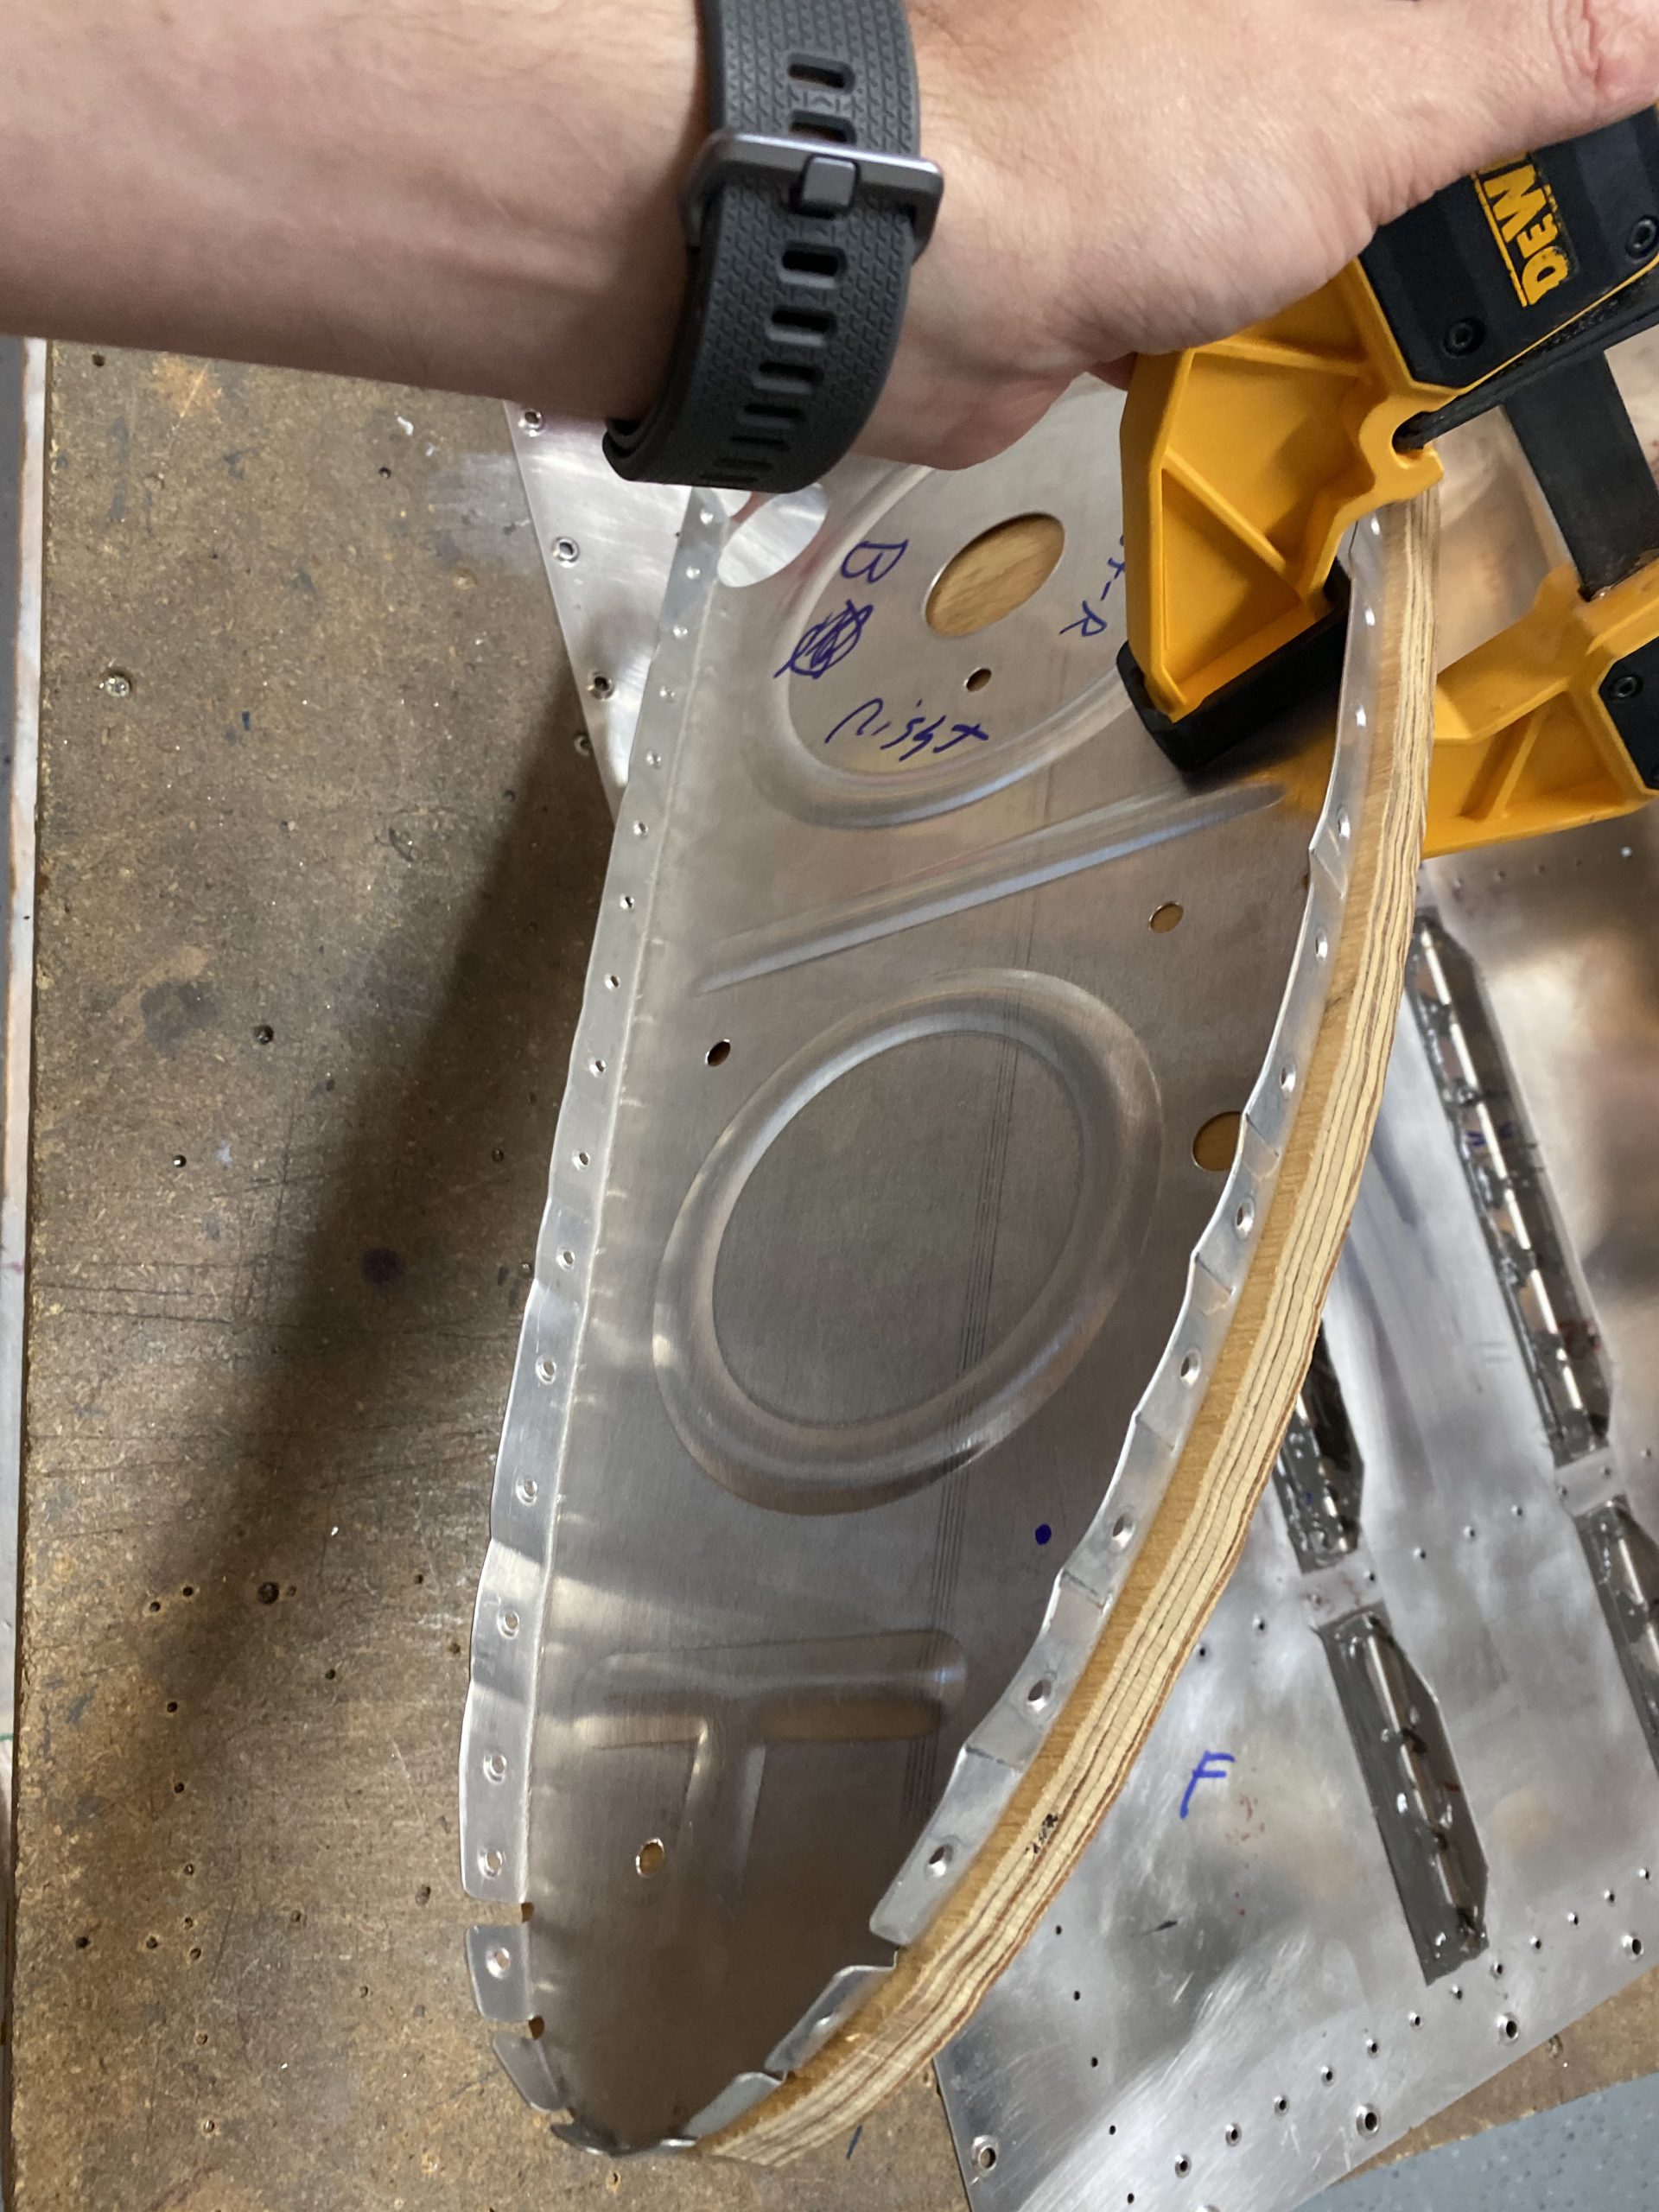
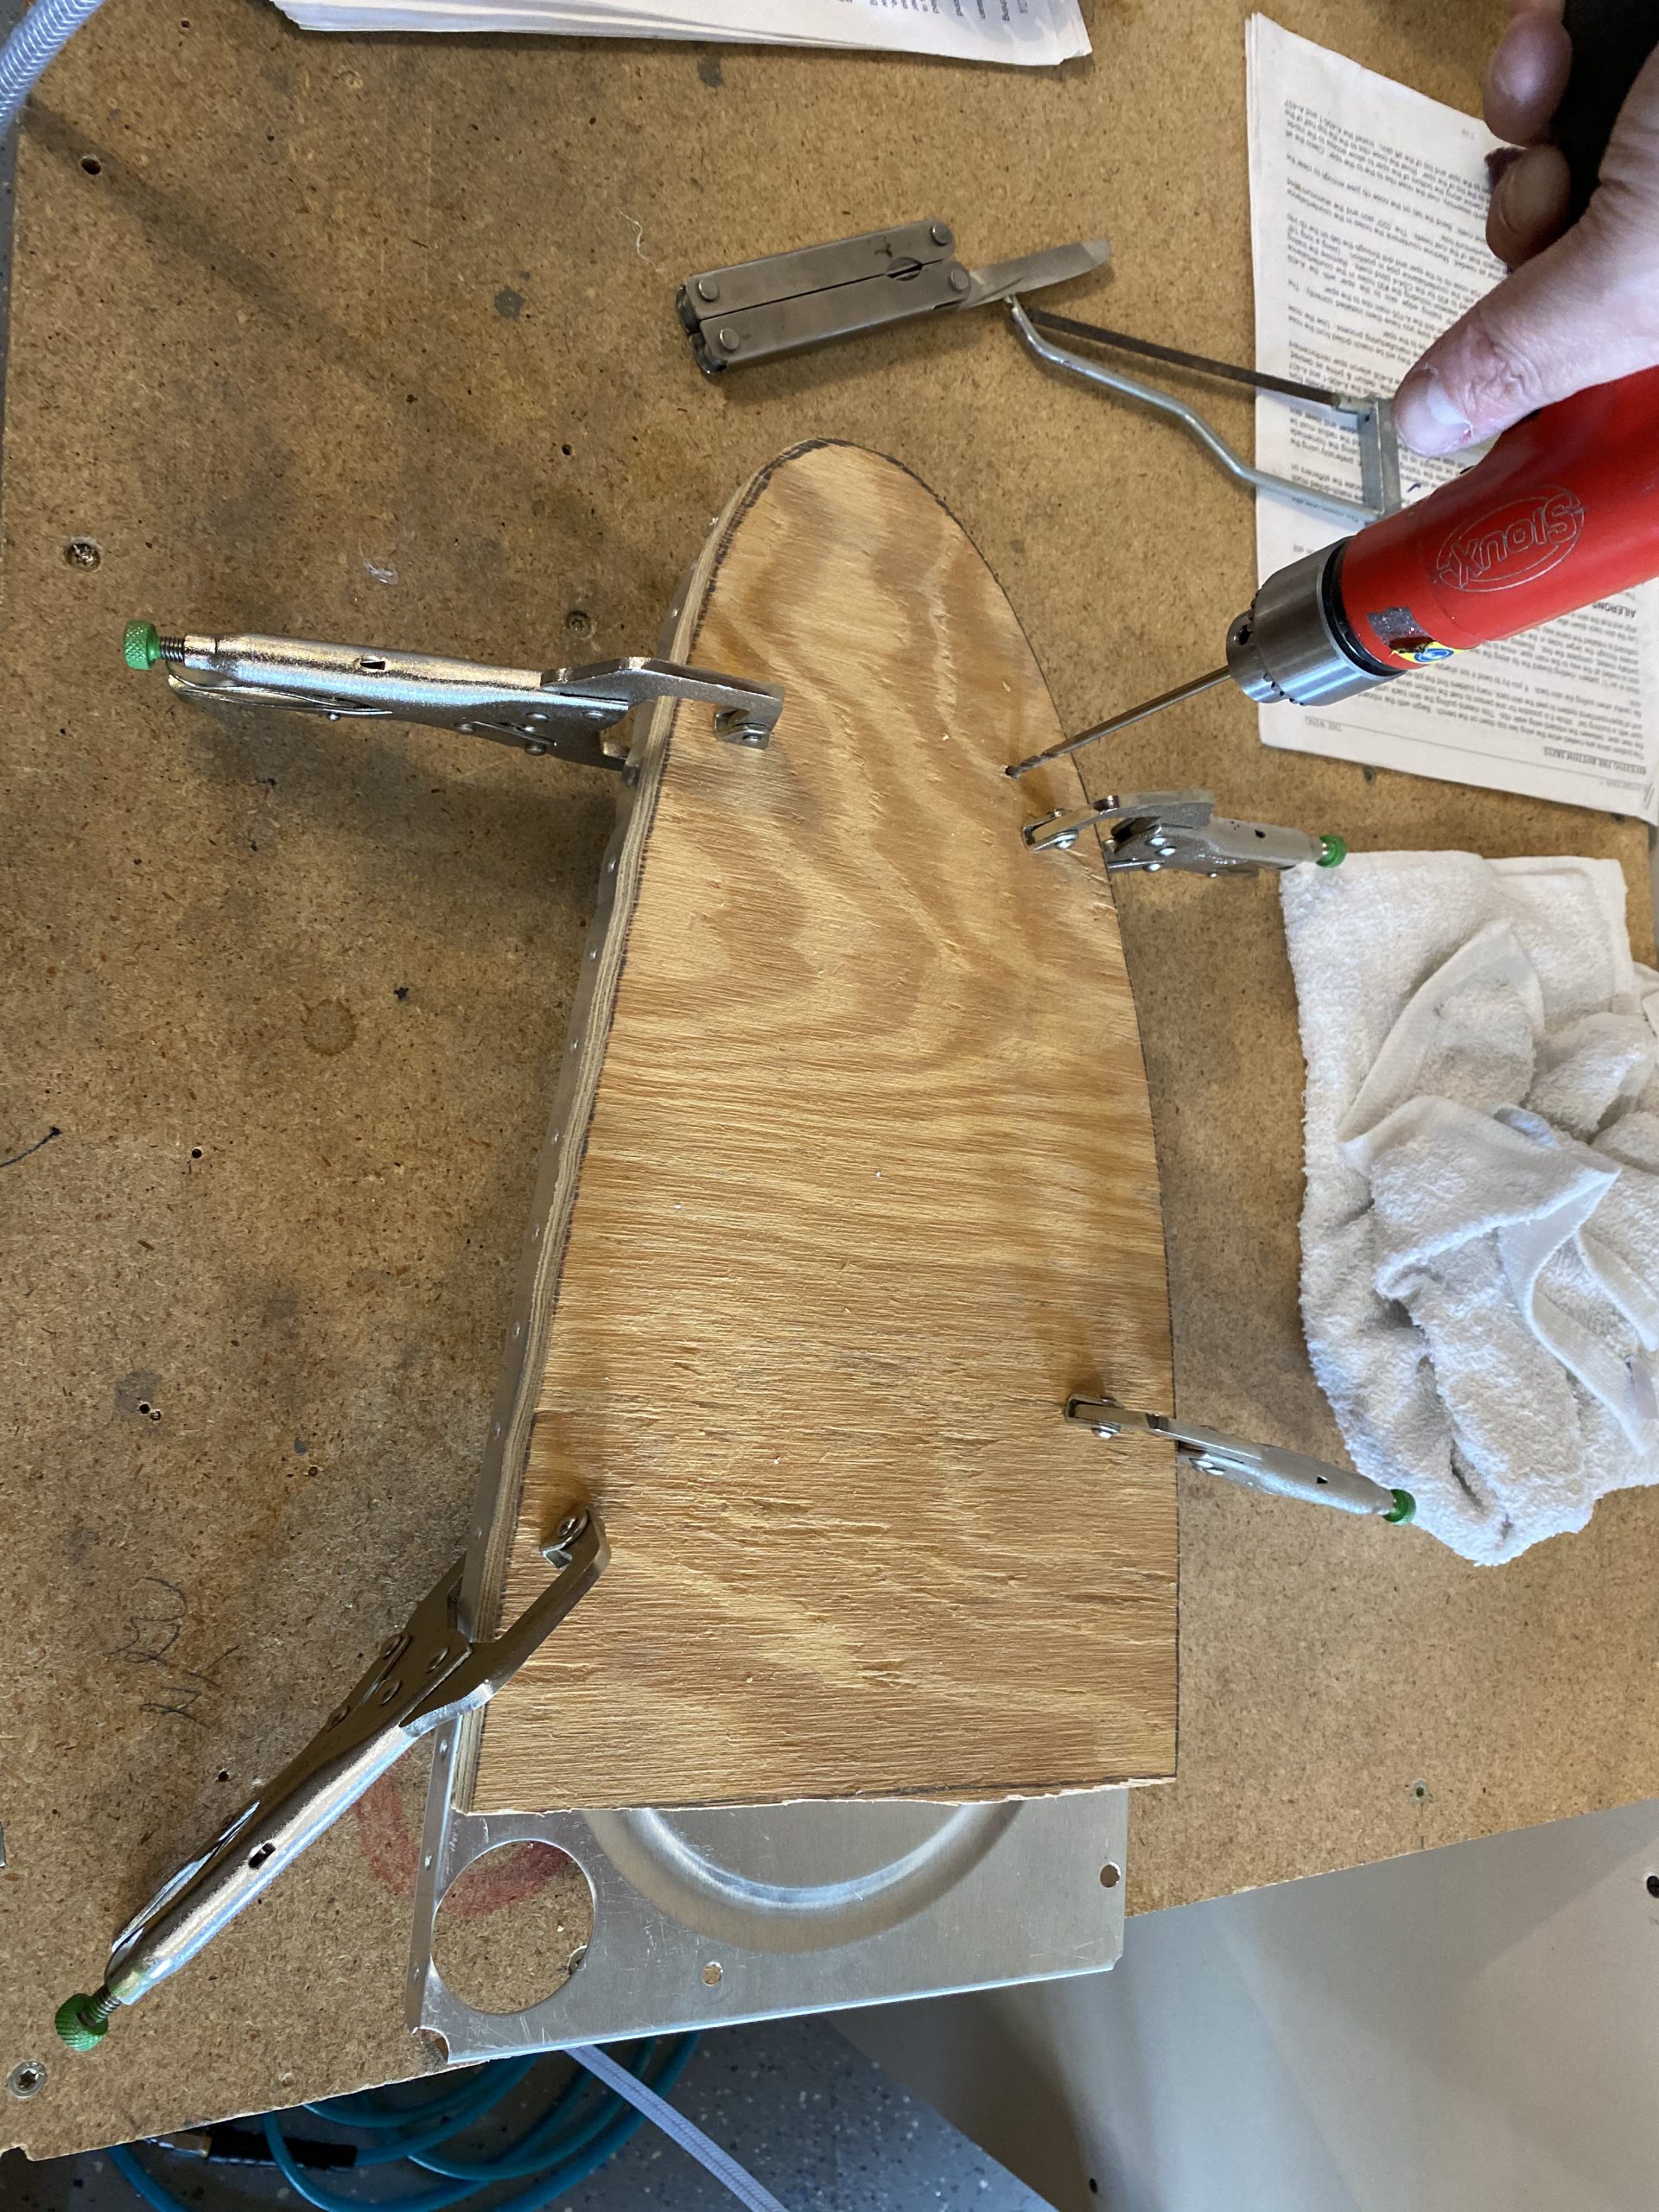
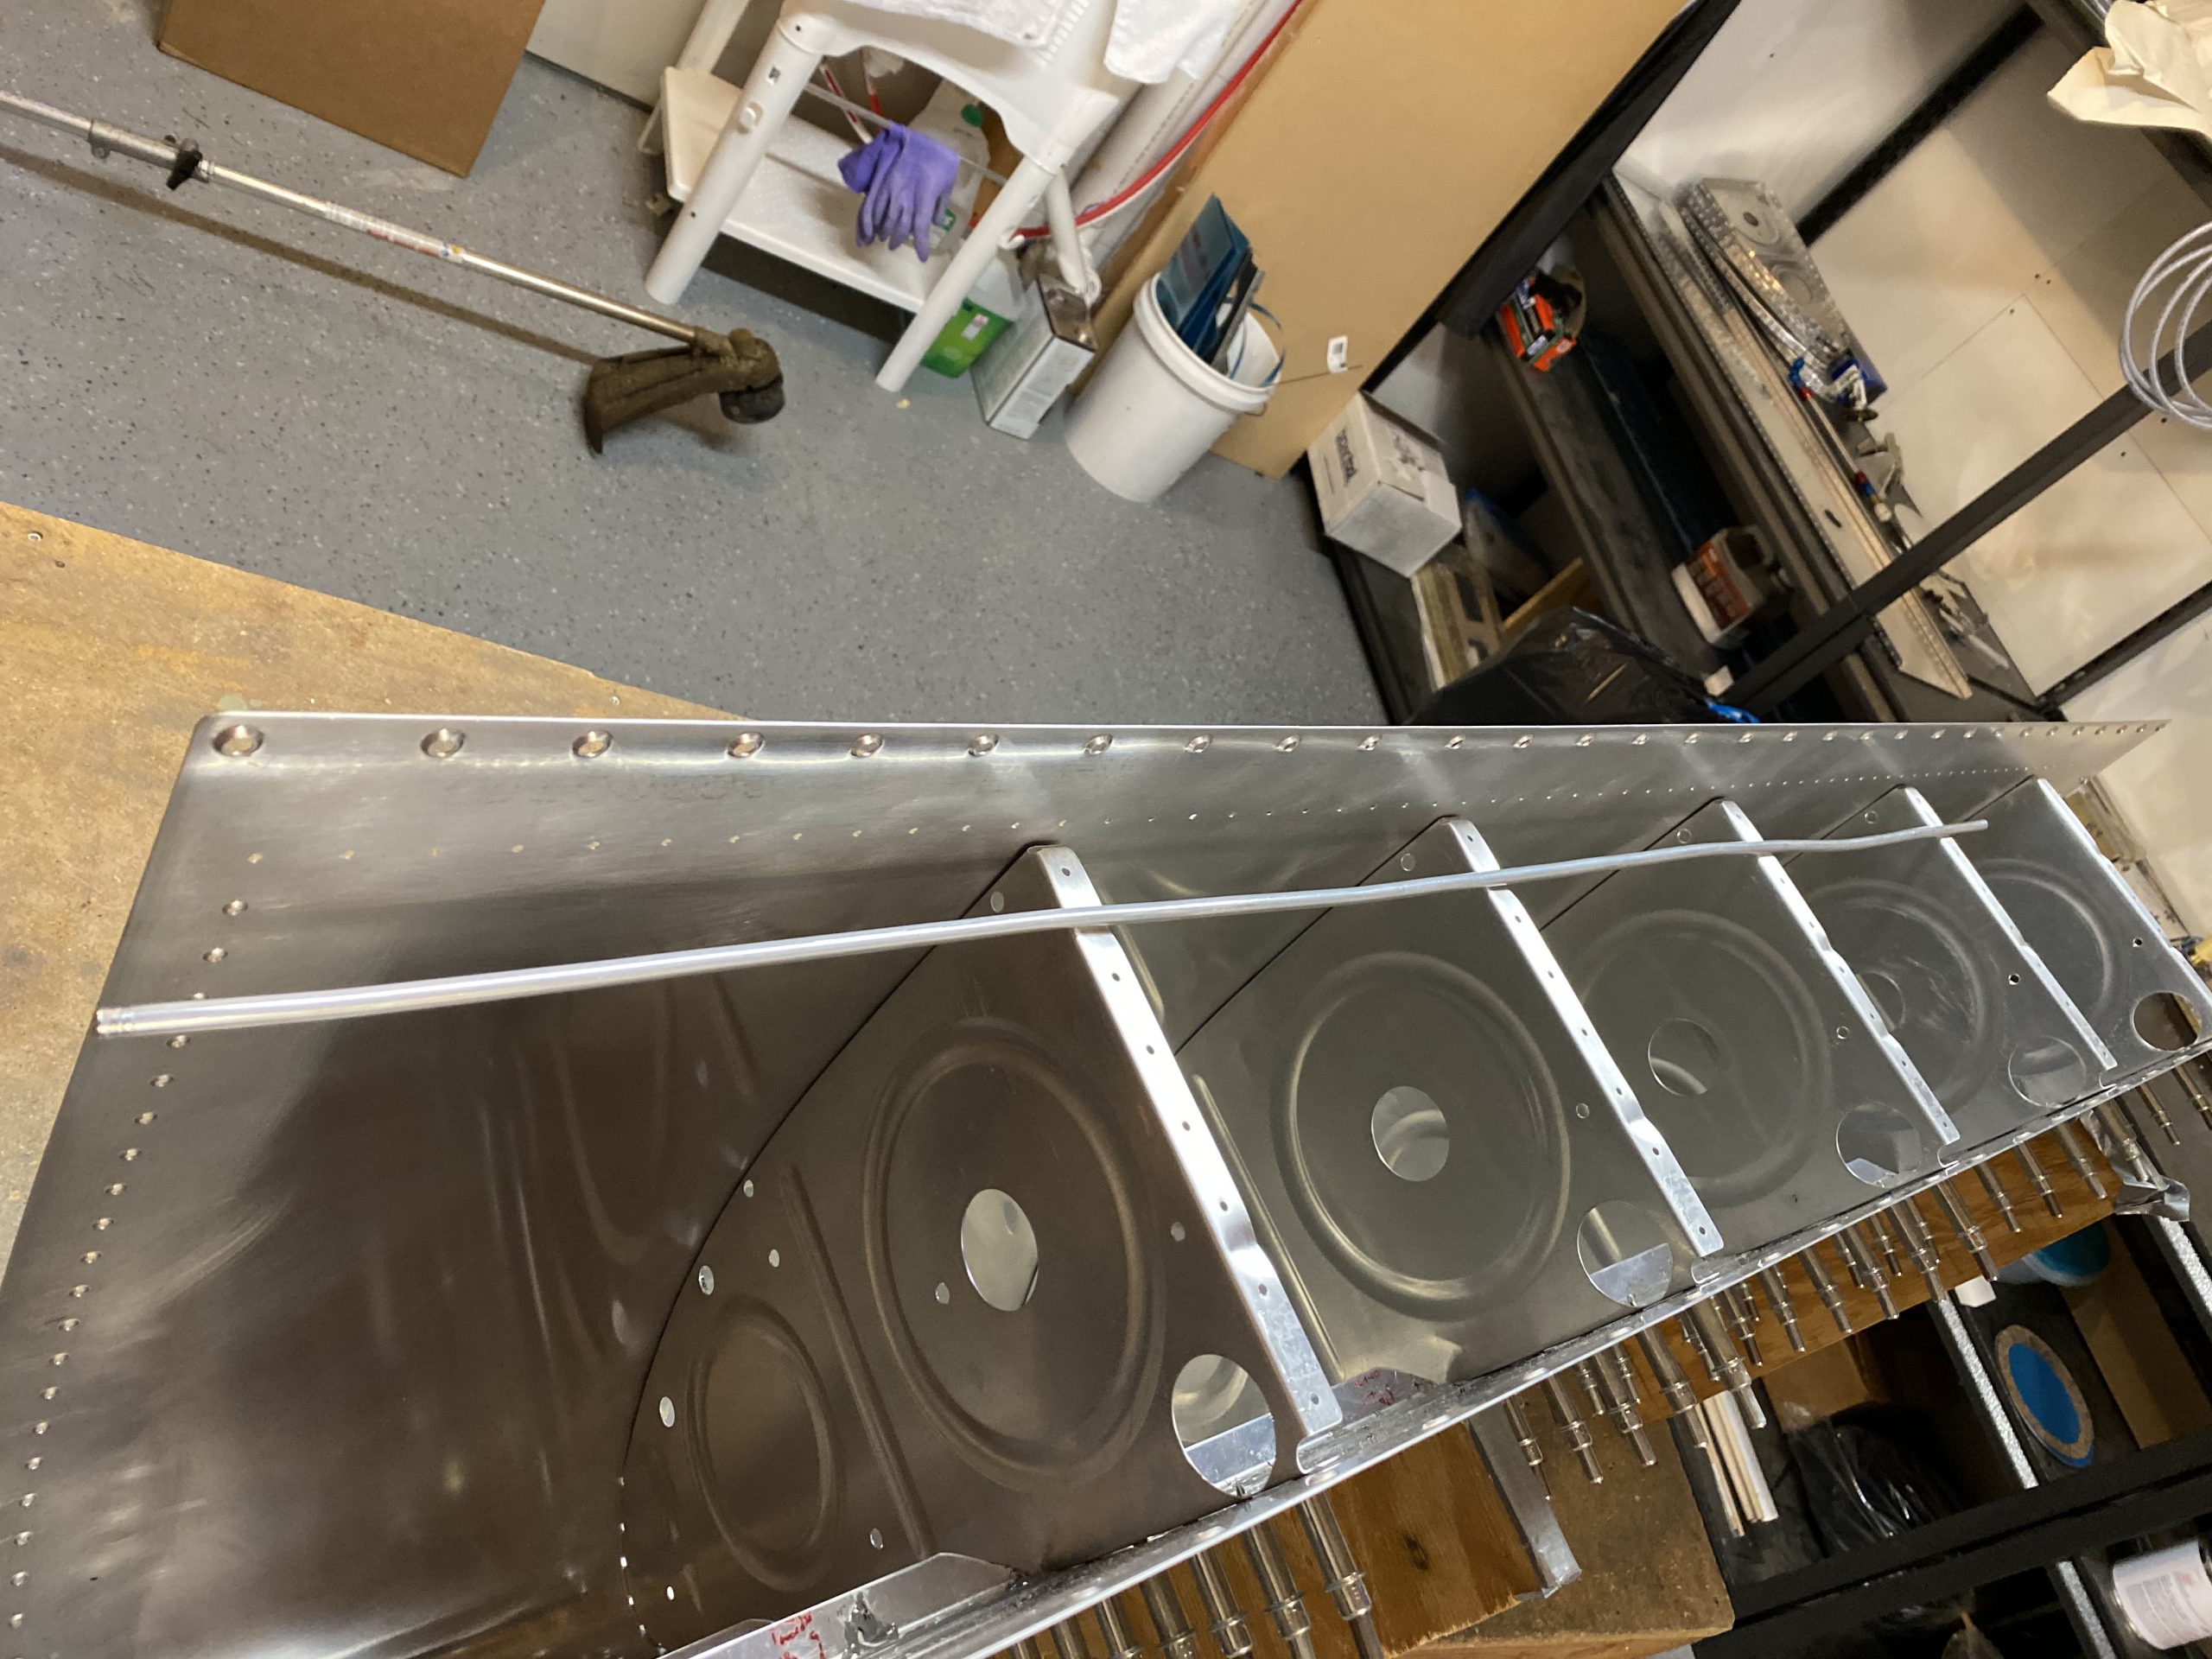
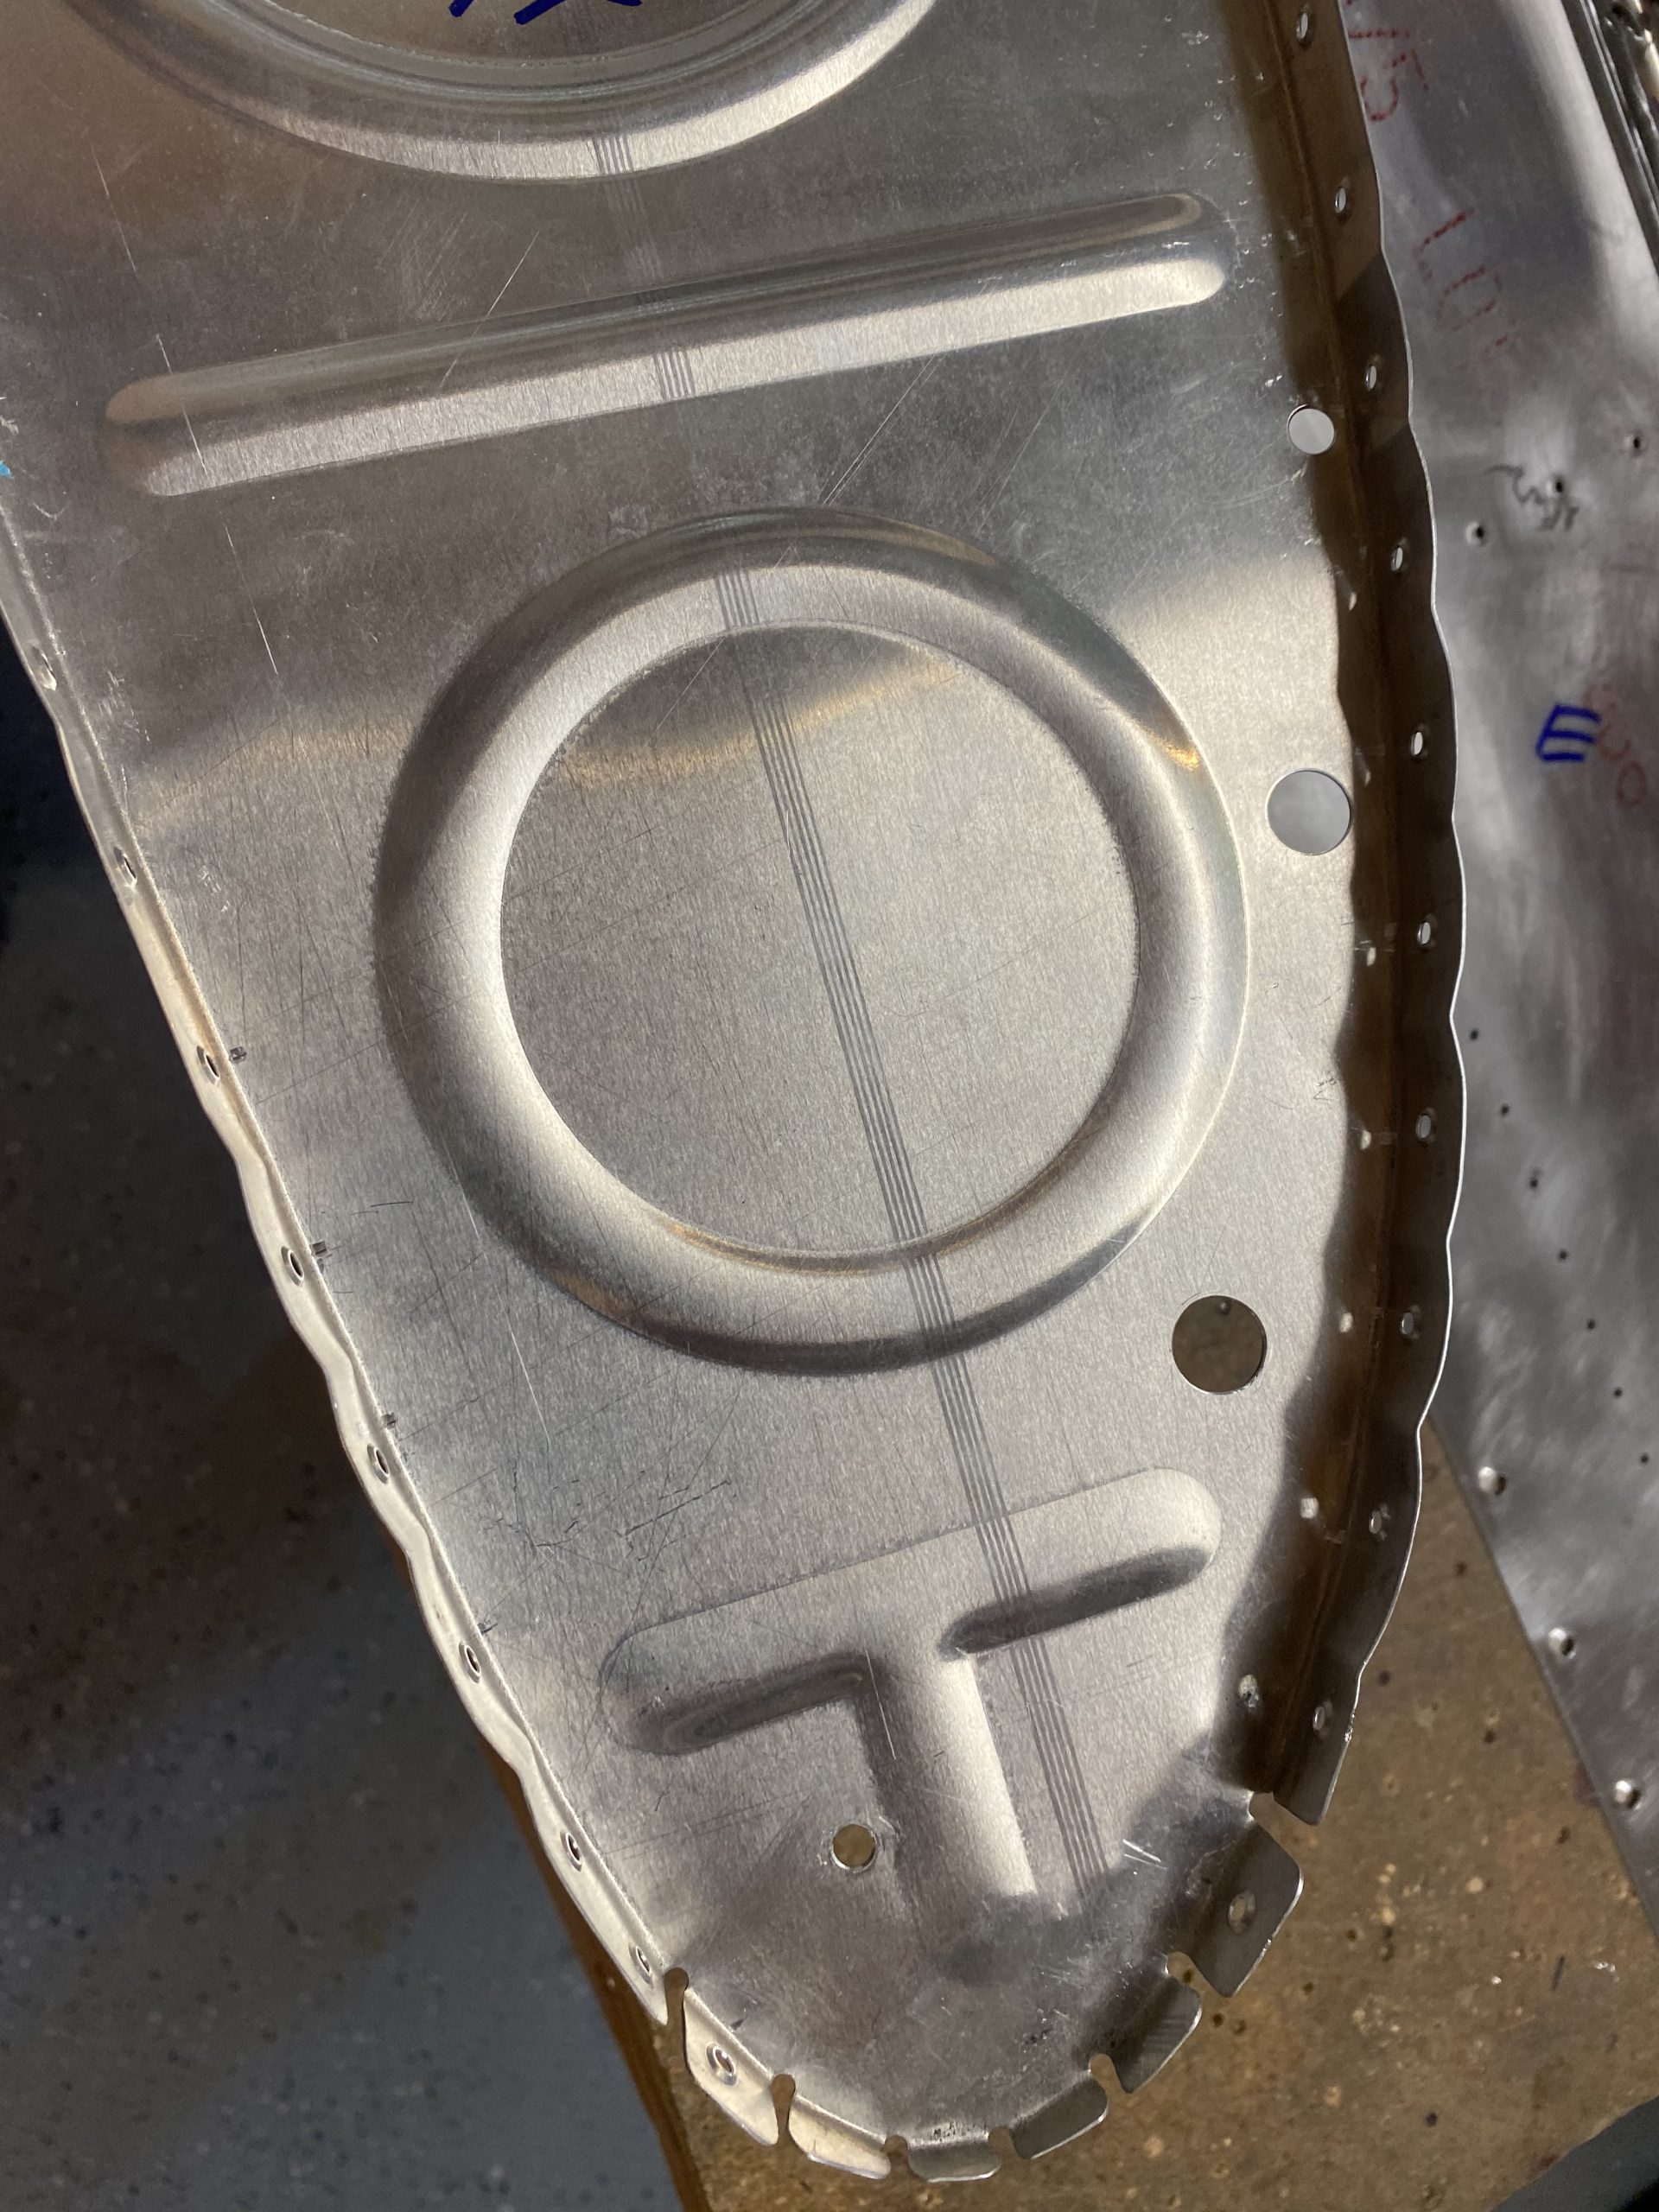
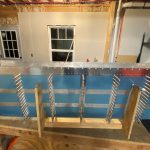
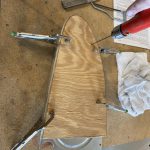
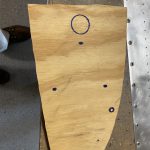
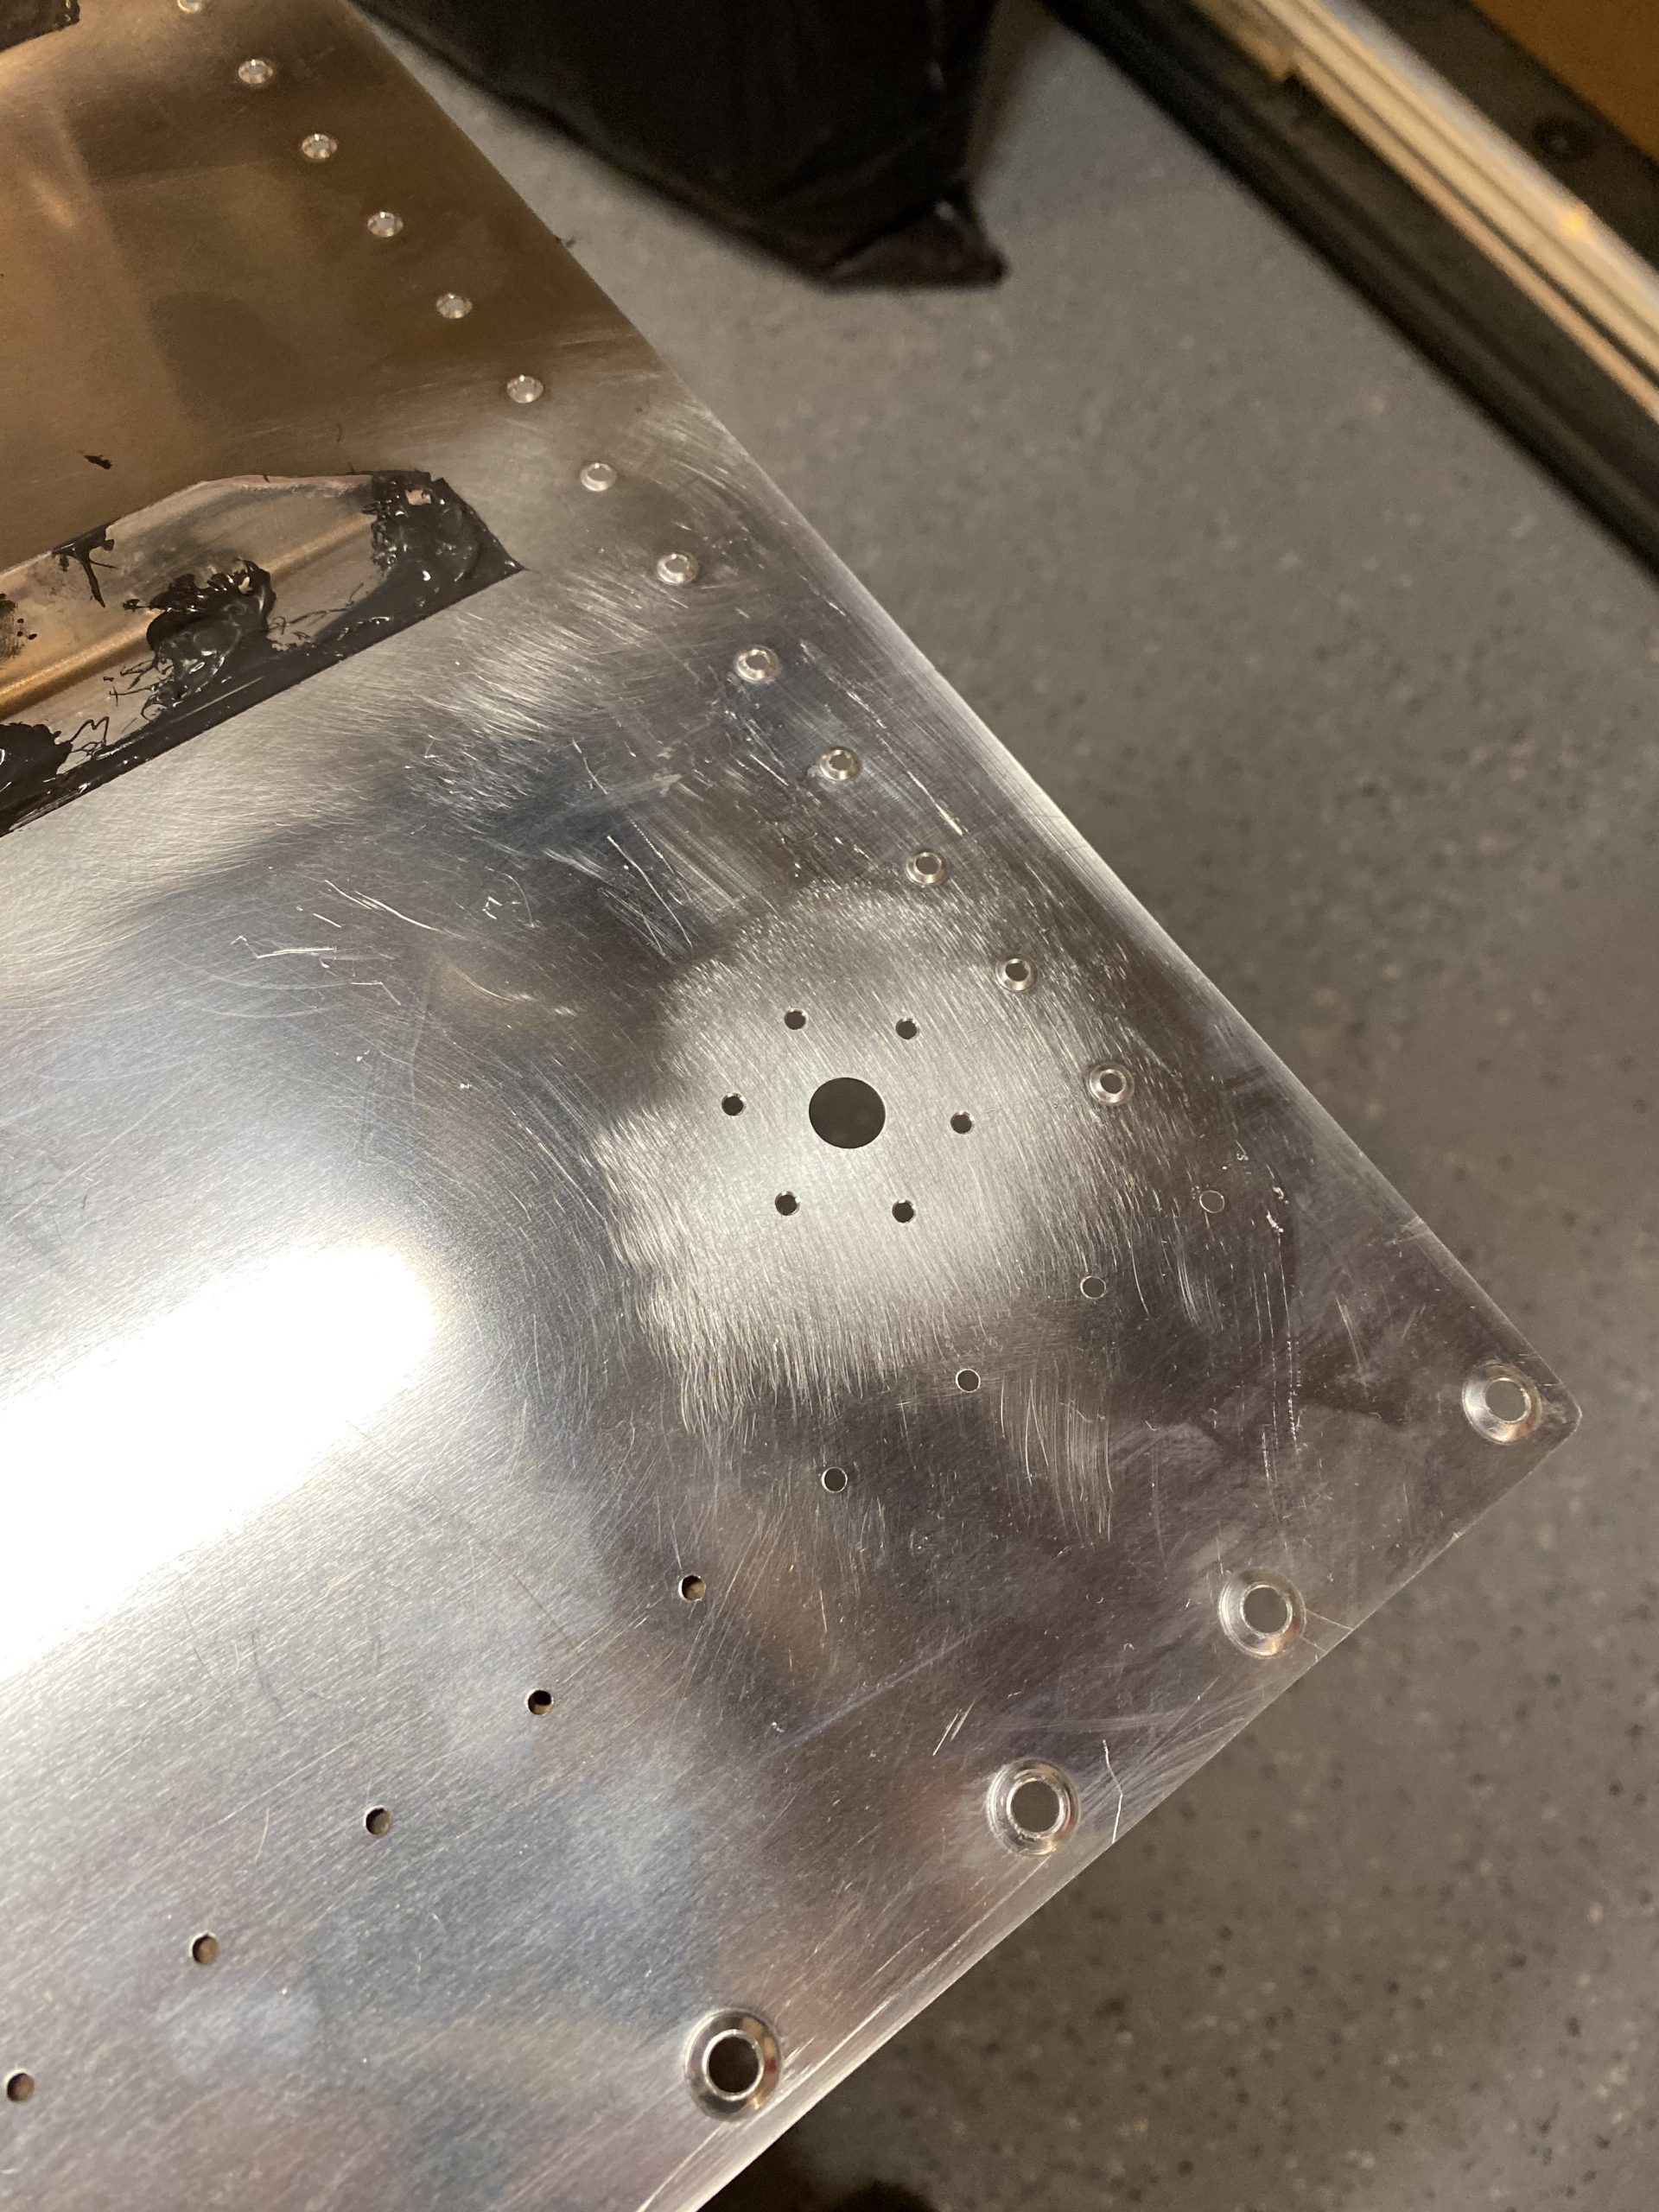
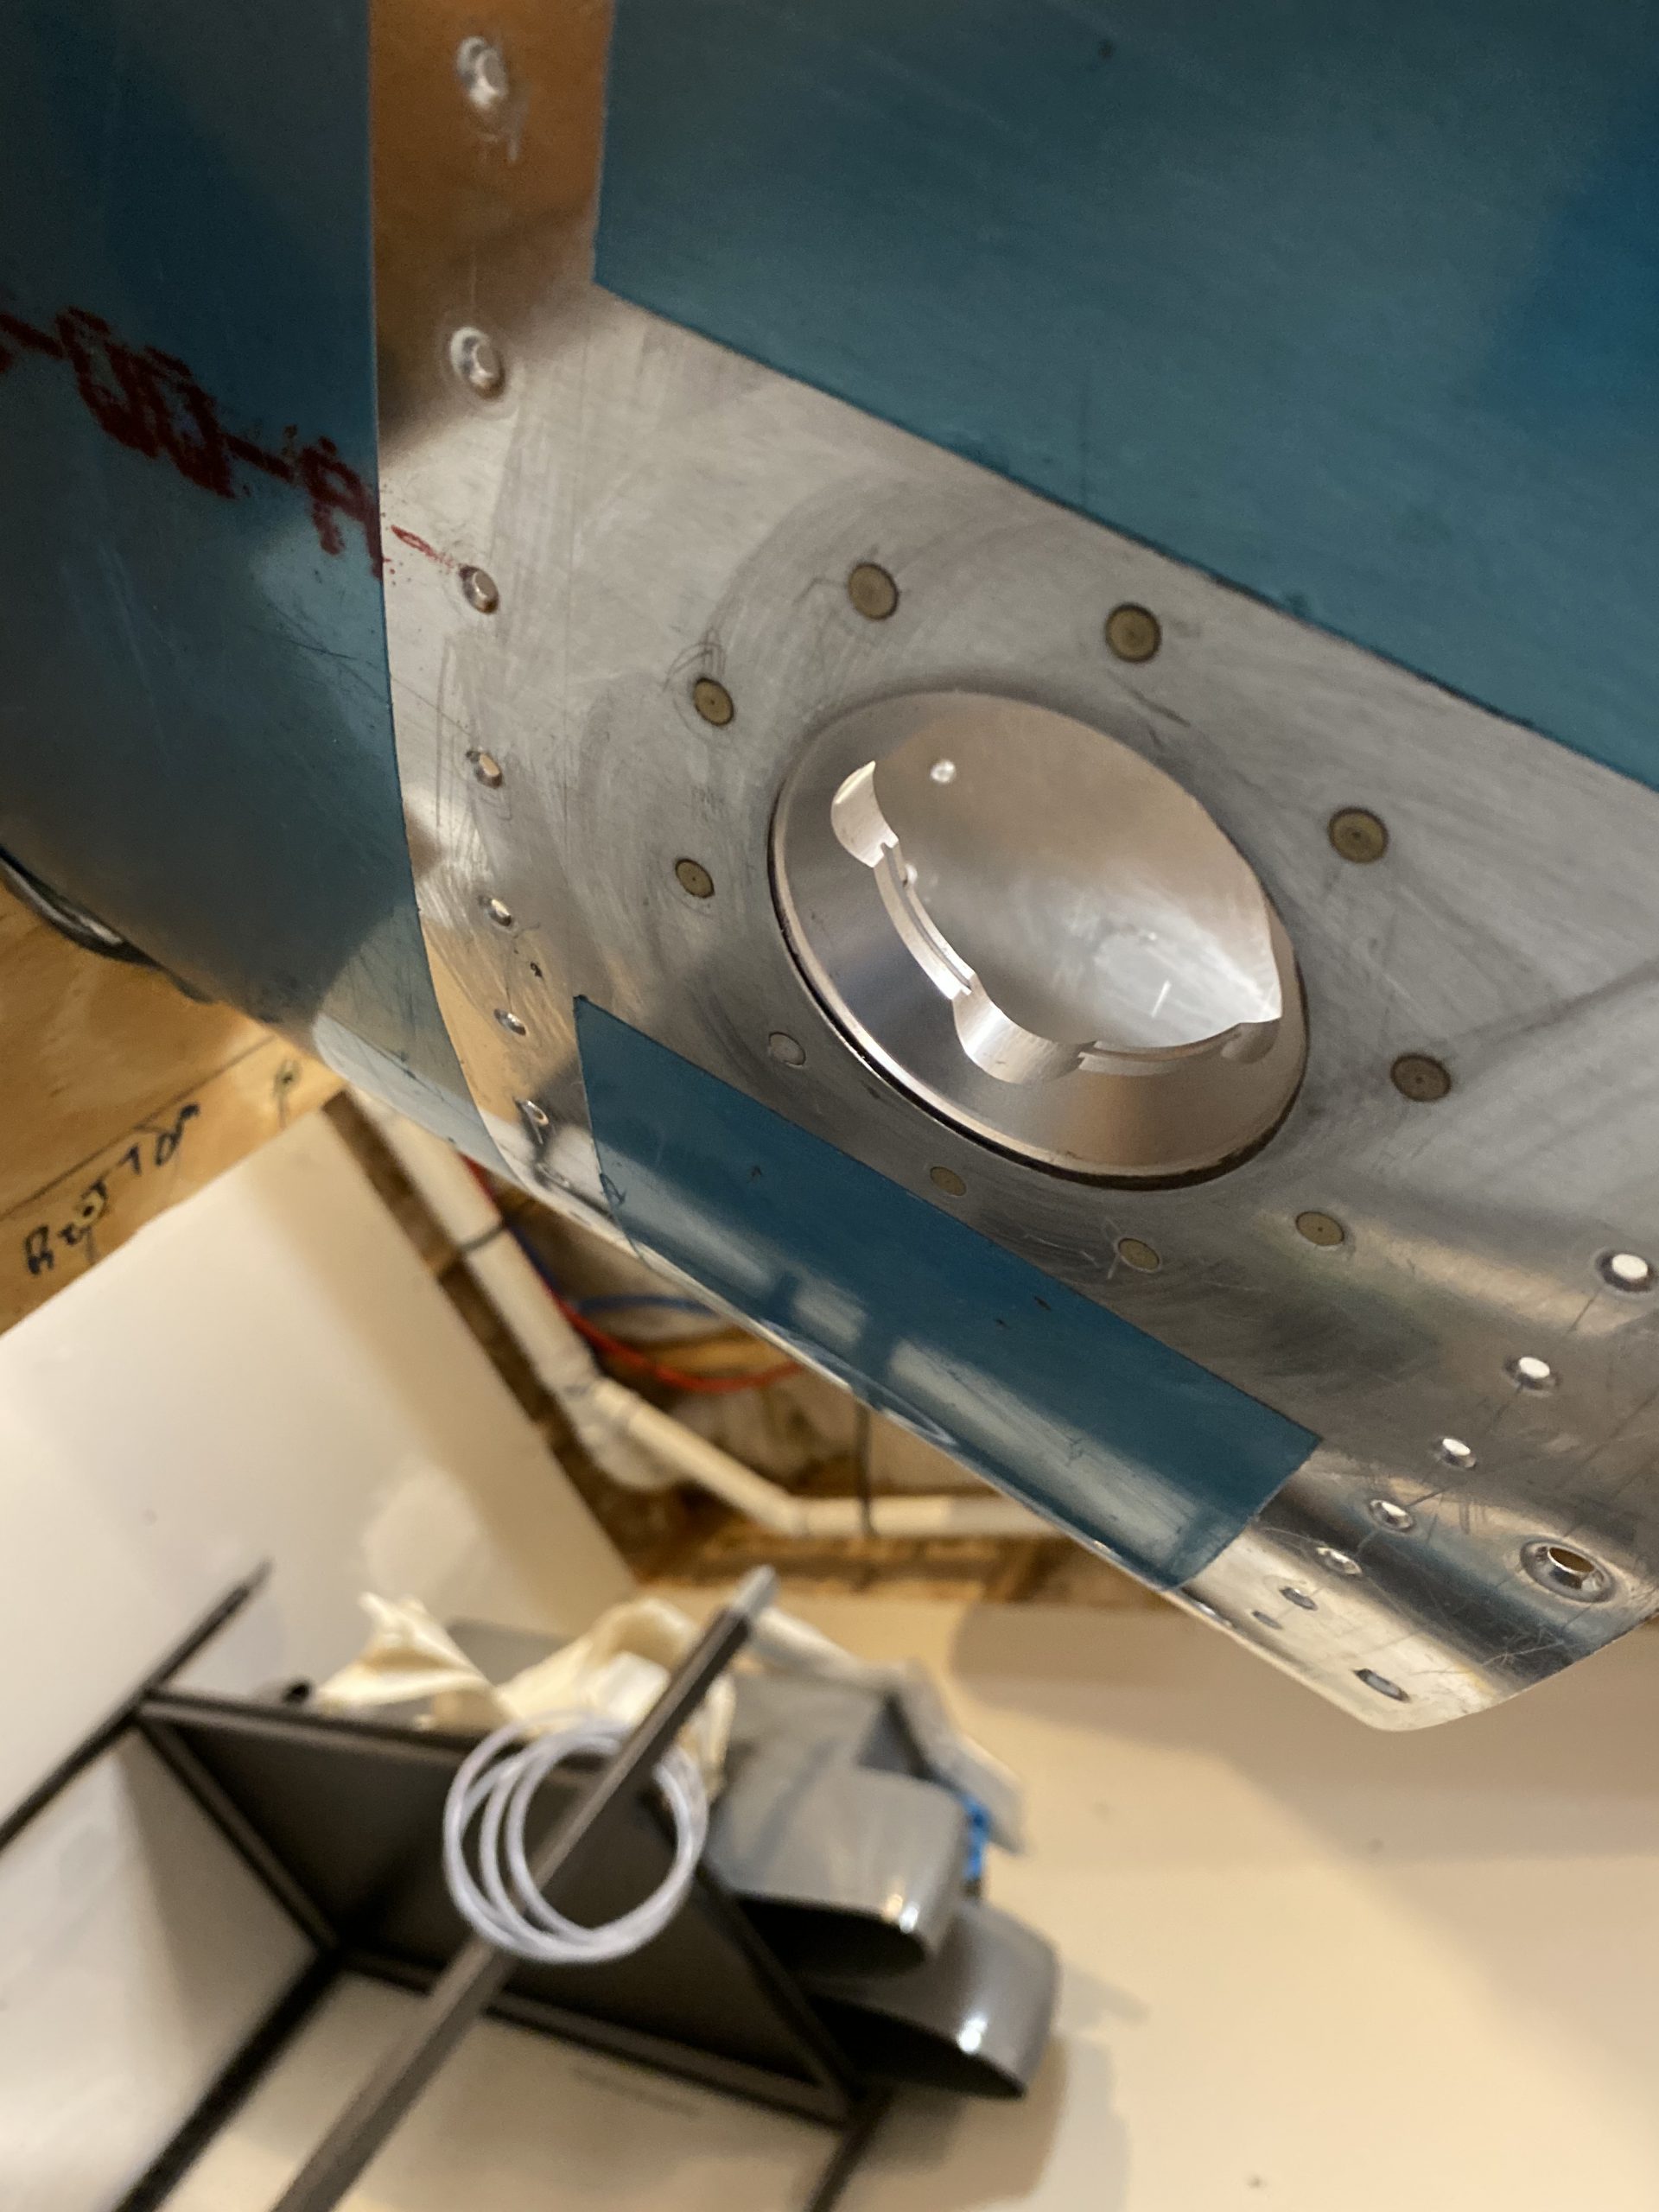
Next up was to get the tank access plate fitted, and clecoed on so that I could position the fuel pickup tube and torque it to spec.  I made sure the pickup was not resting over the tank drain hole so it doesn’t interfere with the tank sump drain.  I also made sure it was sitting as low as possible in the tank.  Then I torqued the nut down for the pickup and removed the access plate with the tube attached.   I need to fit the anti-rotation bracket and get it riveted.

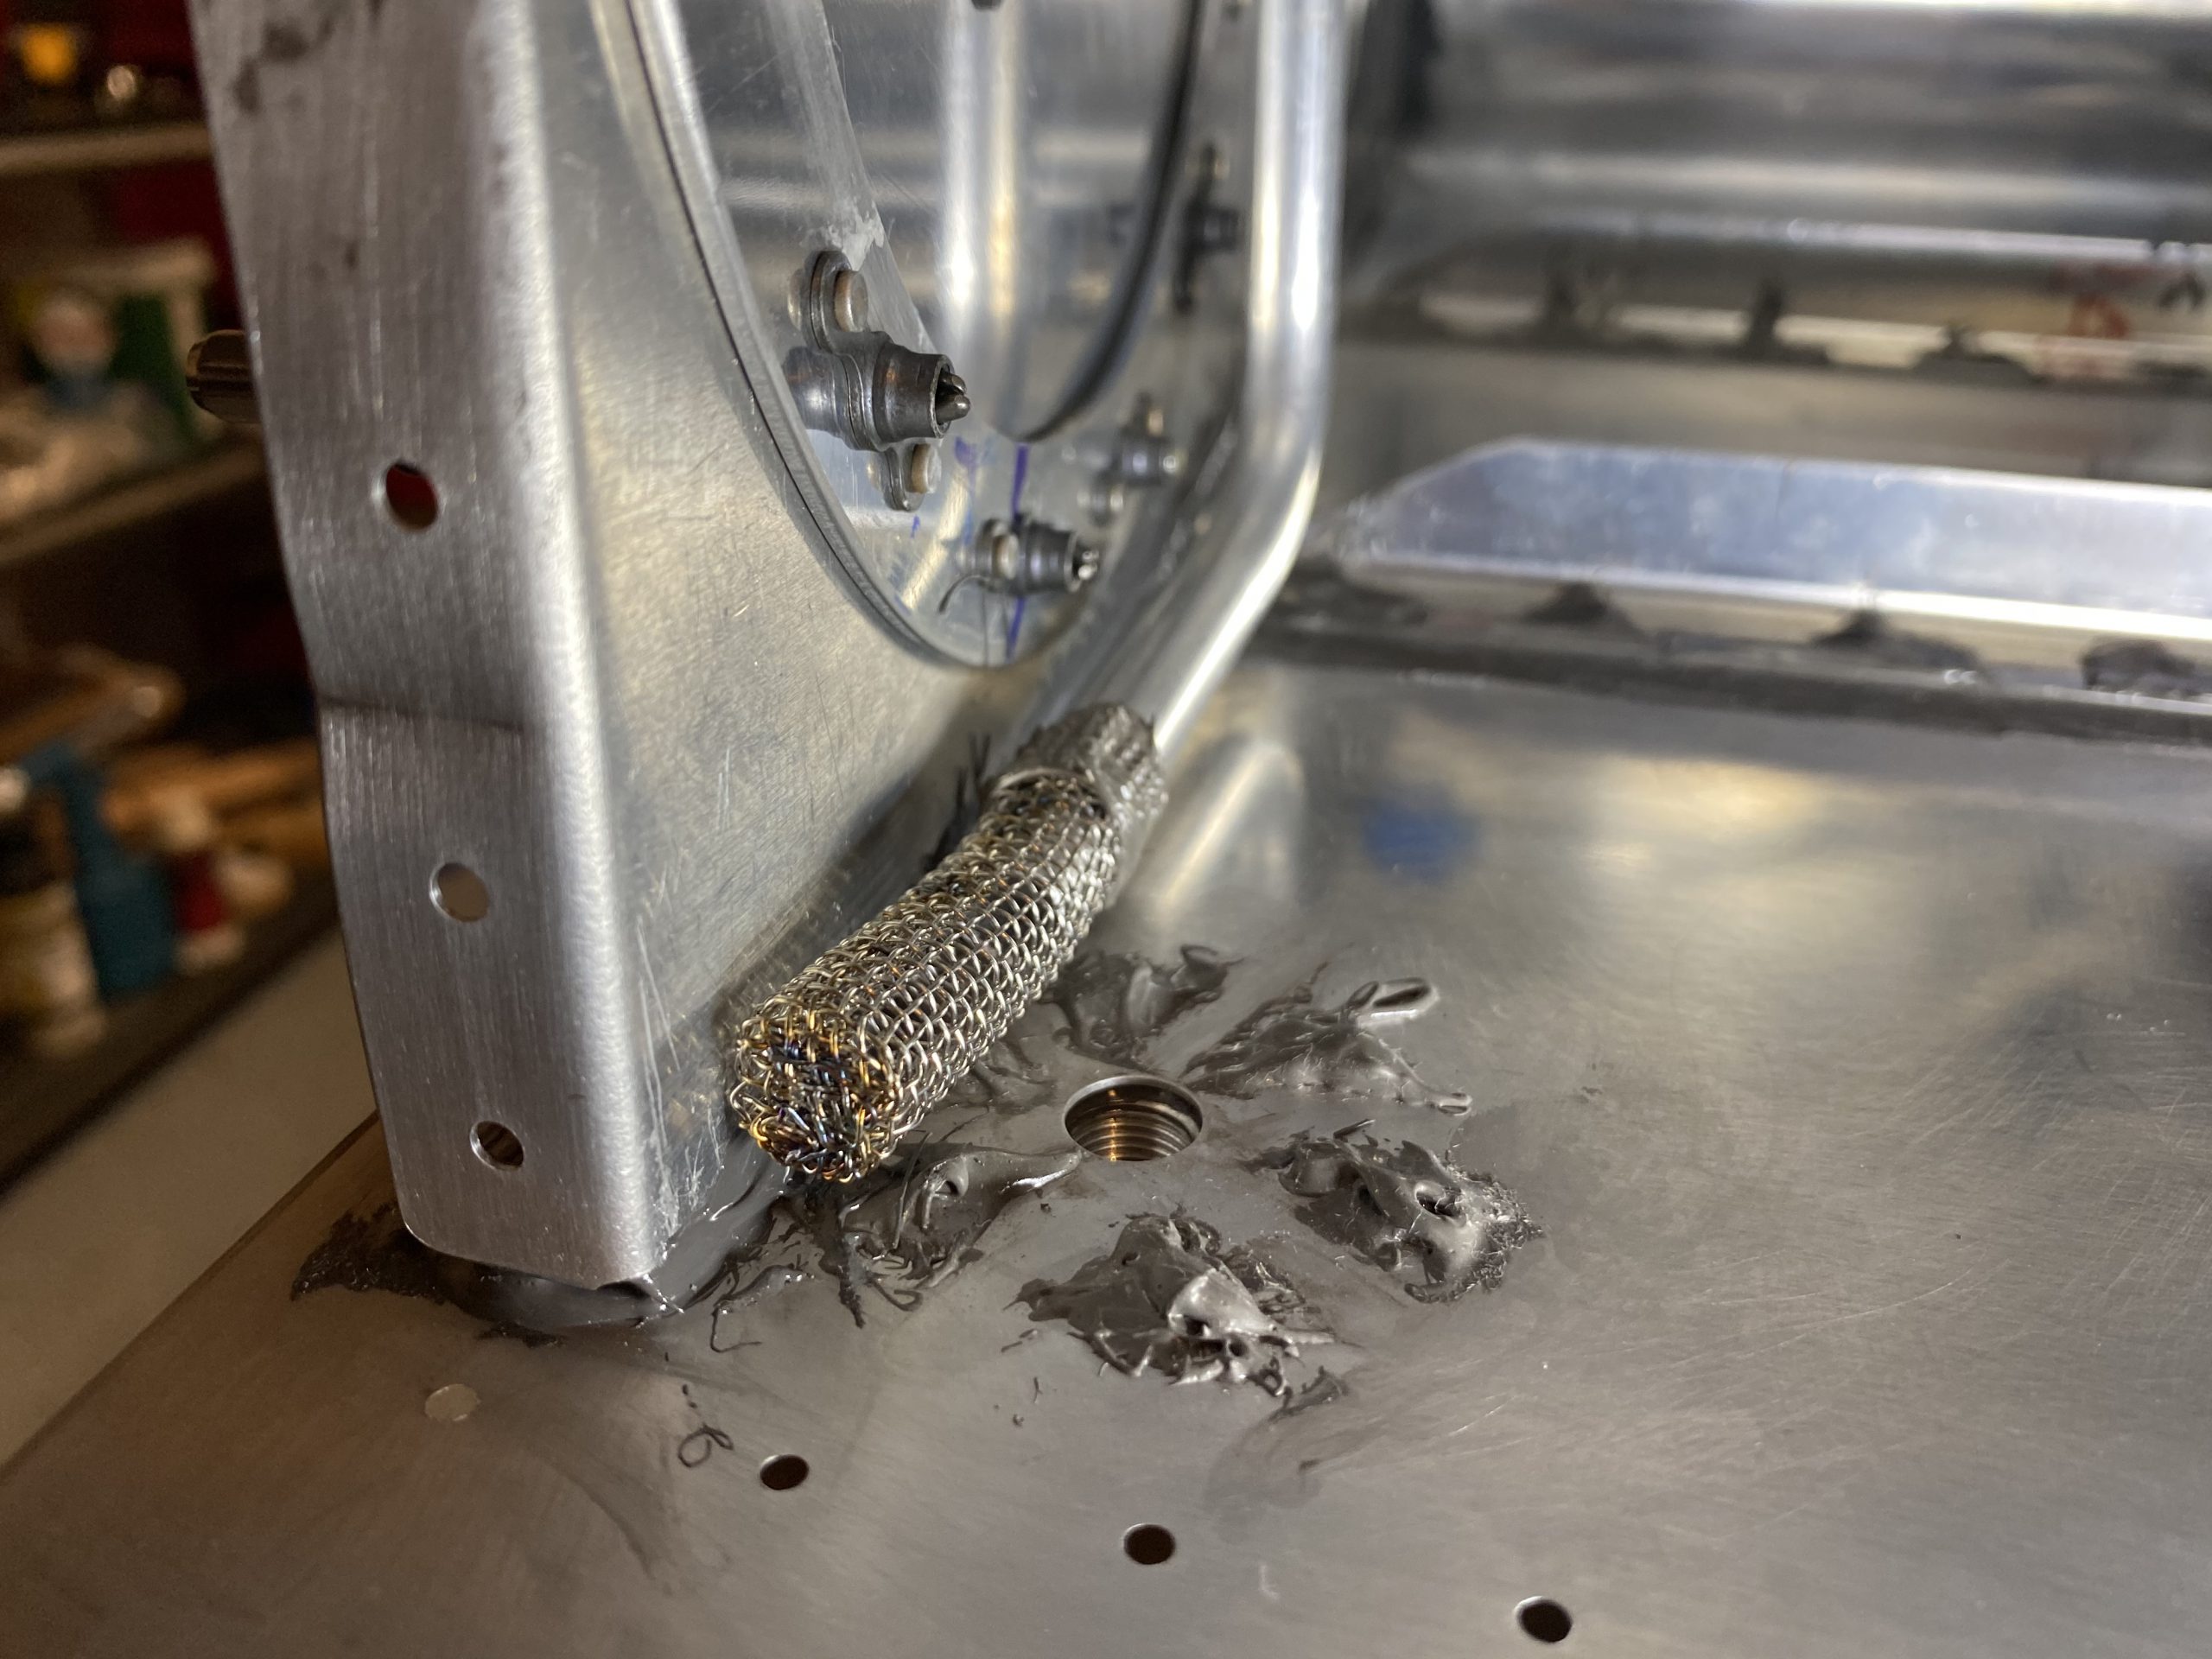
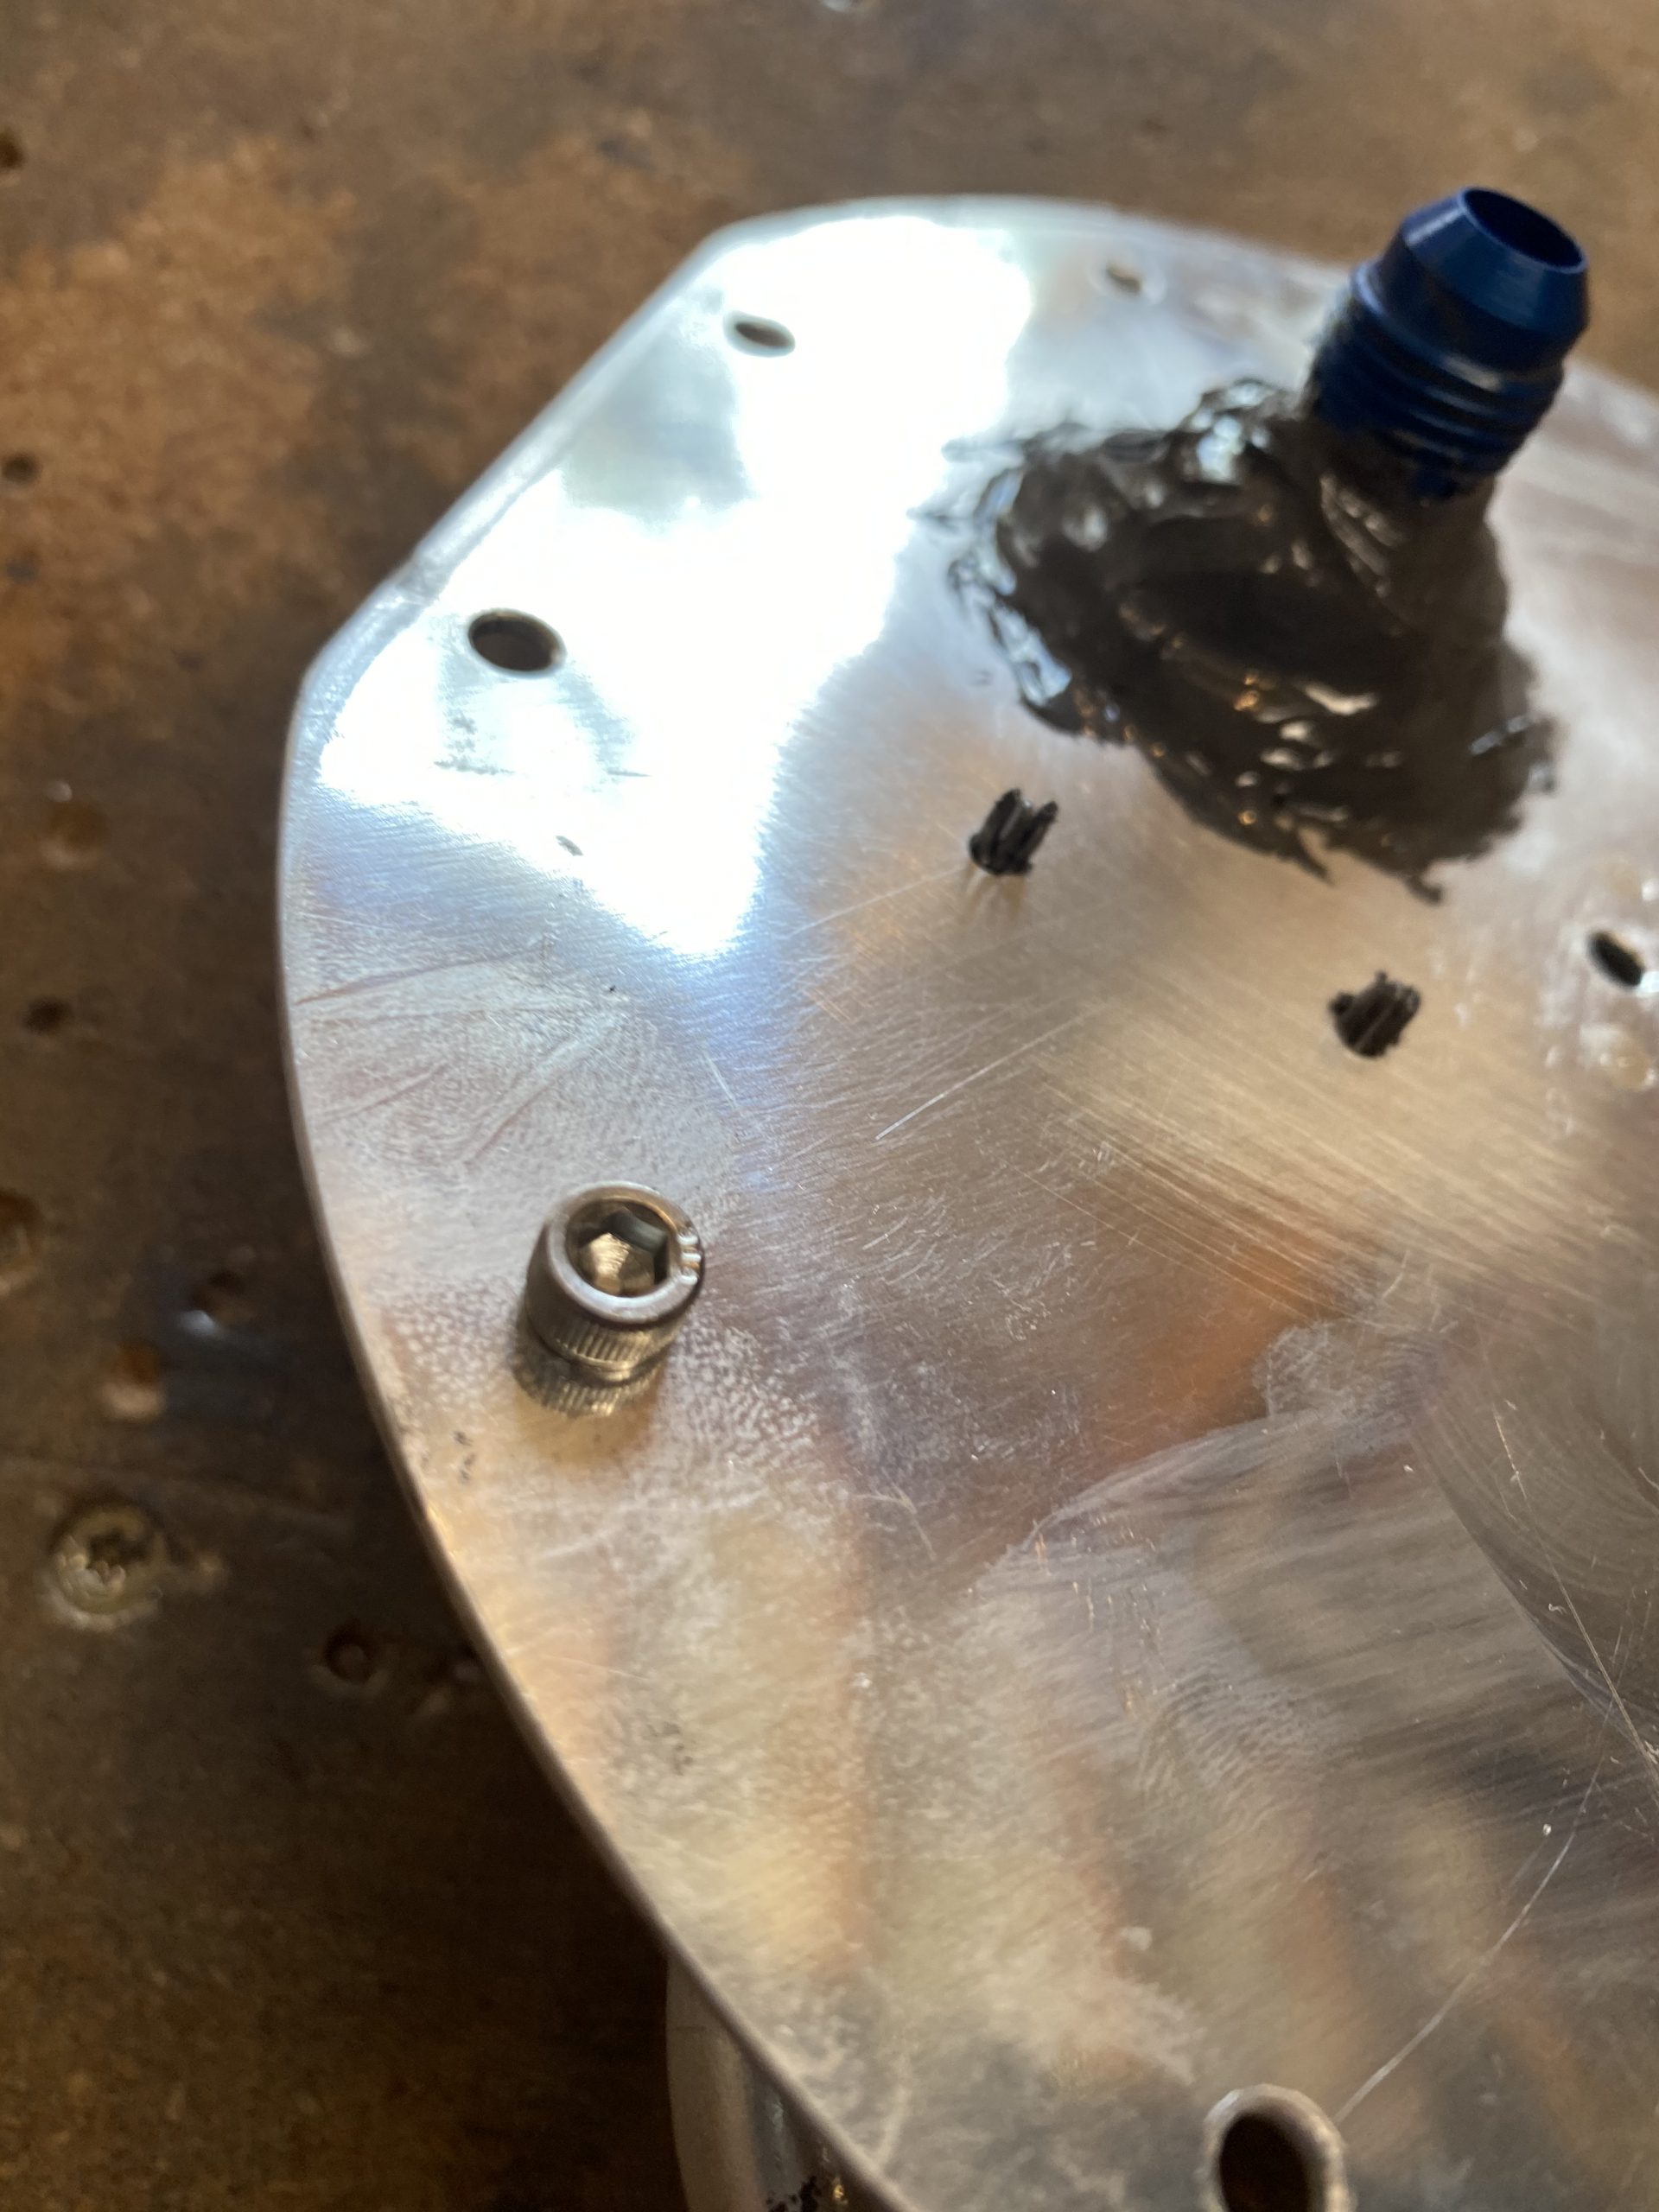
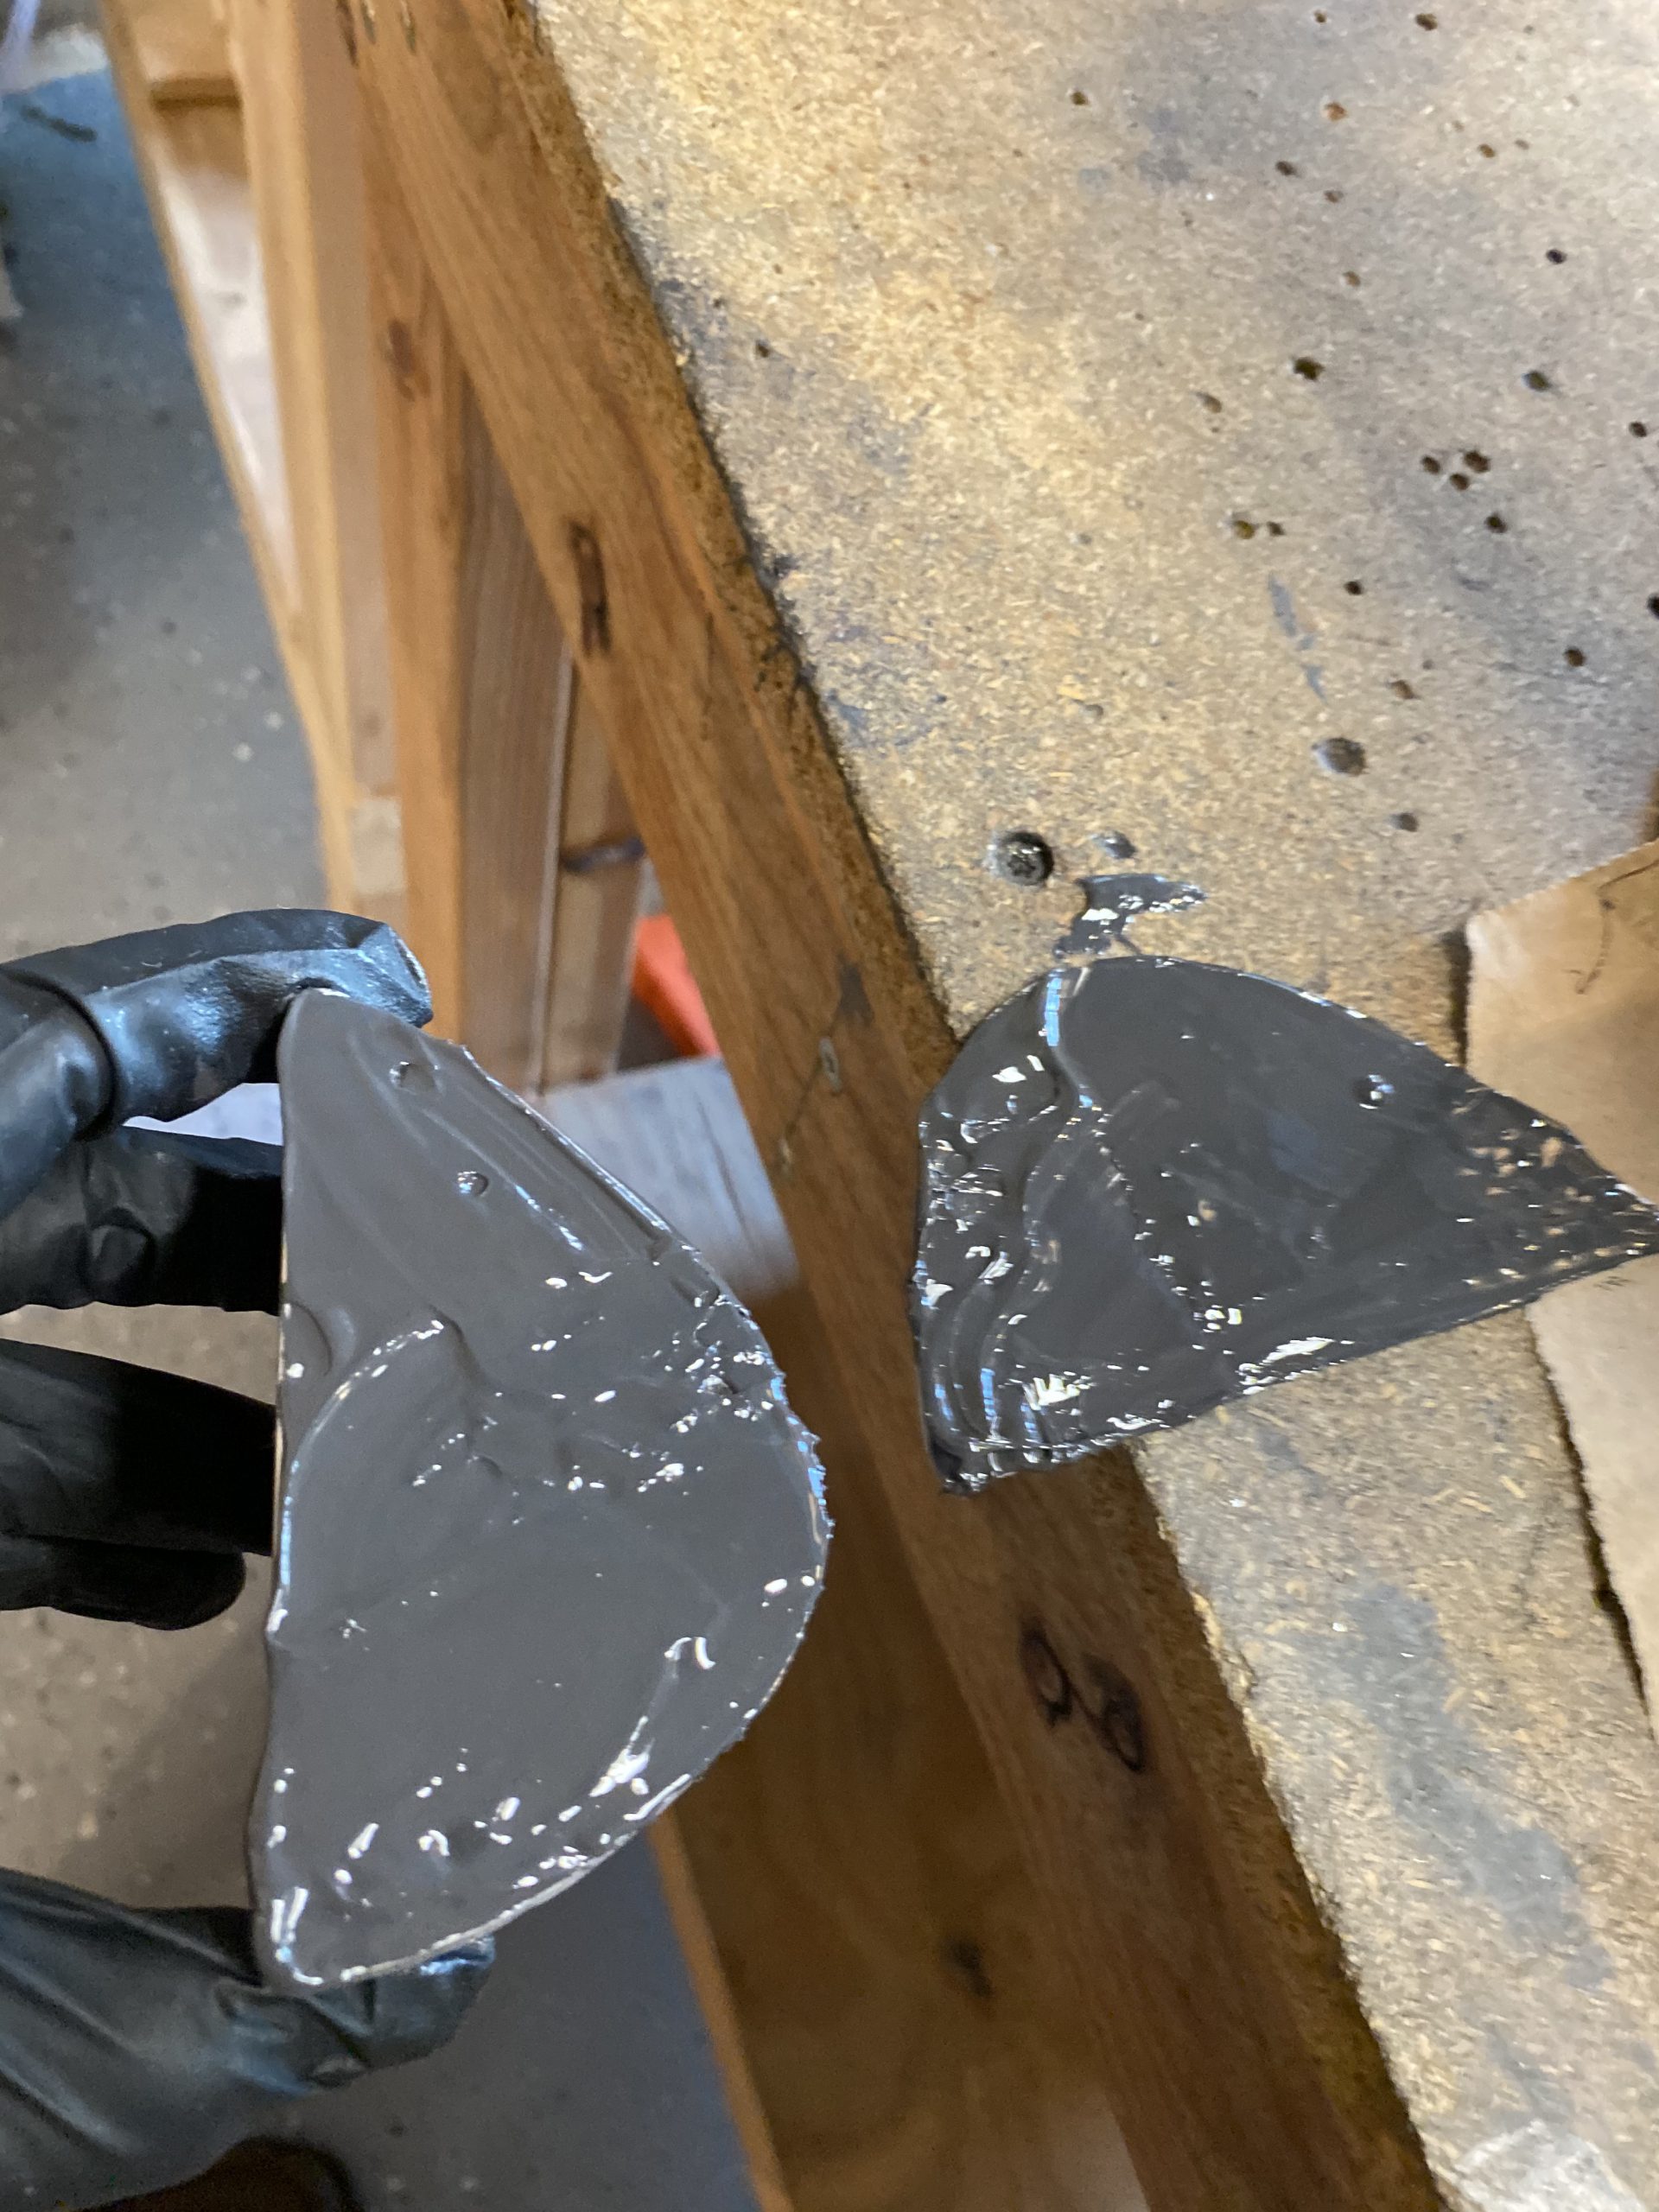
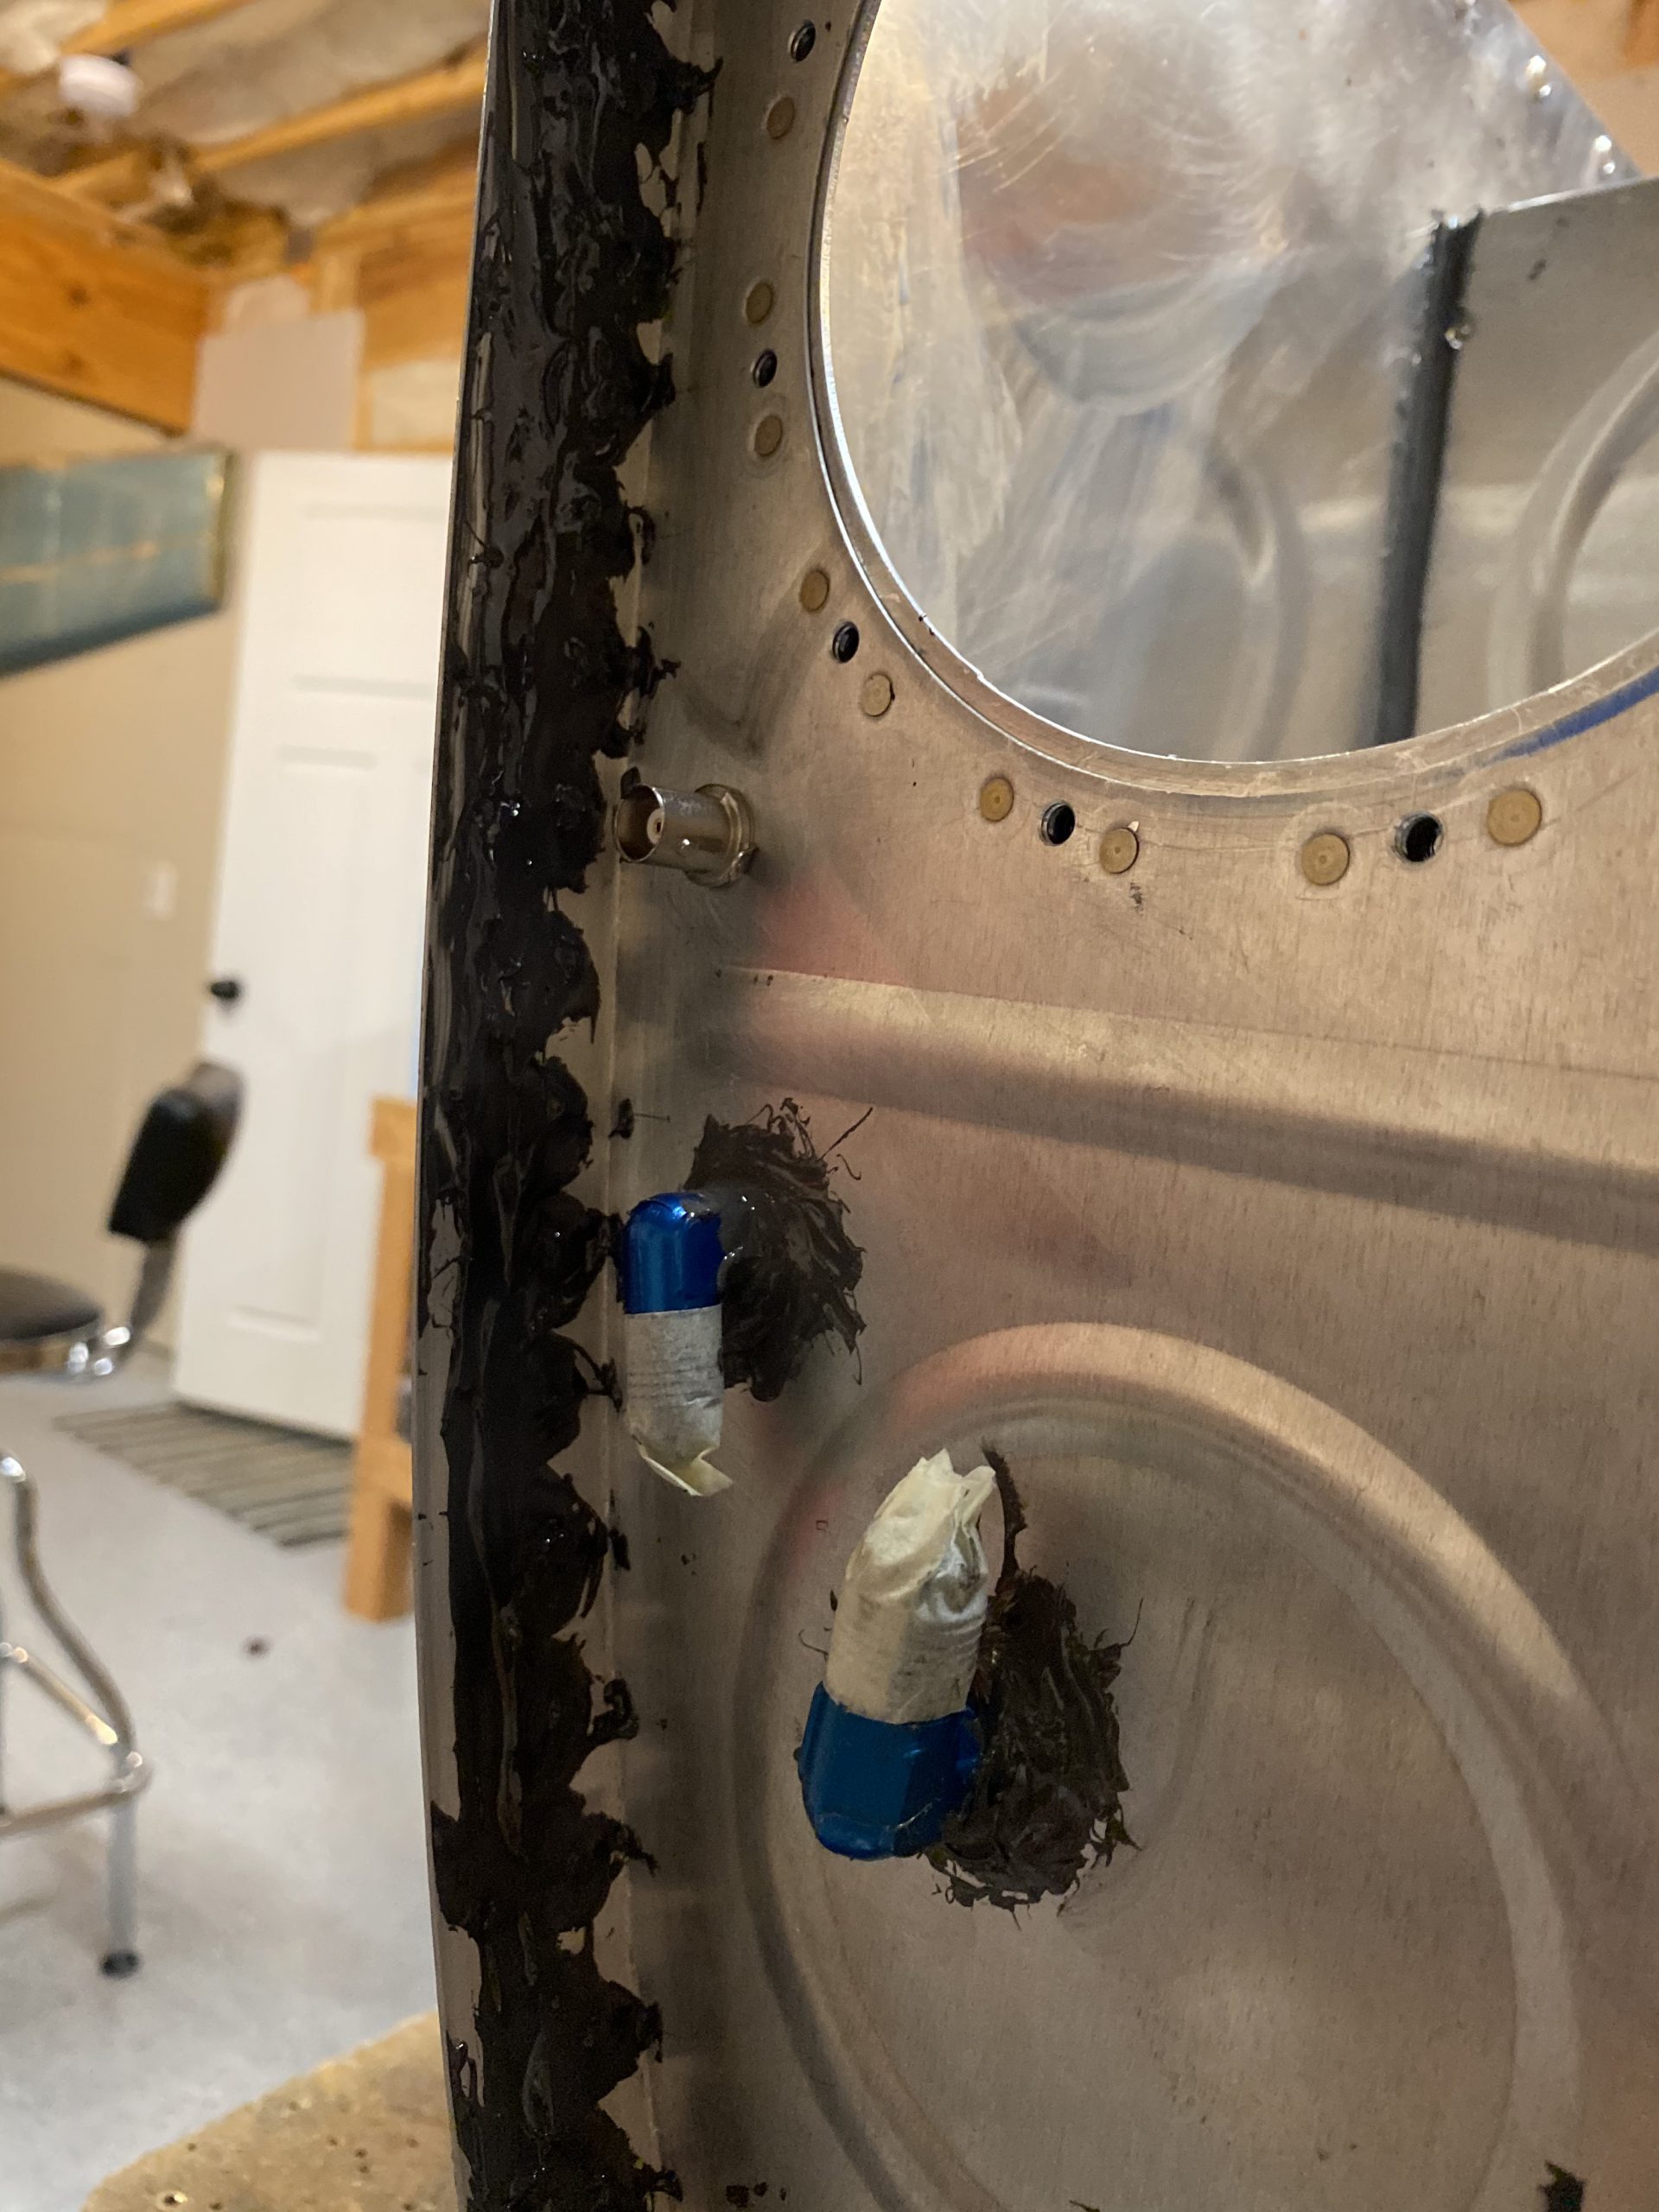
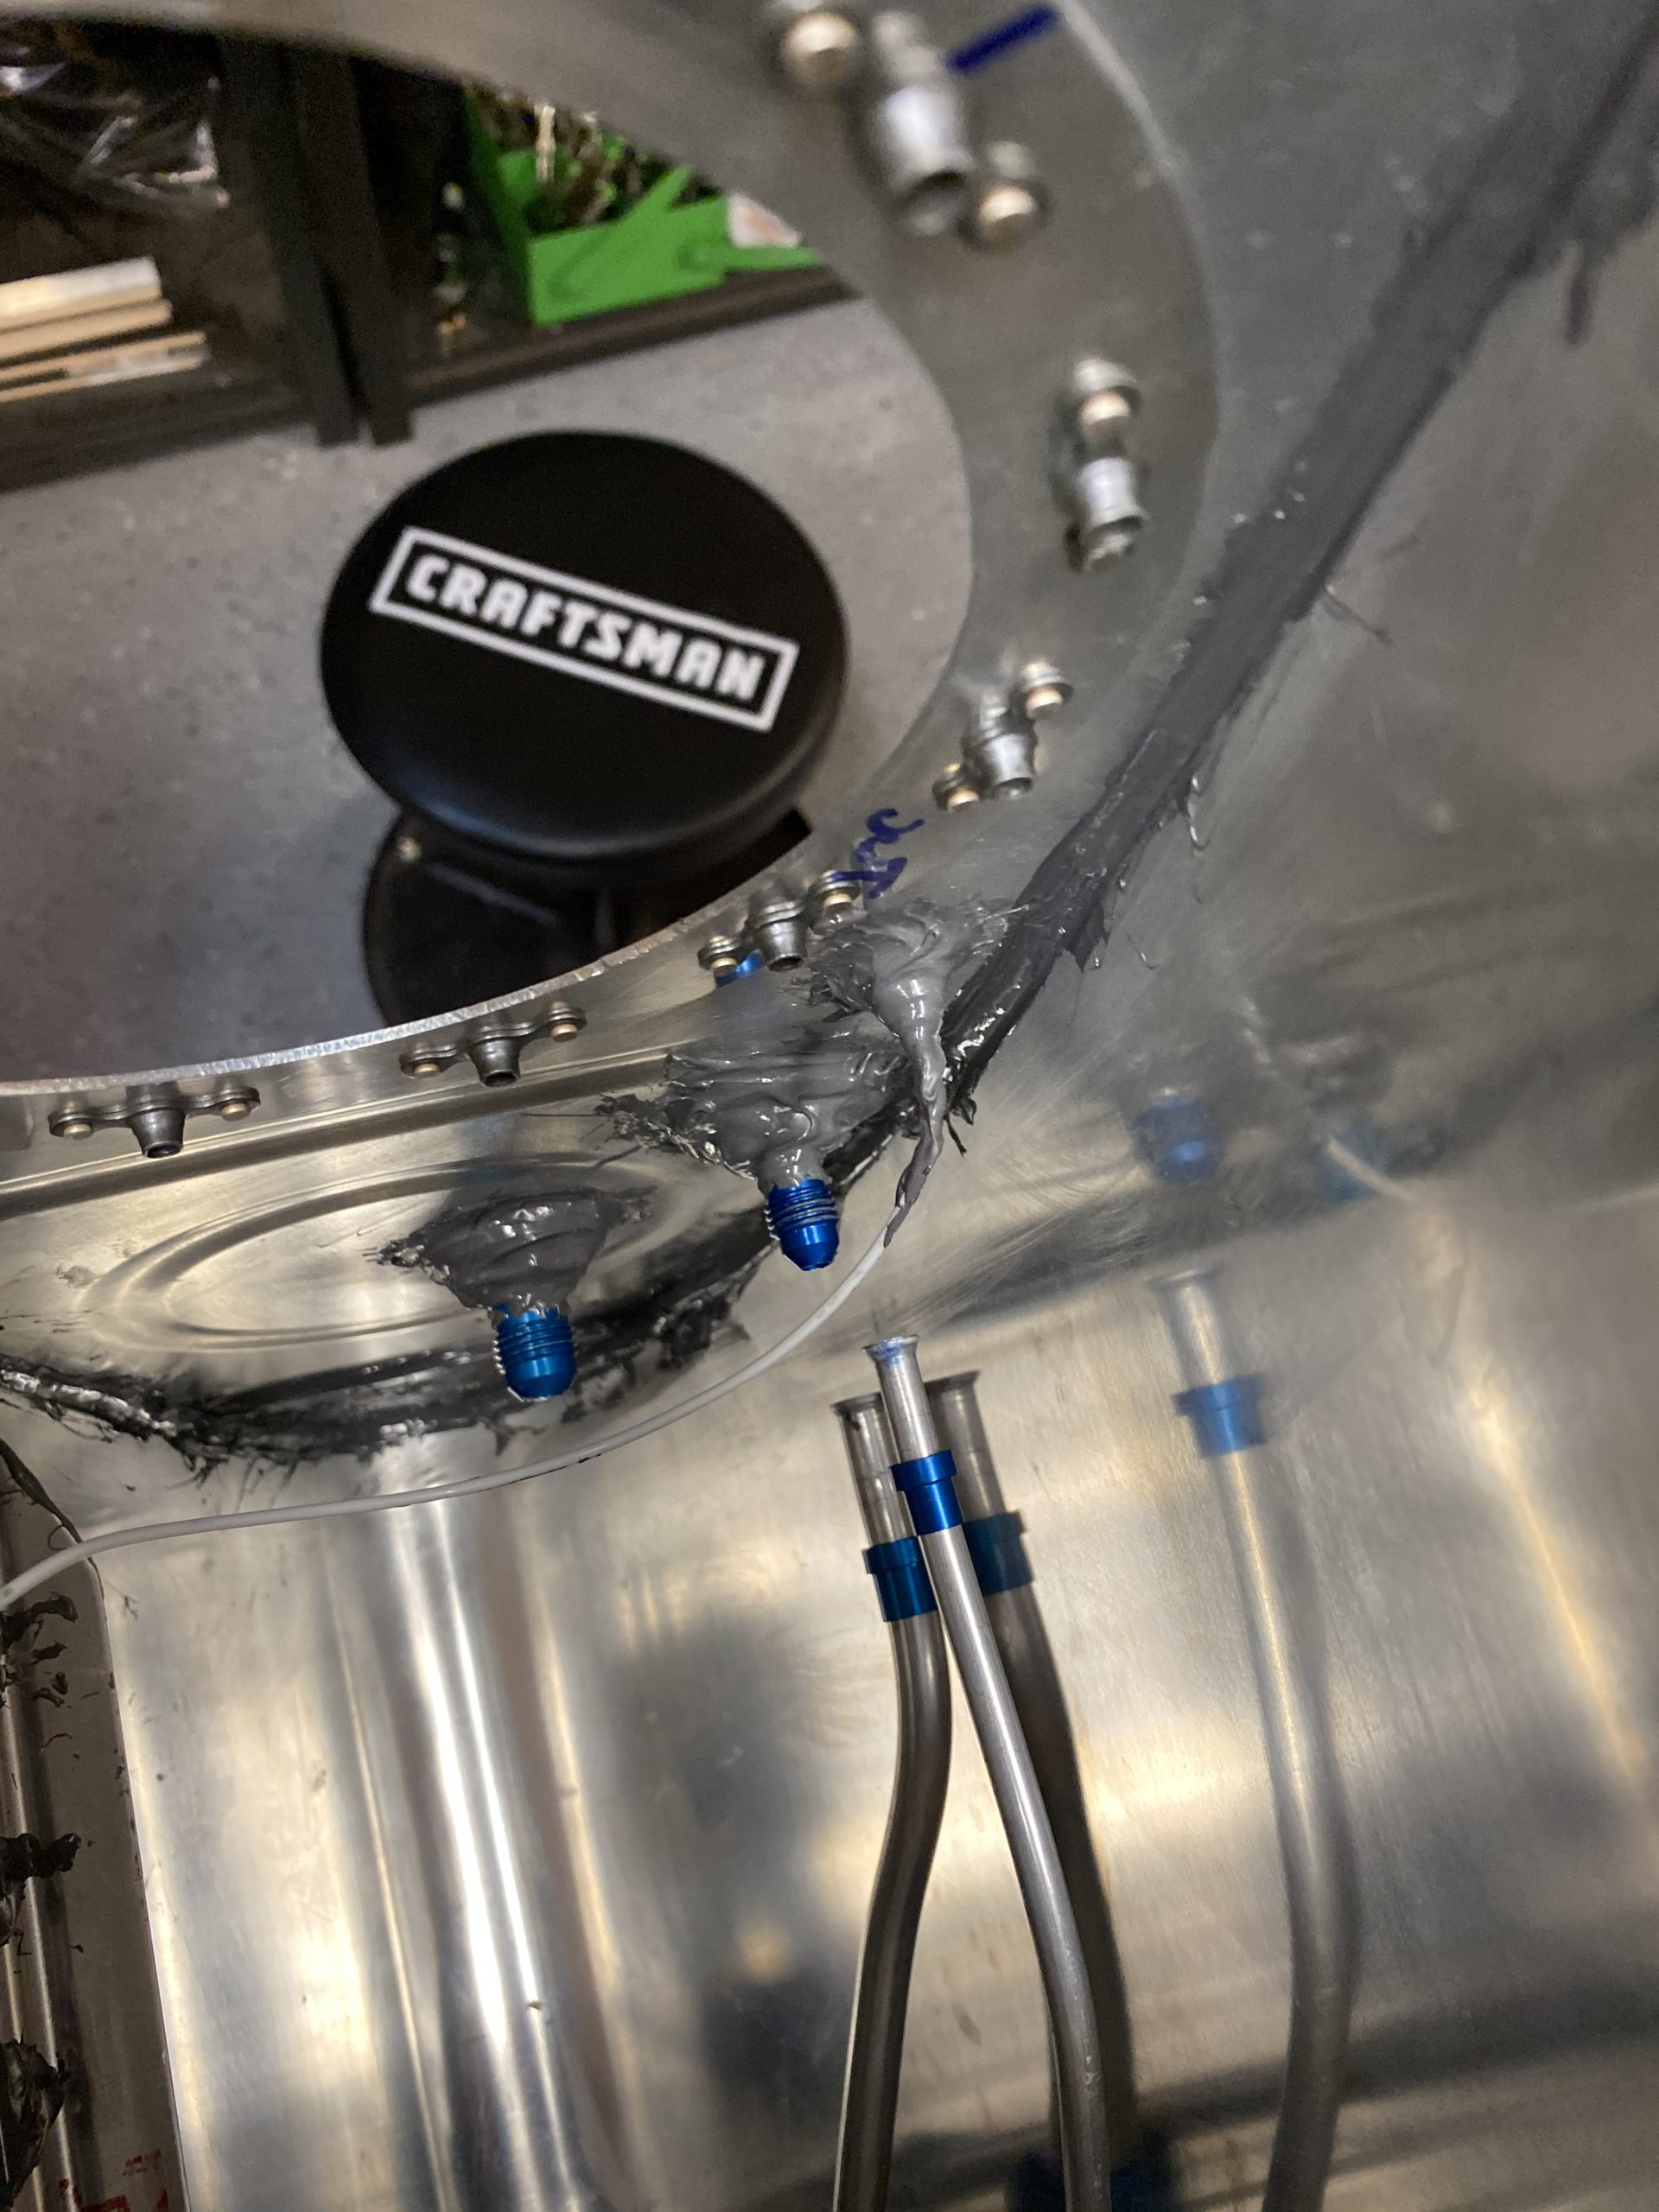
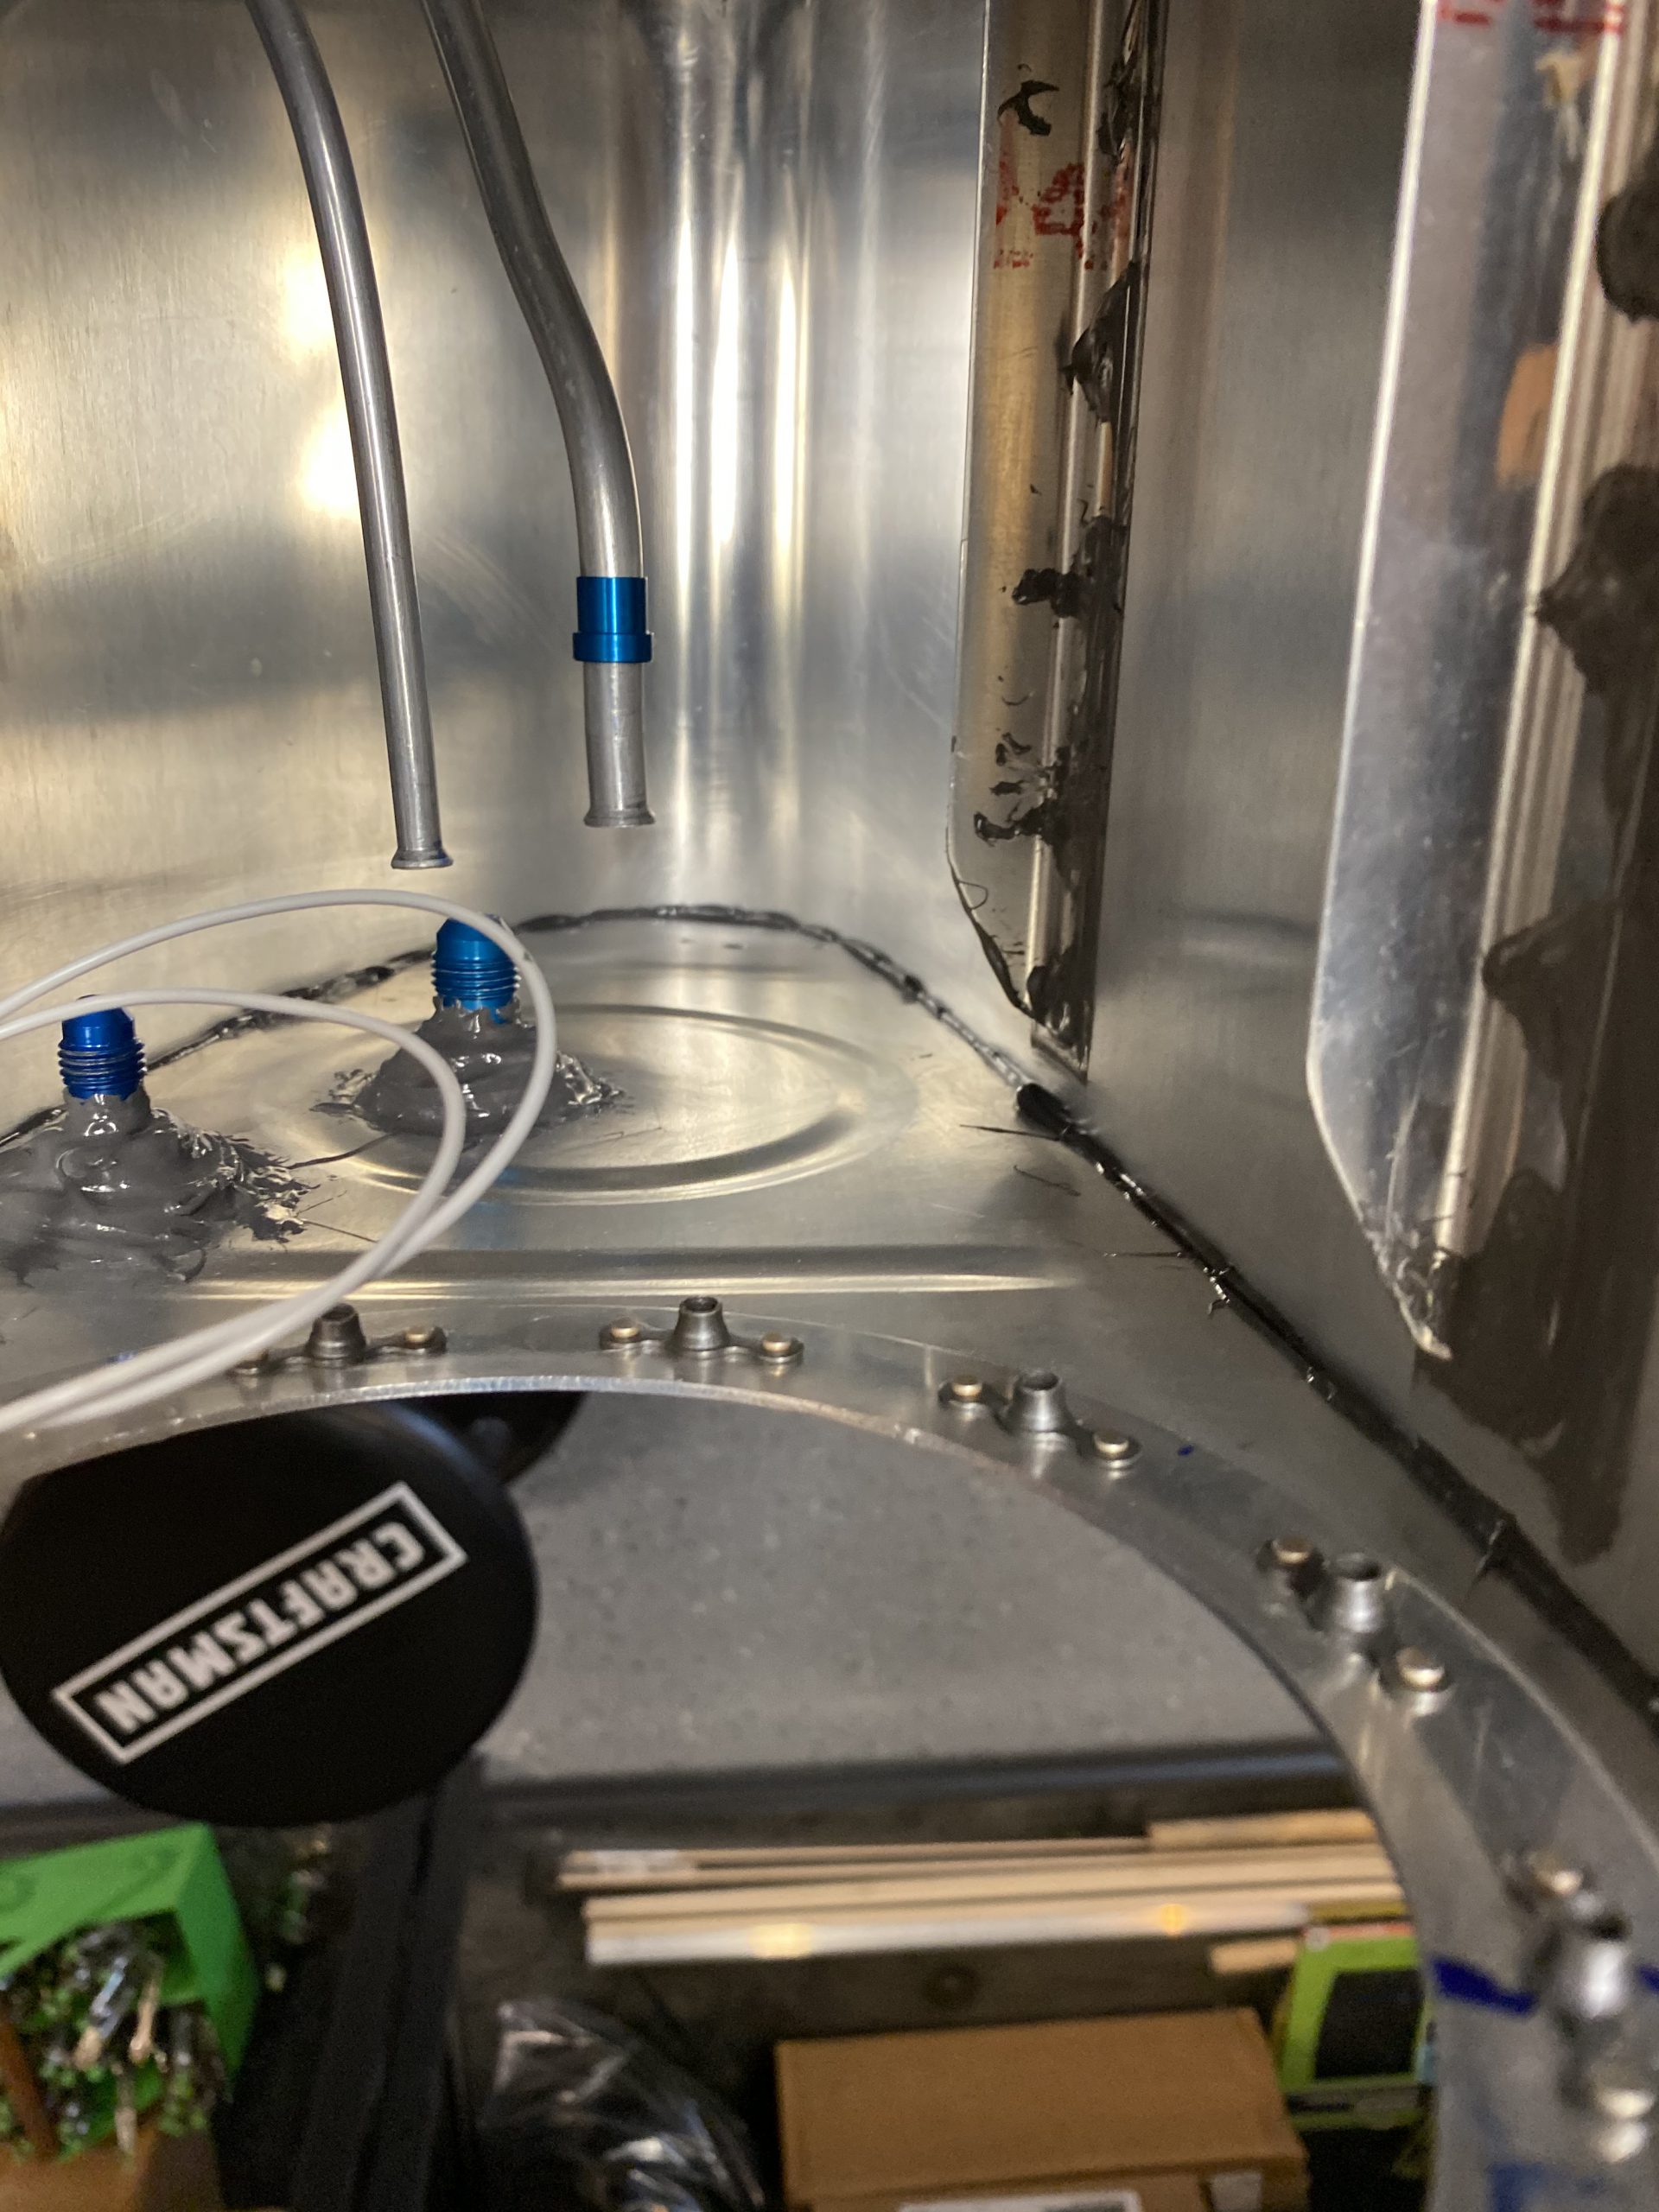
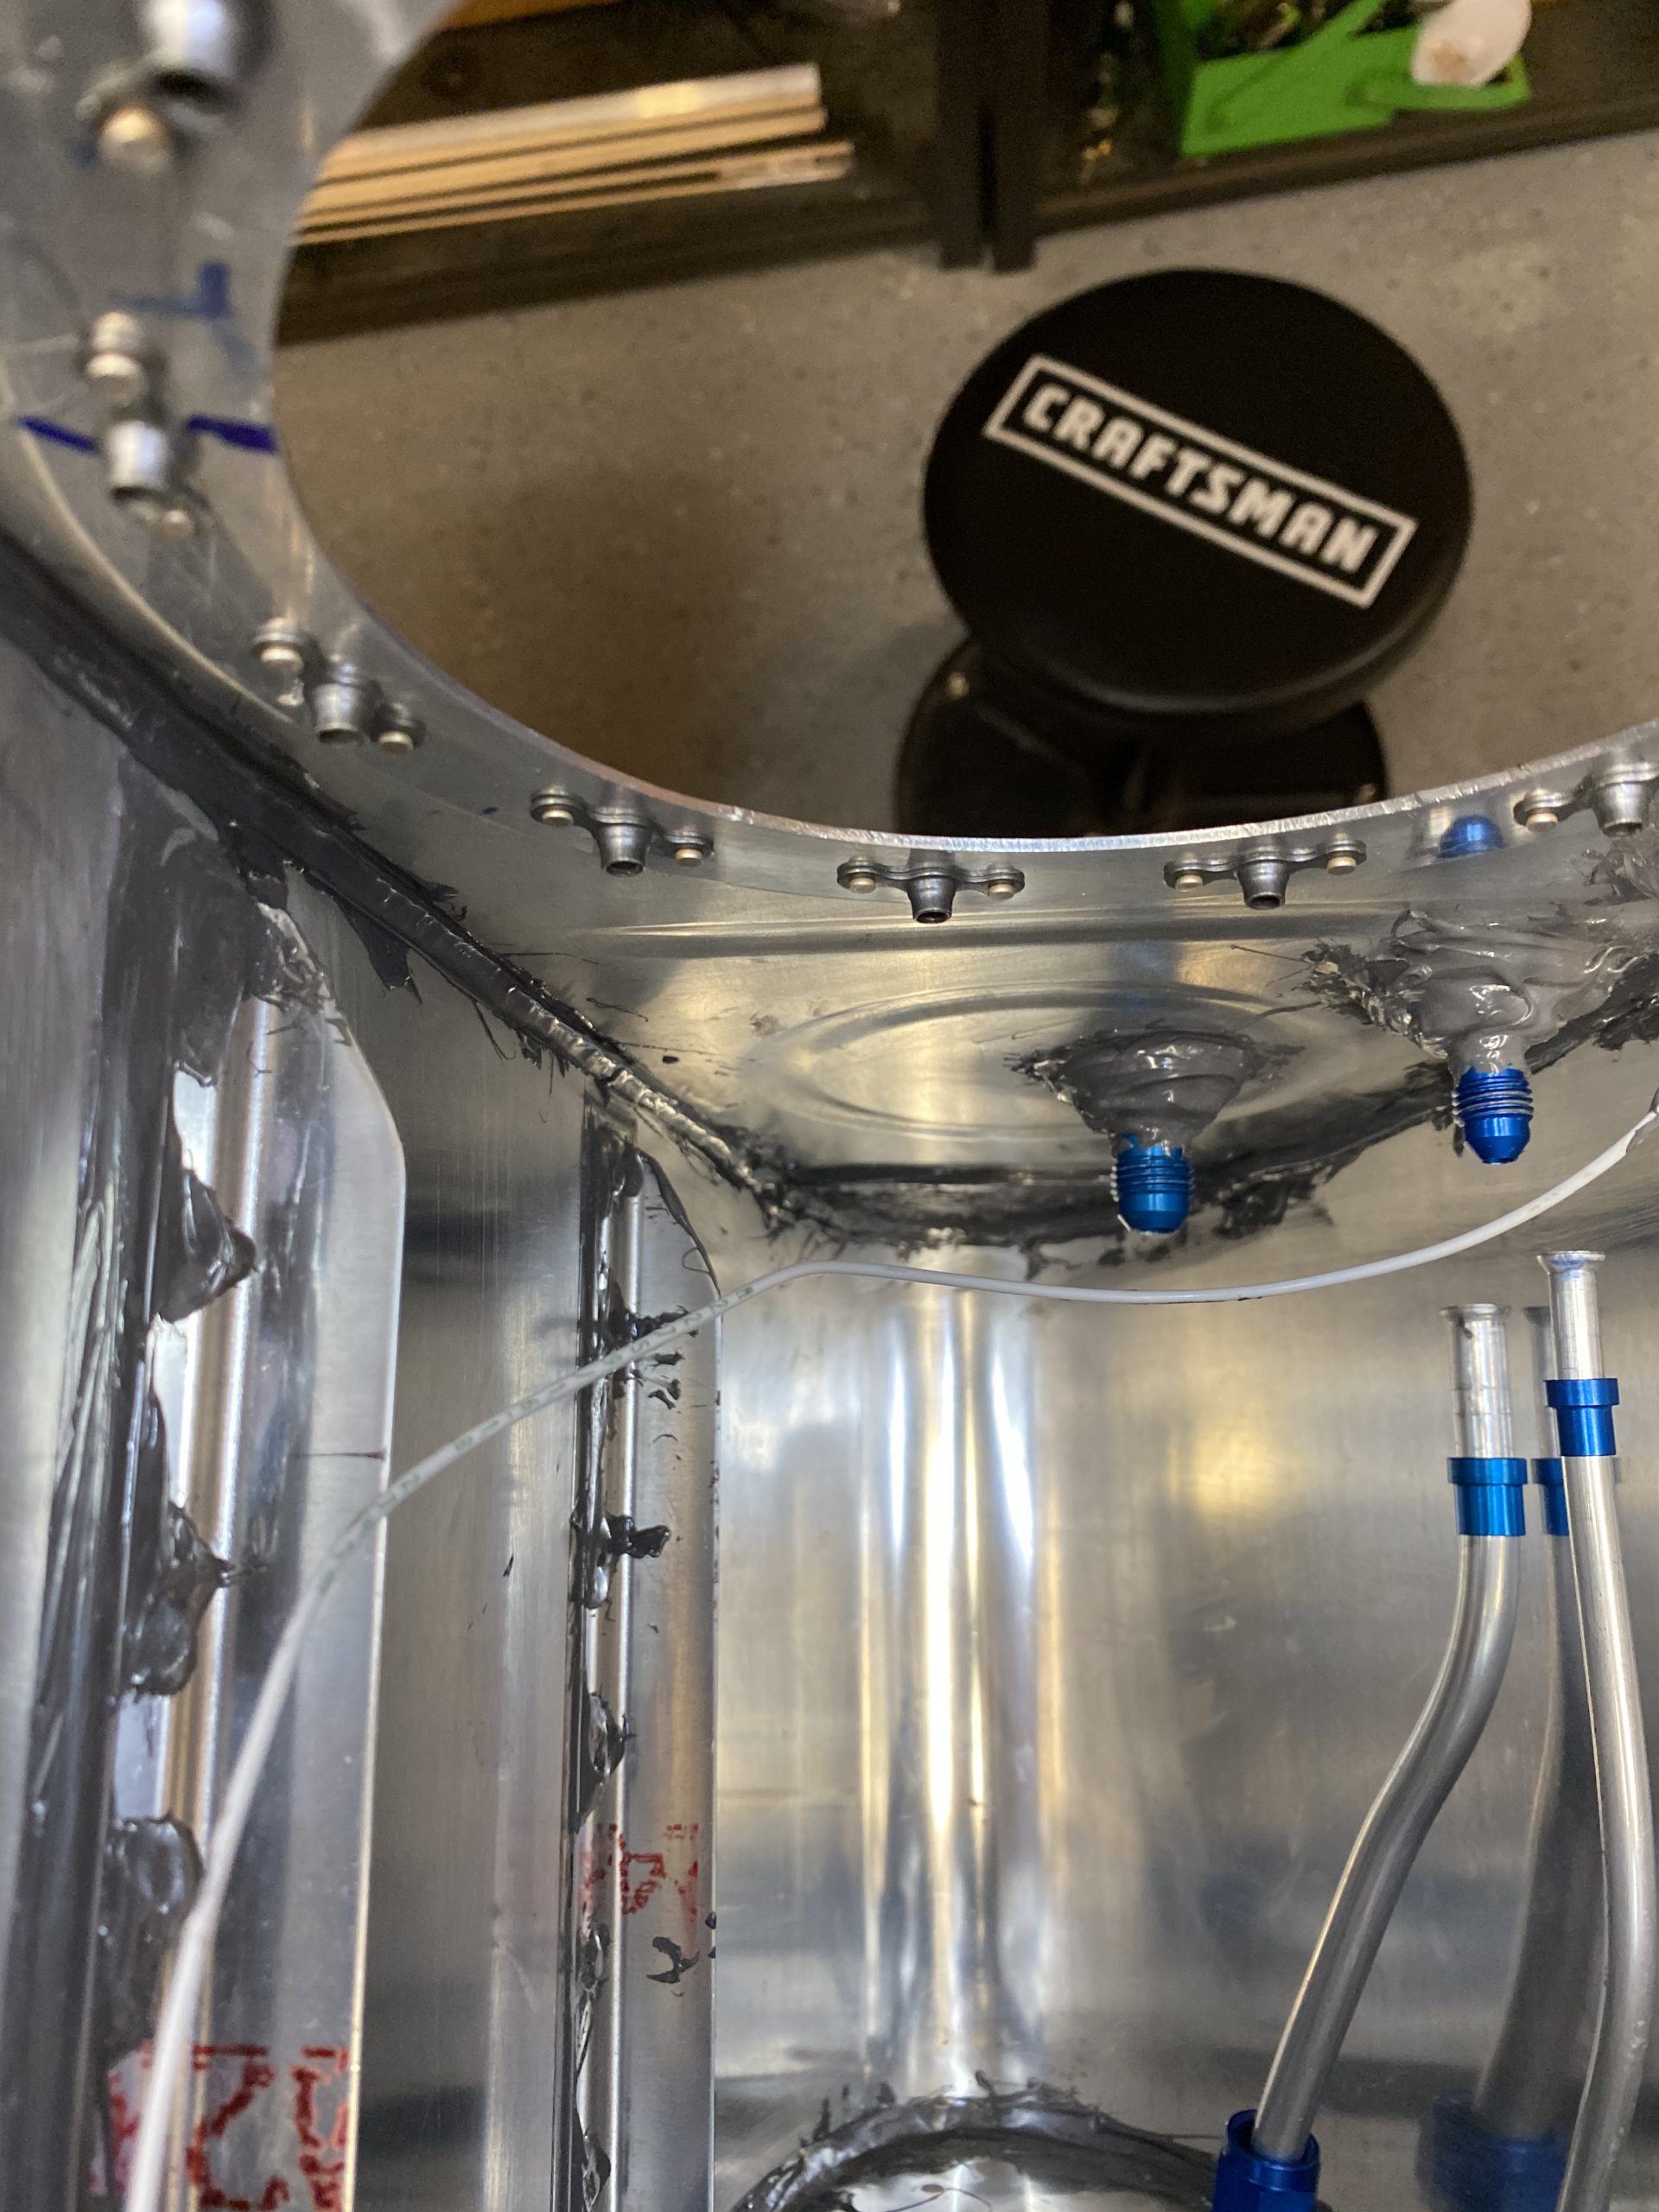
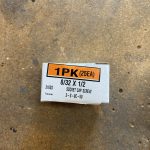
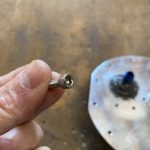
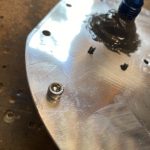
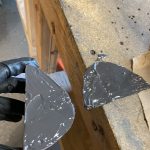
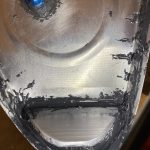
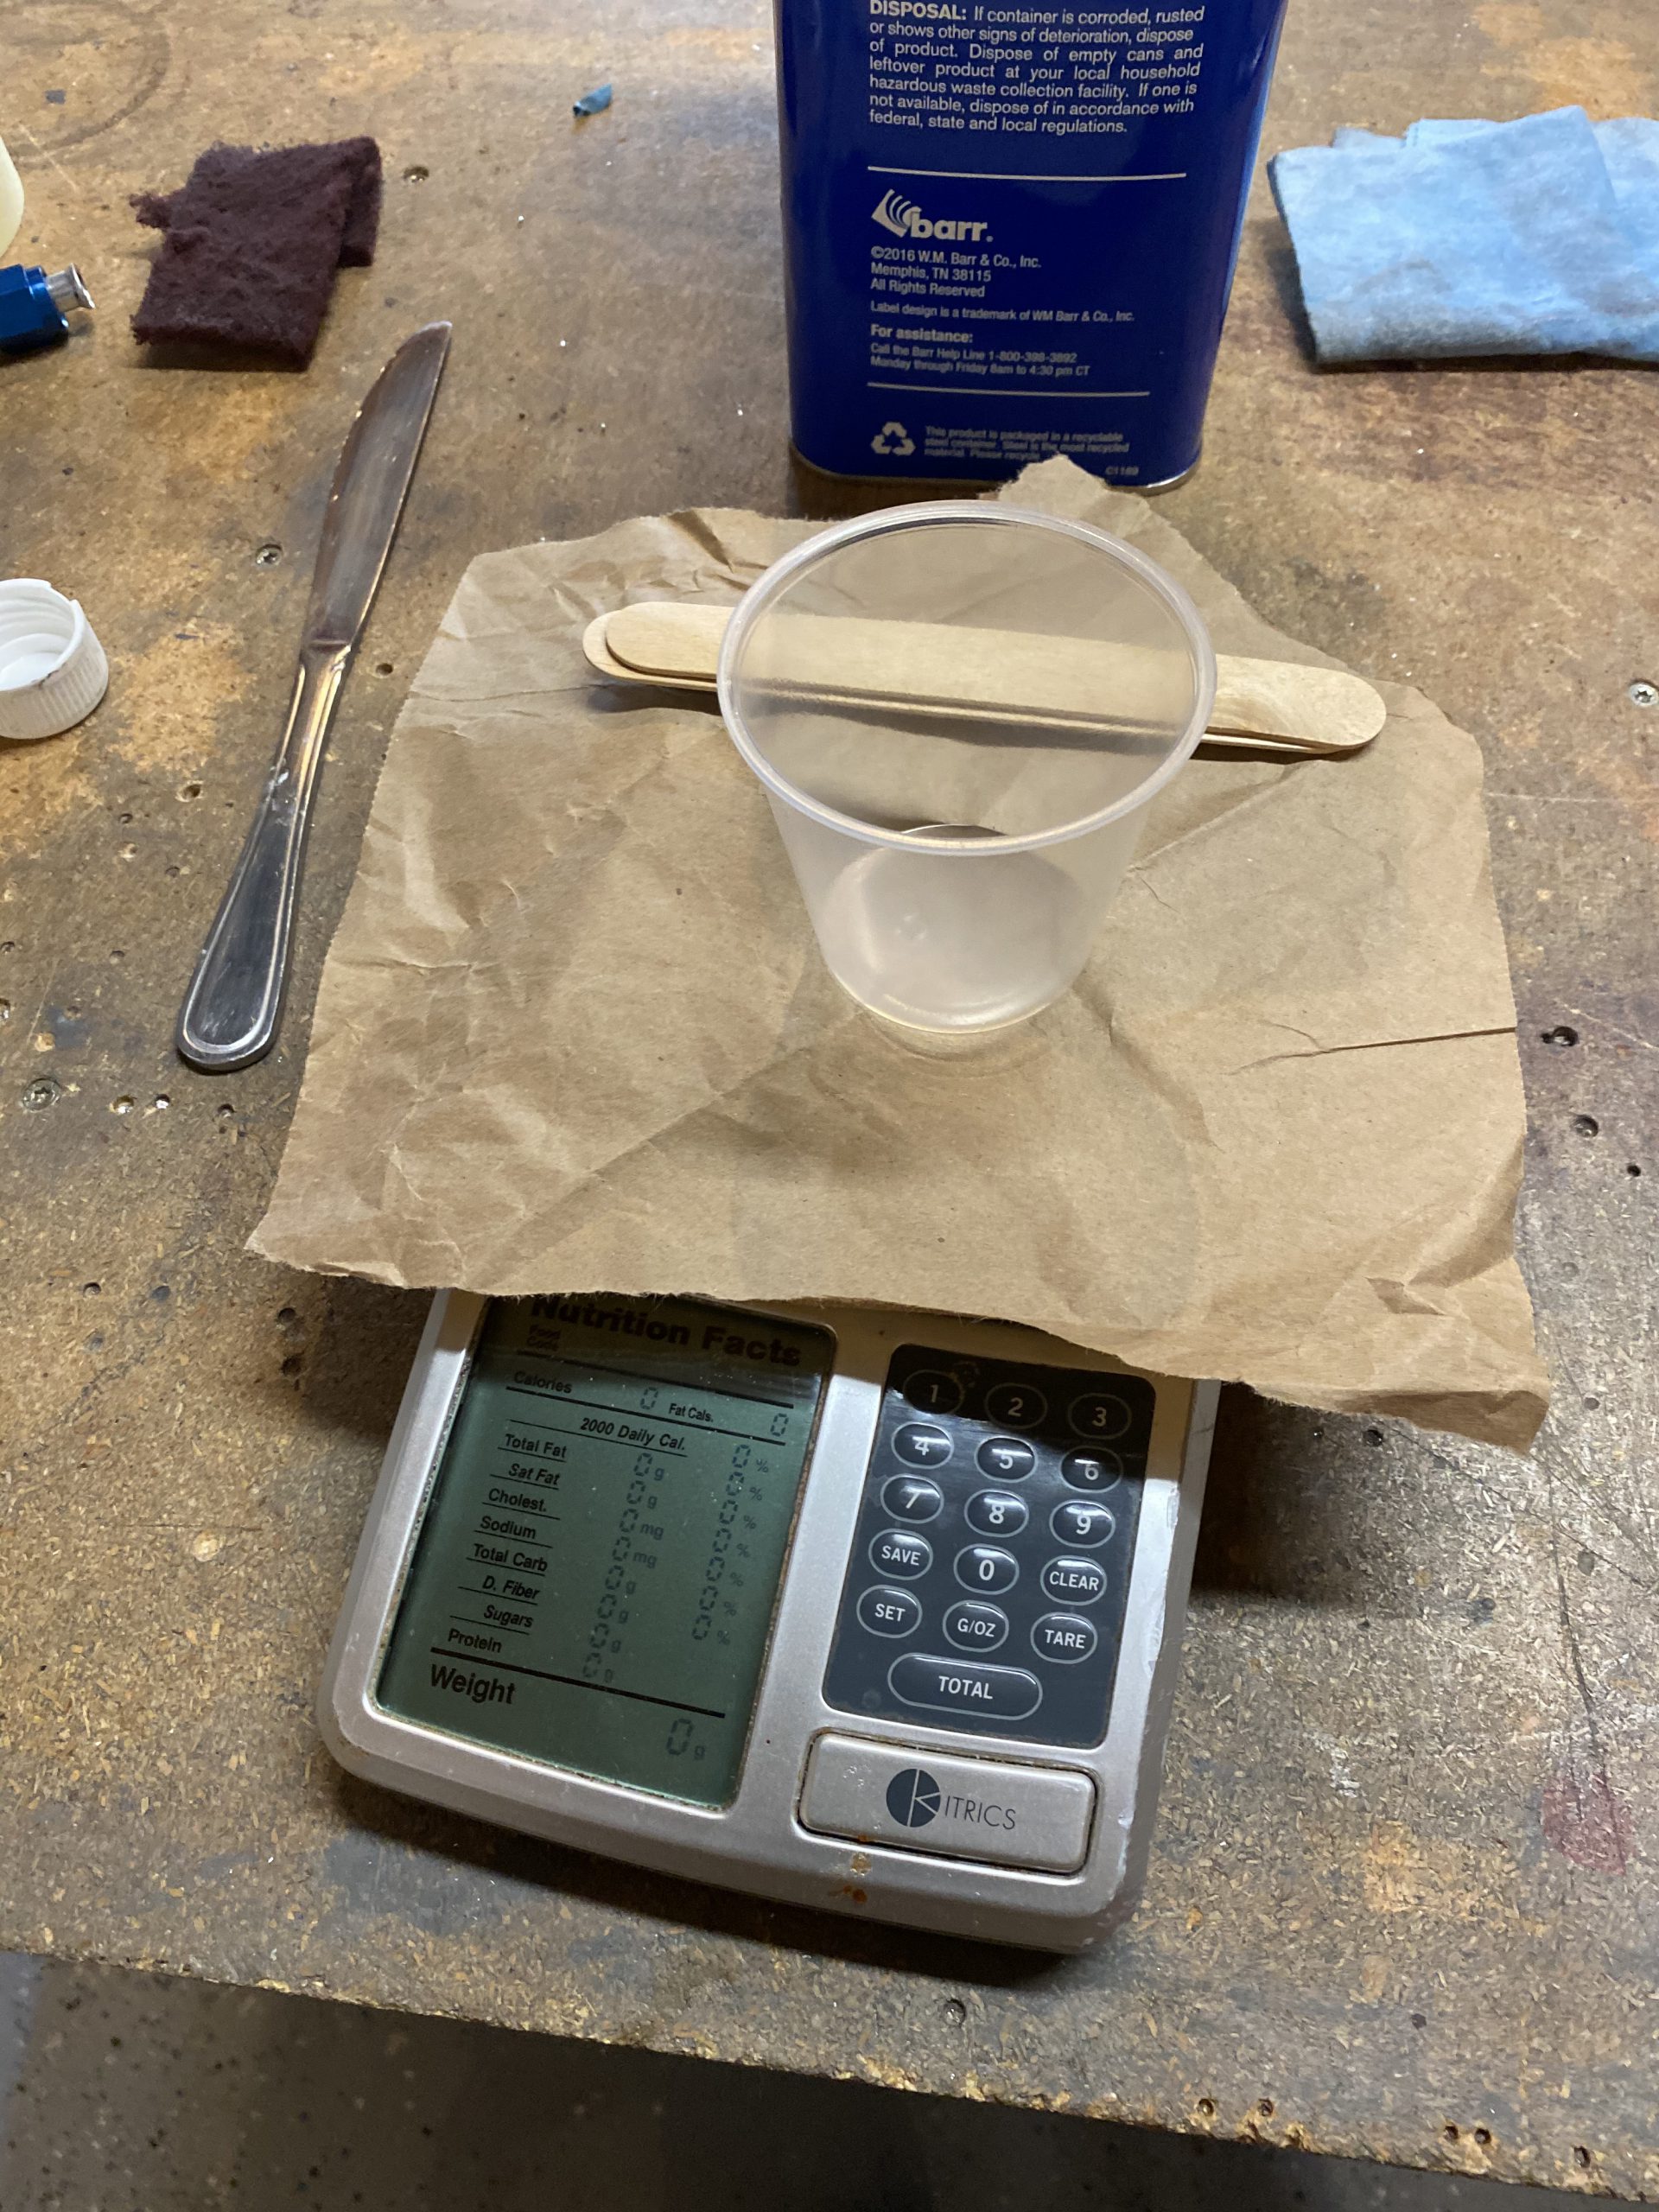
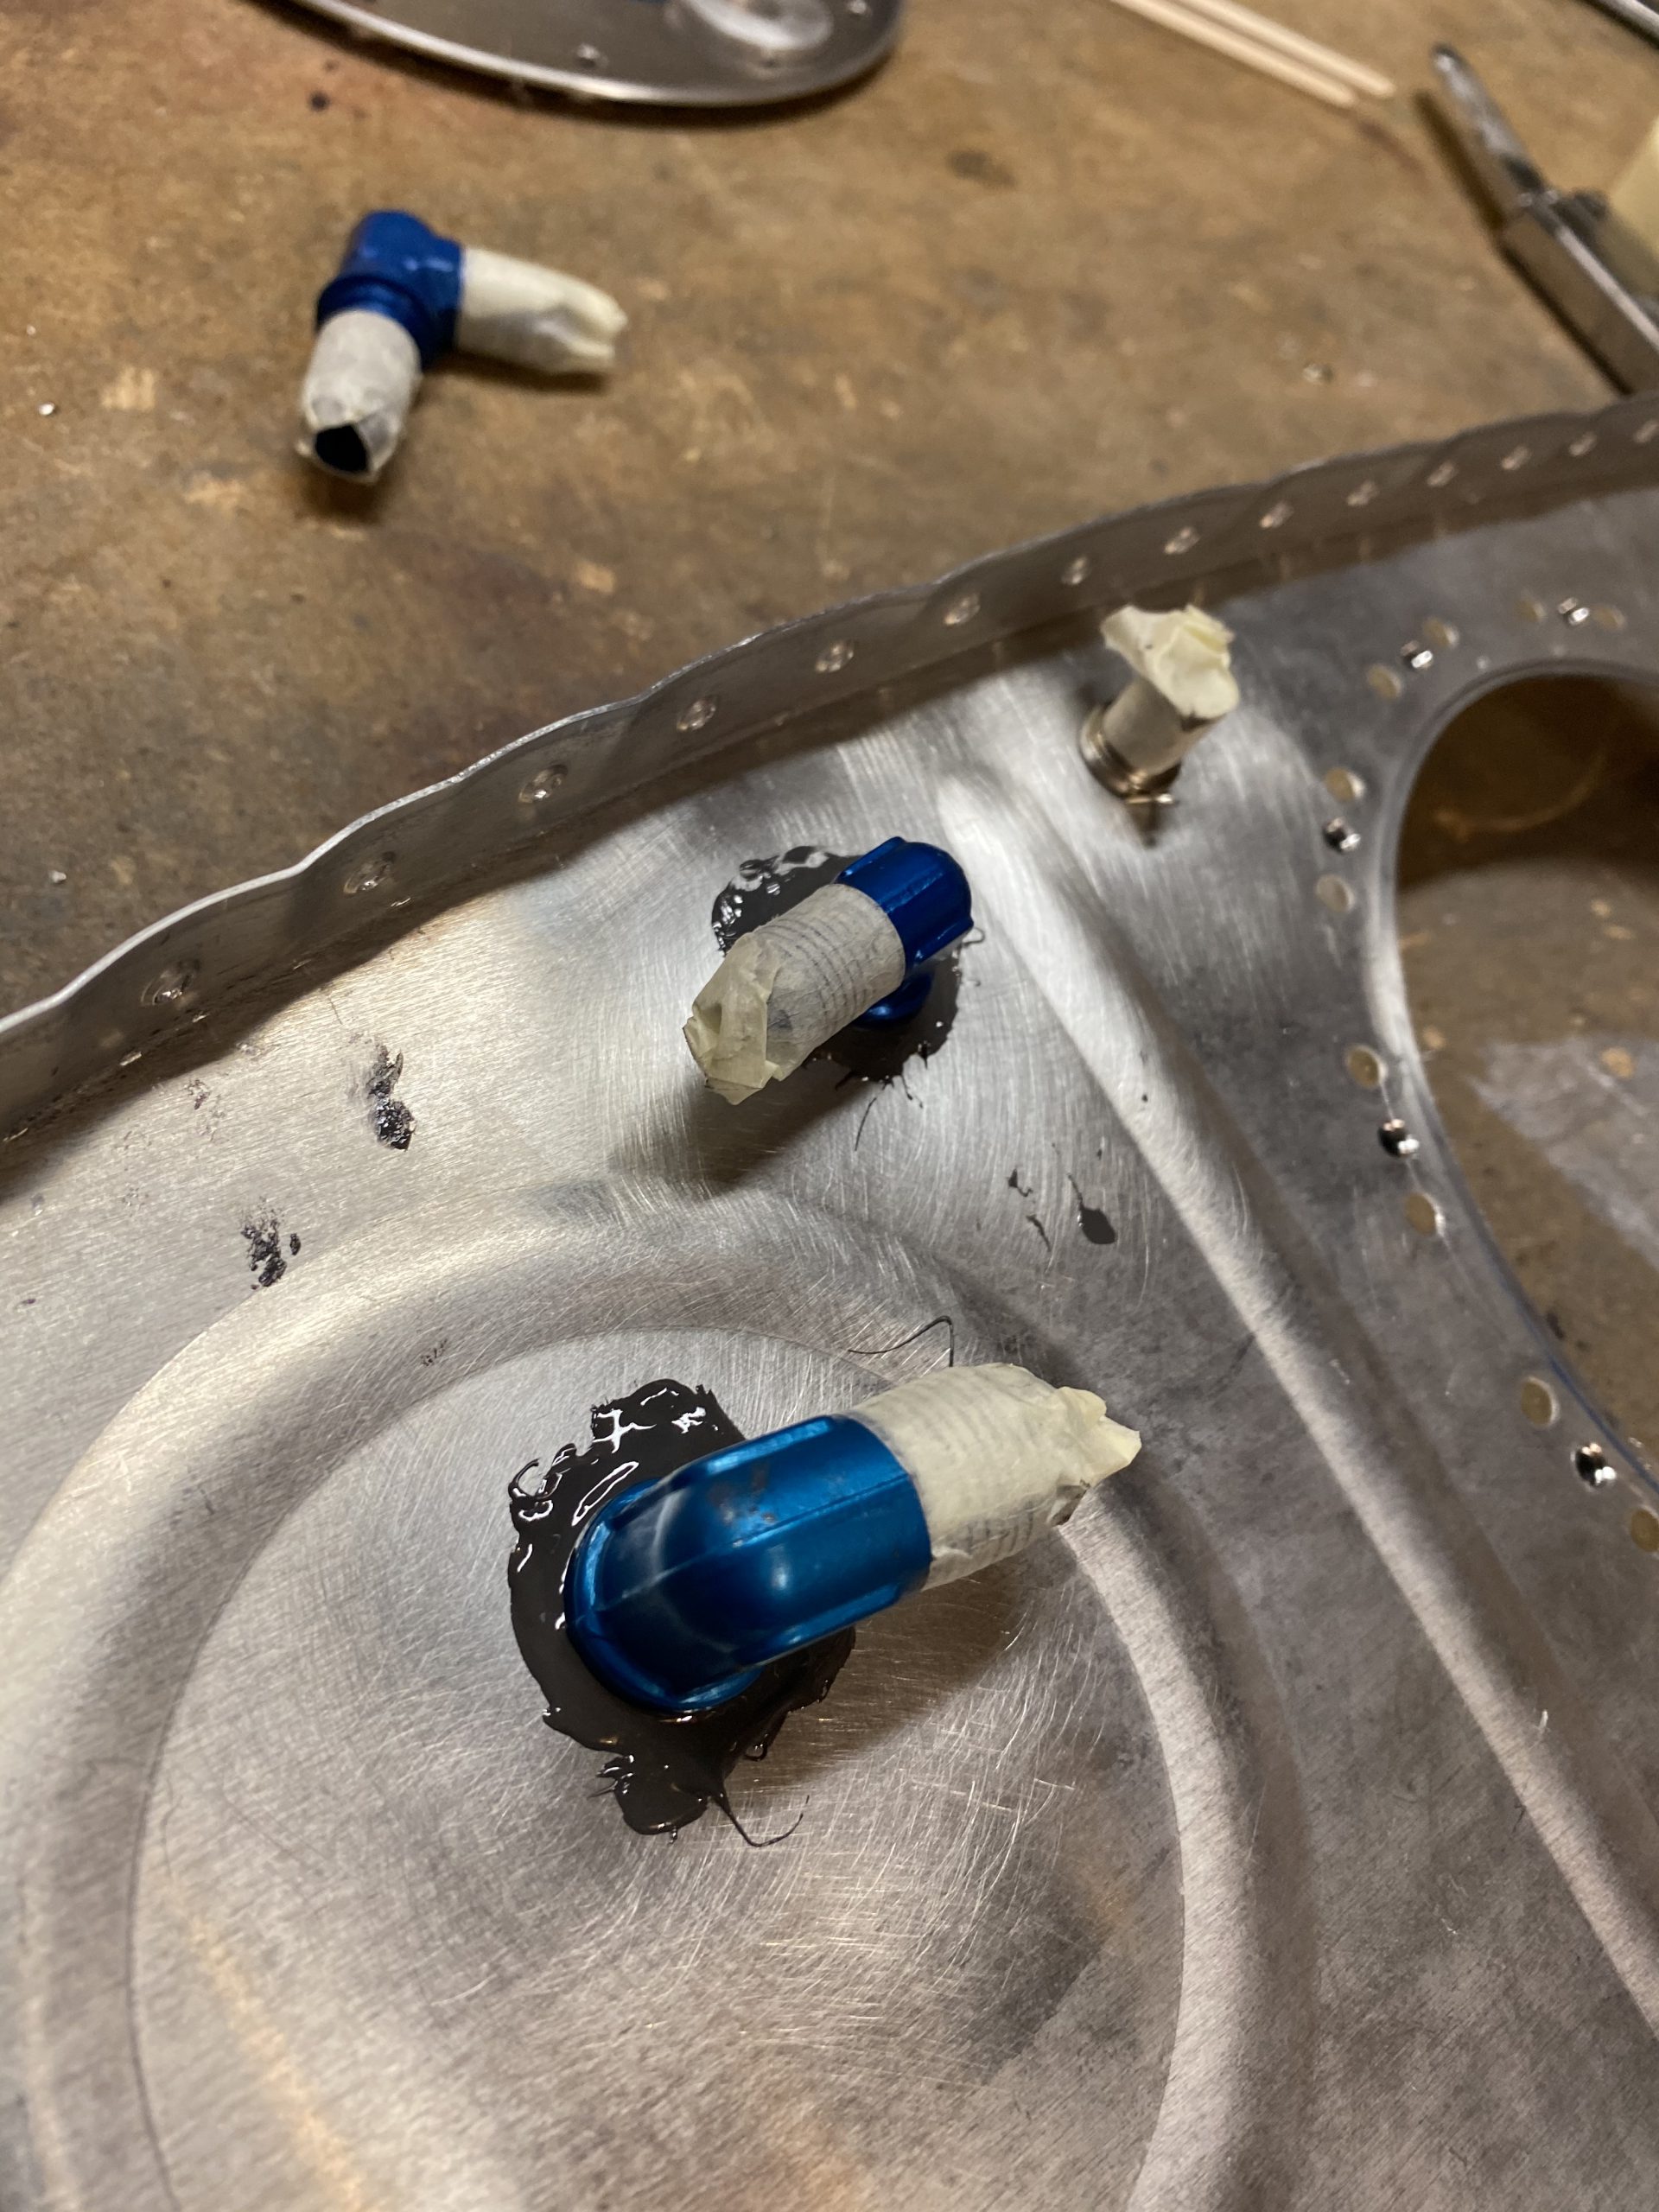
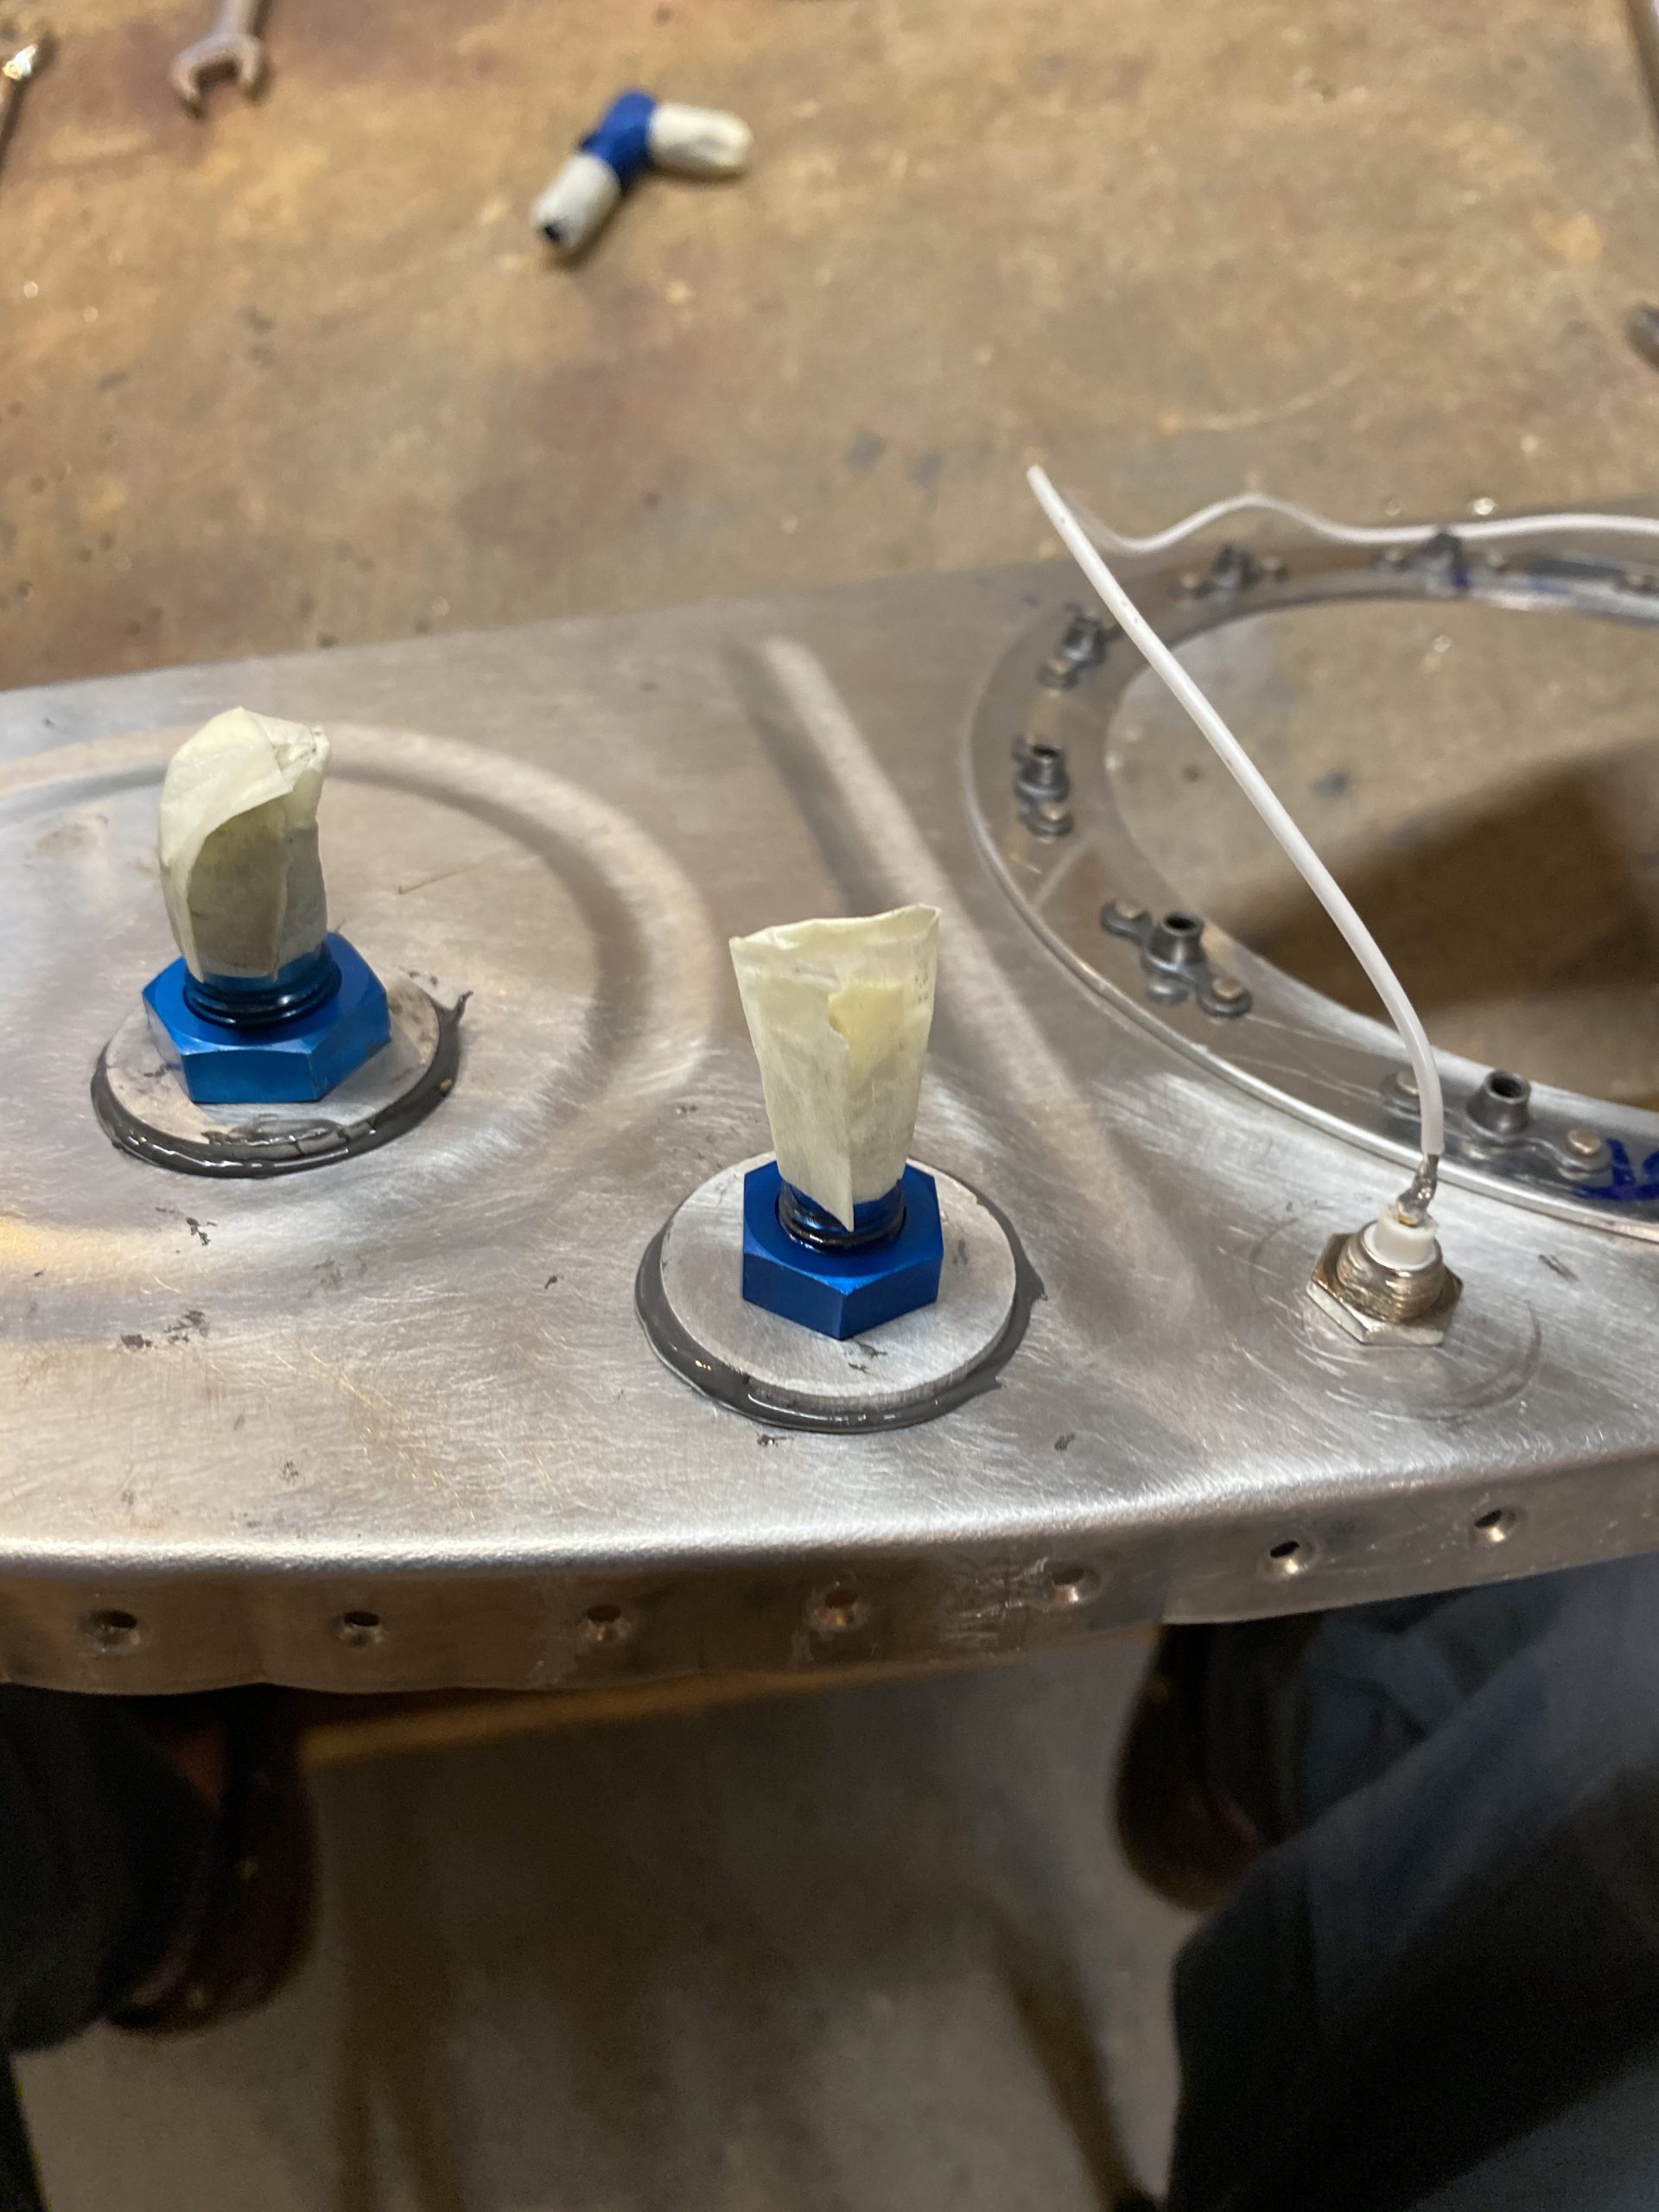
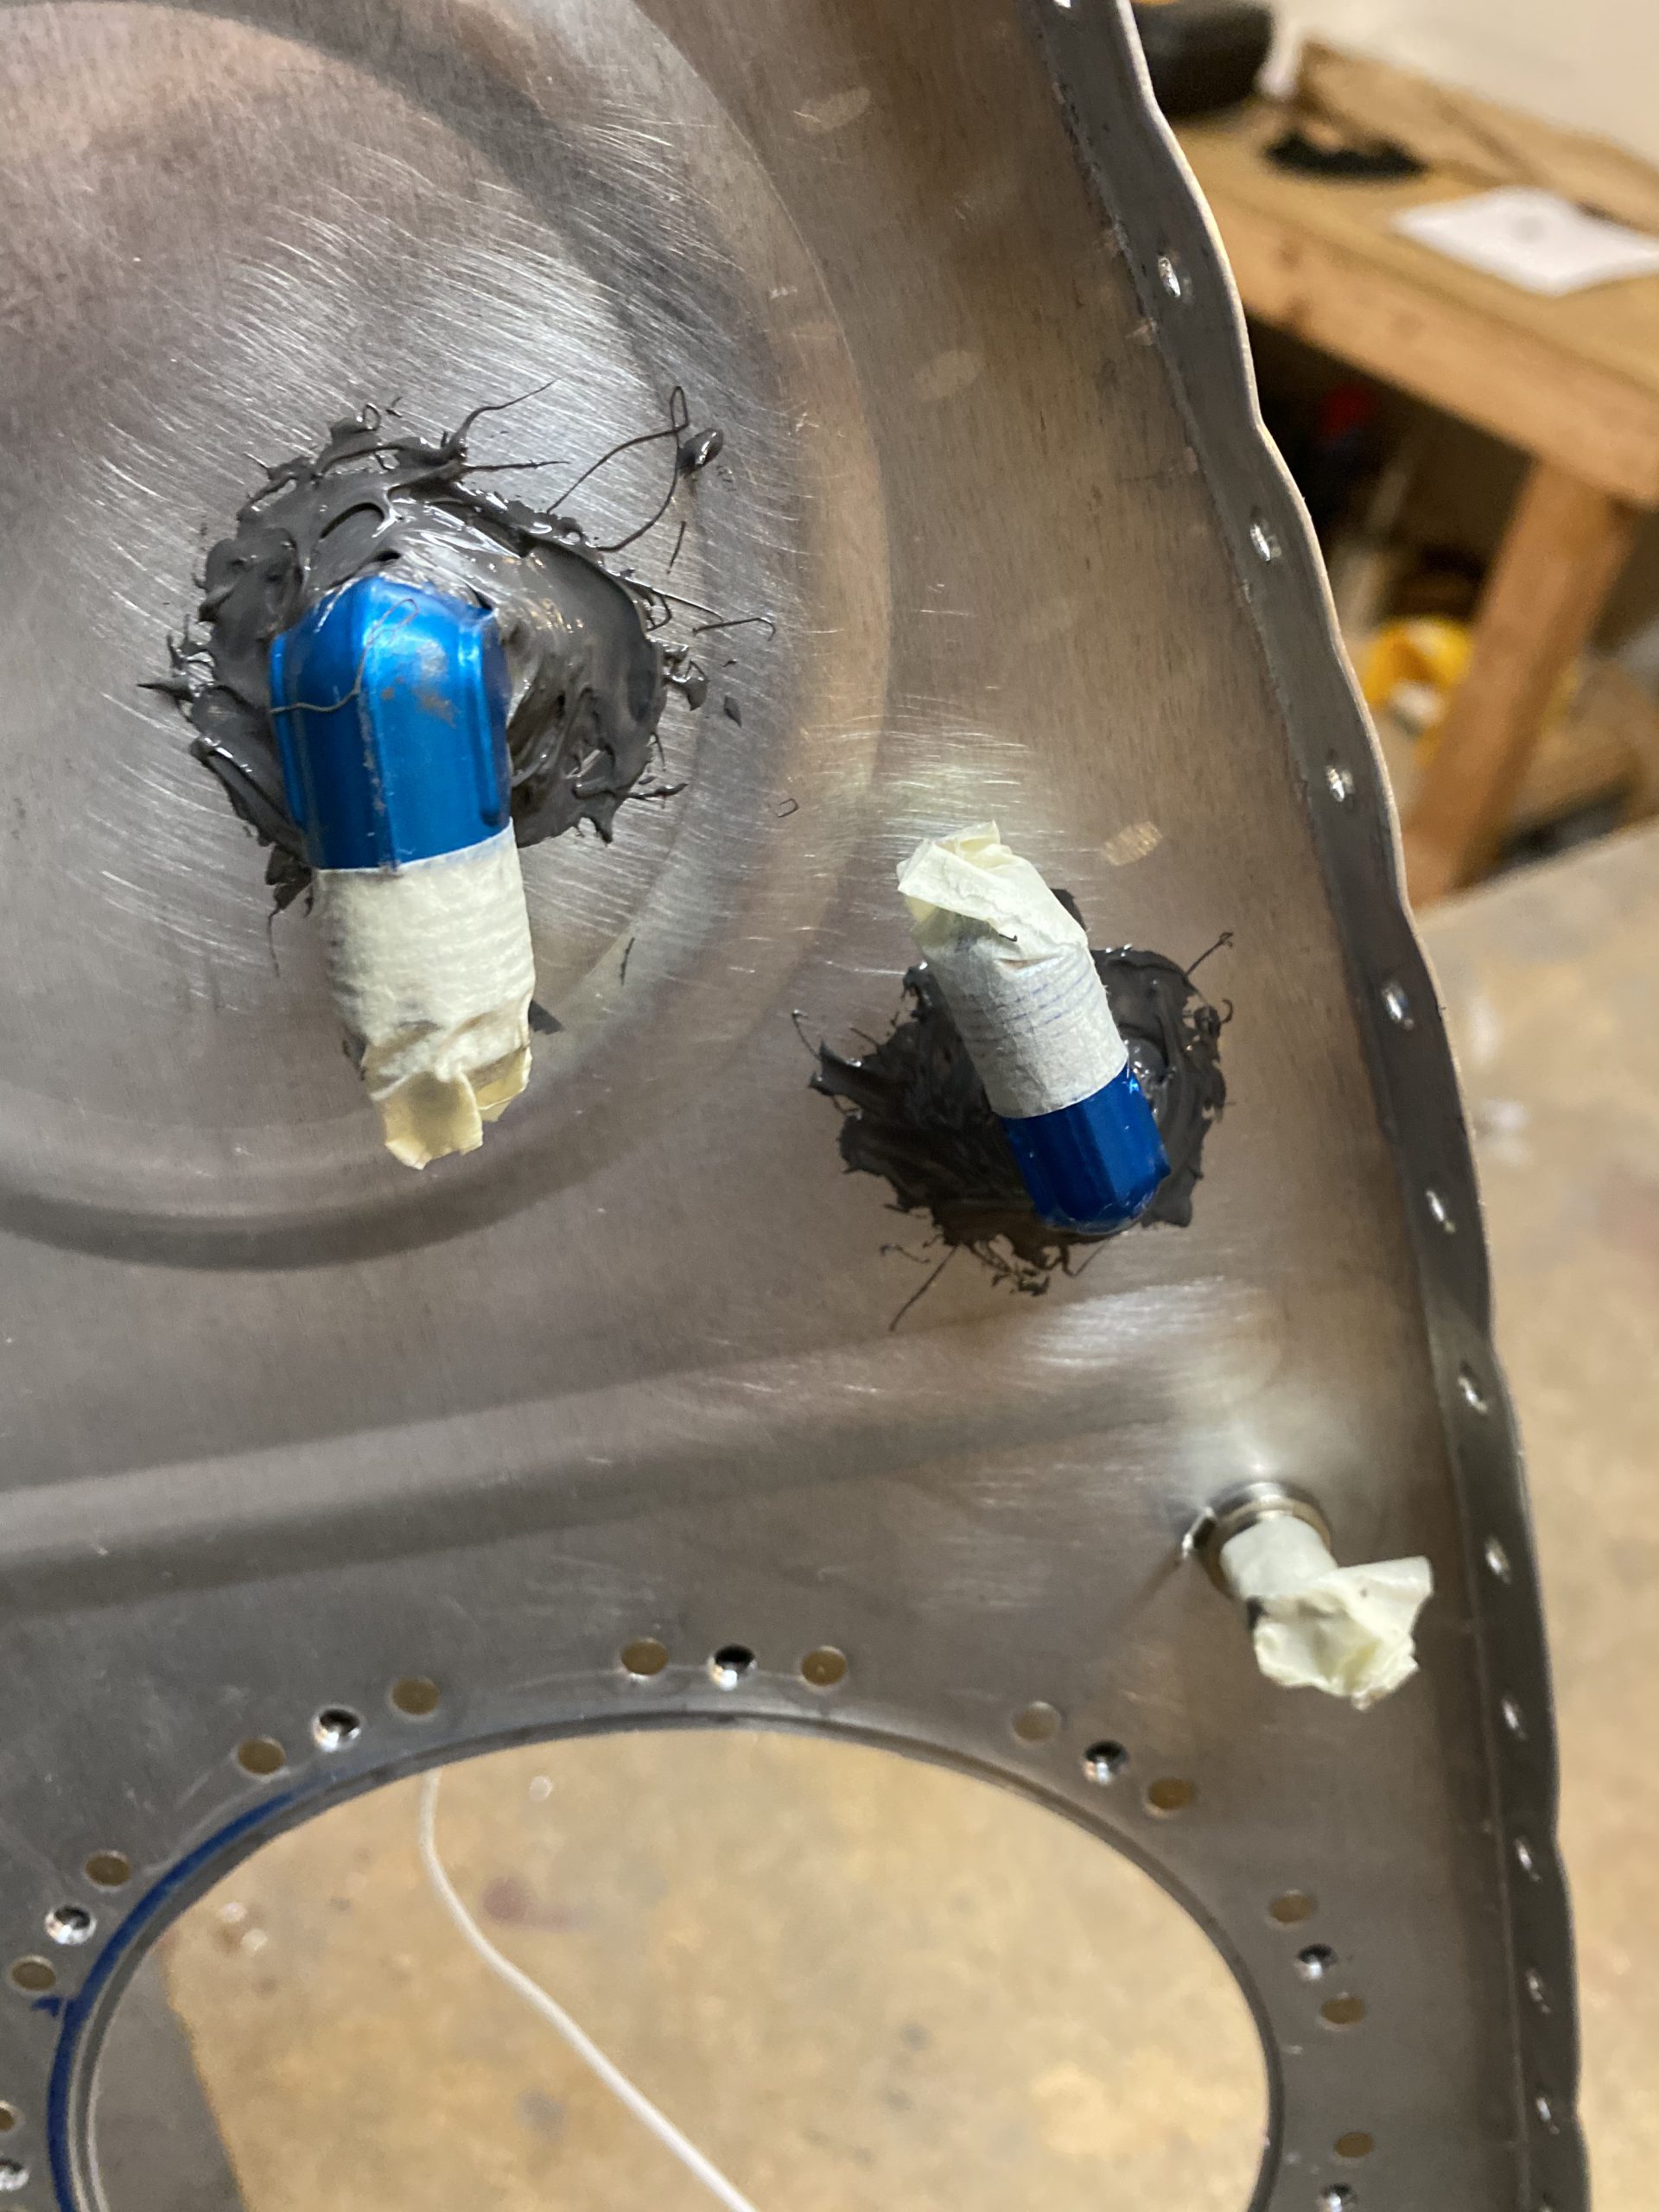
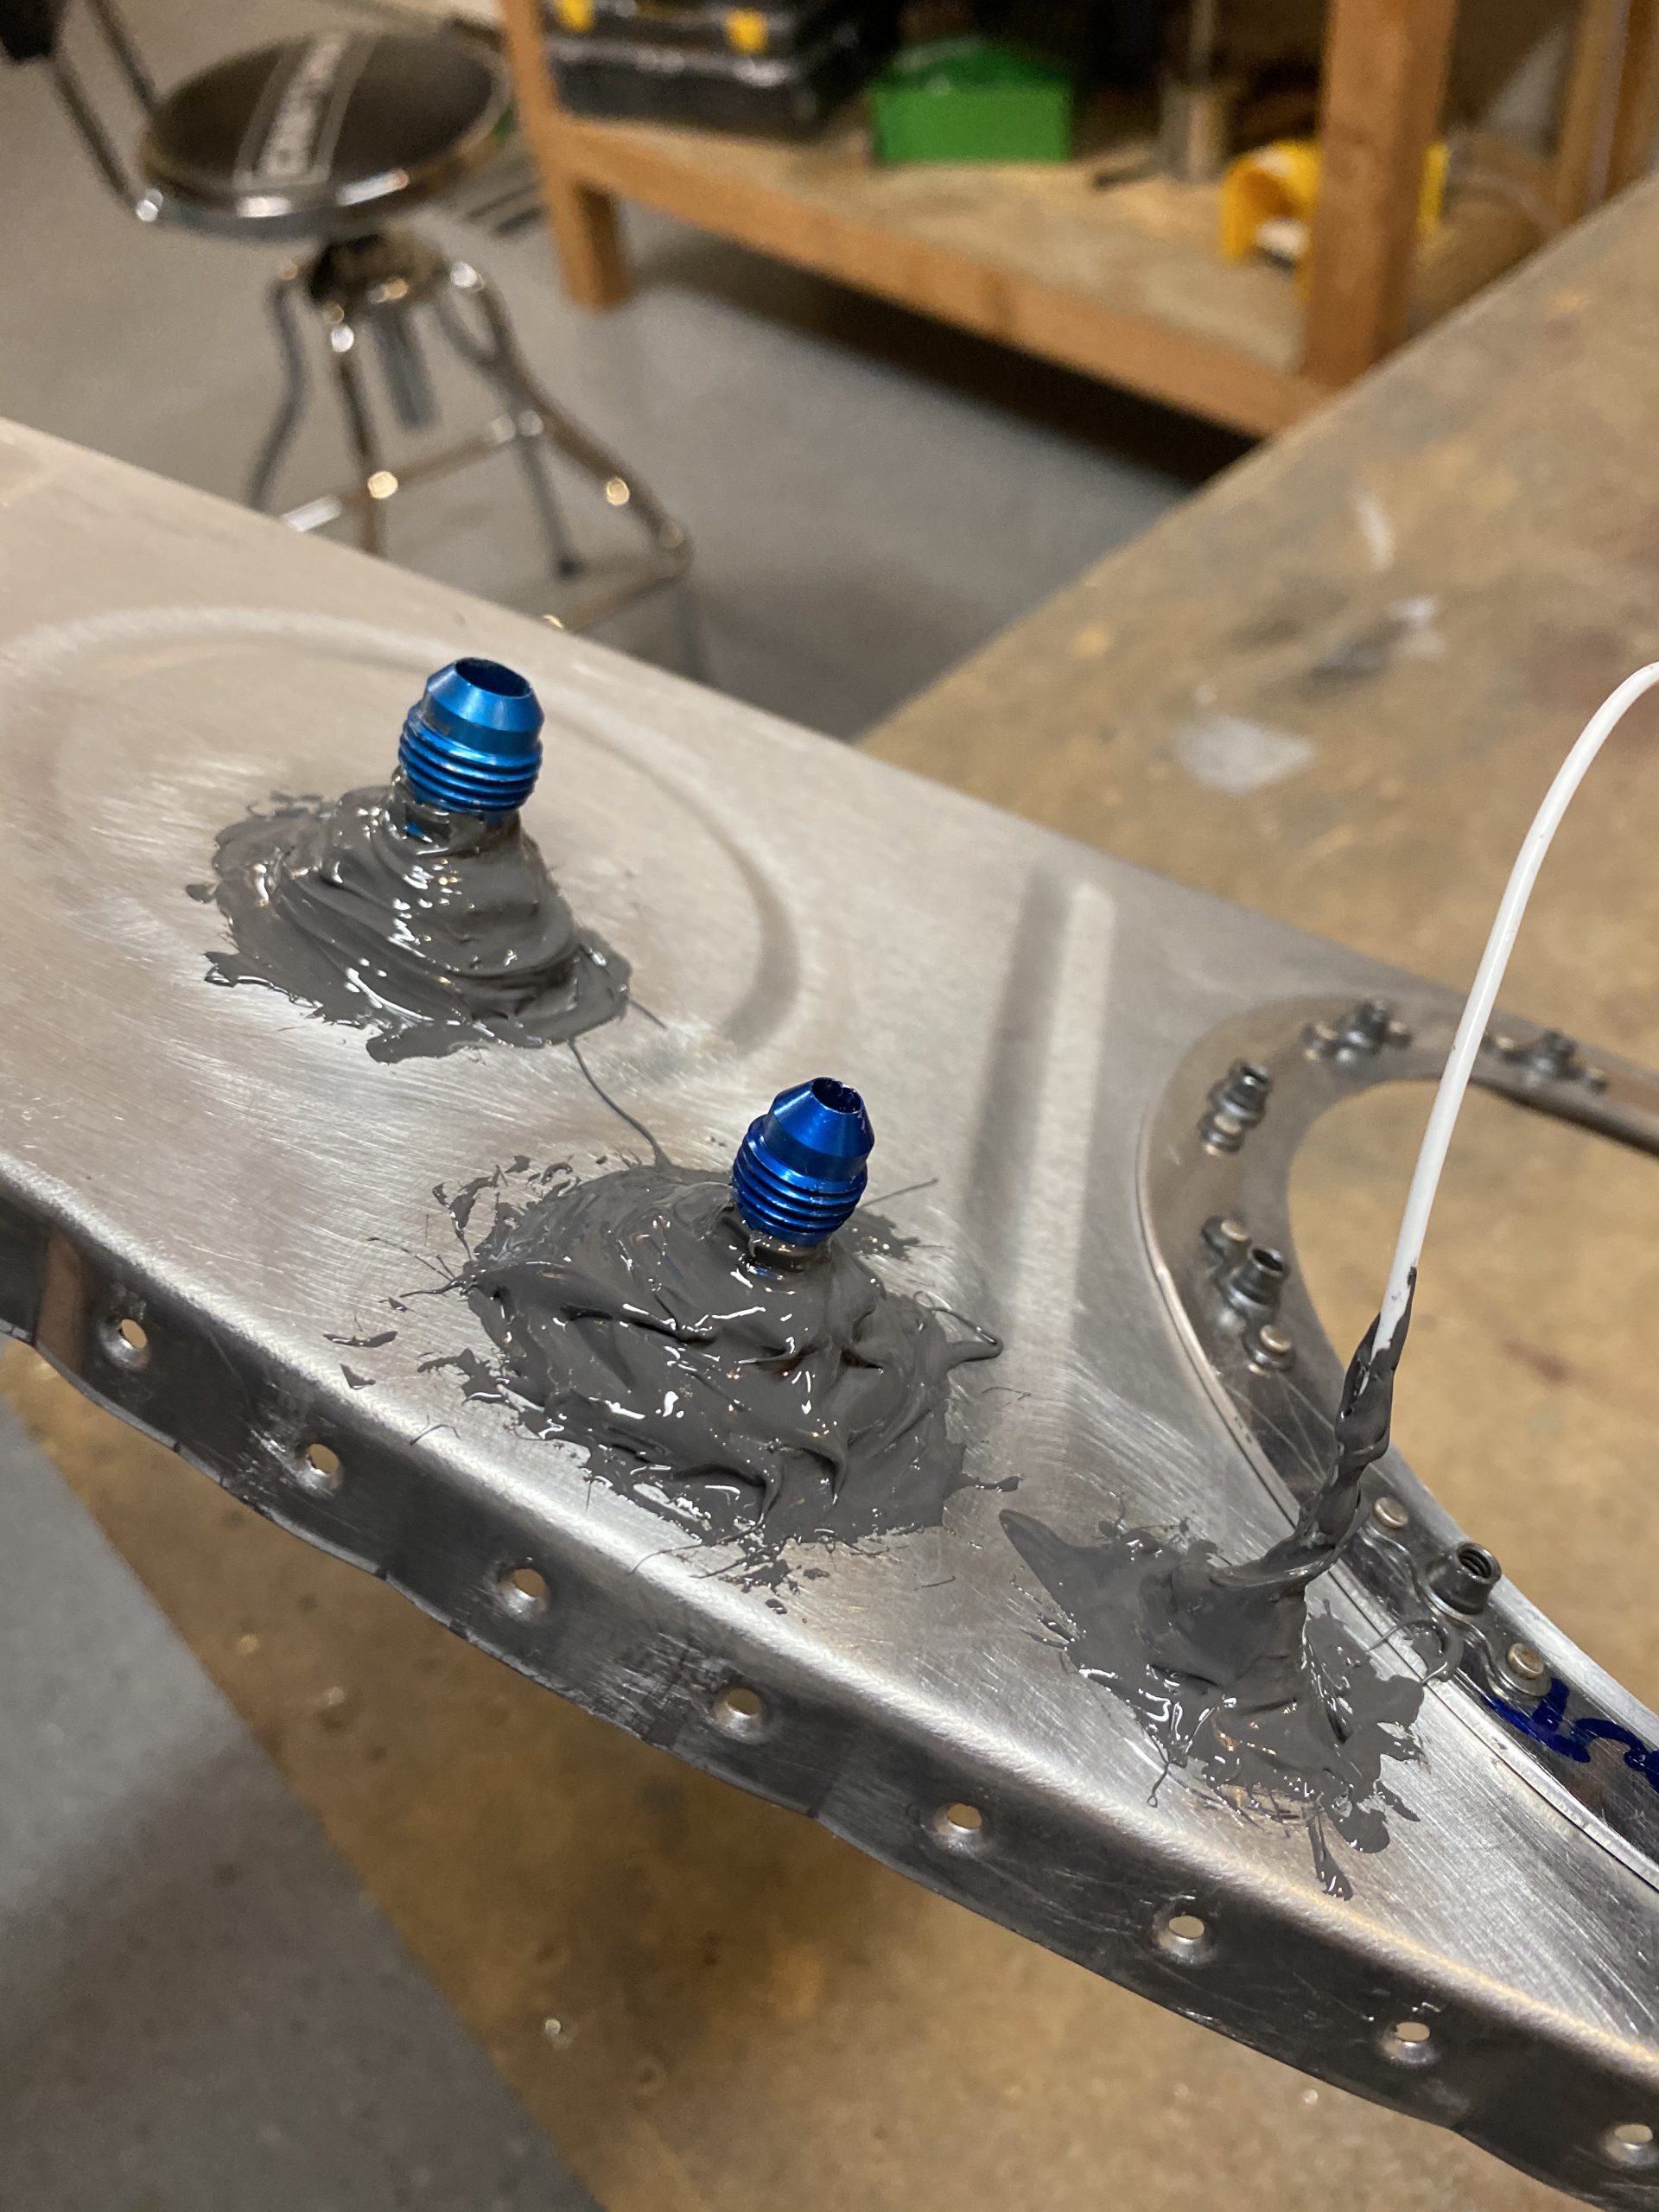
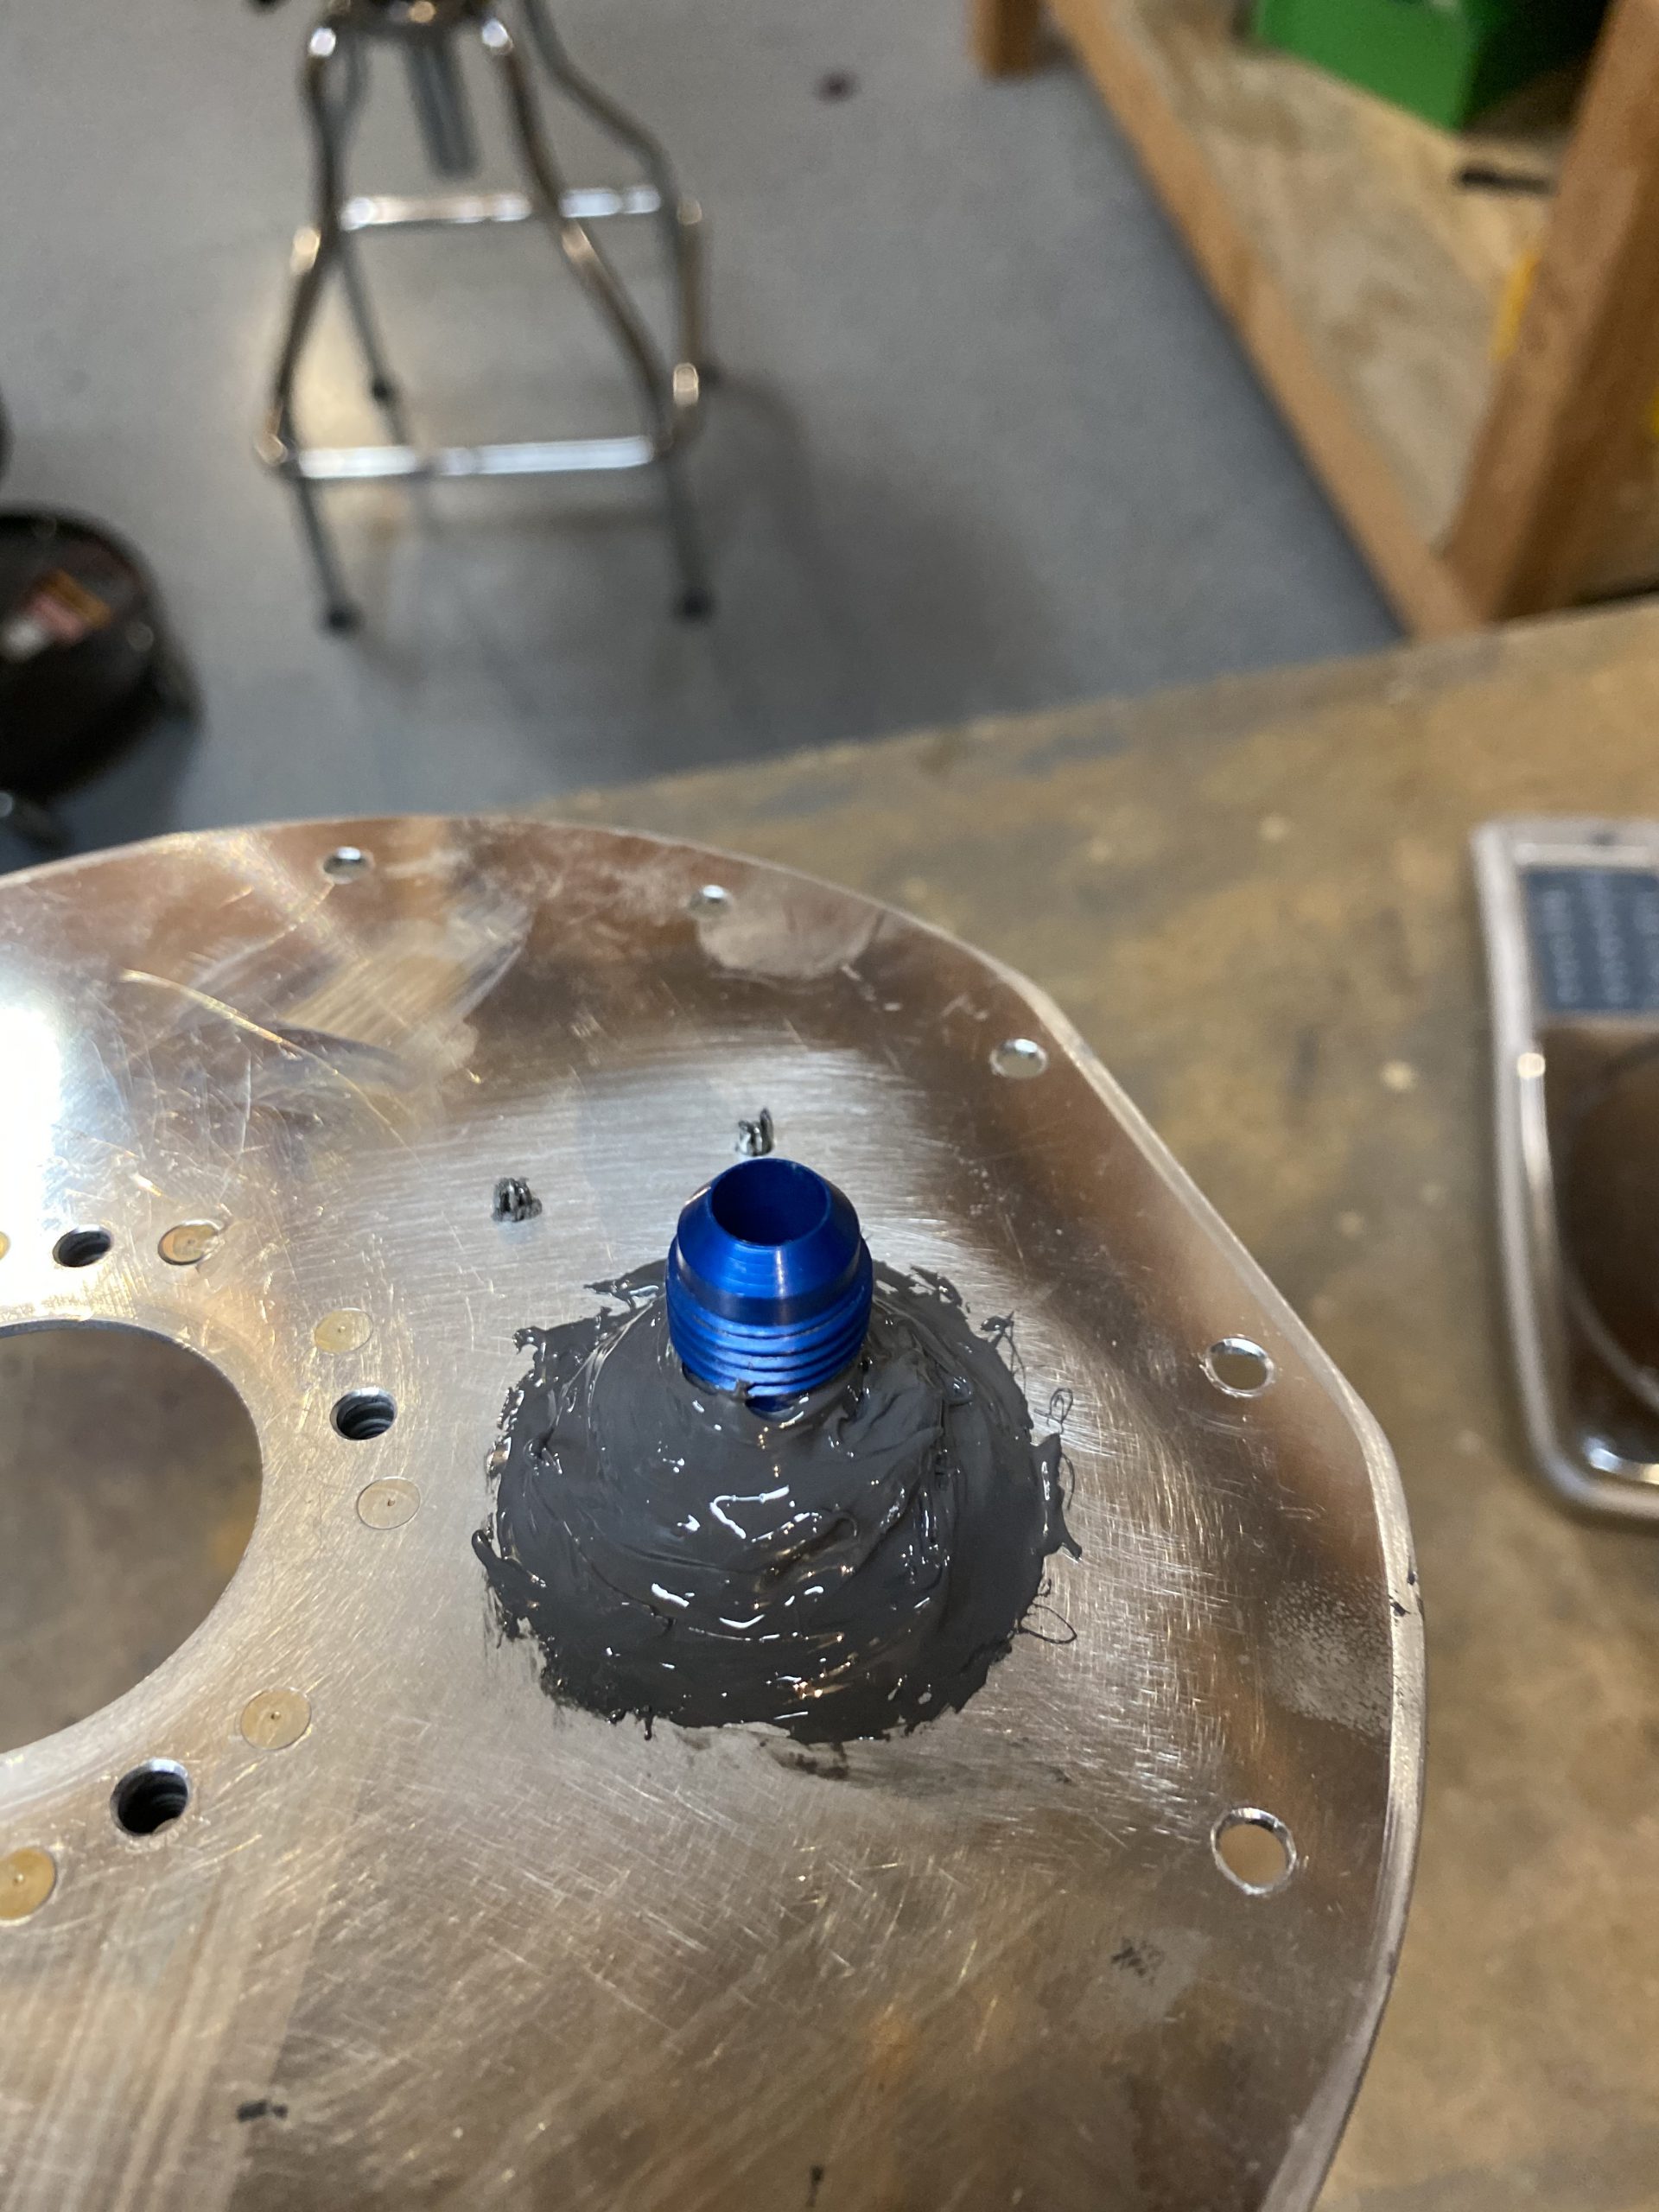
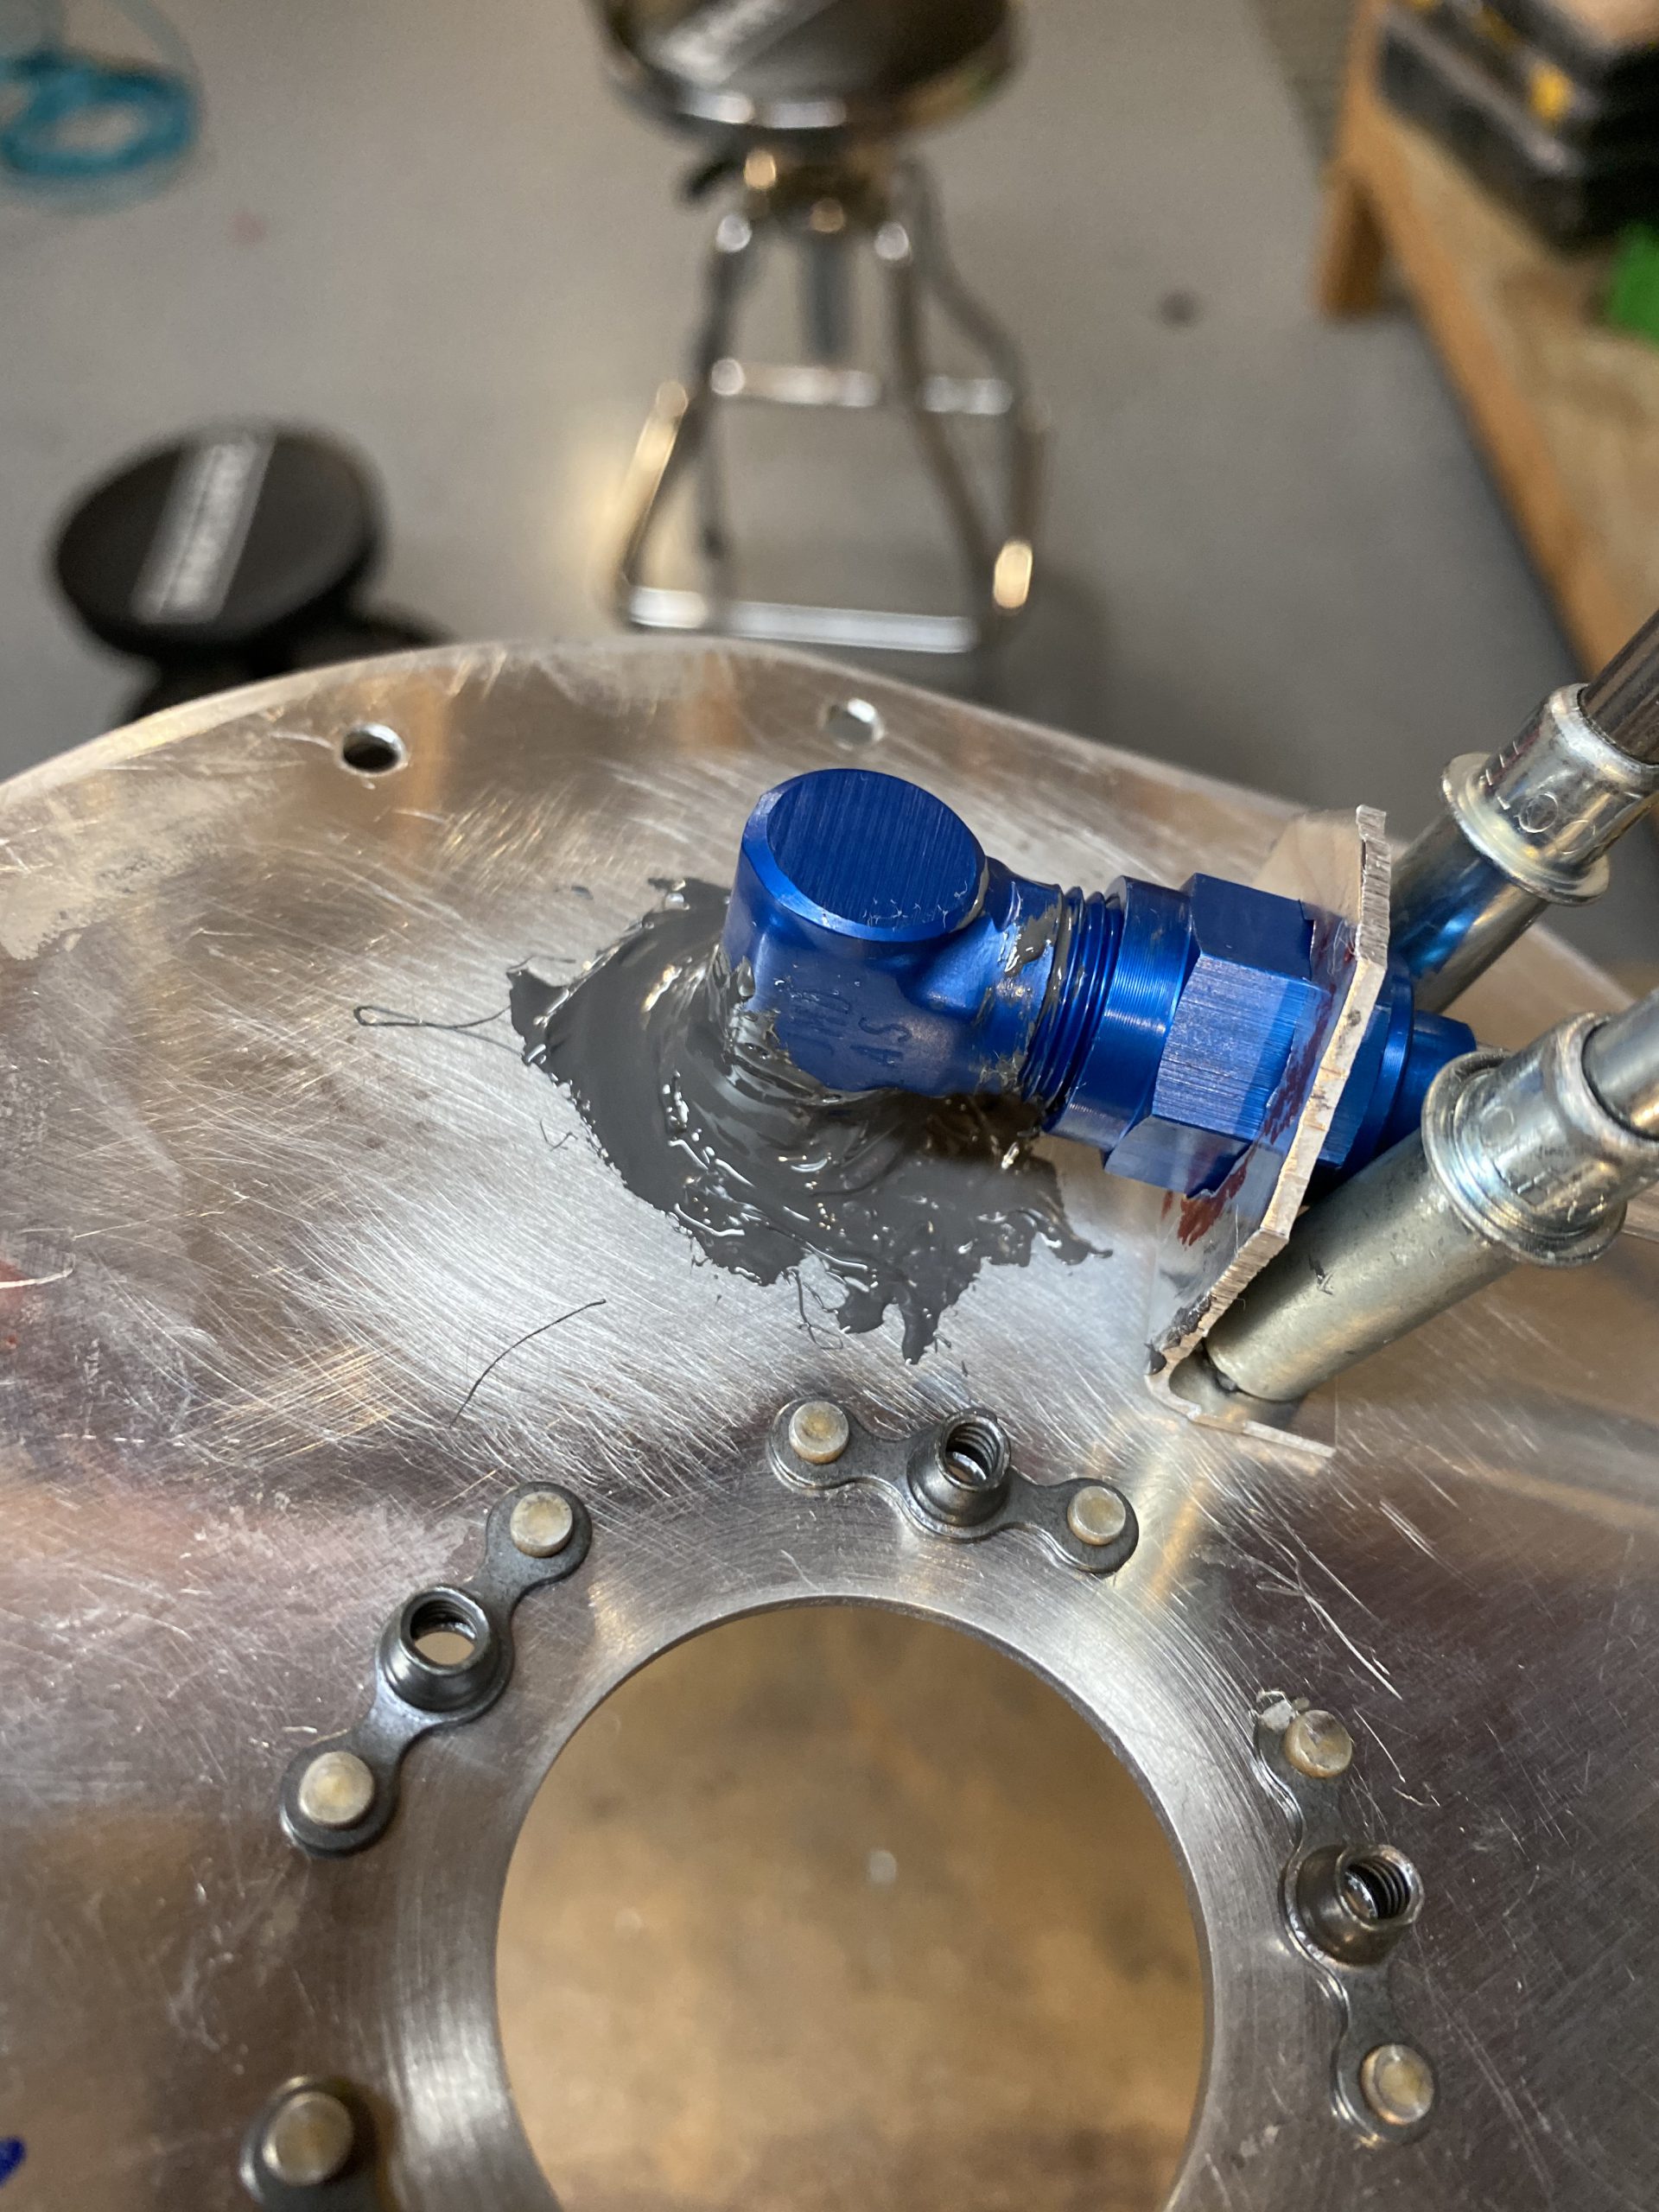
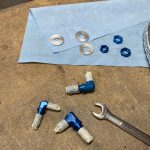
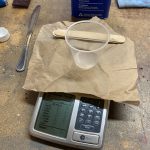
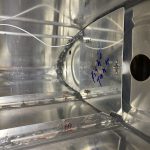
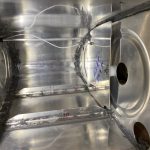
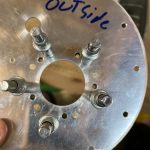
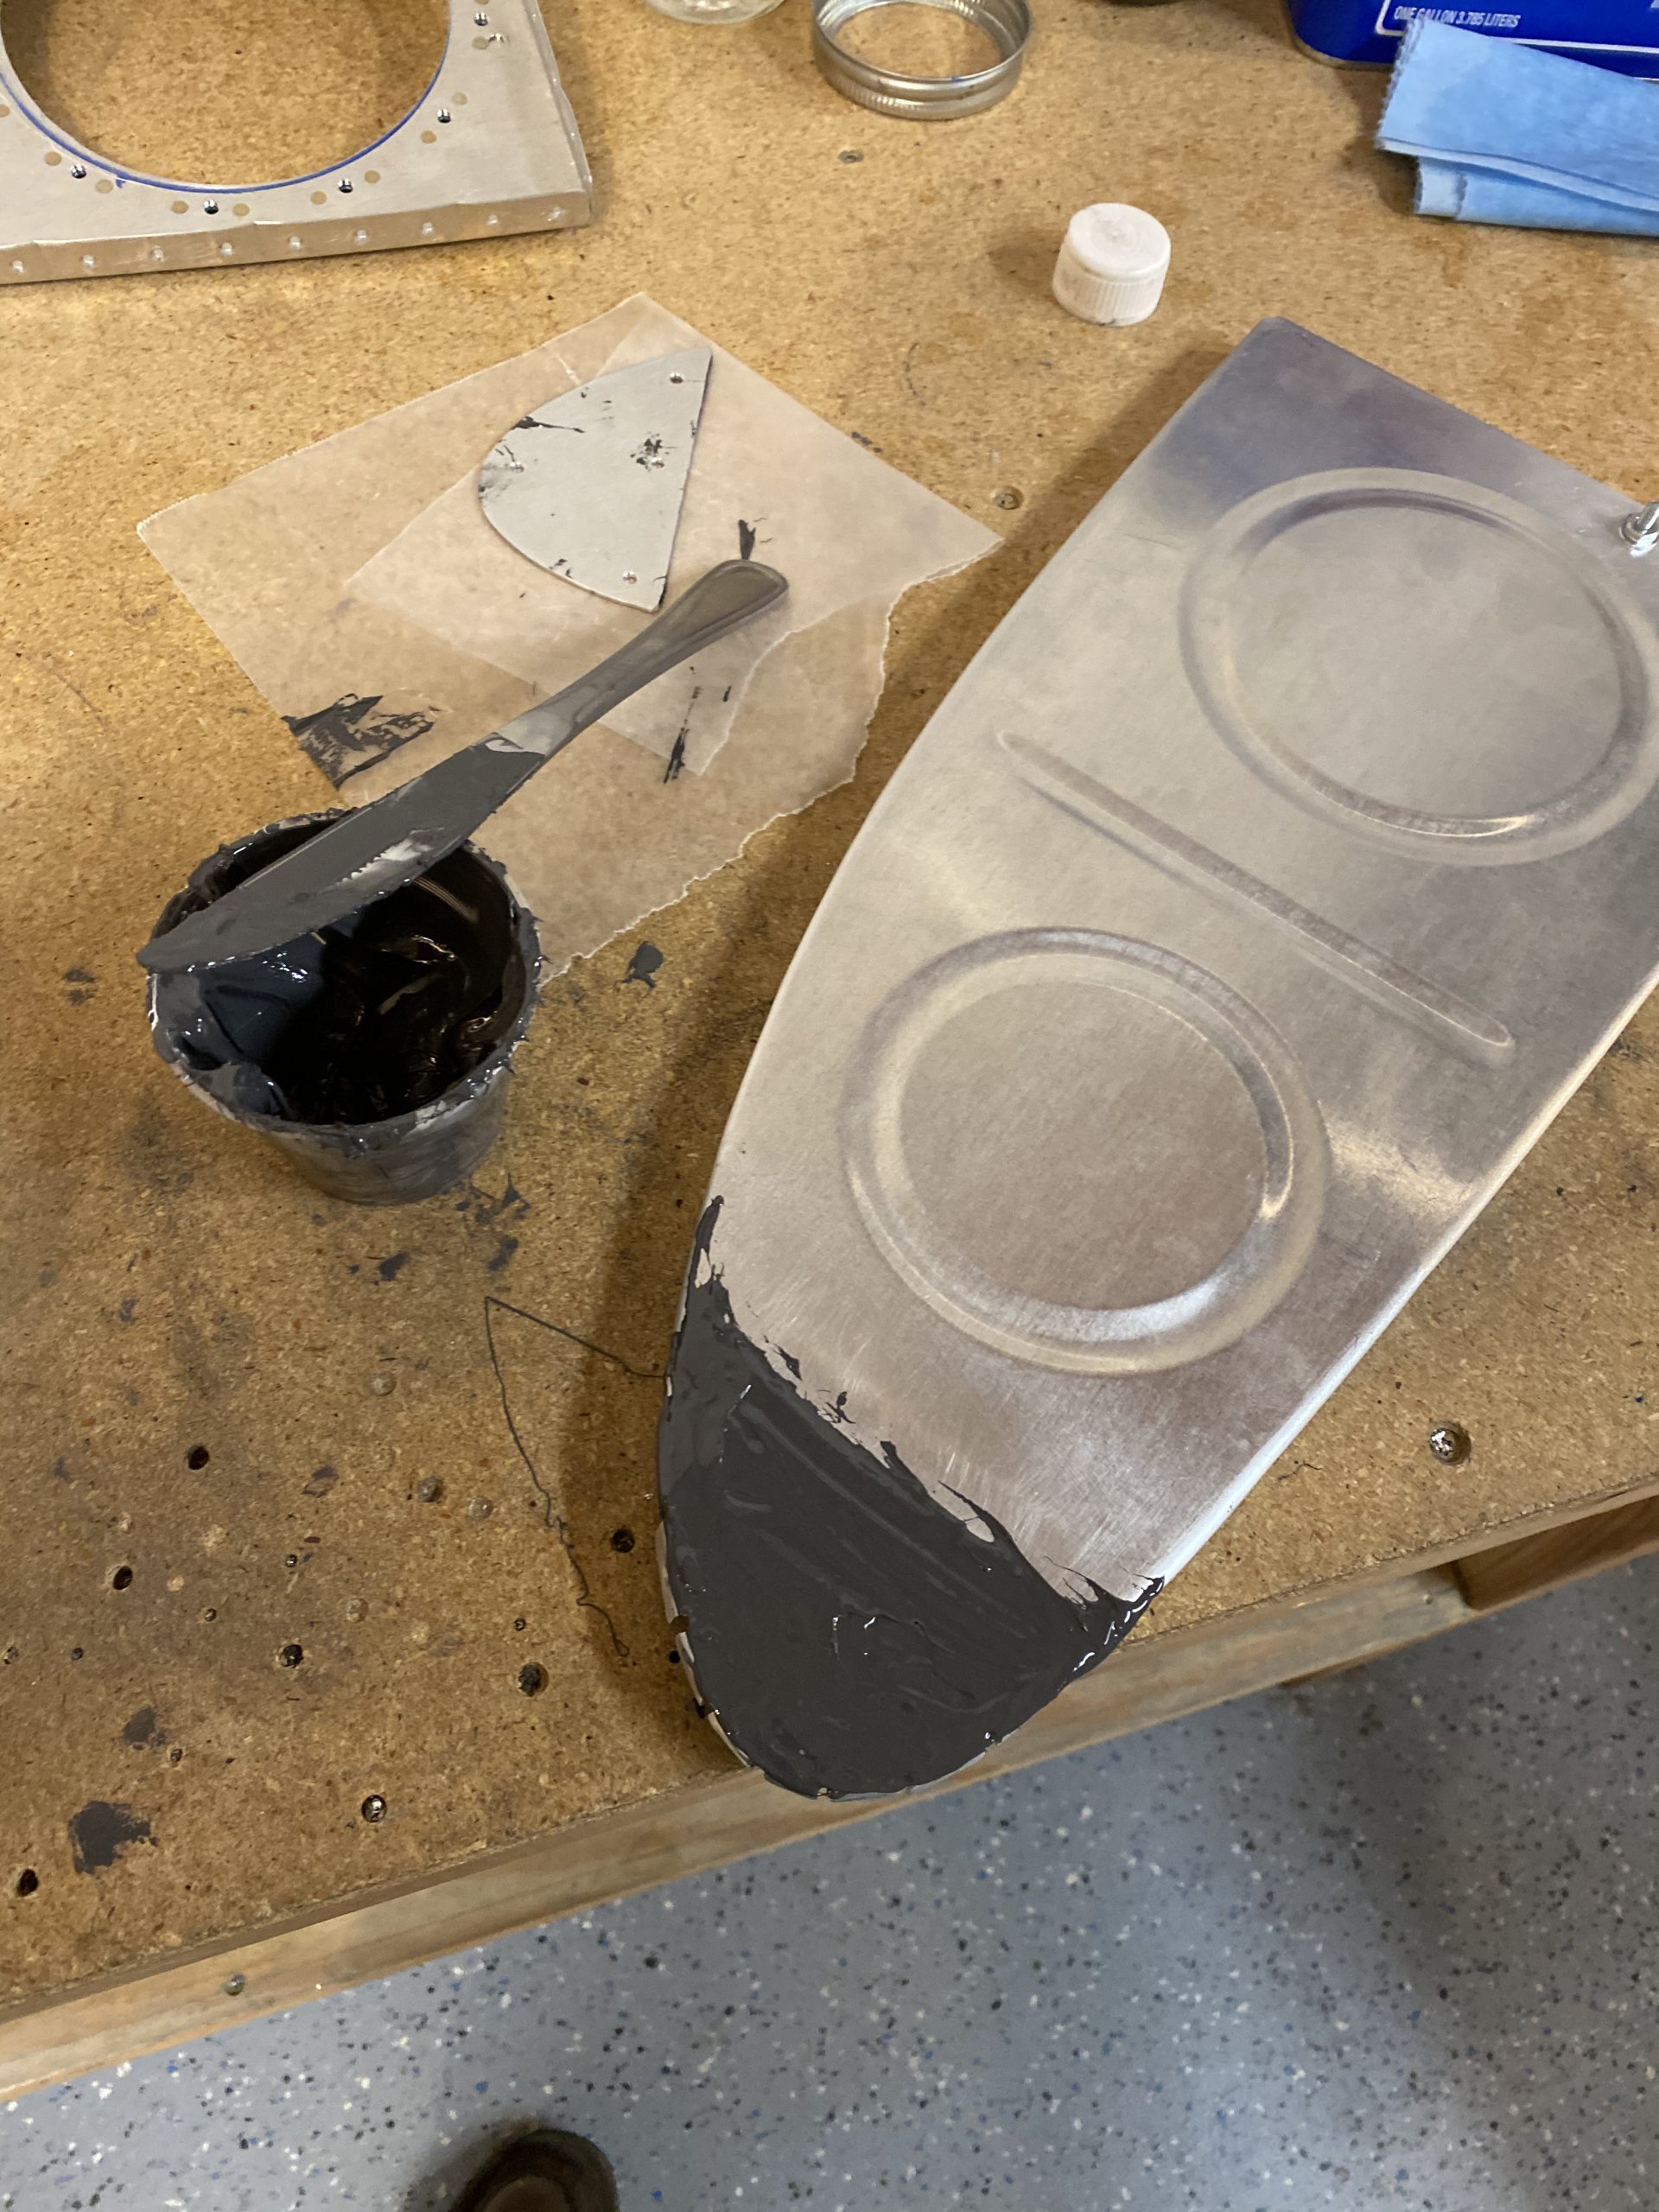
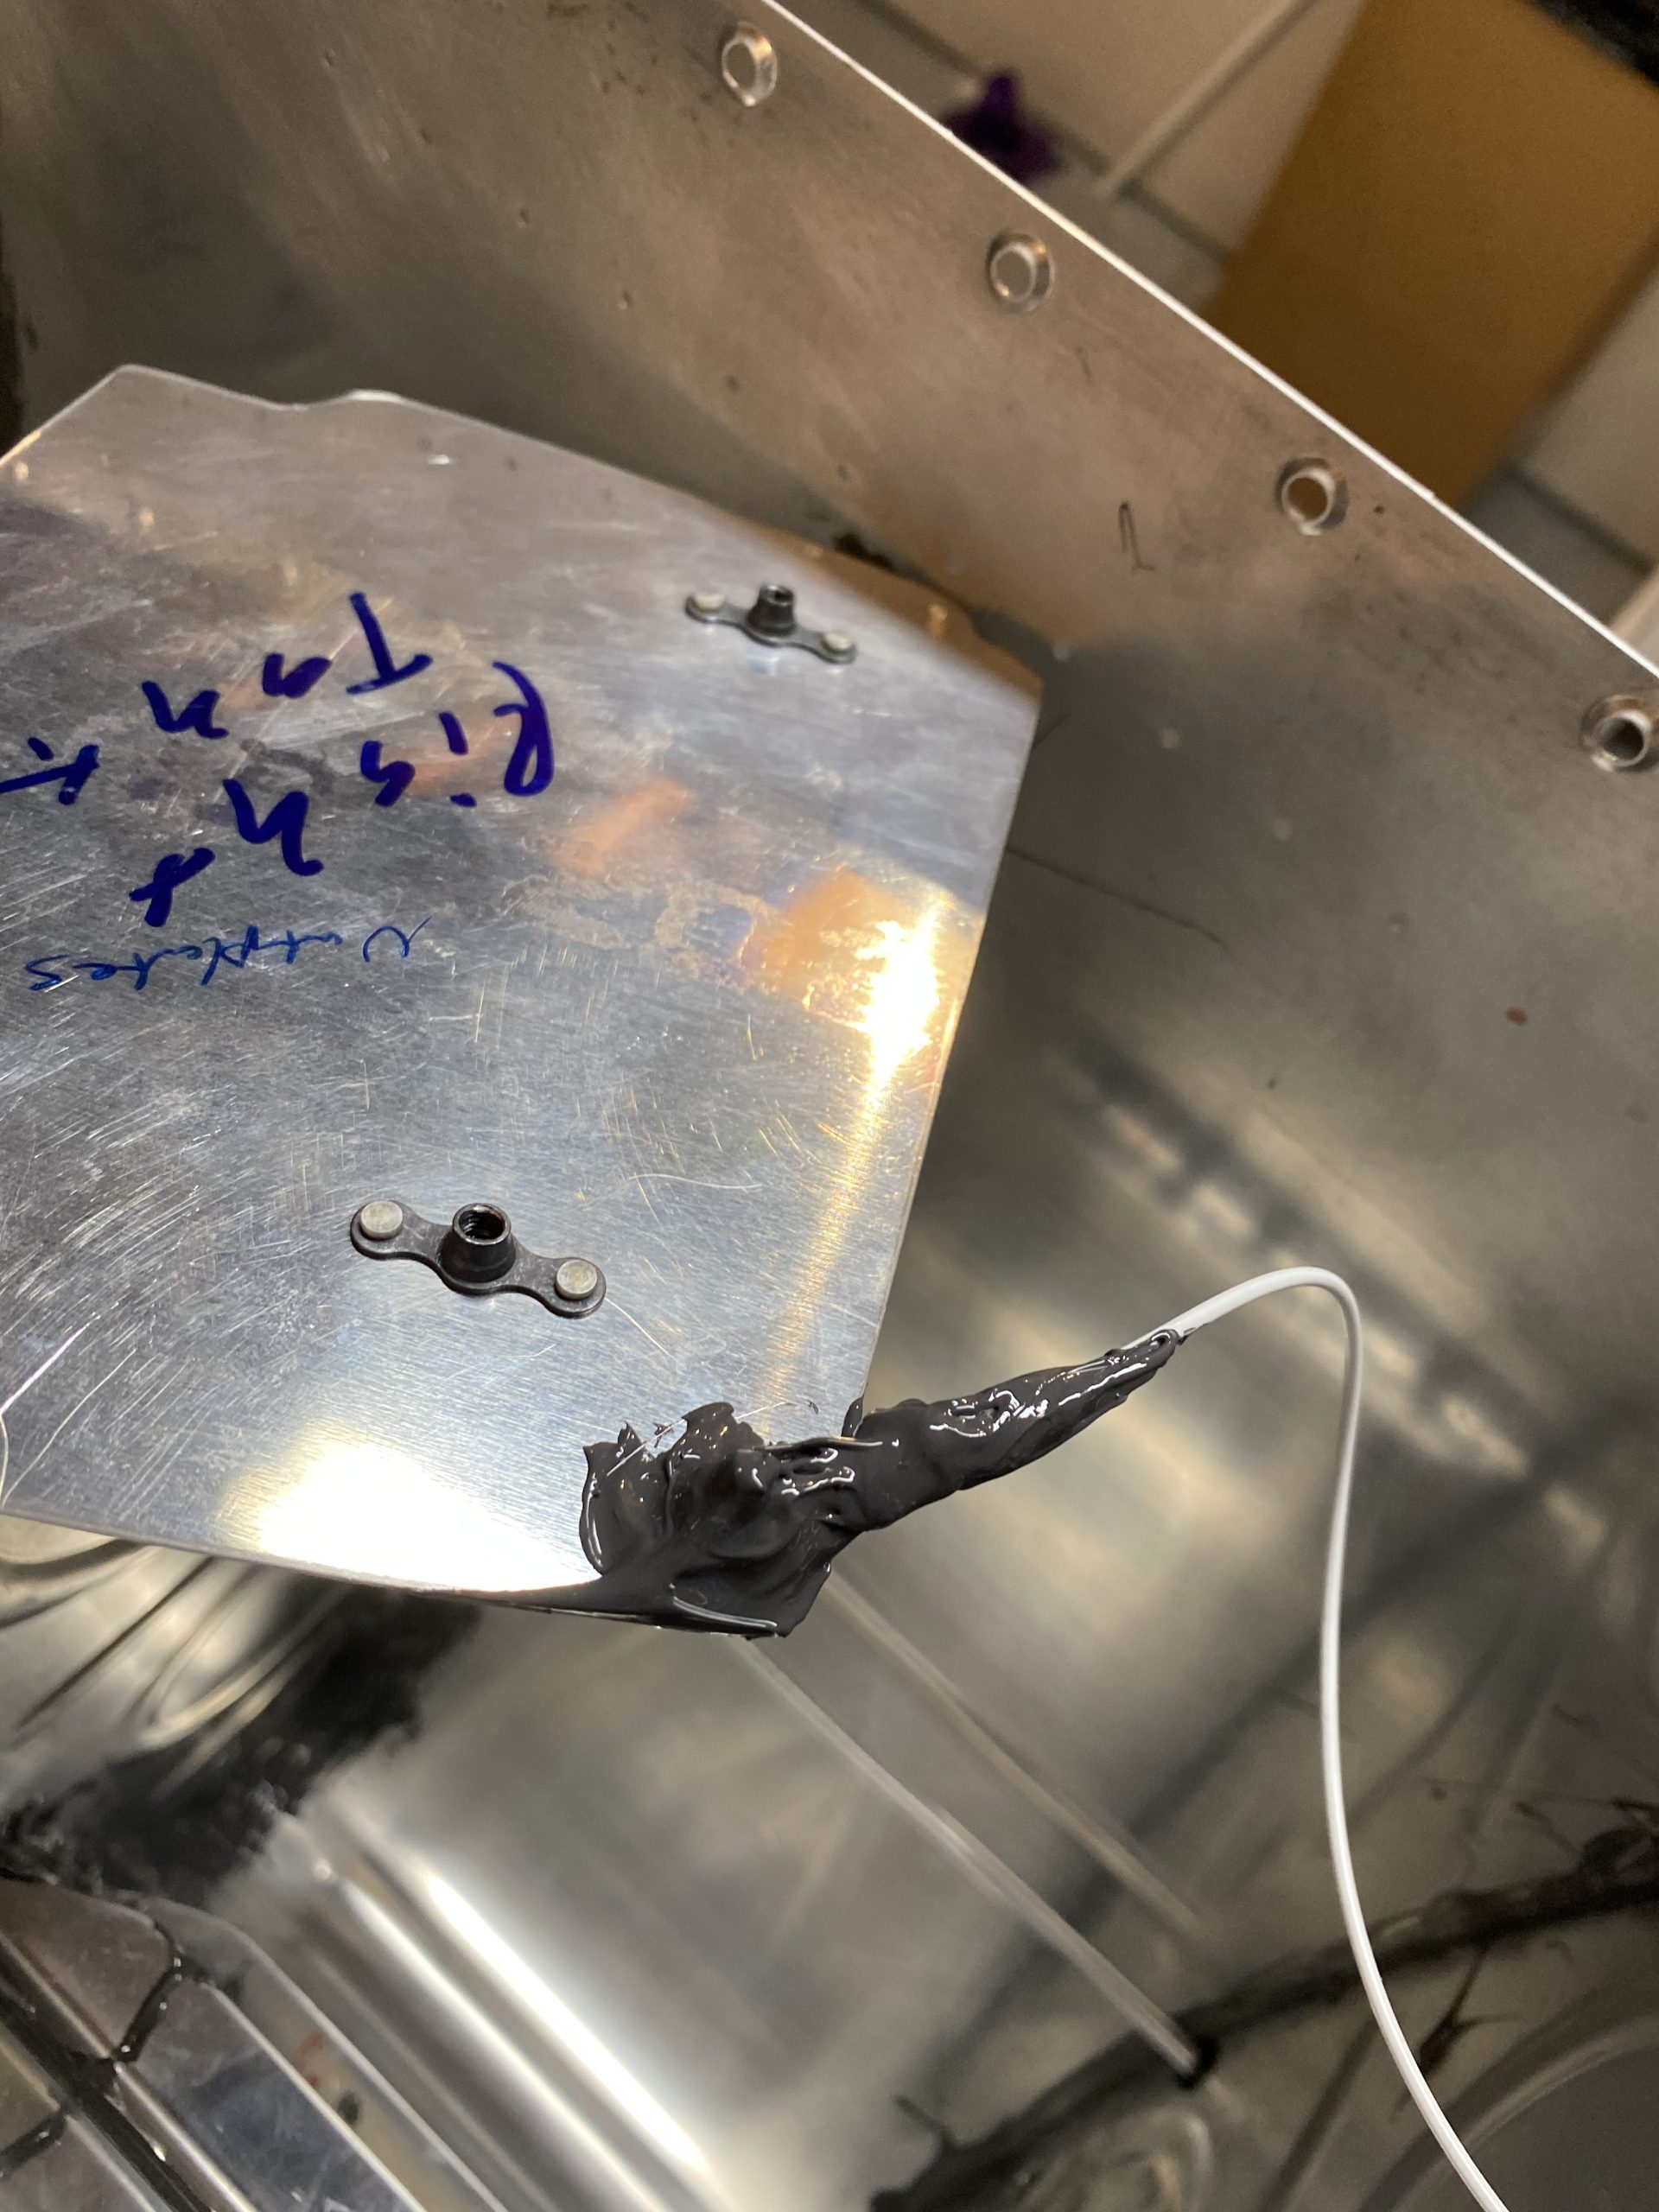
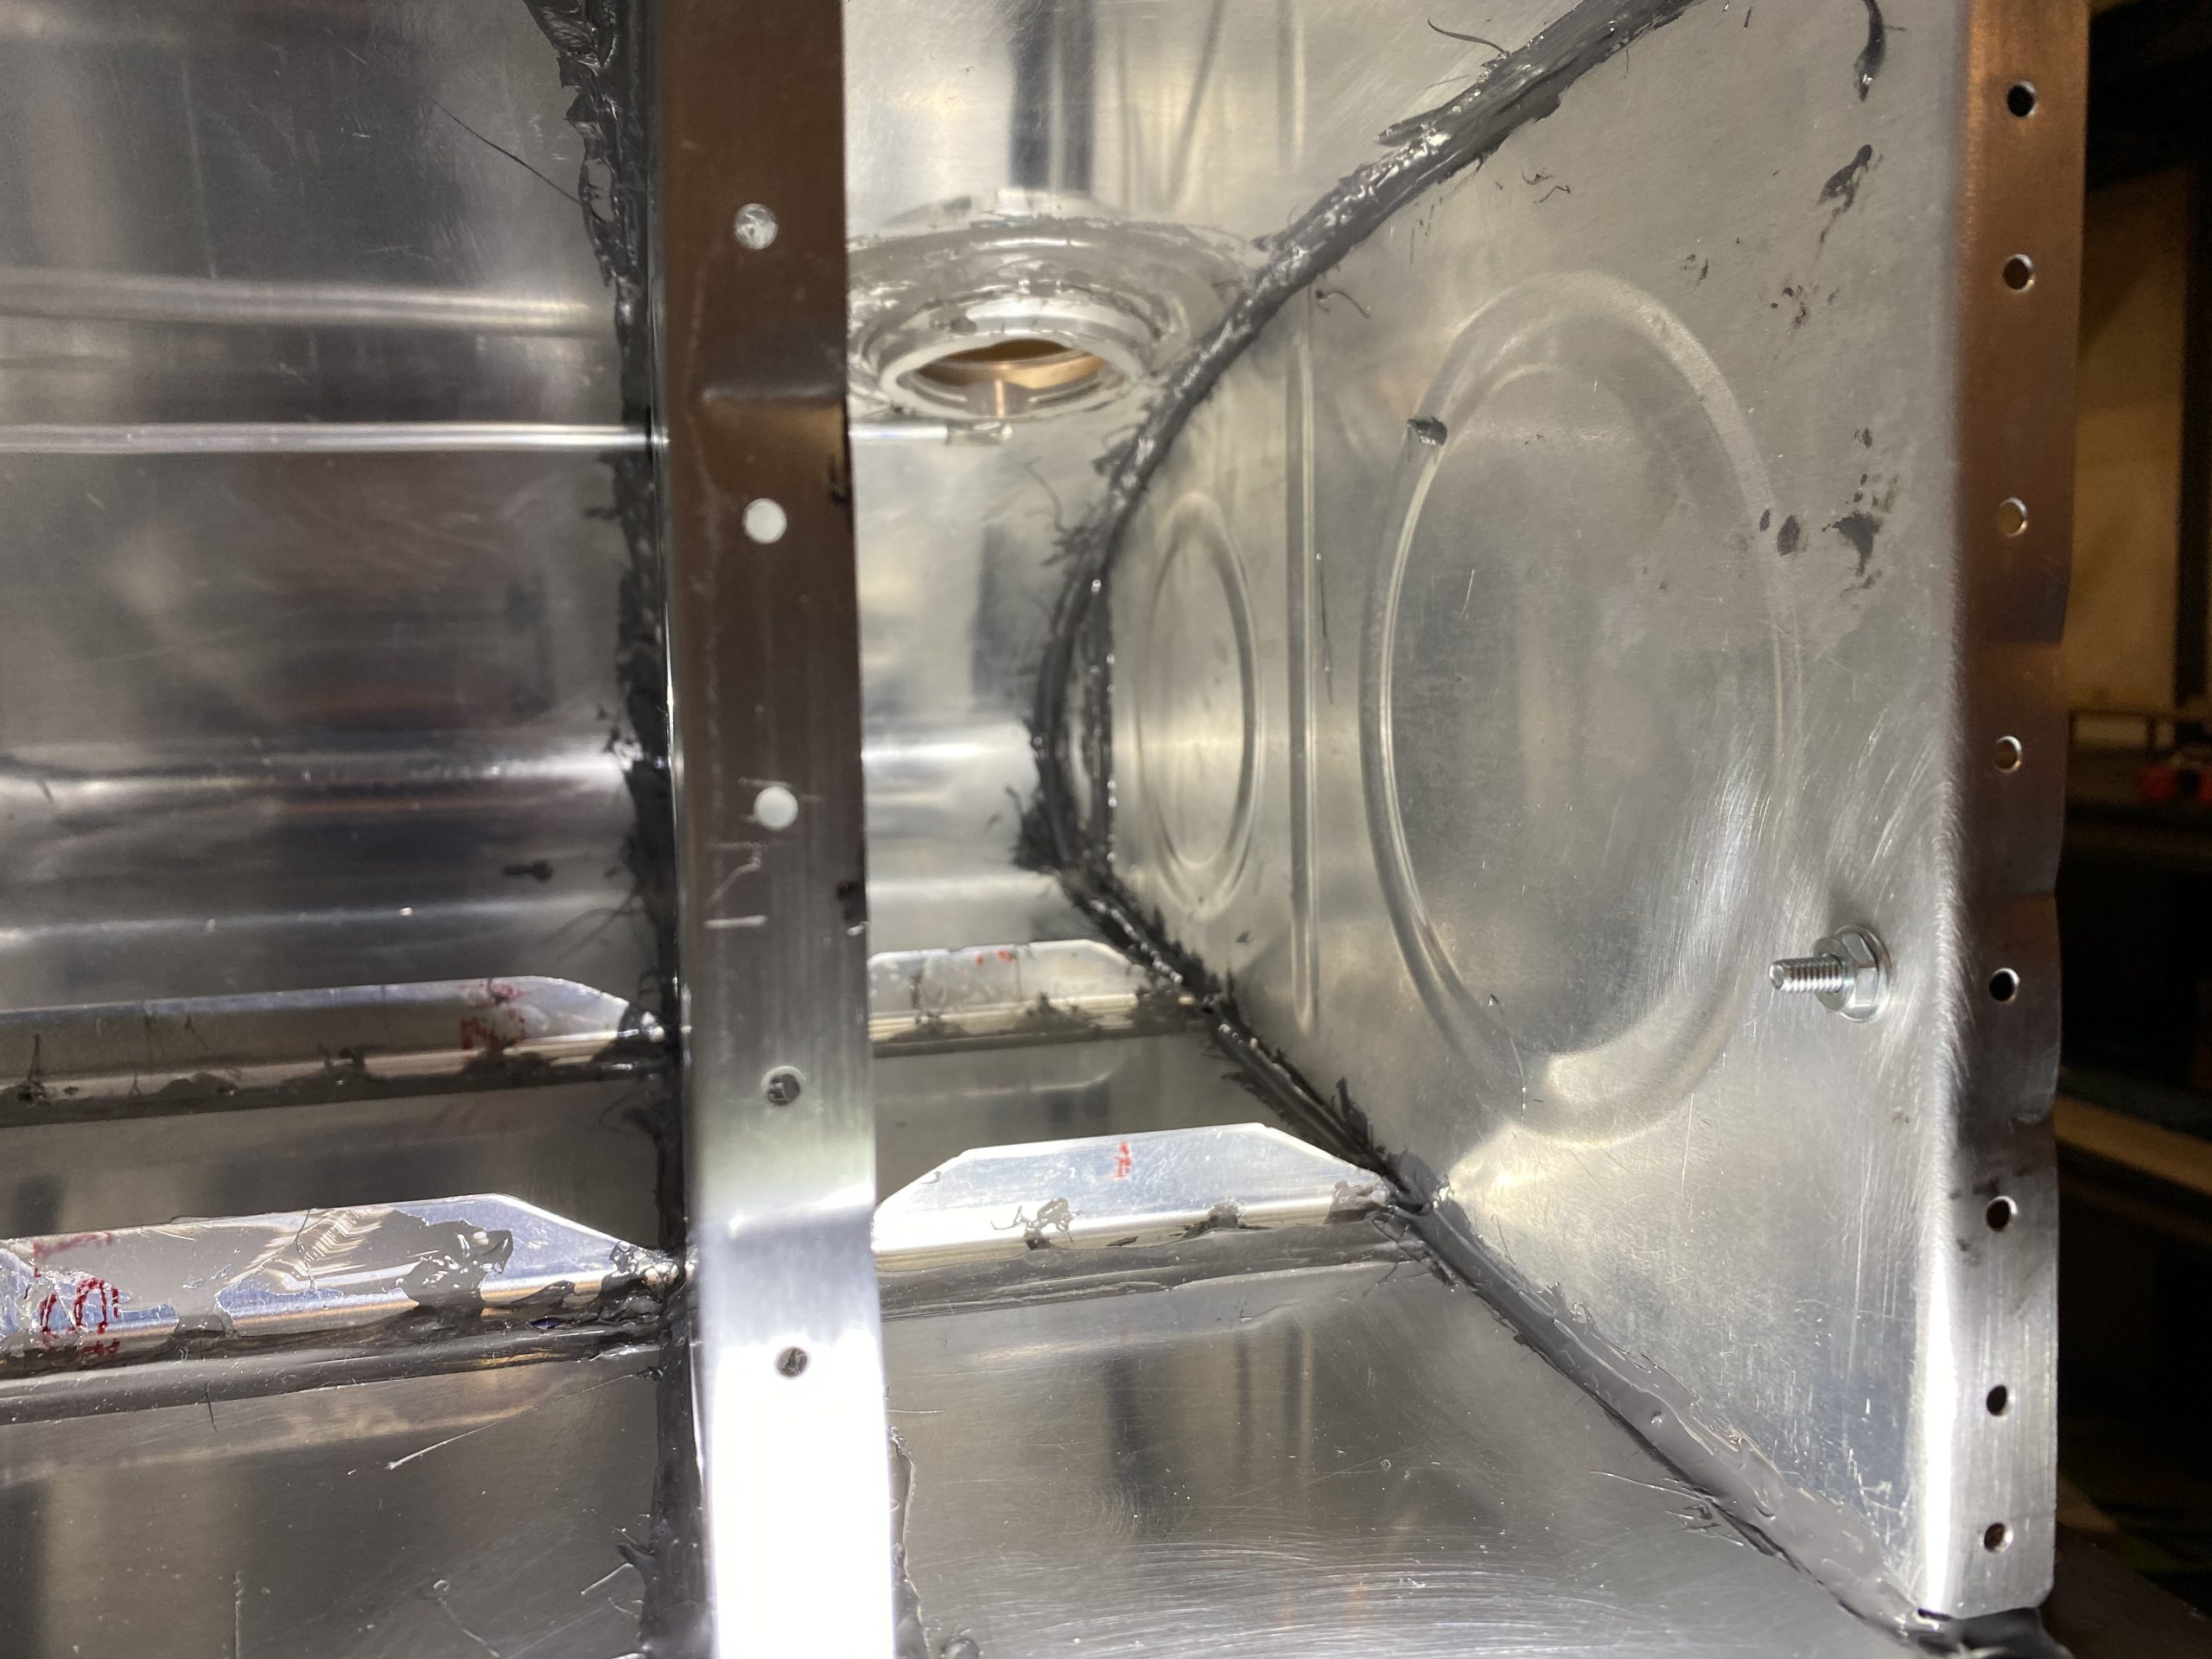
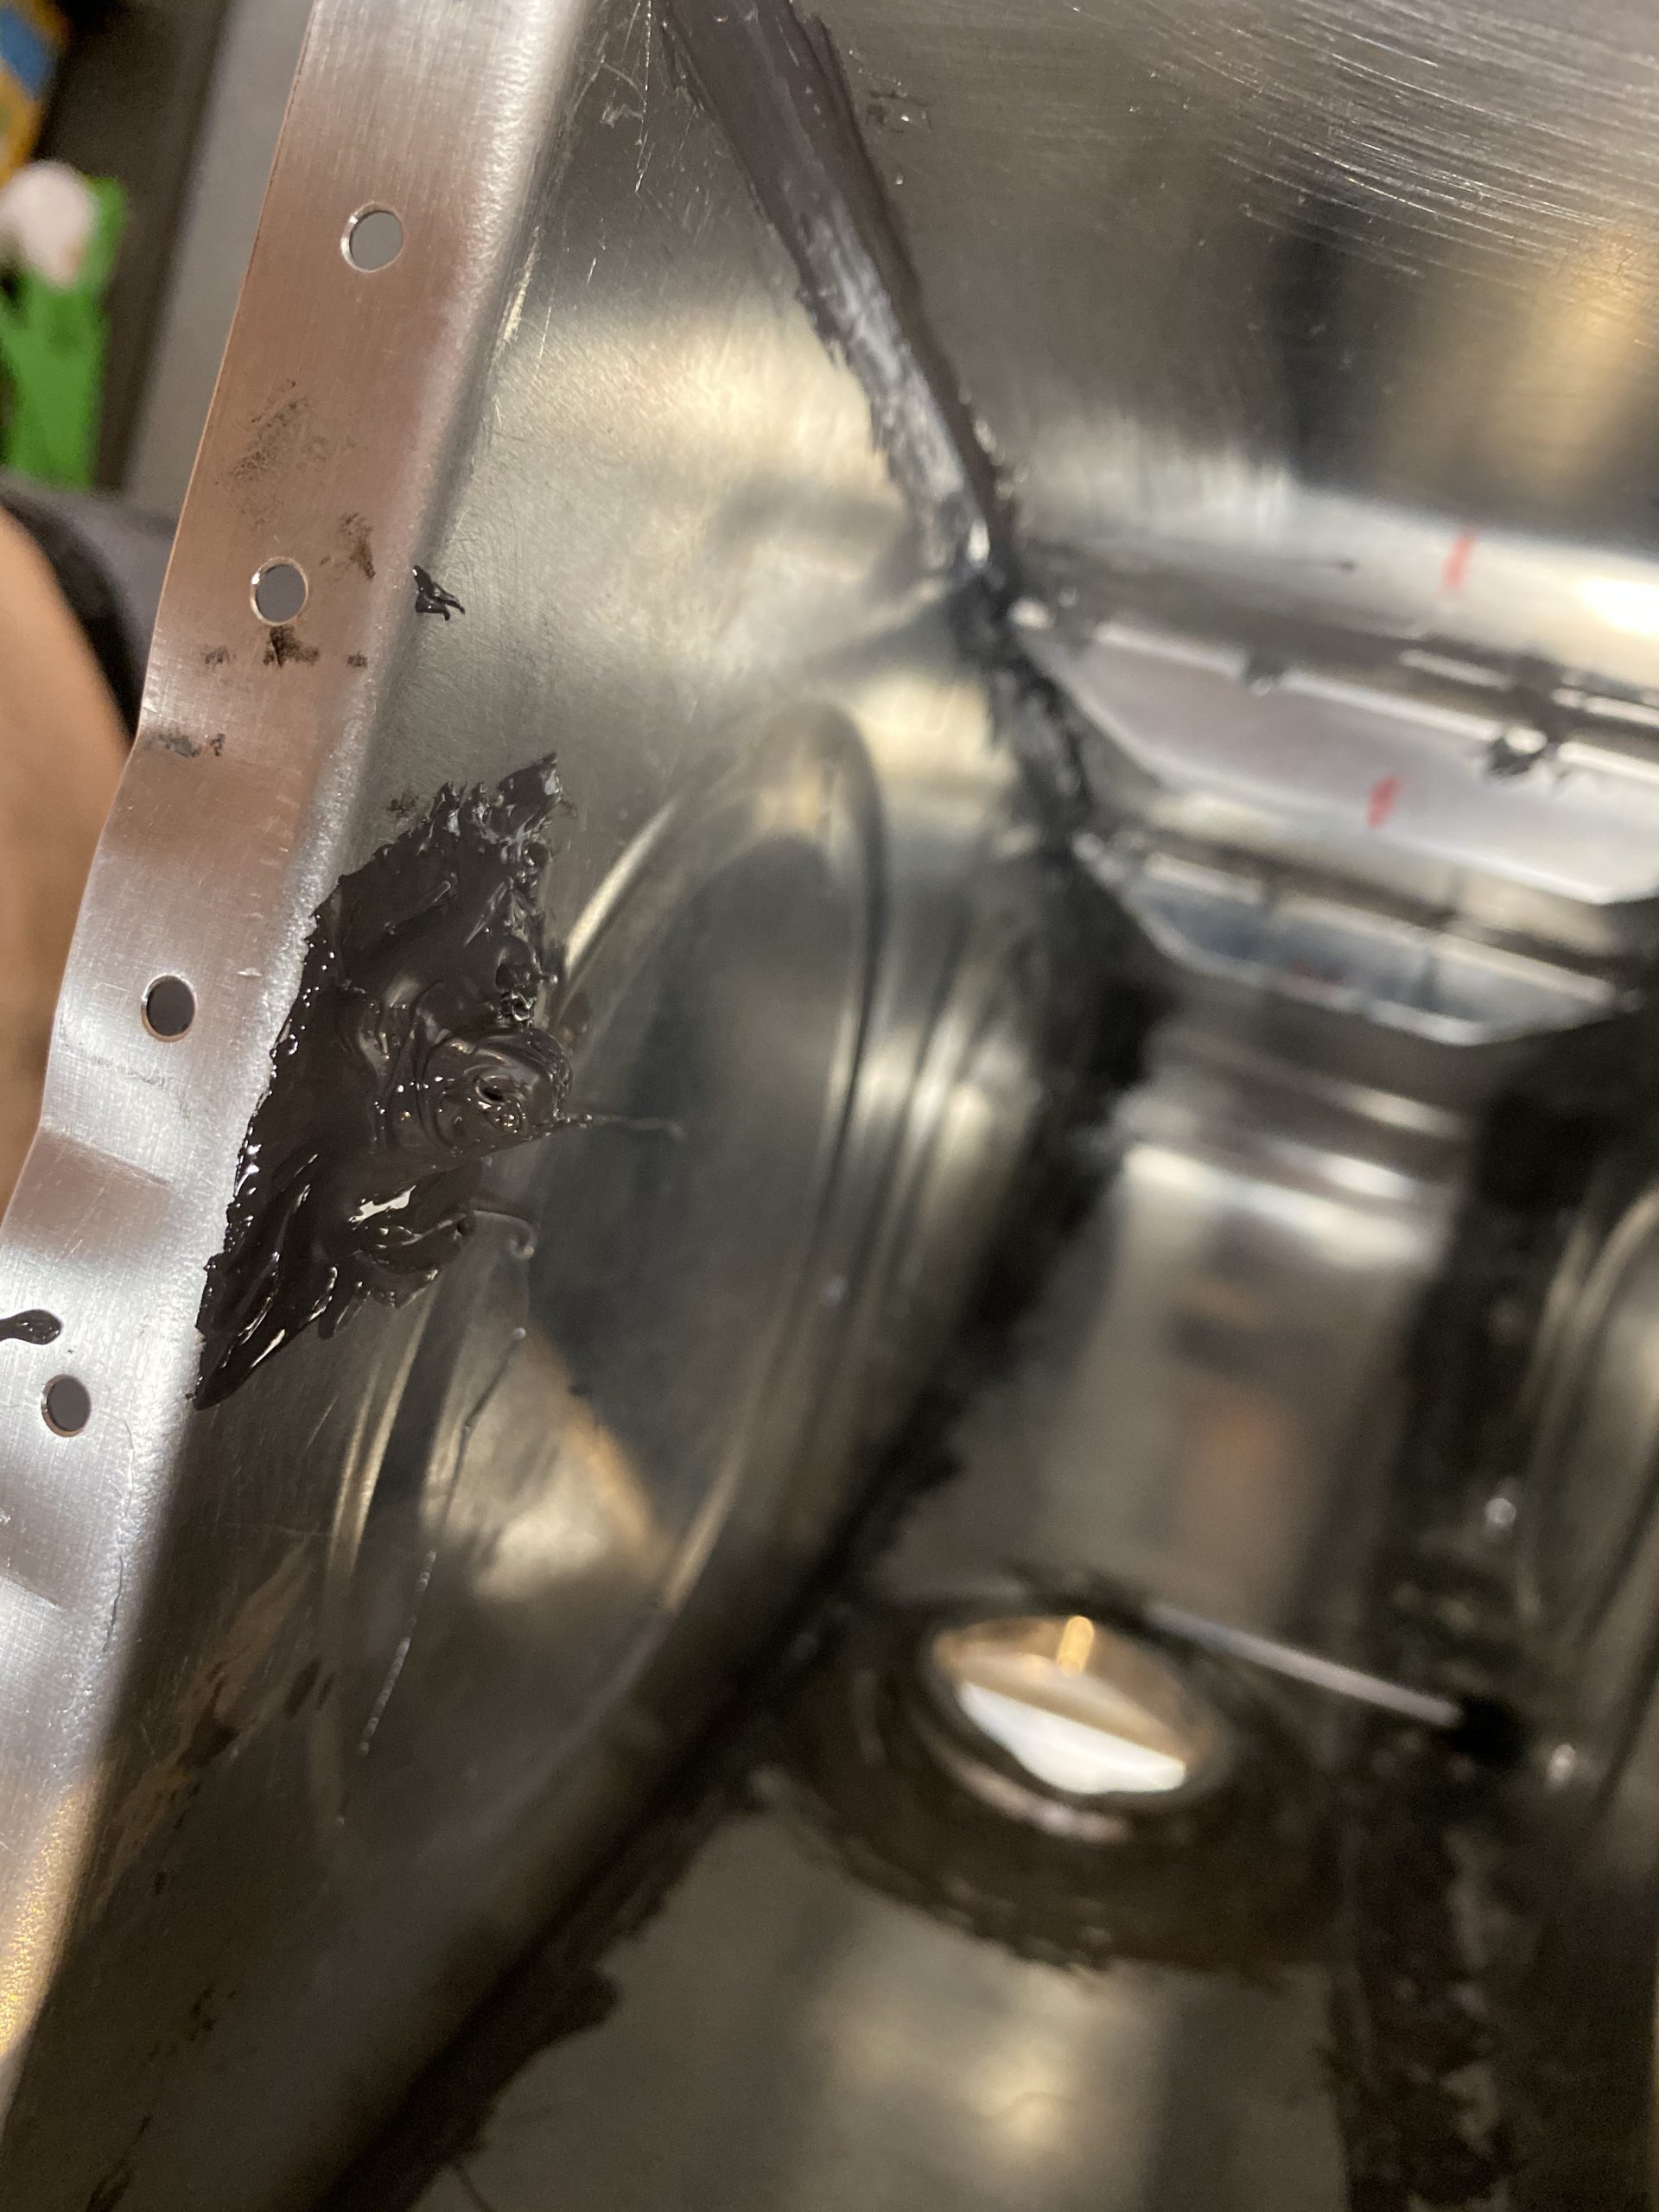
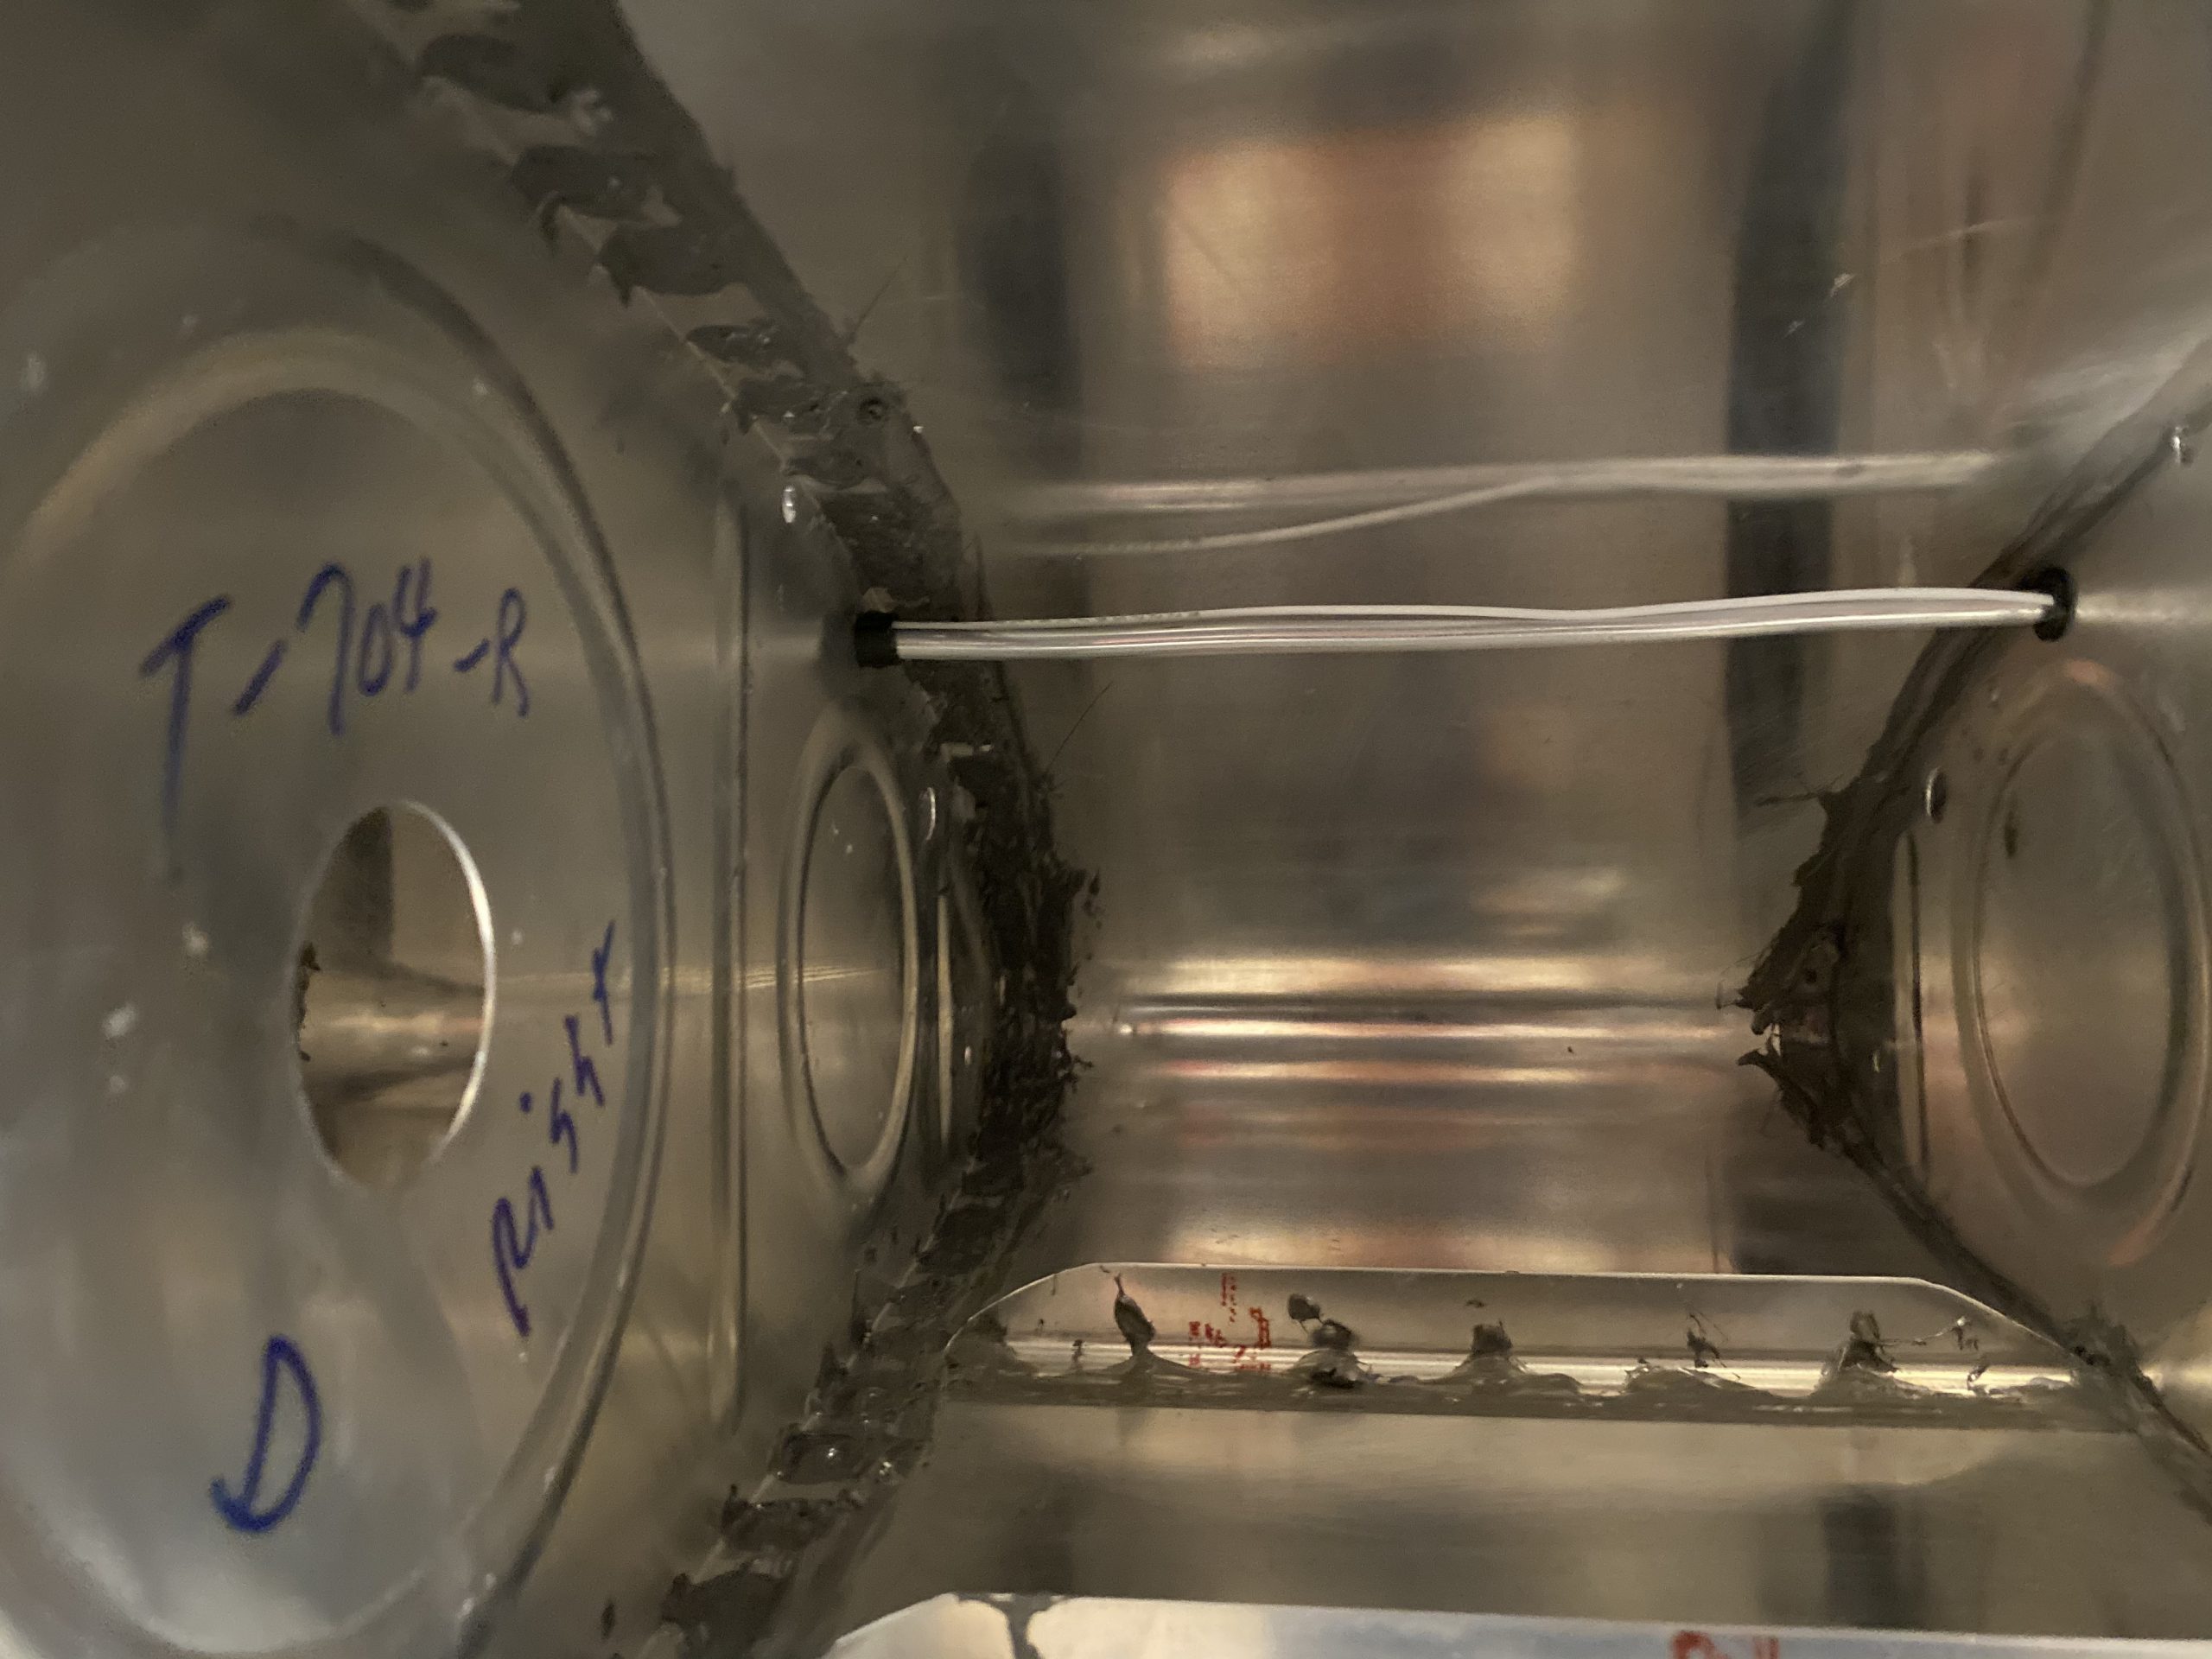
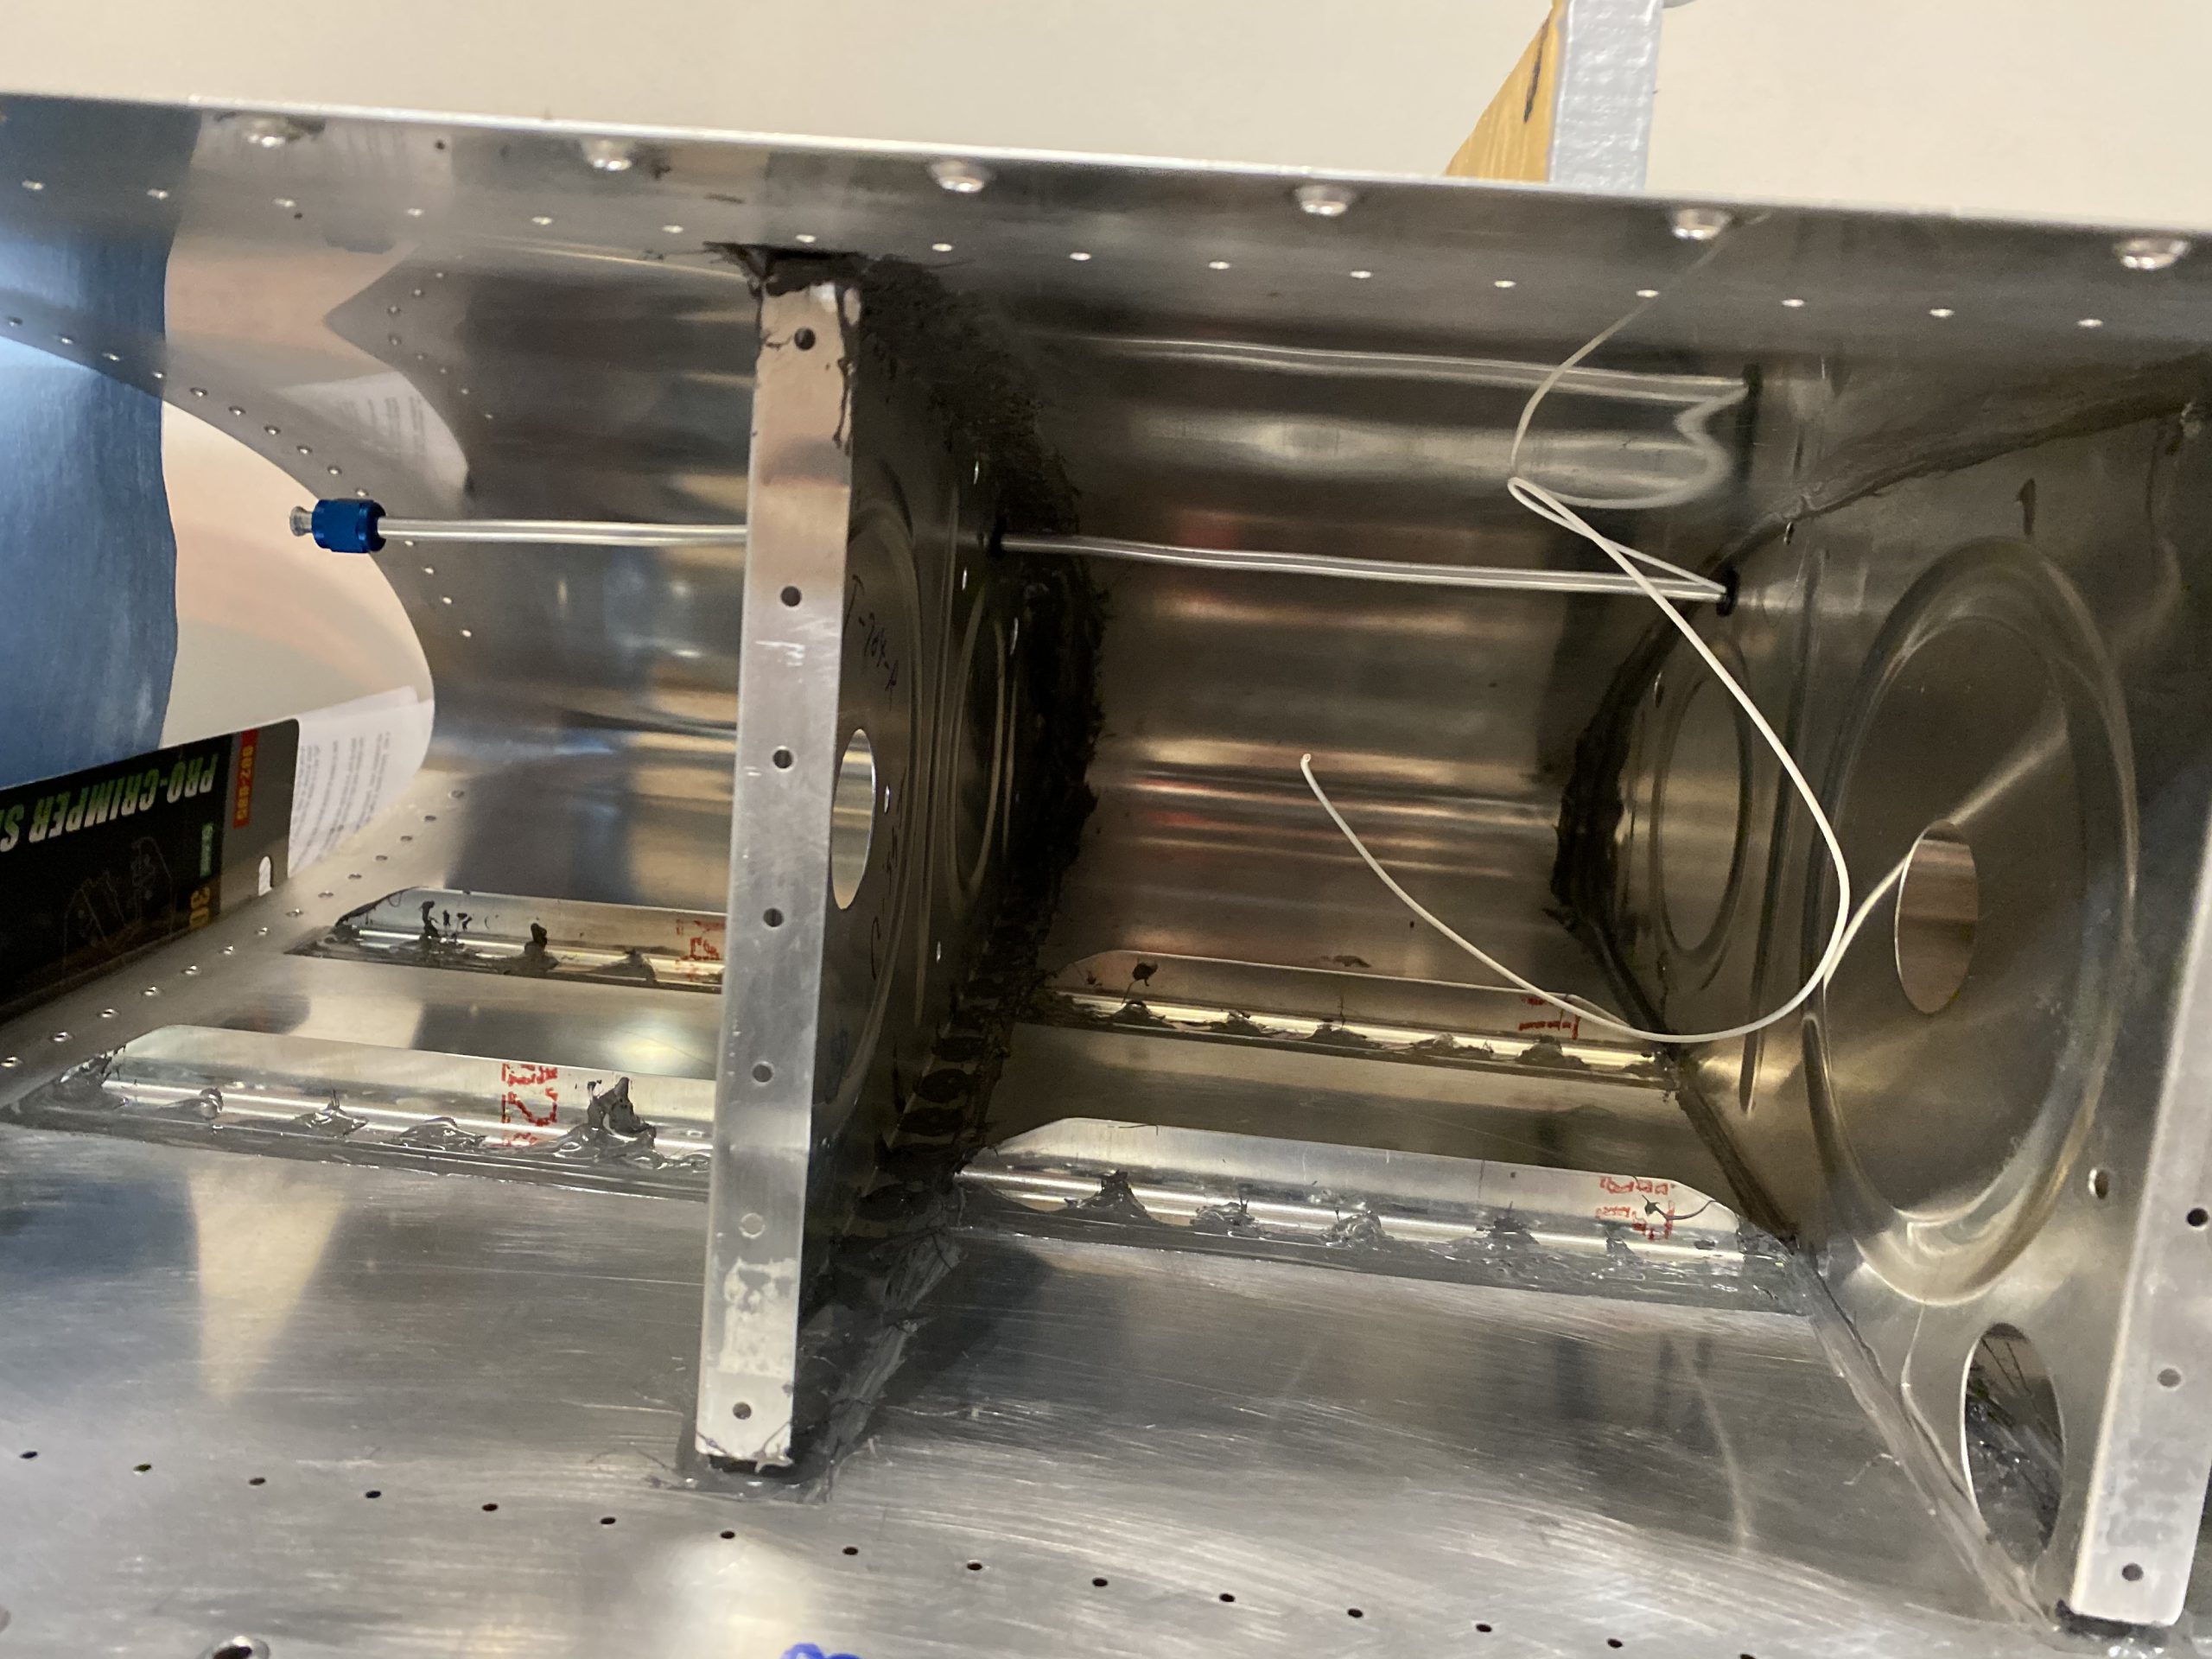
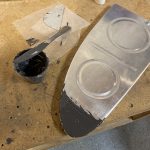
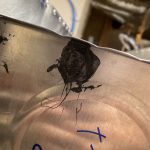
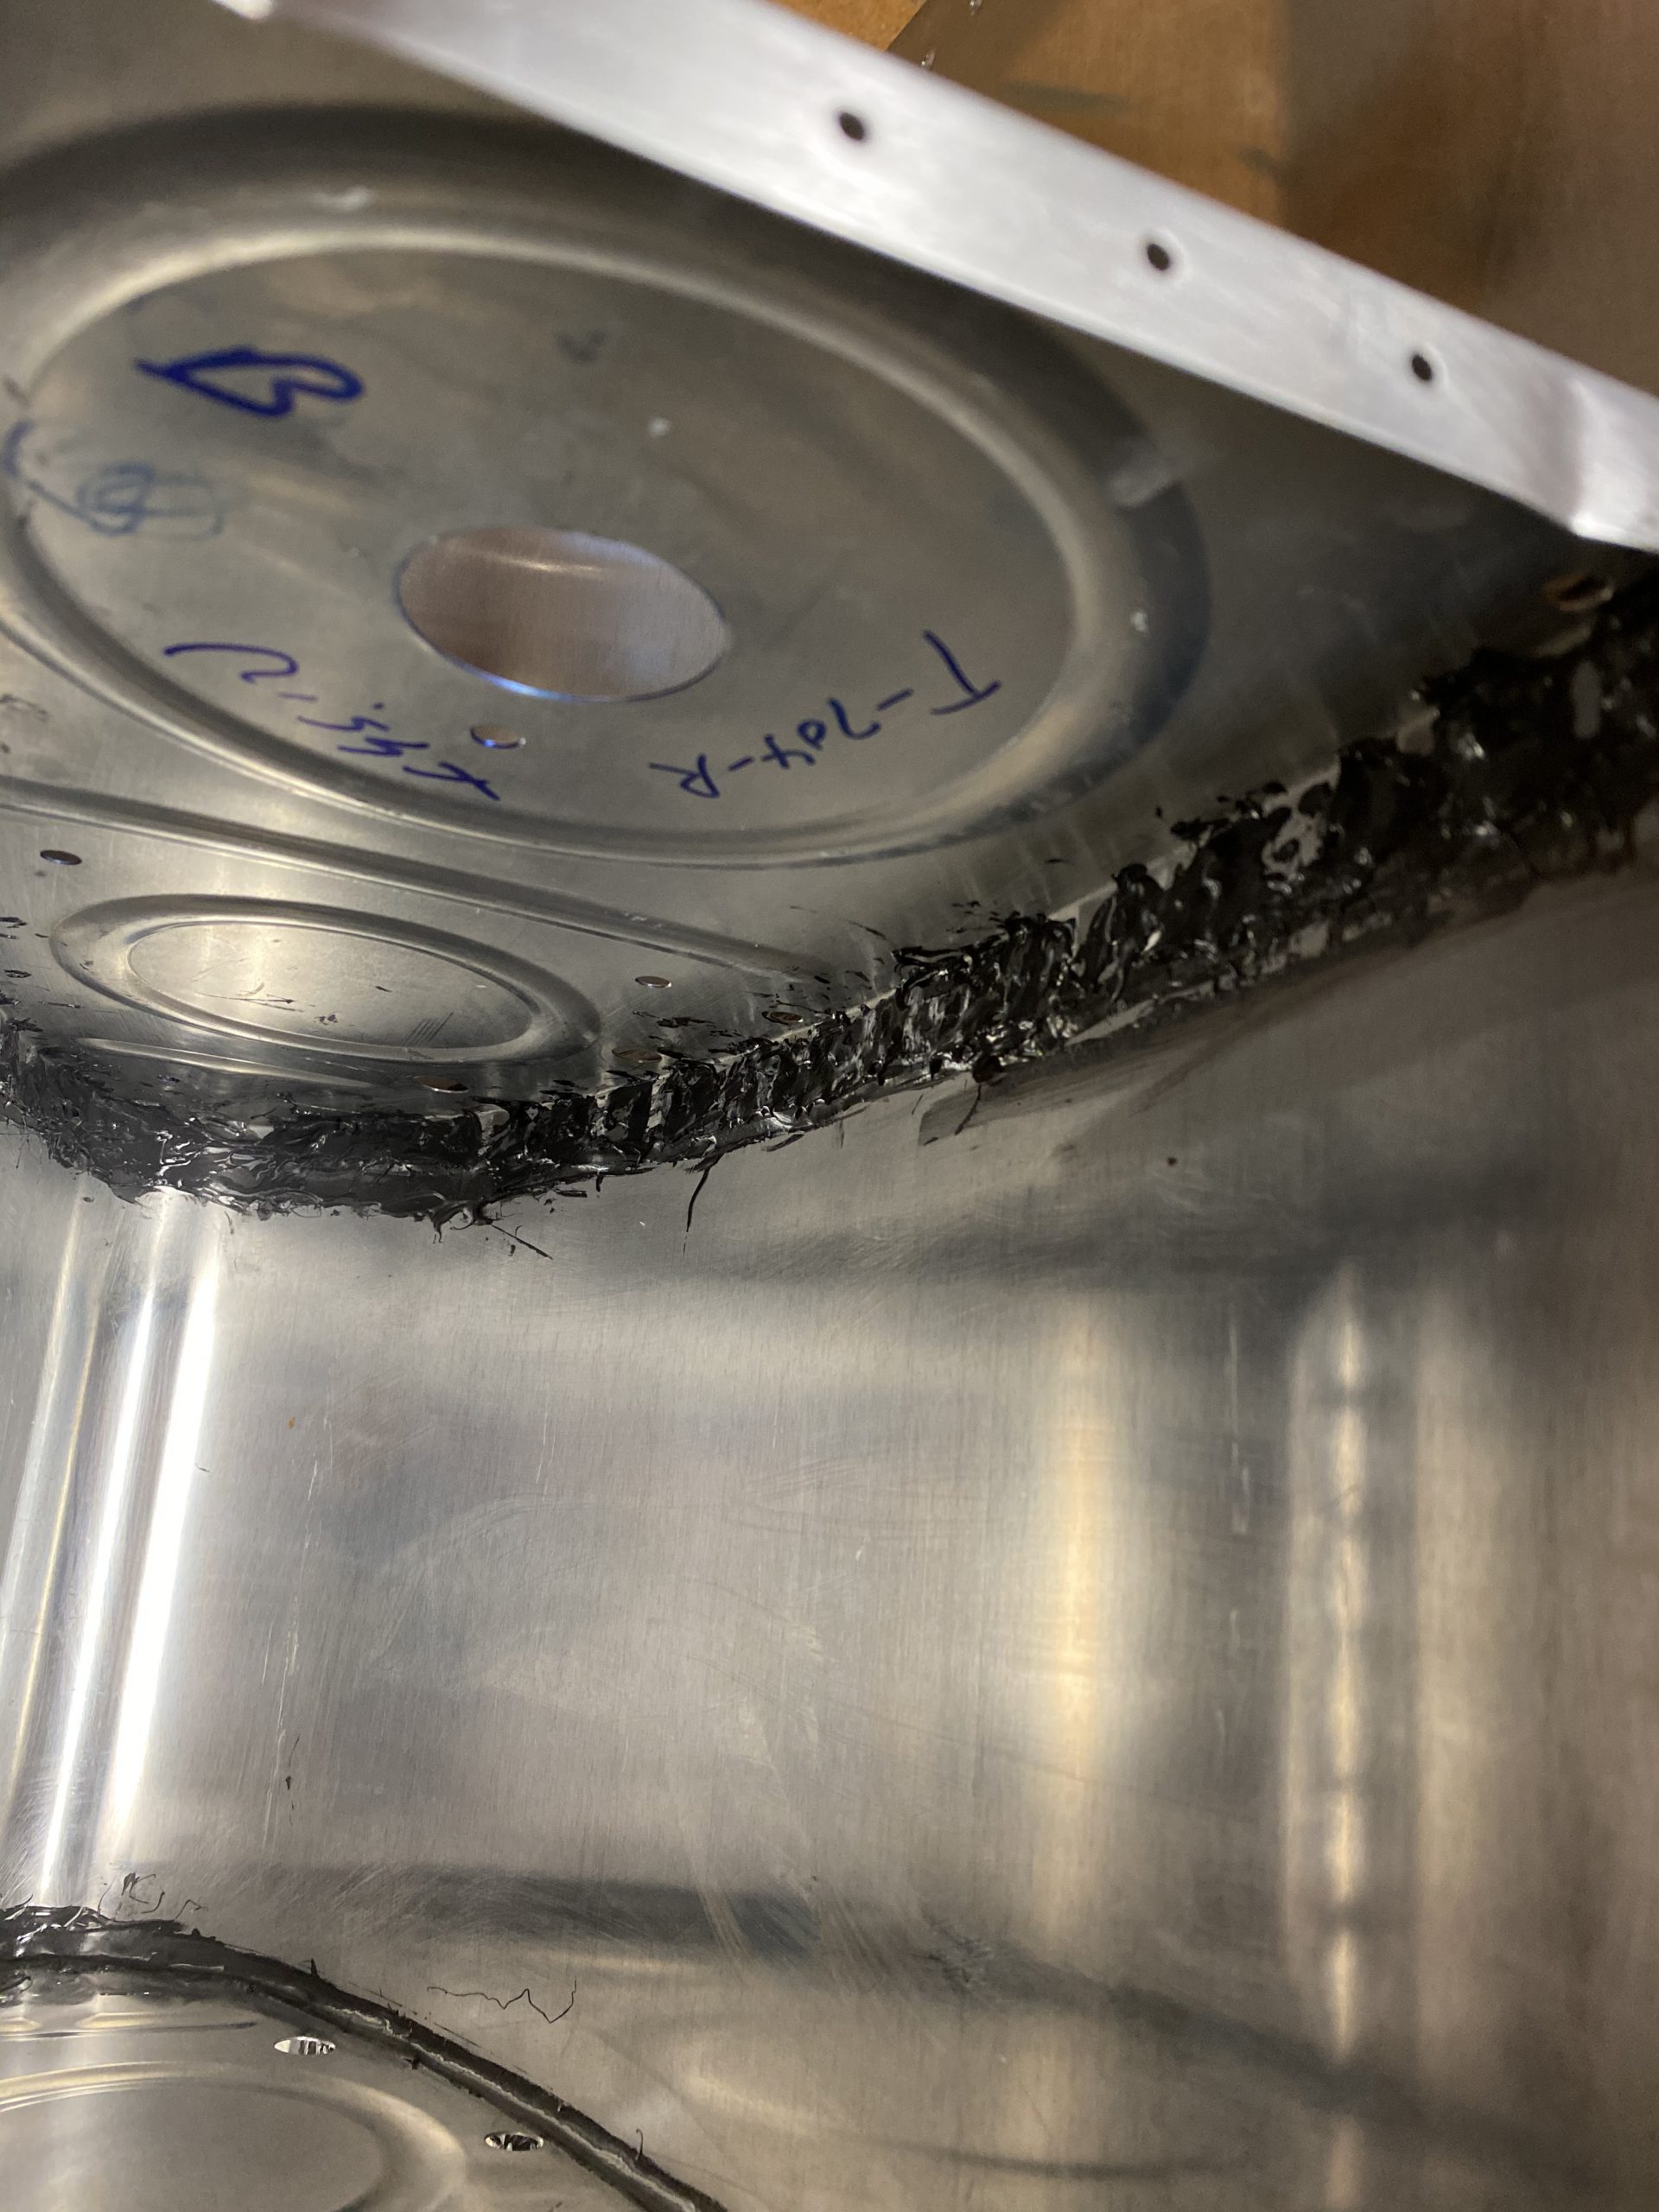
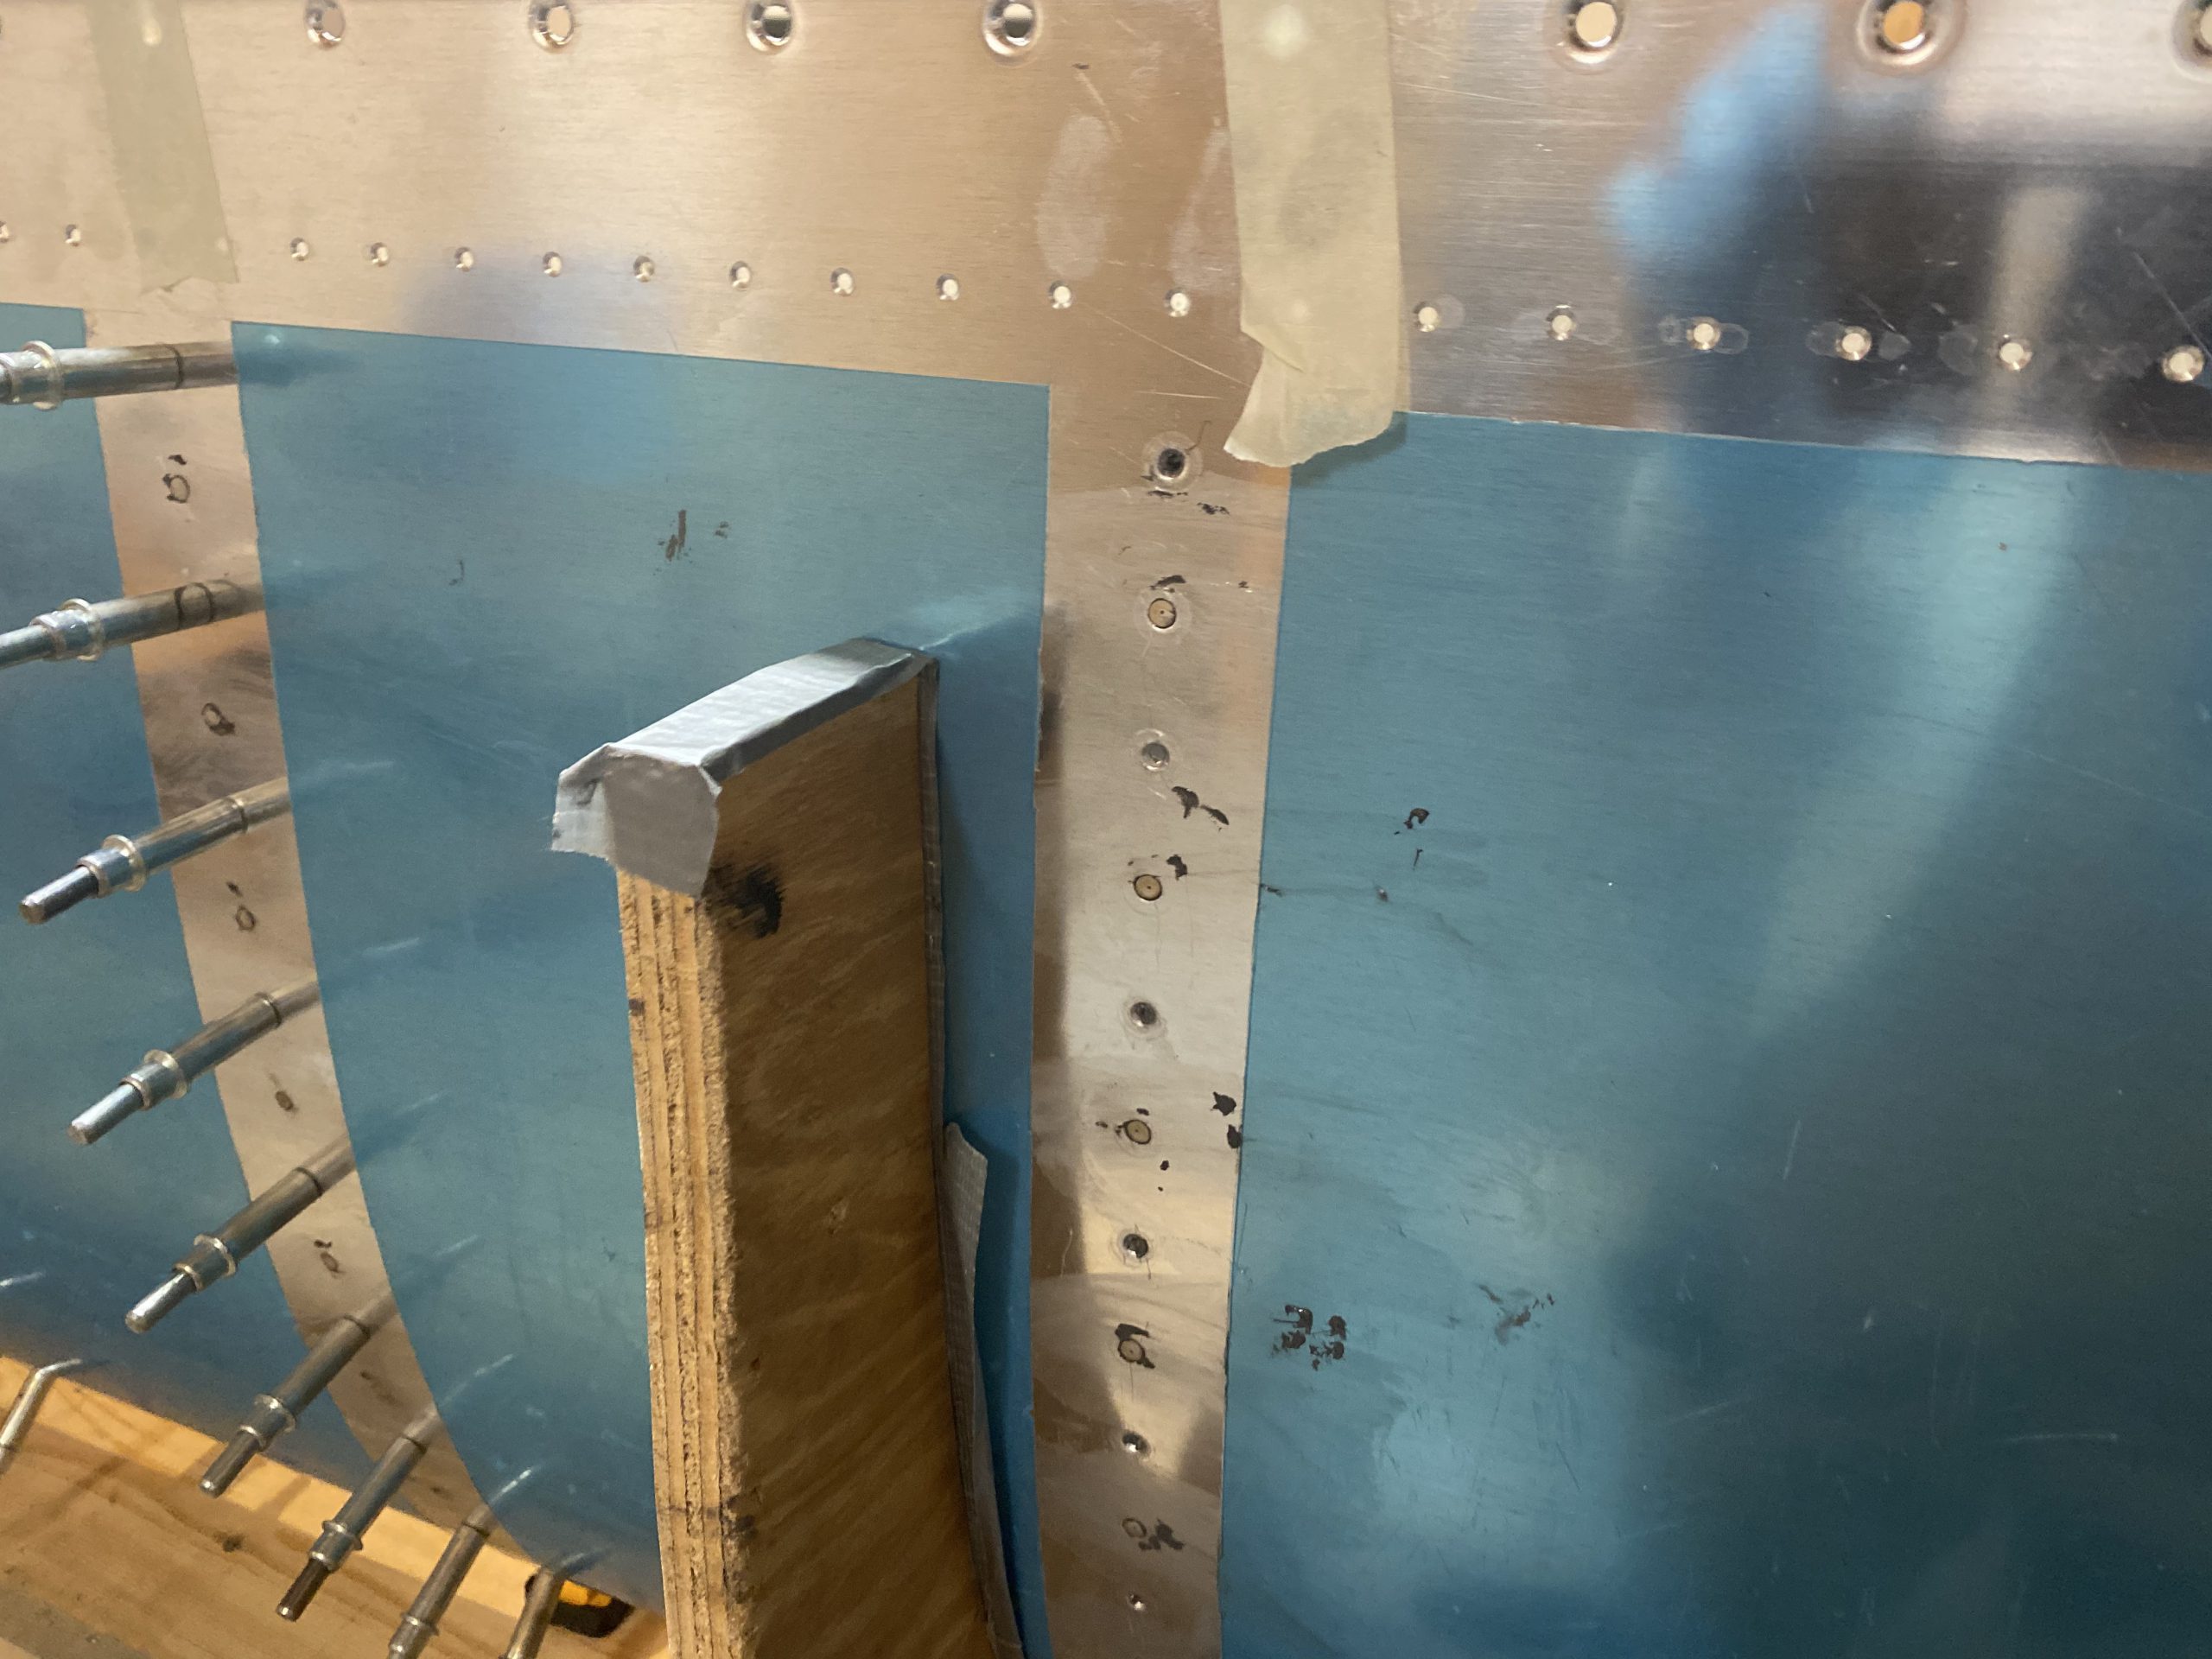
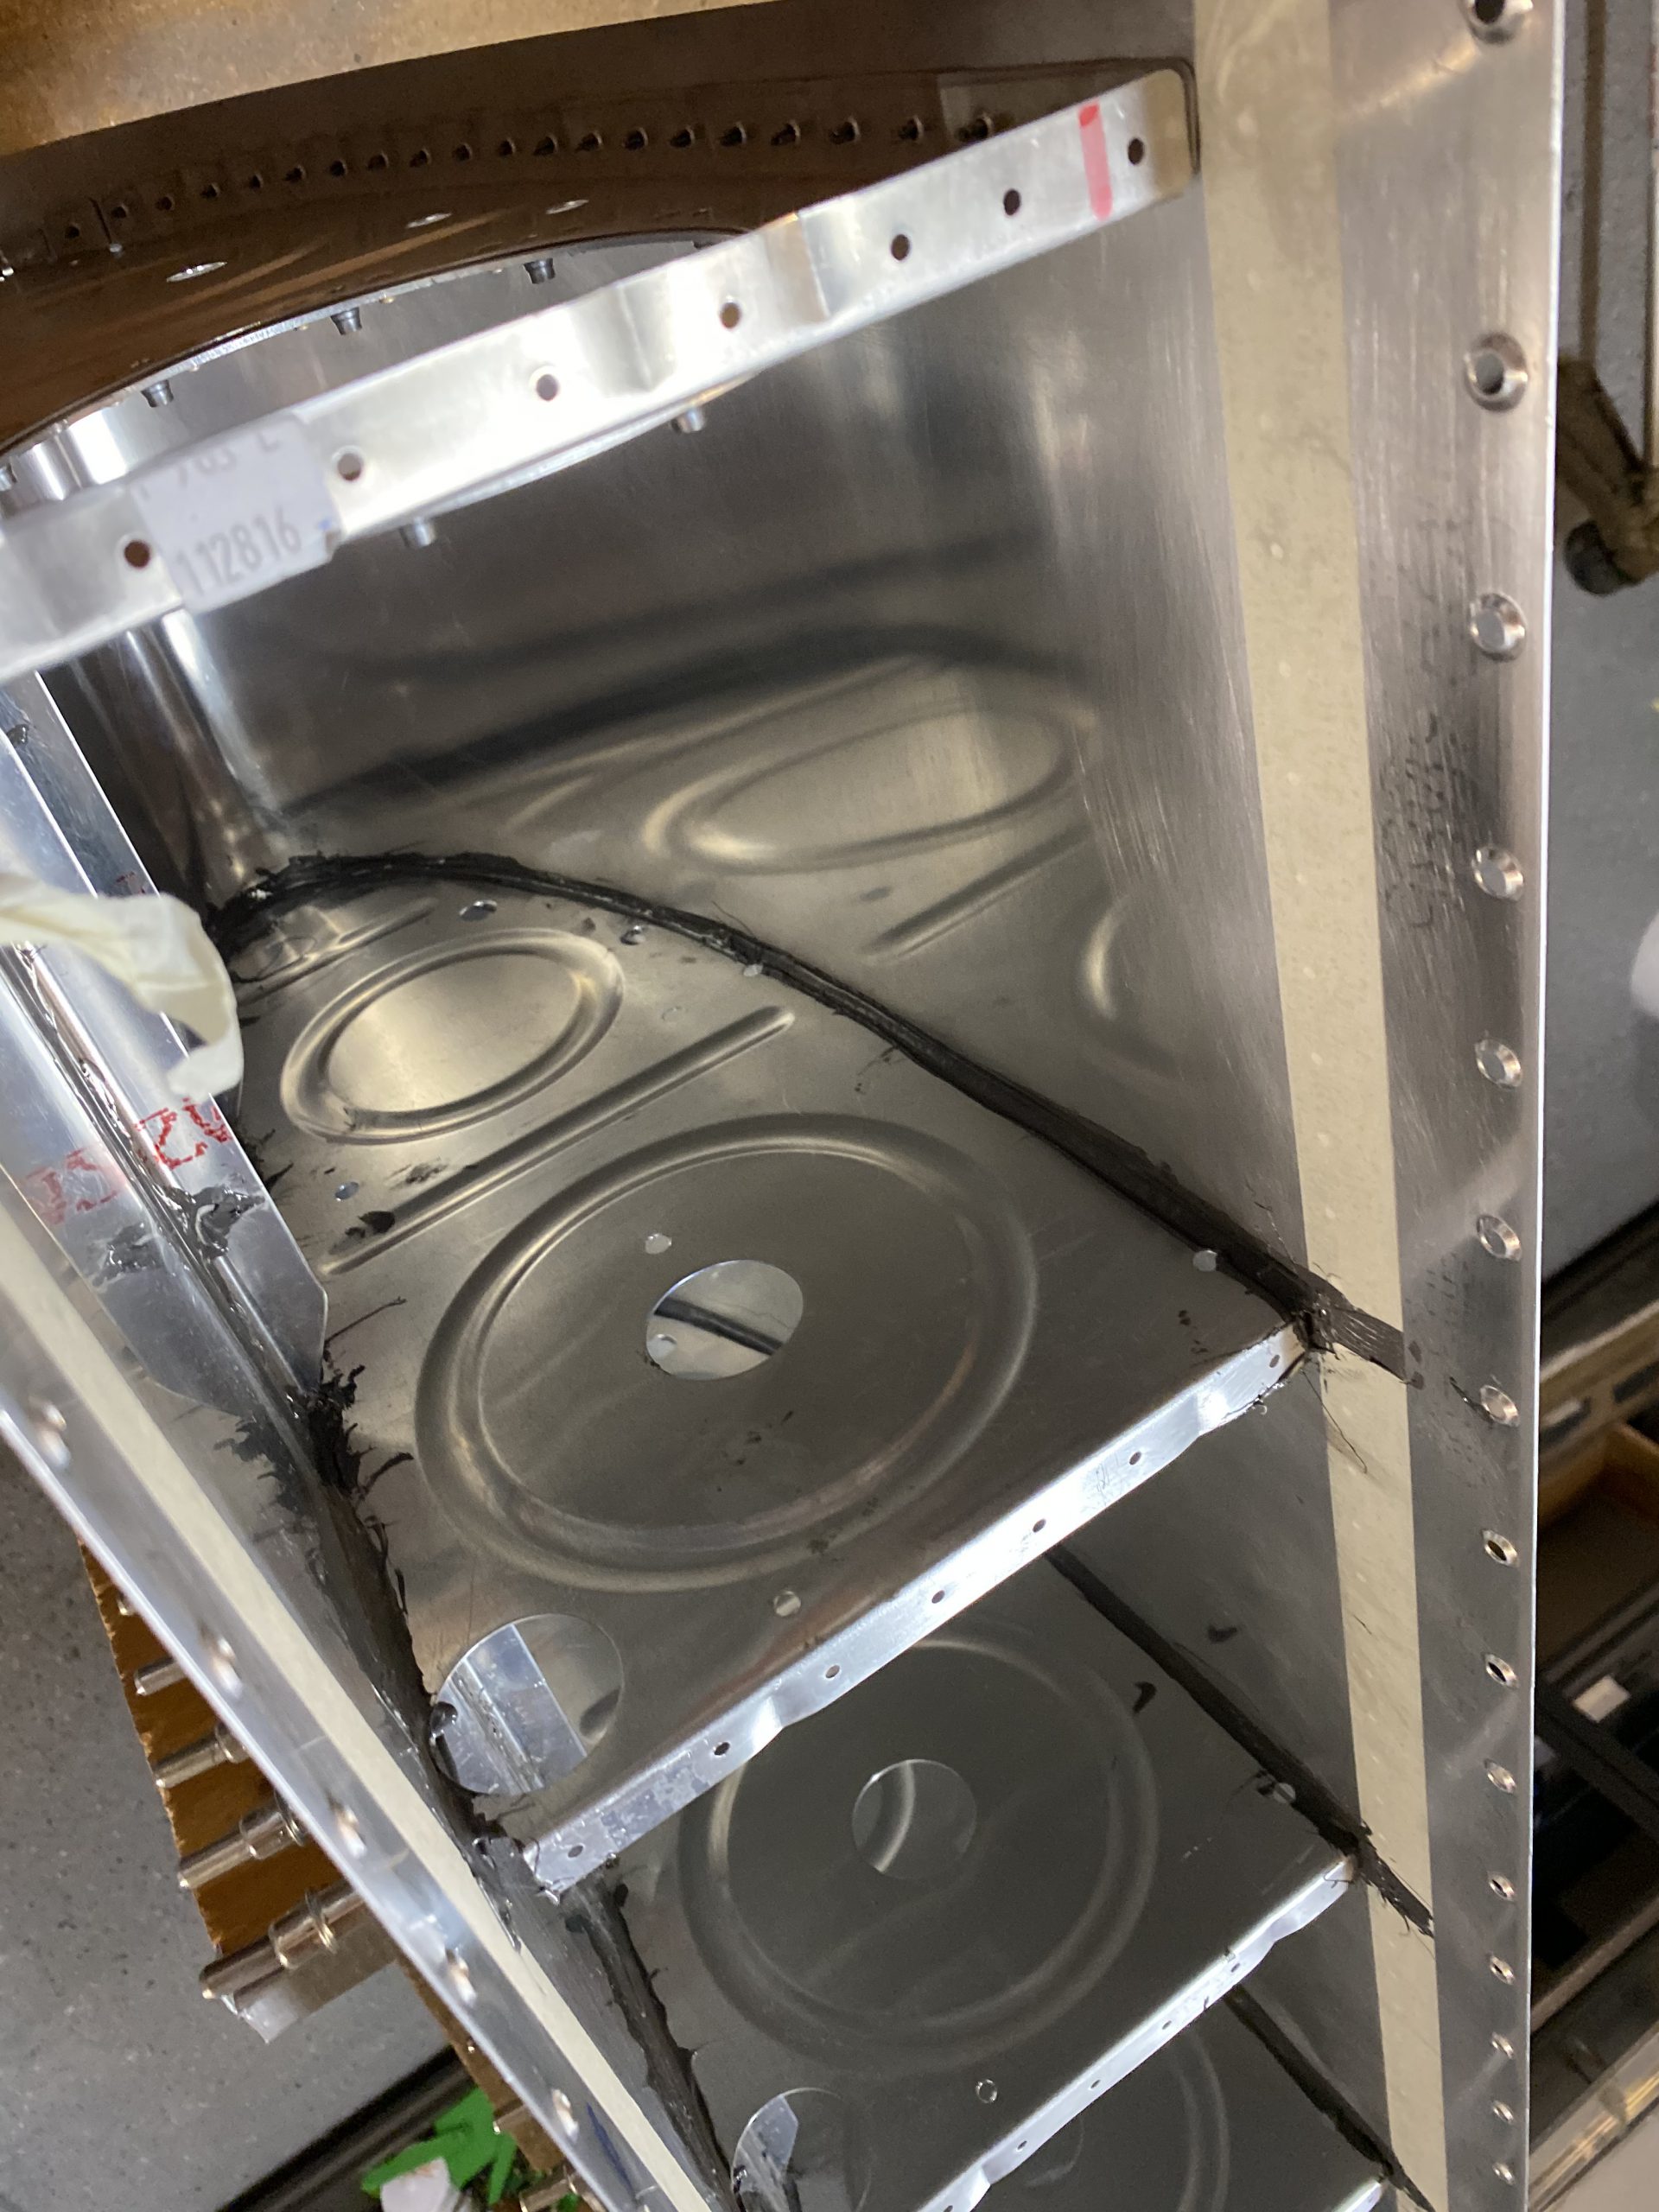
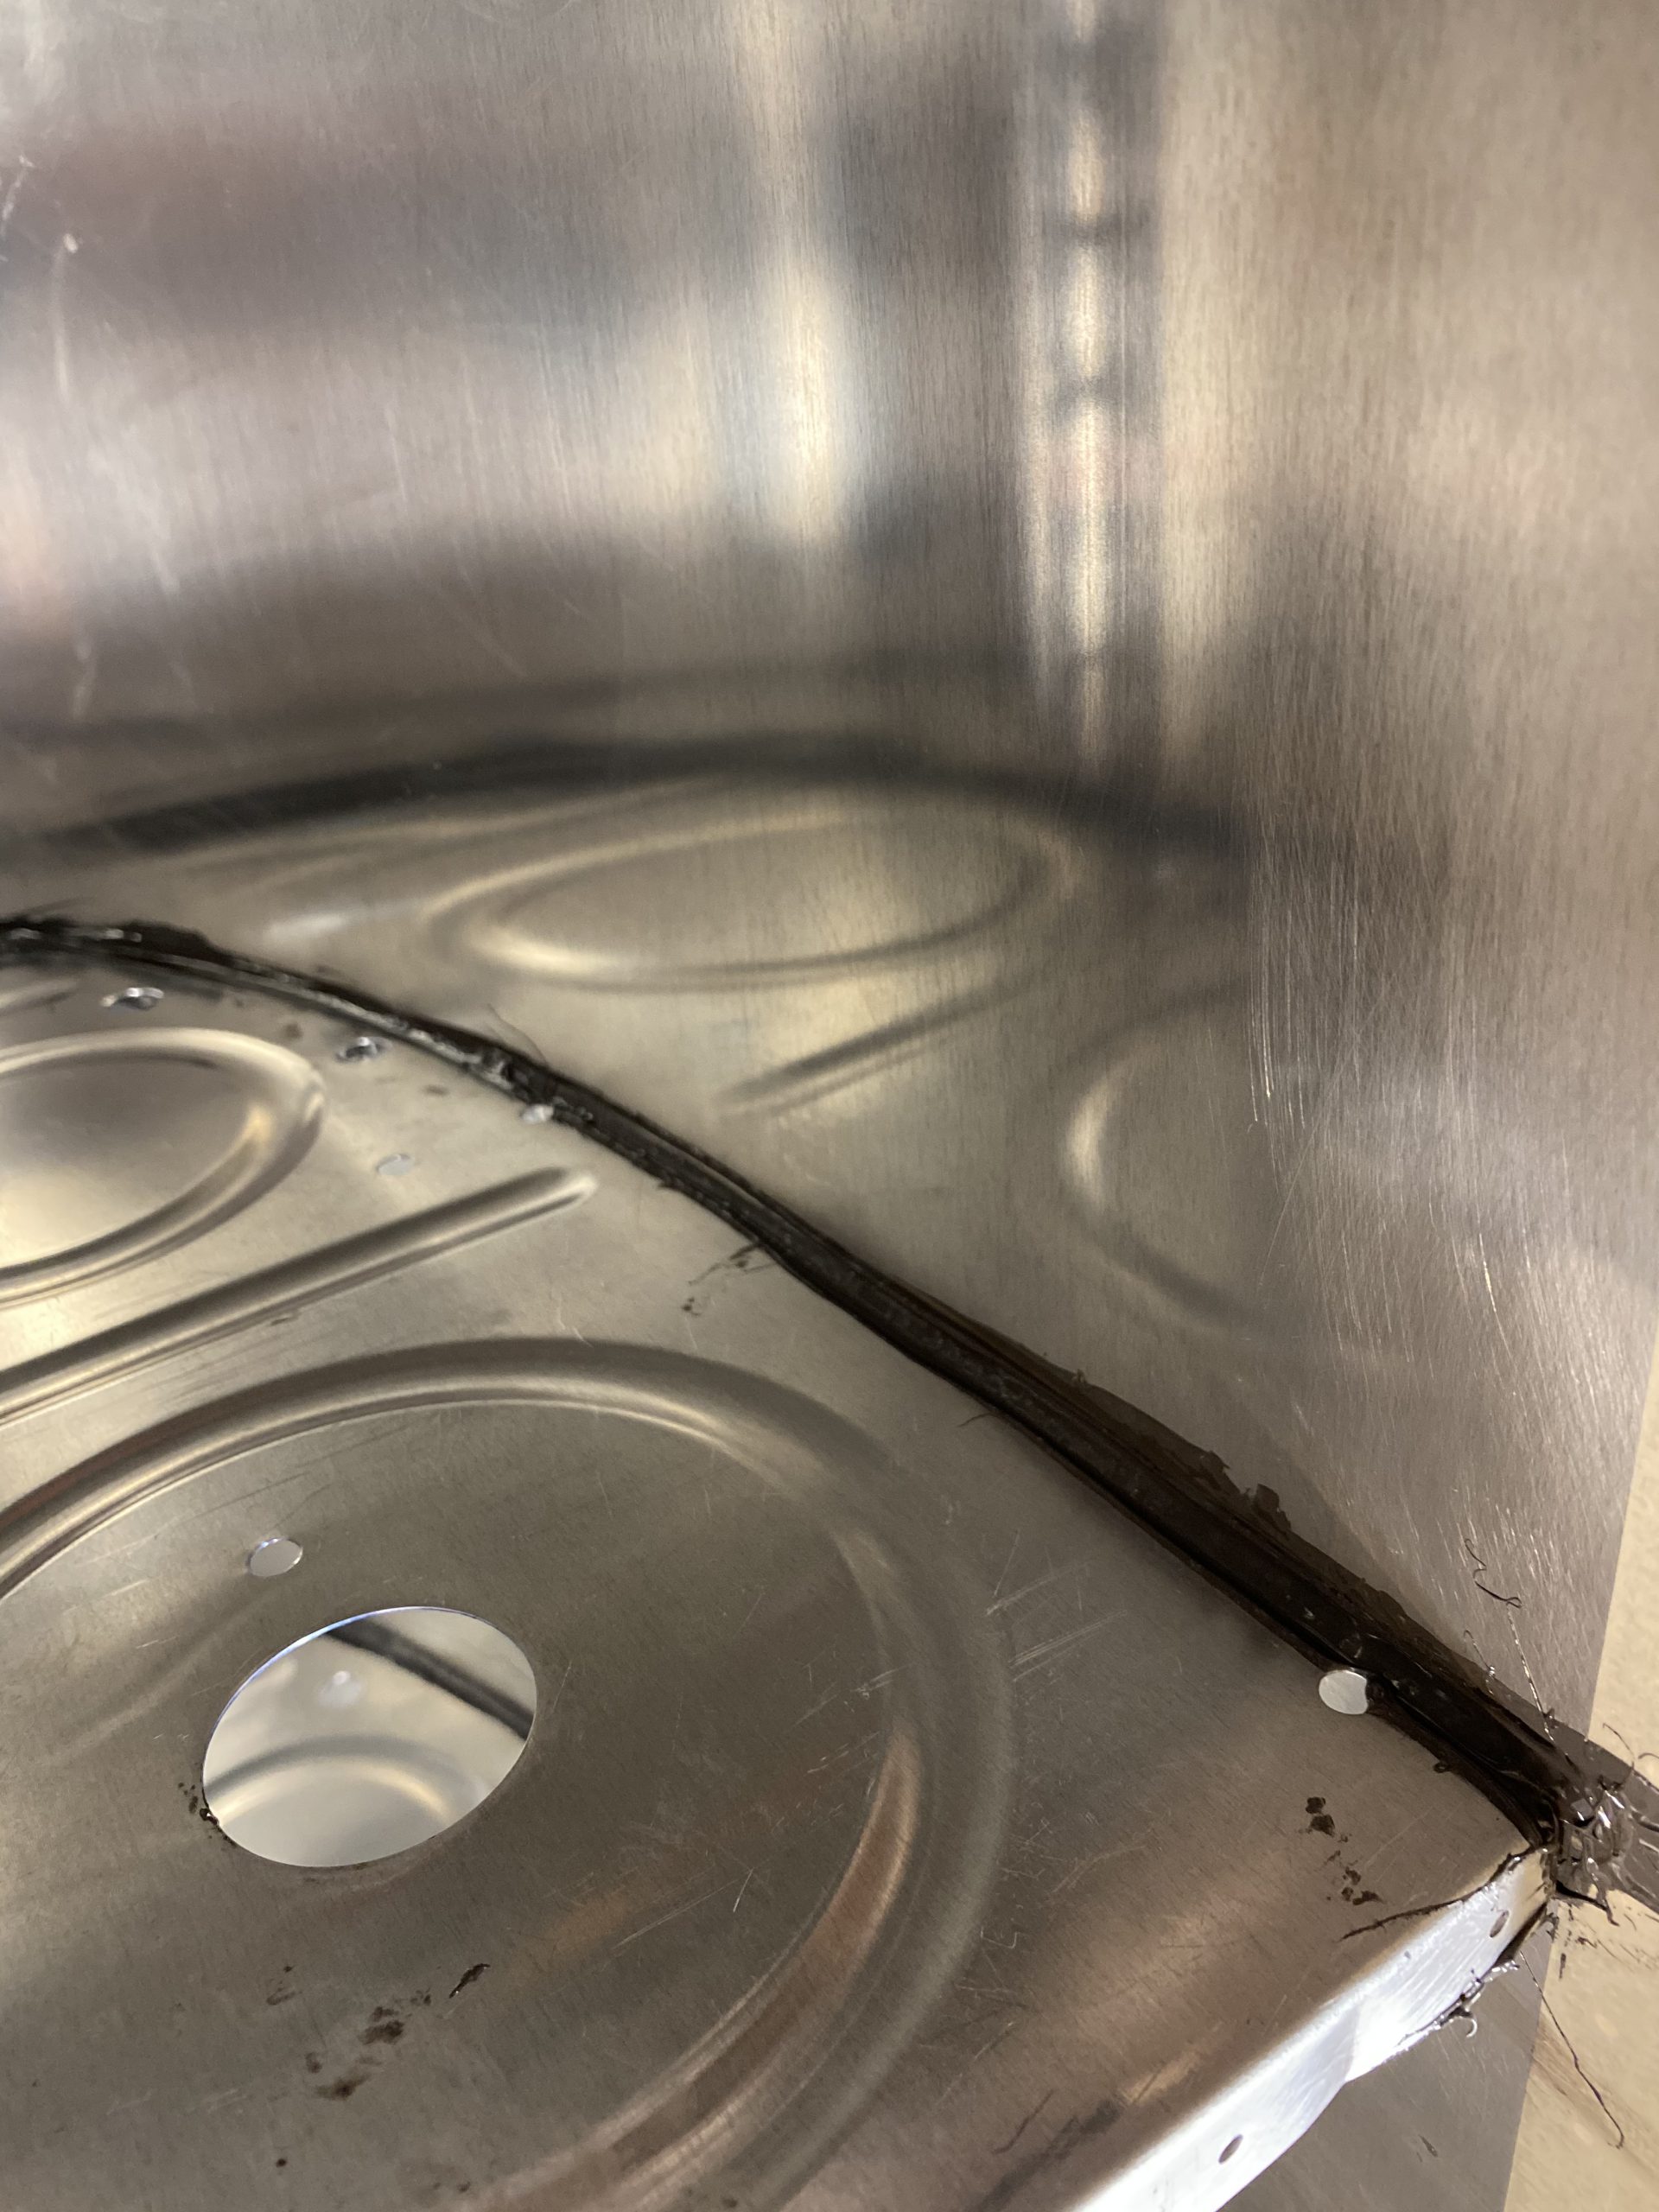
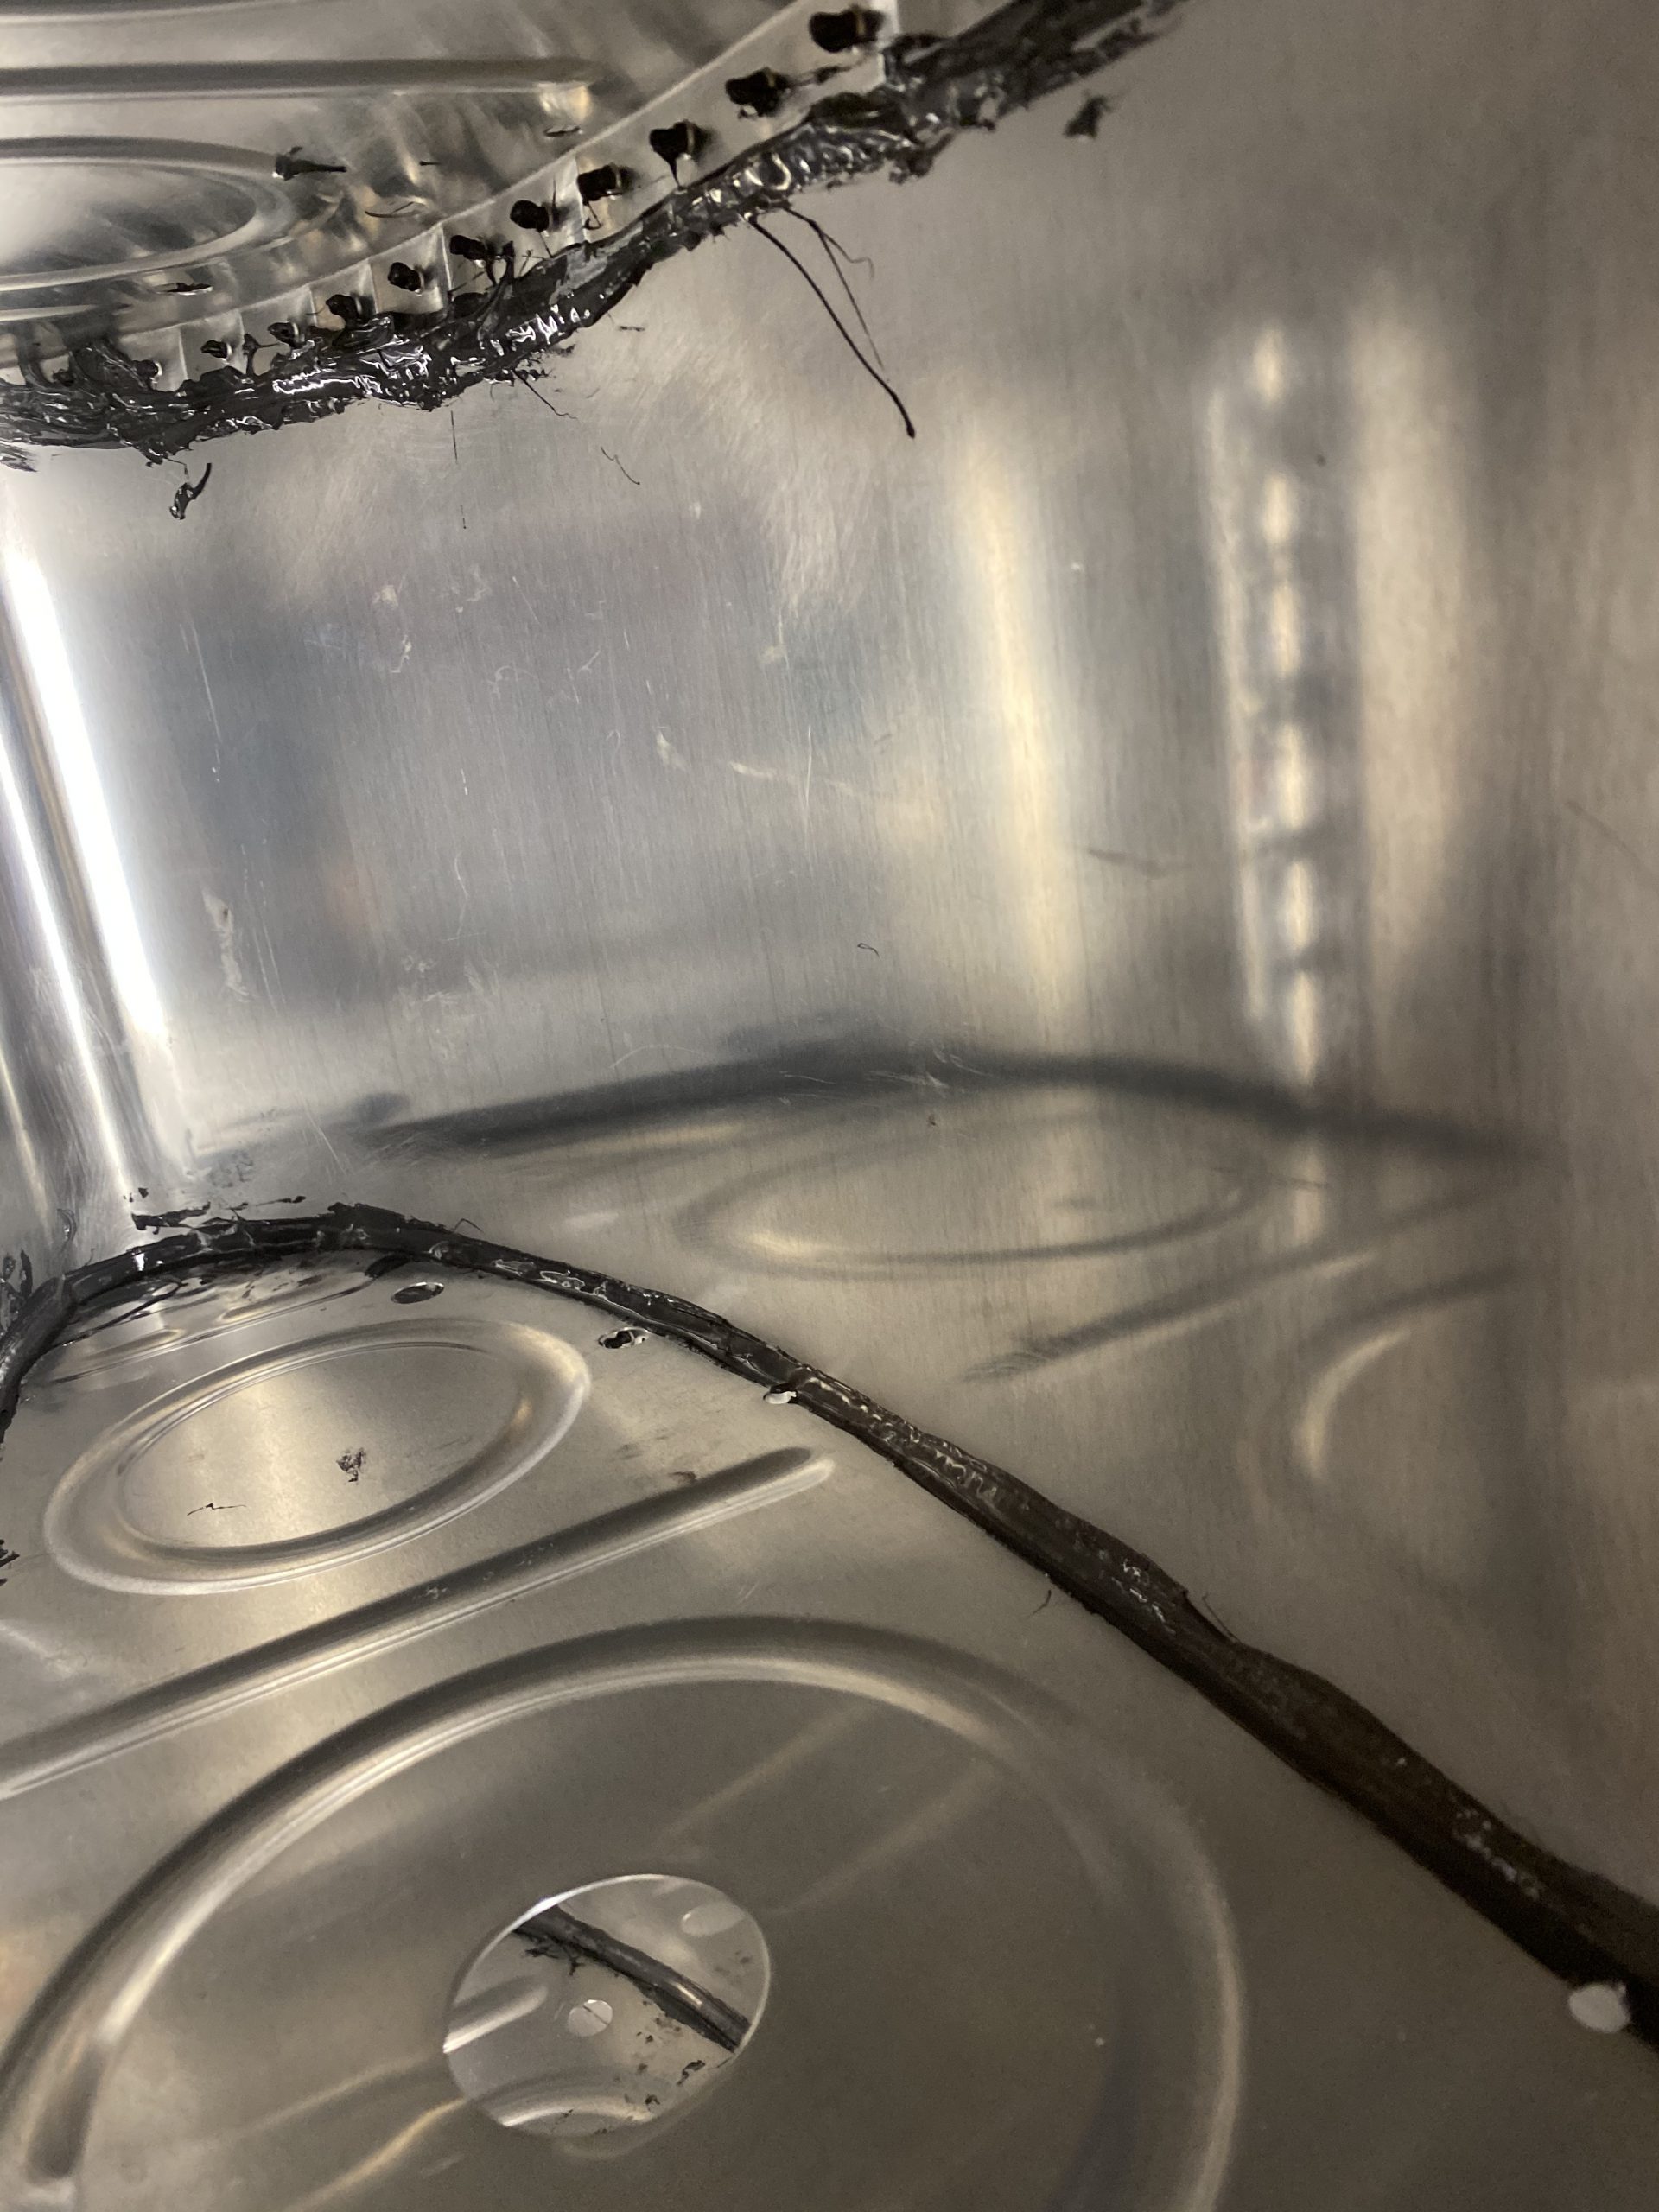
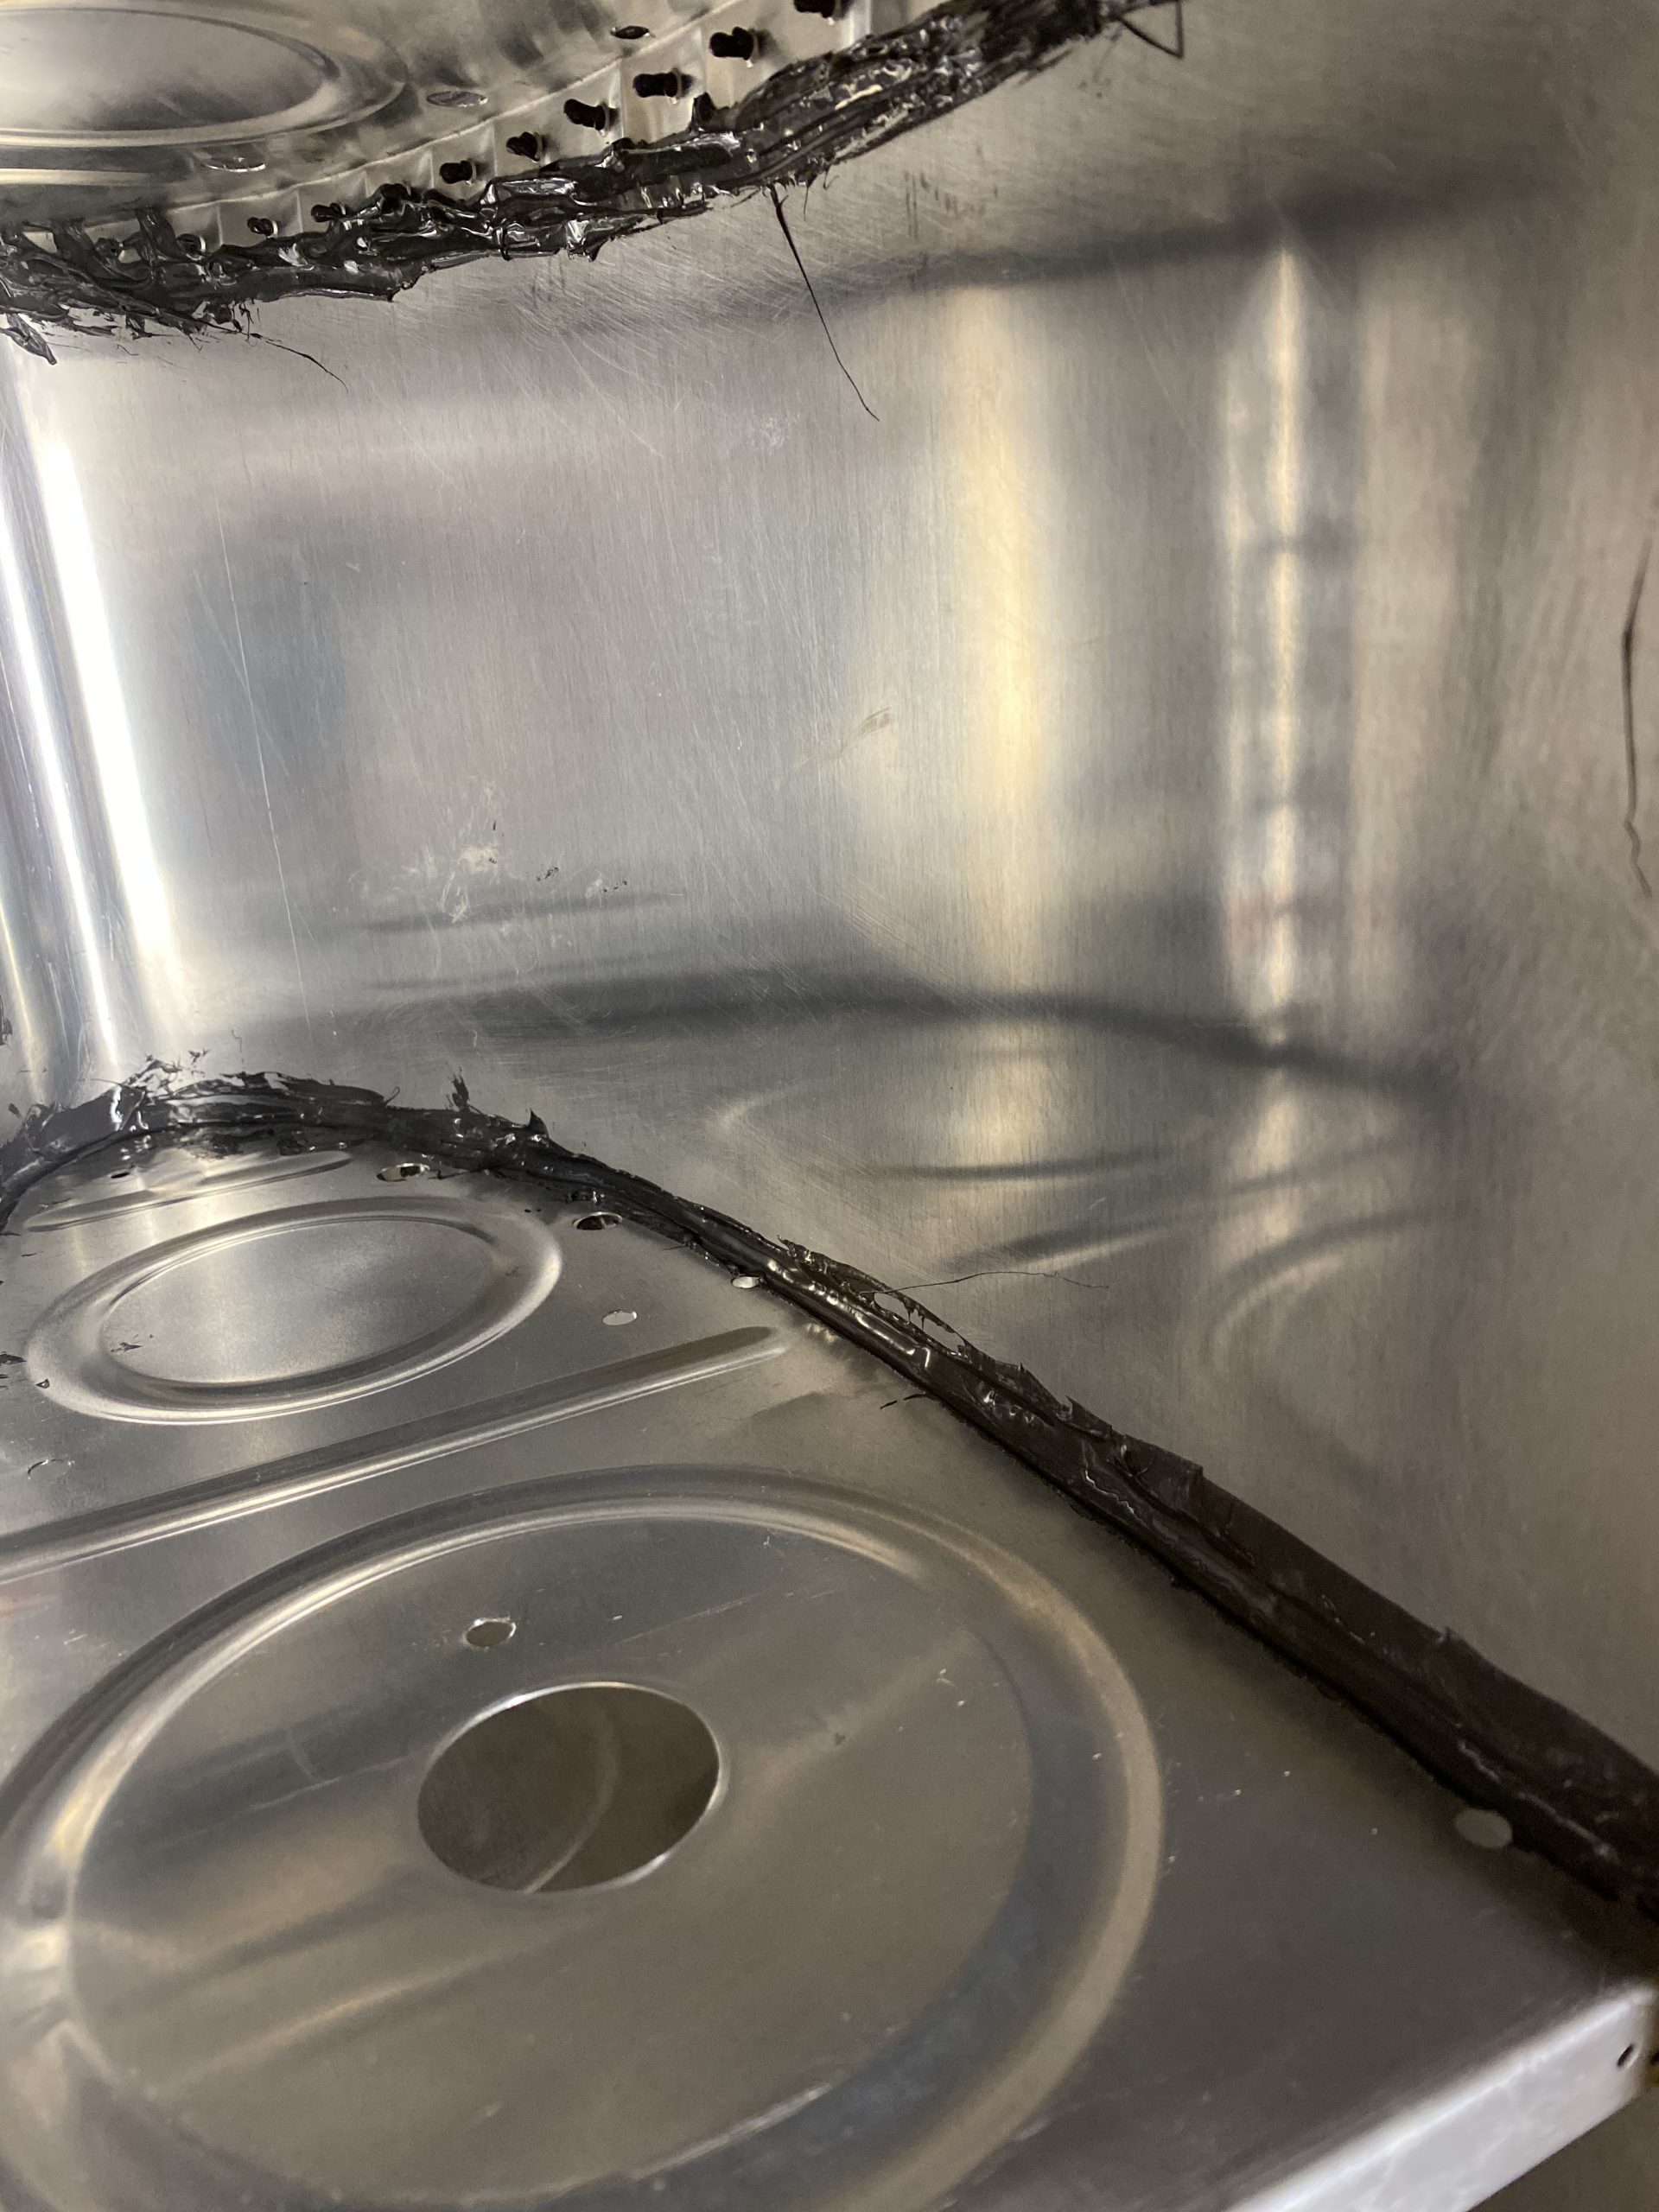
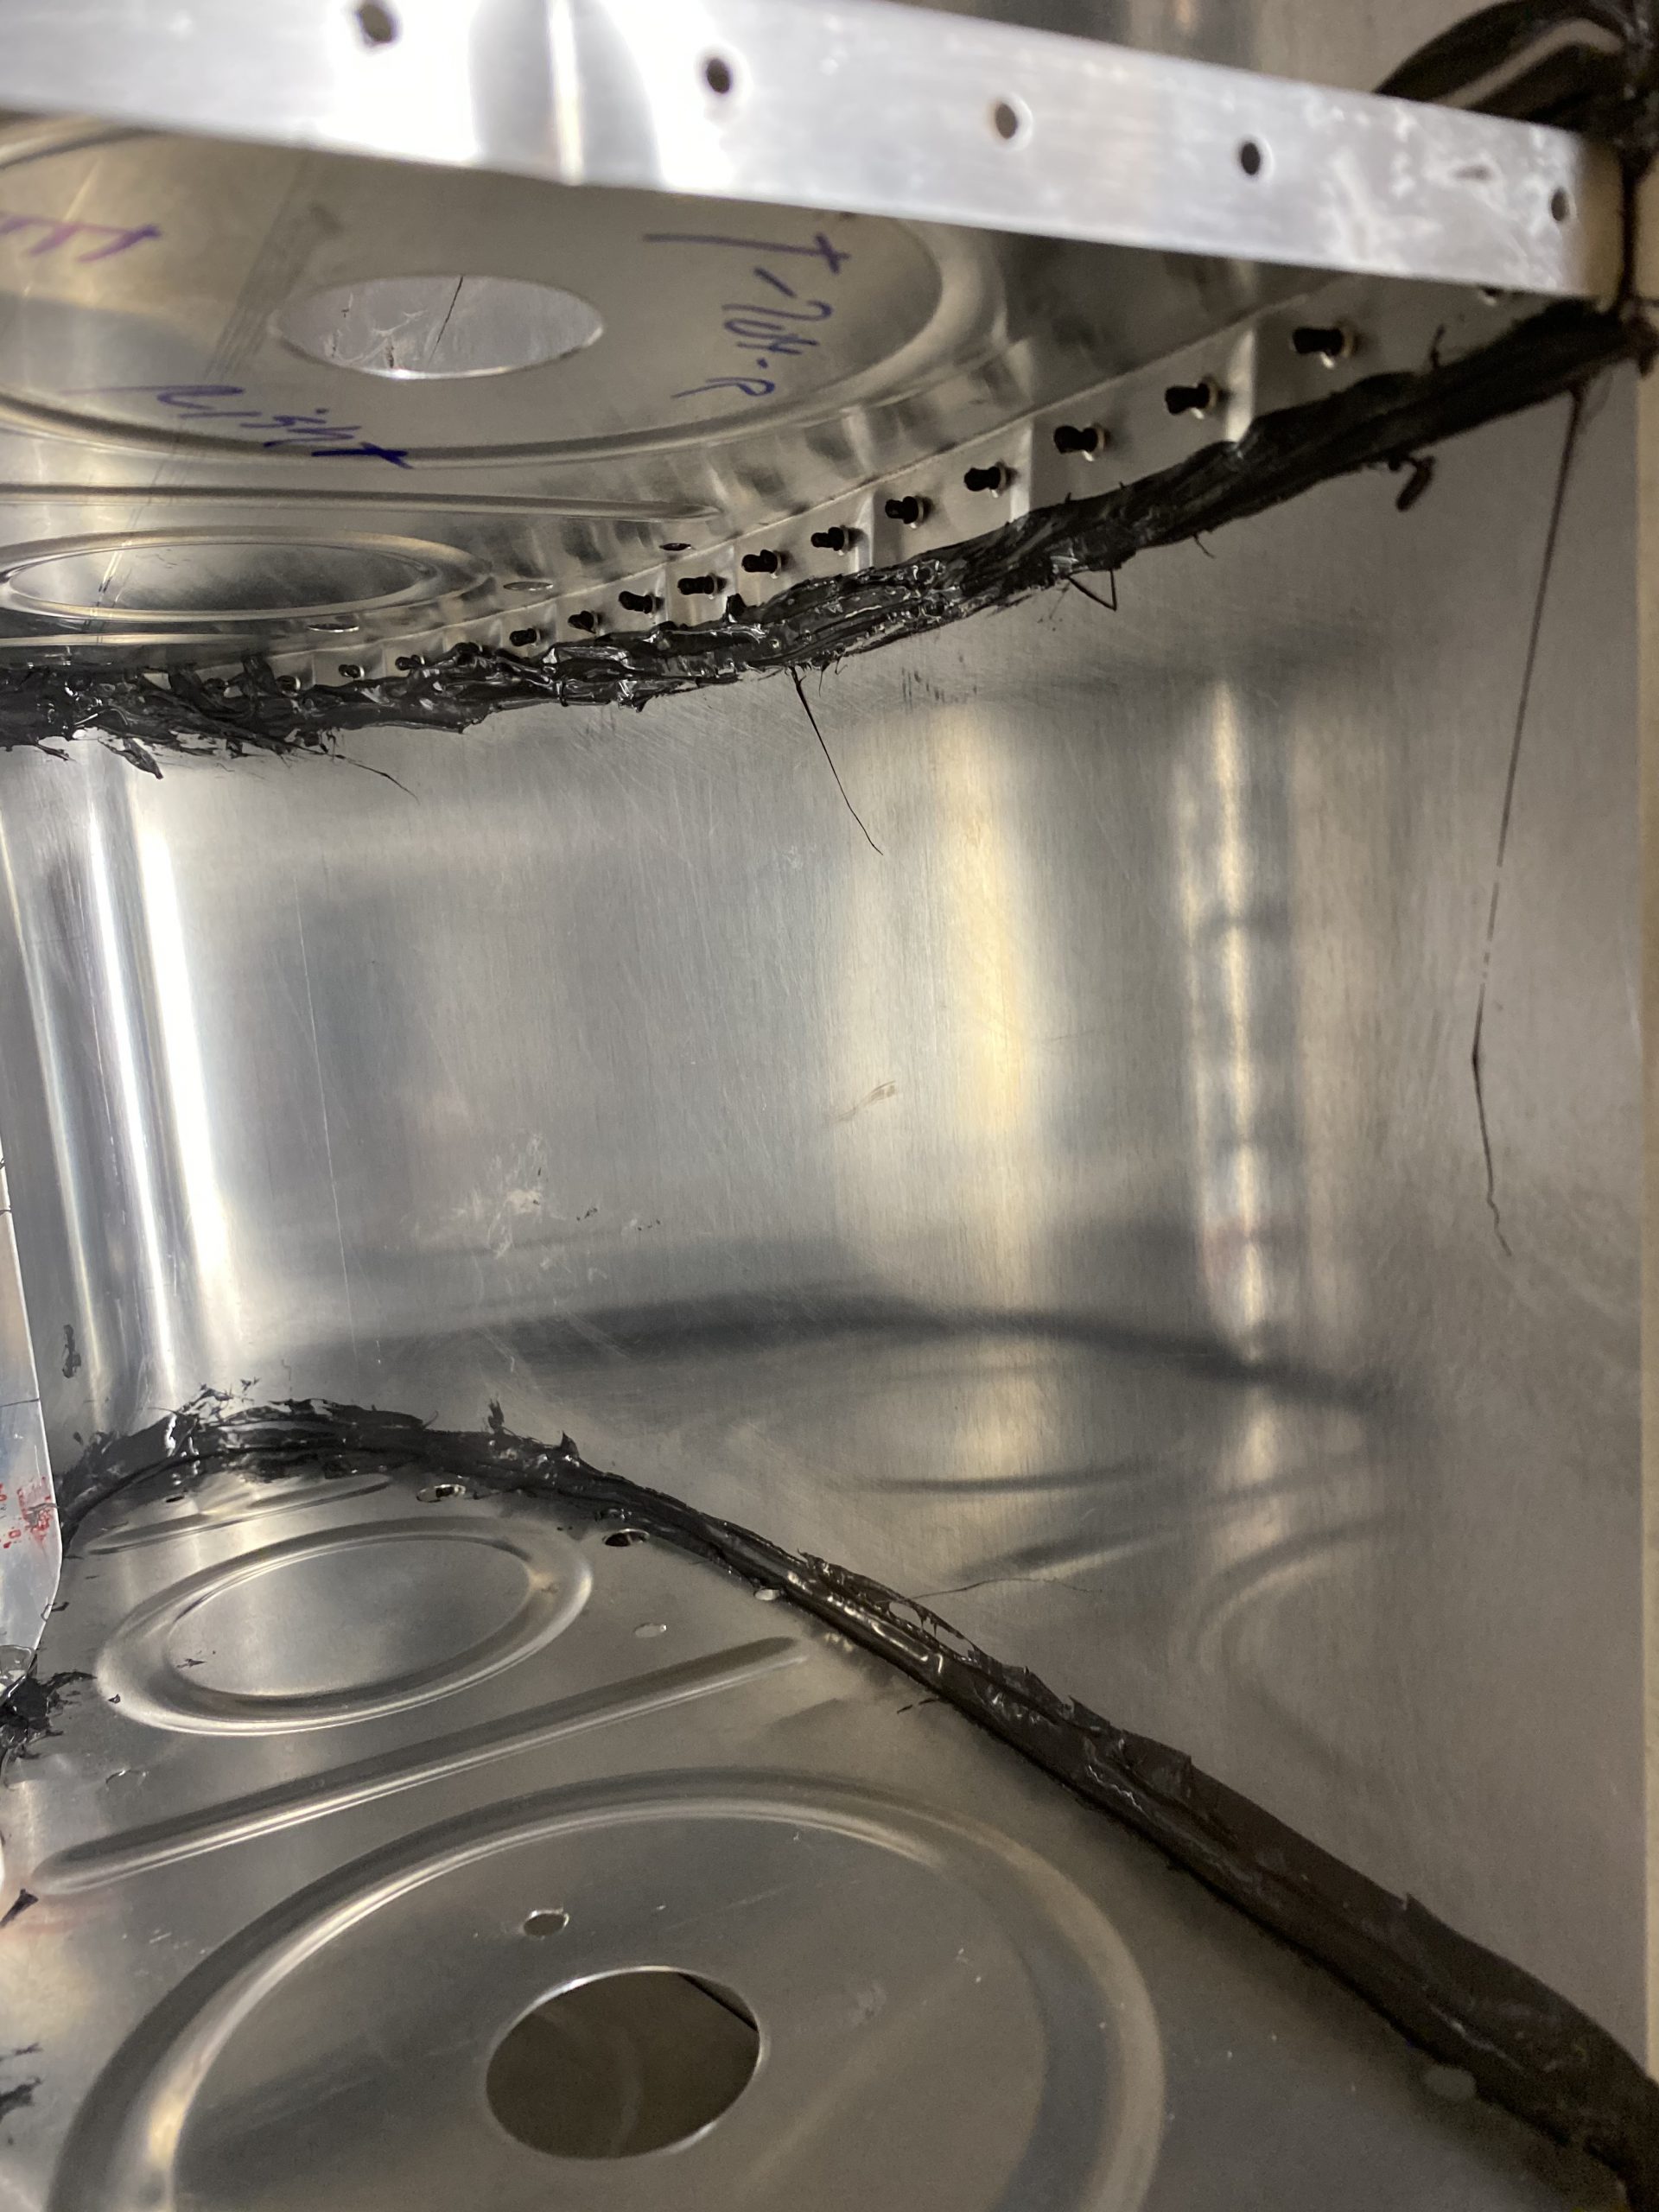
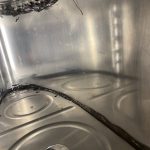
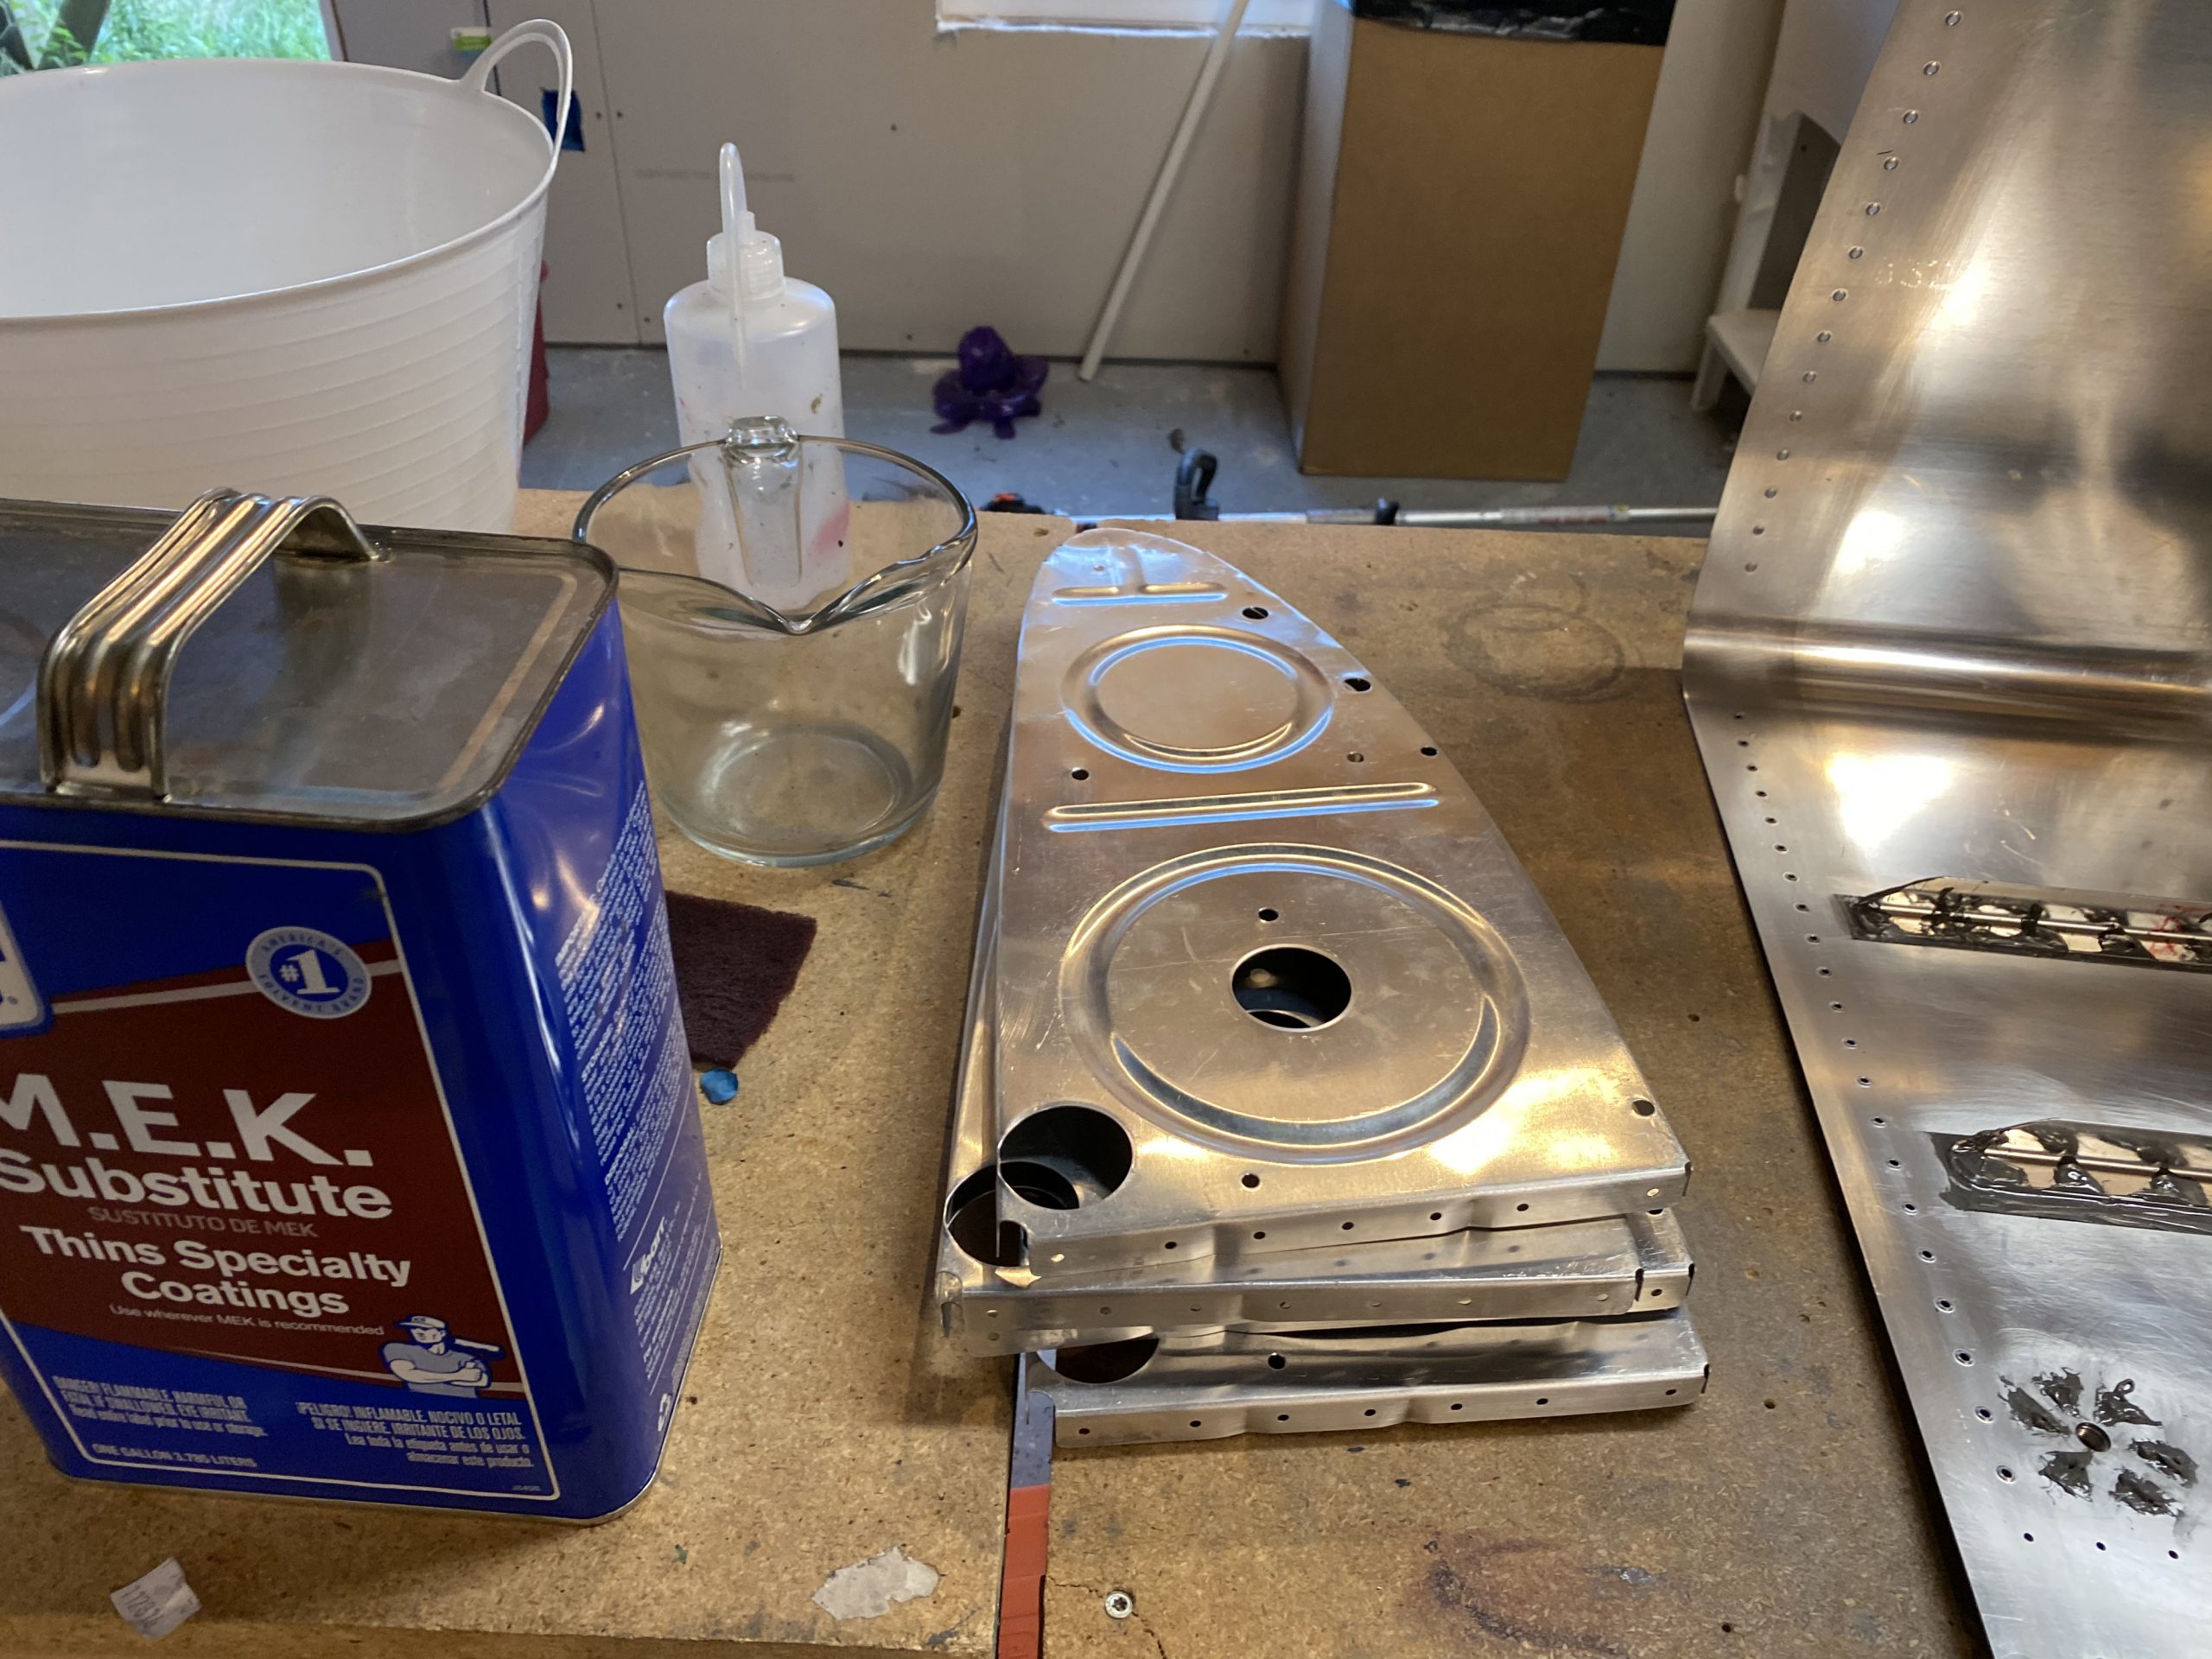
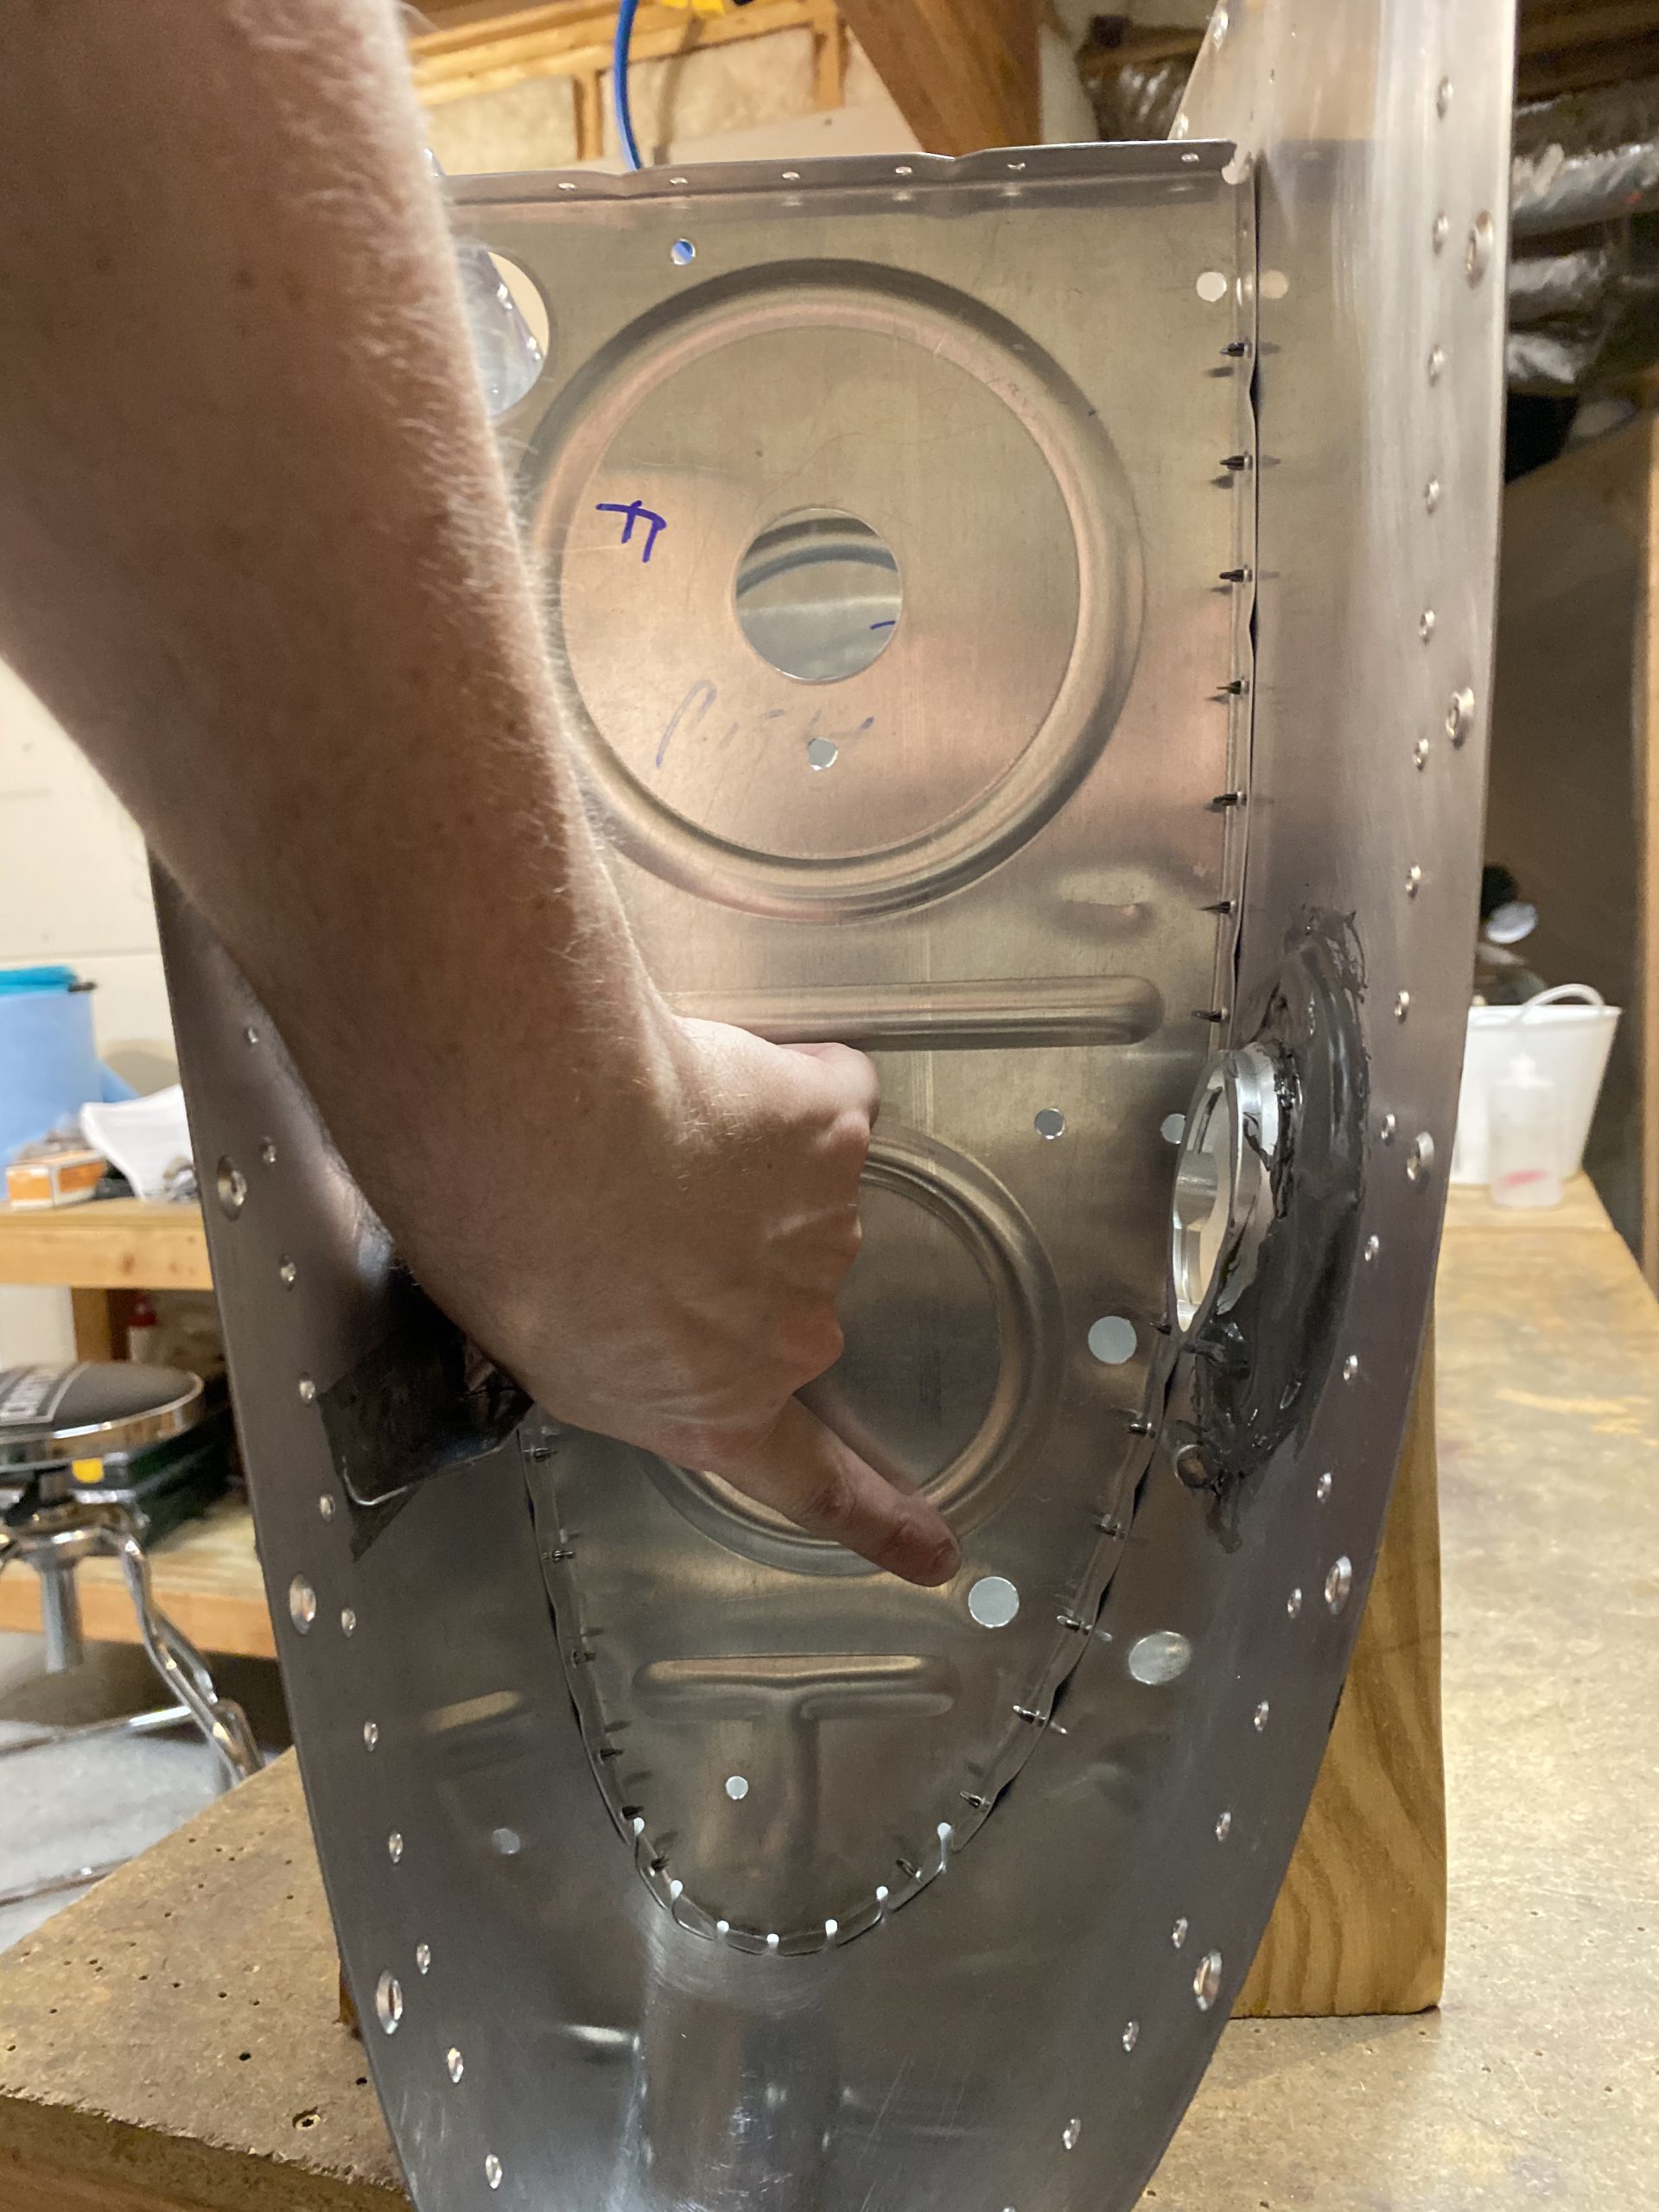
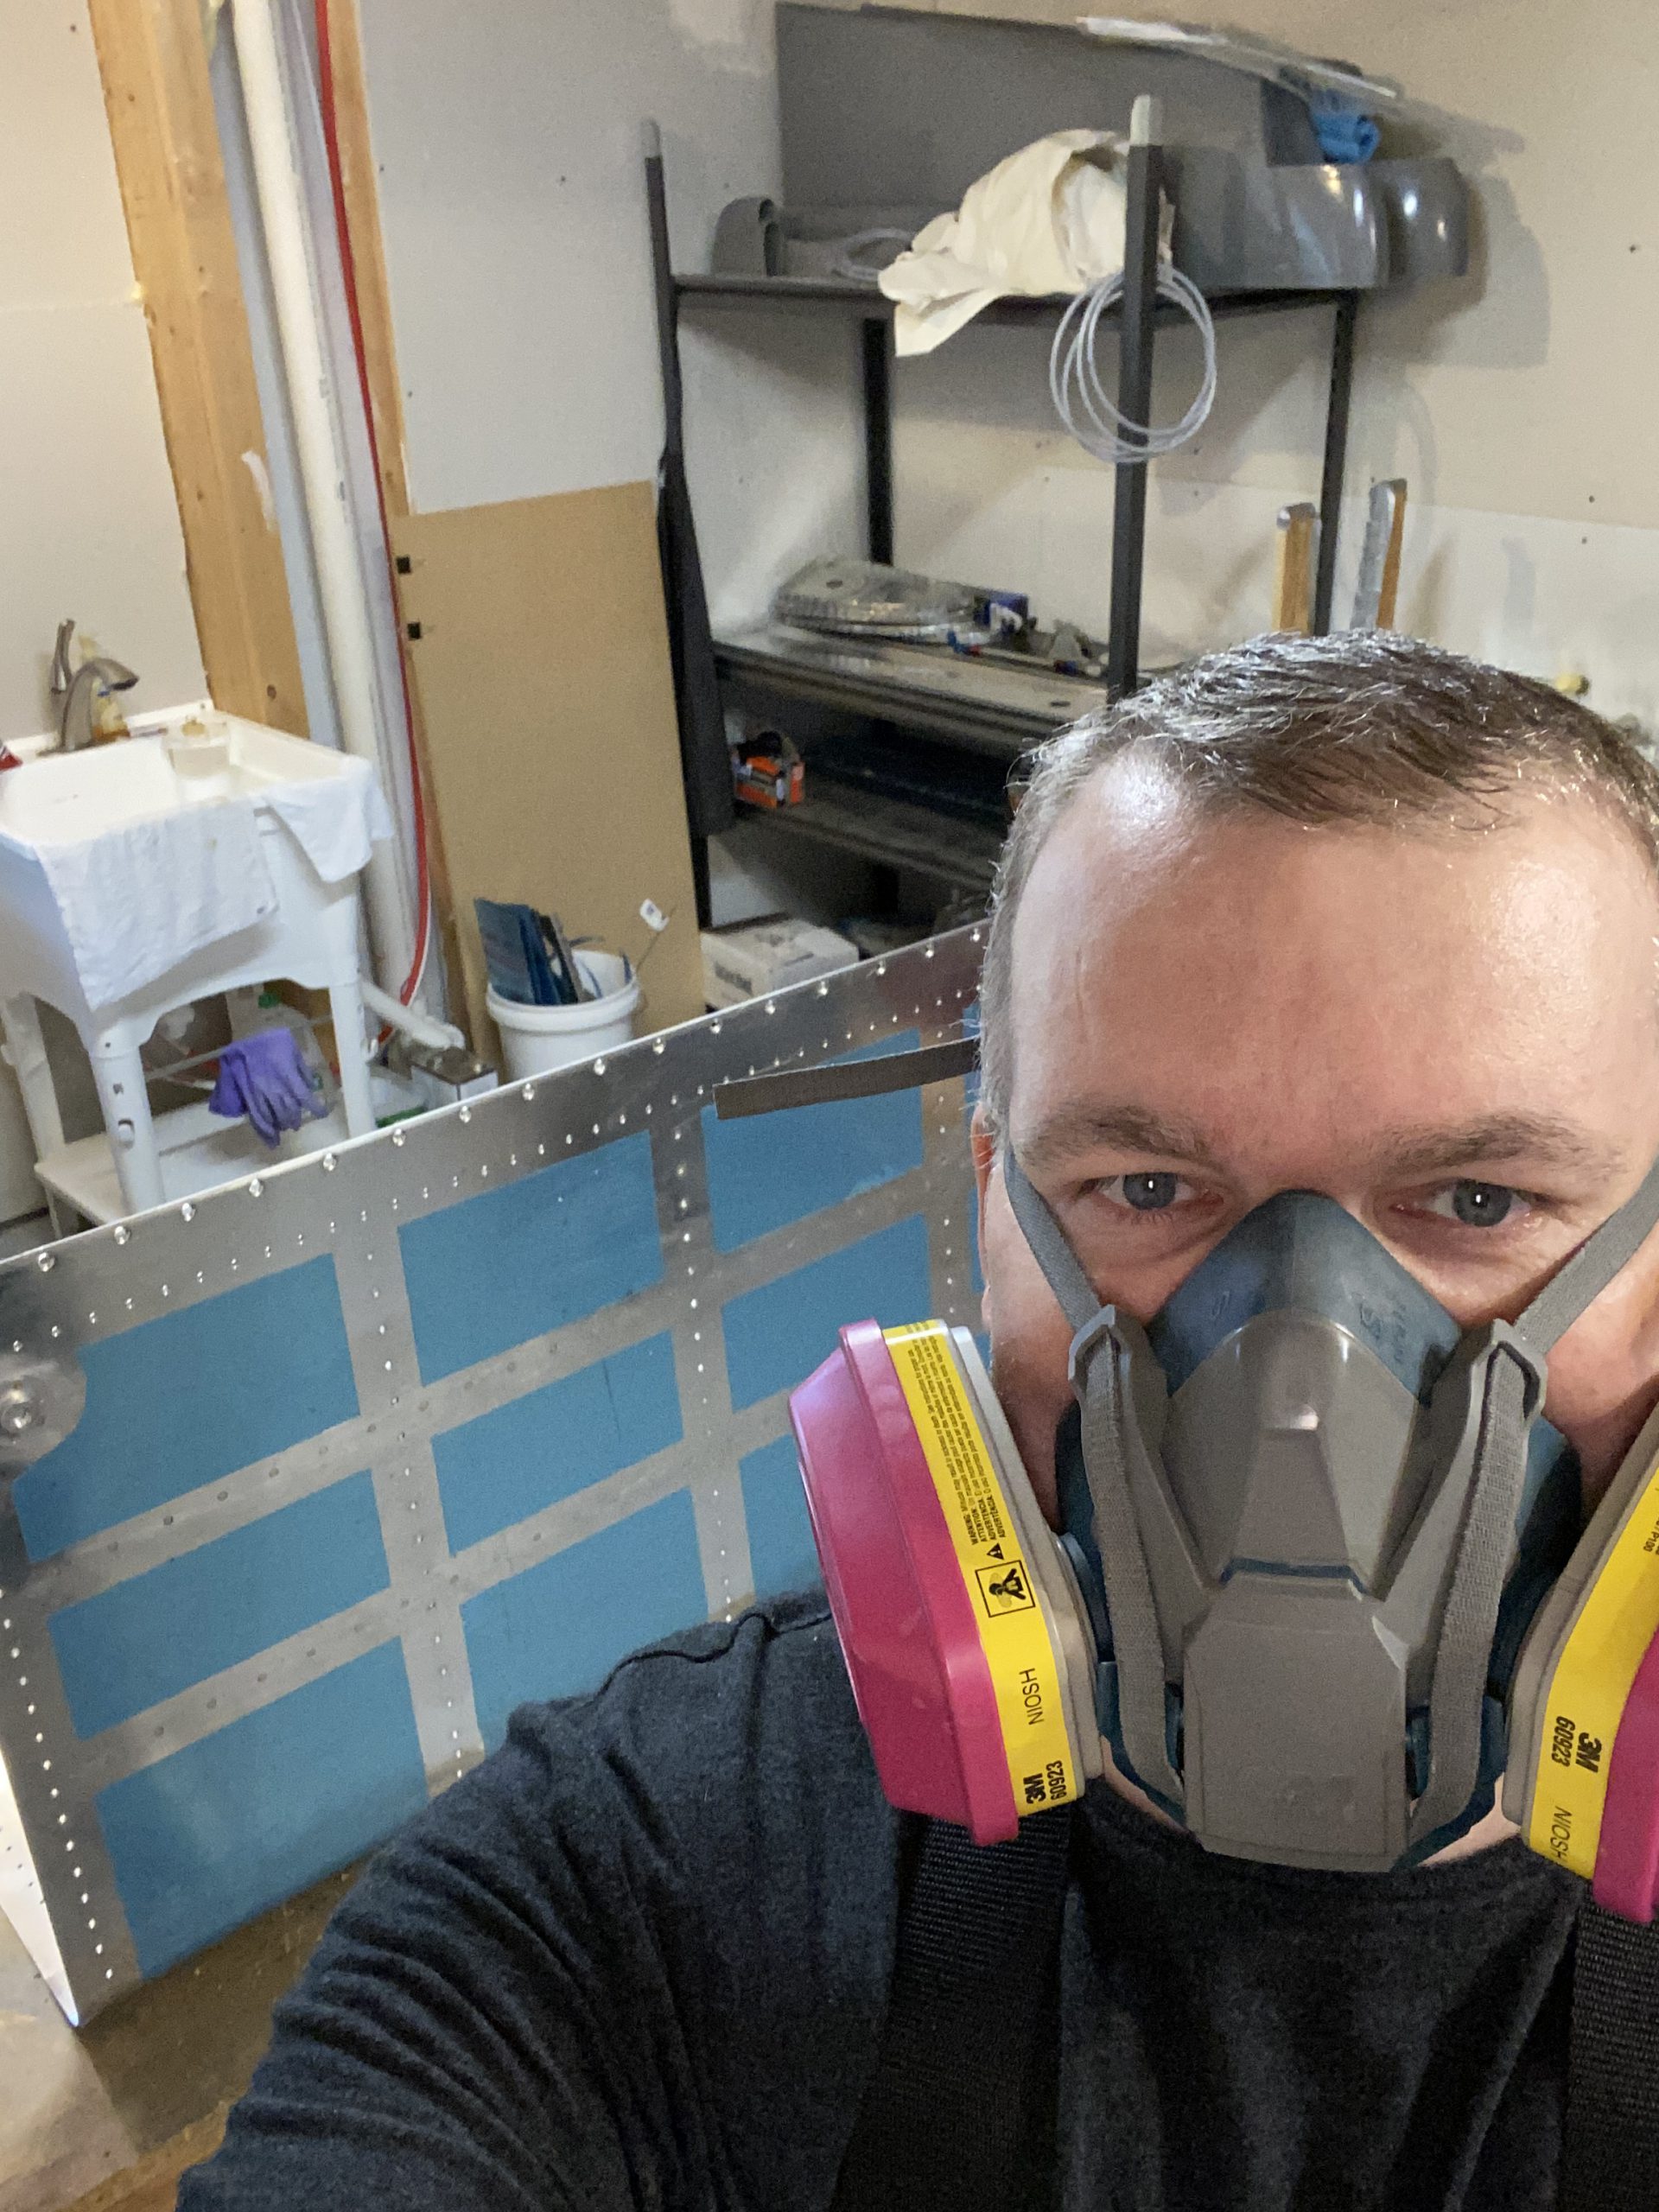
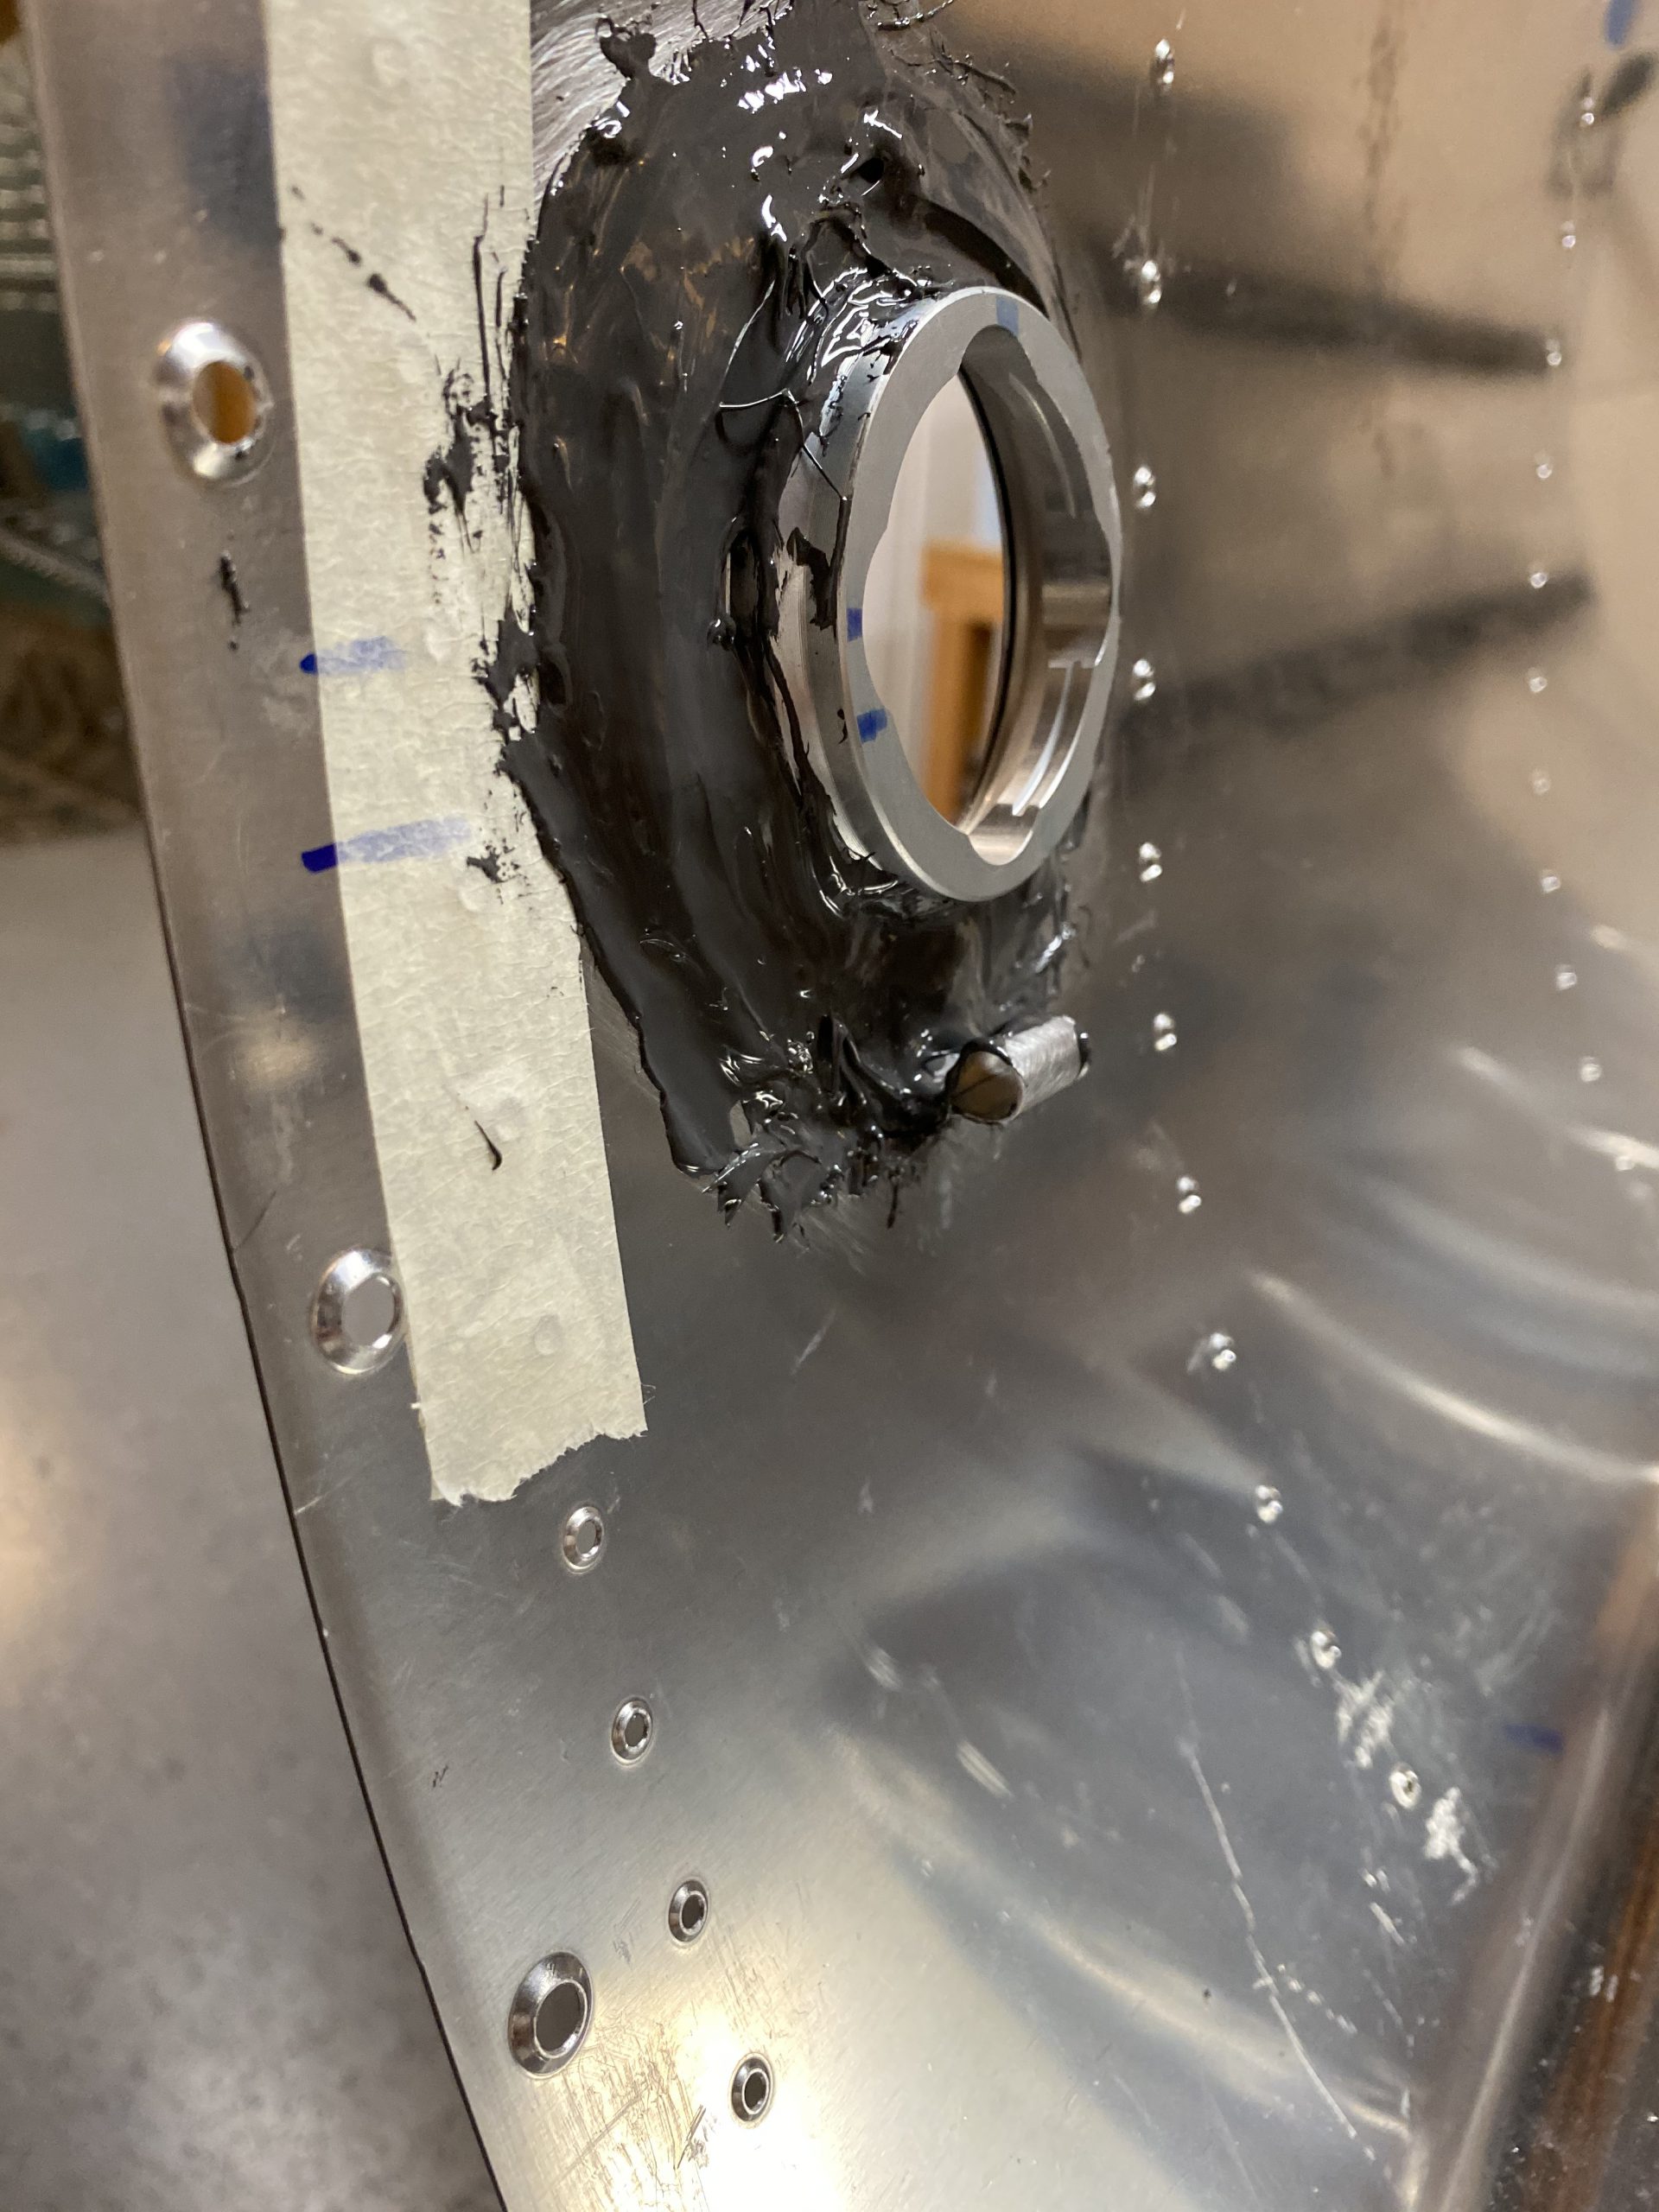
That was the last little bit of work I needed to do before mixing up the sealant.  I made 60 grams of sealant, which was about 5 or 10 grams to much.  50 would have been about the right amount.  I was gloved up and working with this goop so I don’t have great pictures, but I went ahead and fitted the anti-rotation bracket to the fuel pickup tube, and then riveted it with some AN470AD4-5 rivets per the plans.  I made sure to scuff the bracket and the access plate and clean them with MEK. I used sealant on the bottom of the bracket as well as dolloping some around the head and tails of the two rivets holding it on. Then I smeared sealant all around the fittings for the tank vent and the fuel return line.  This will help prevent the fittings from vibrating loose and also help prevent any leaks.   This photo was taken AFTER I had sealed the access plate on, but I did this process before even working on the access plate.

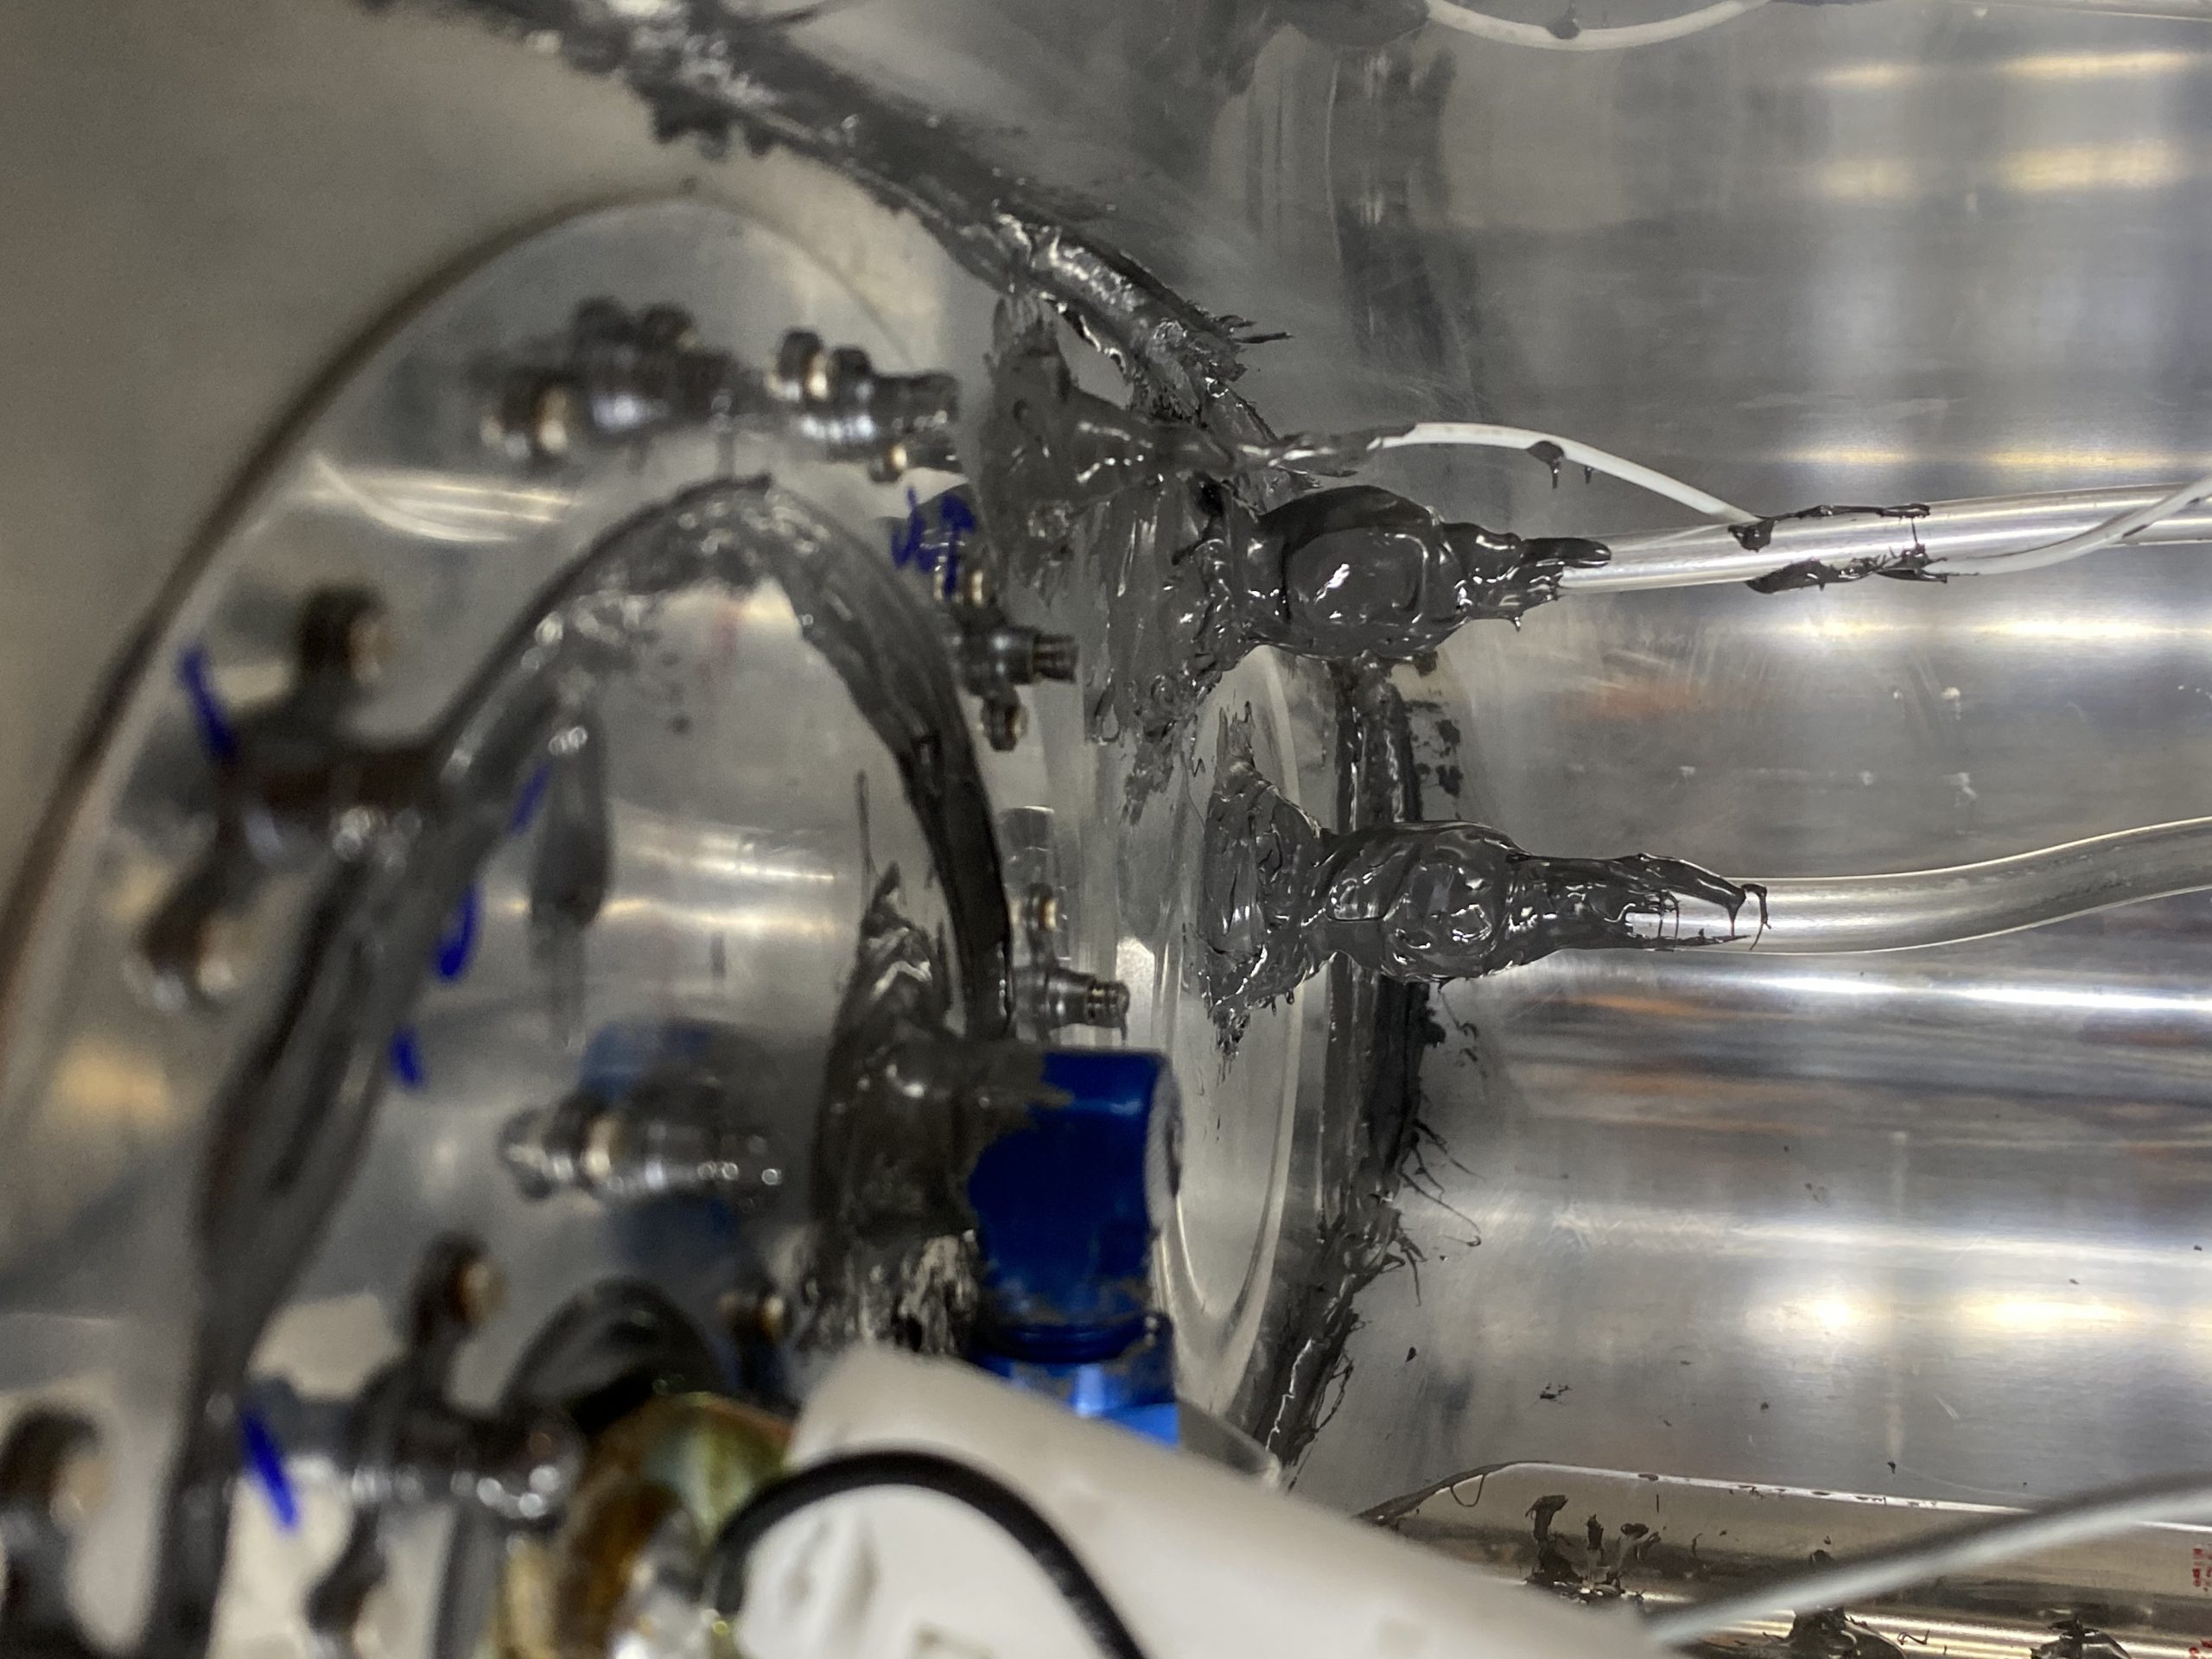
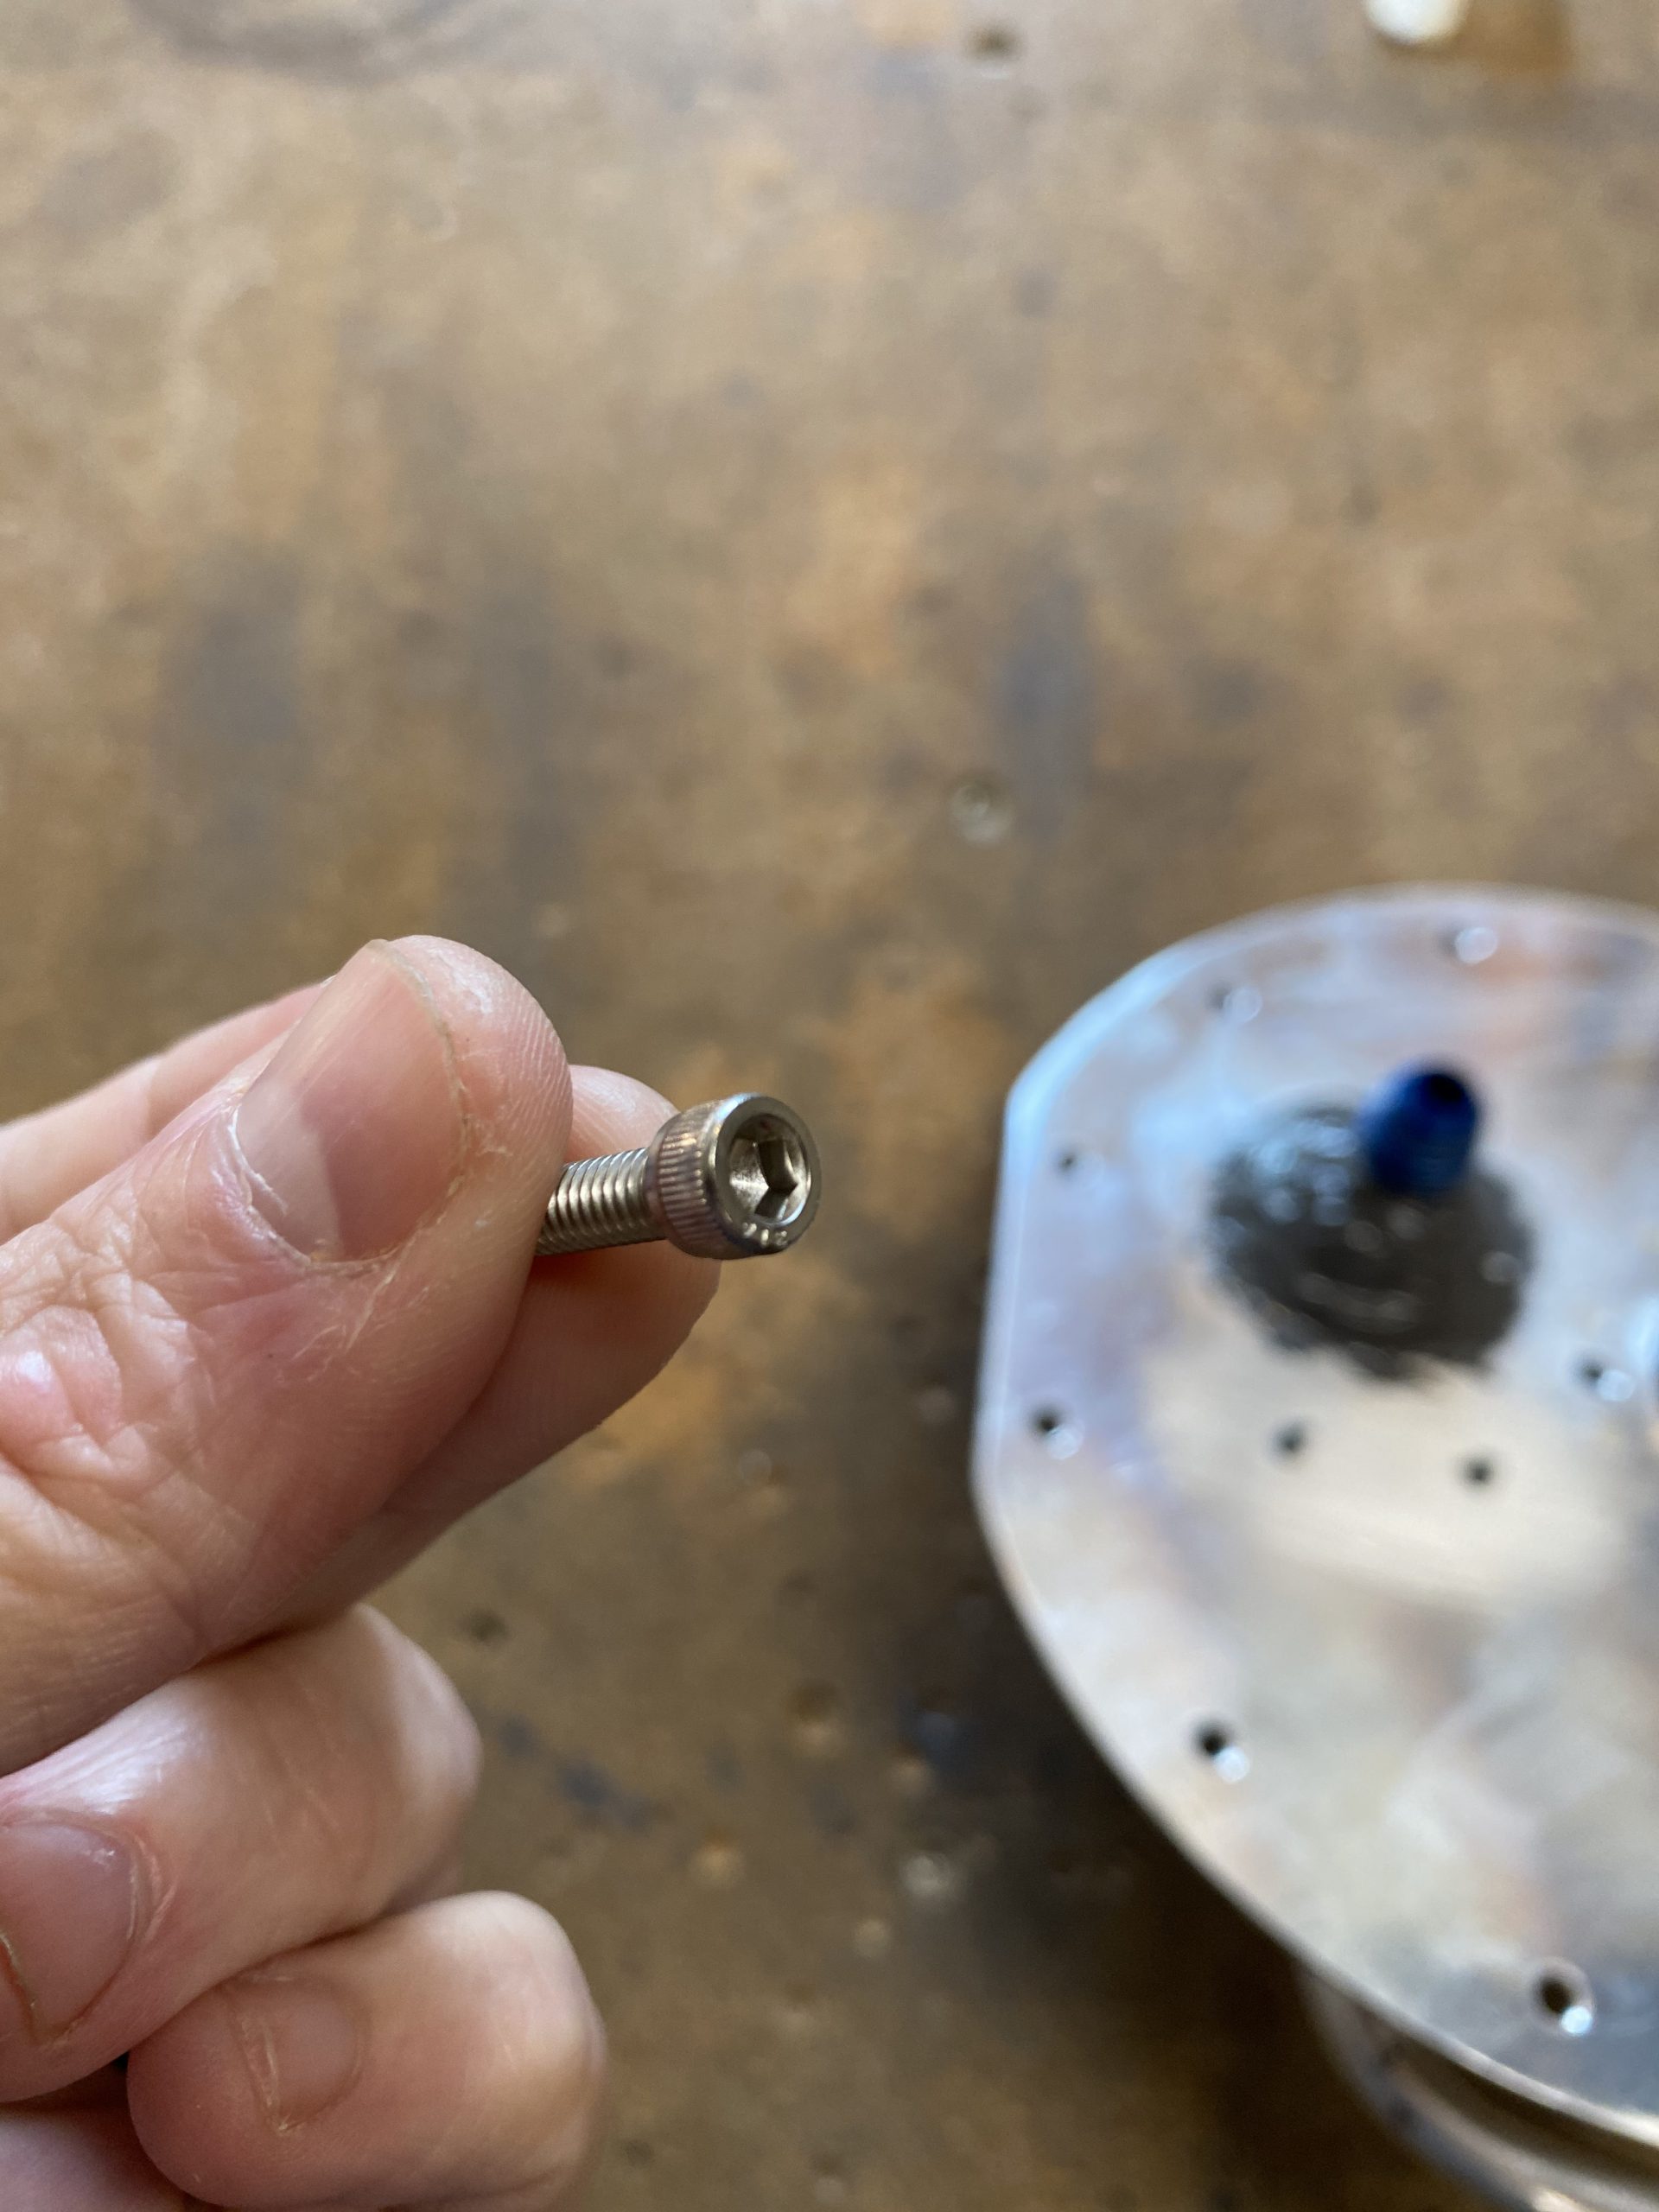
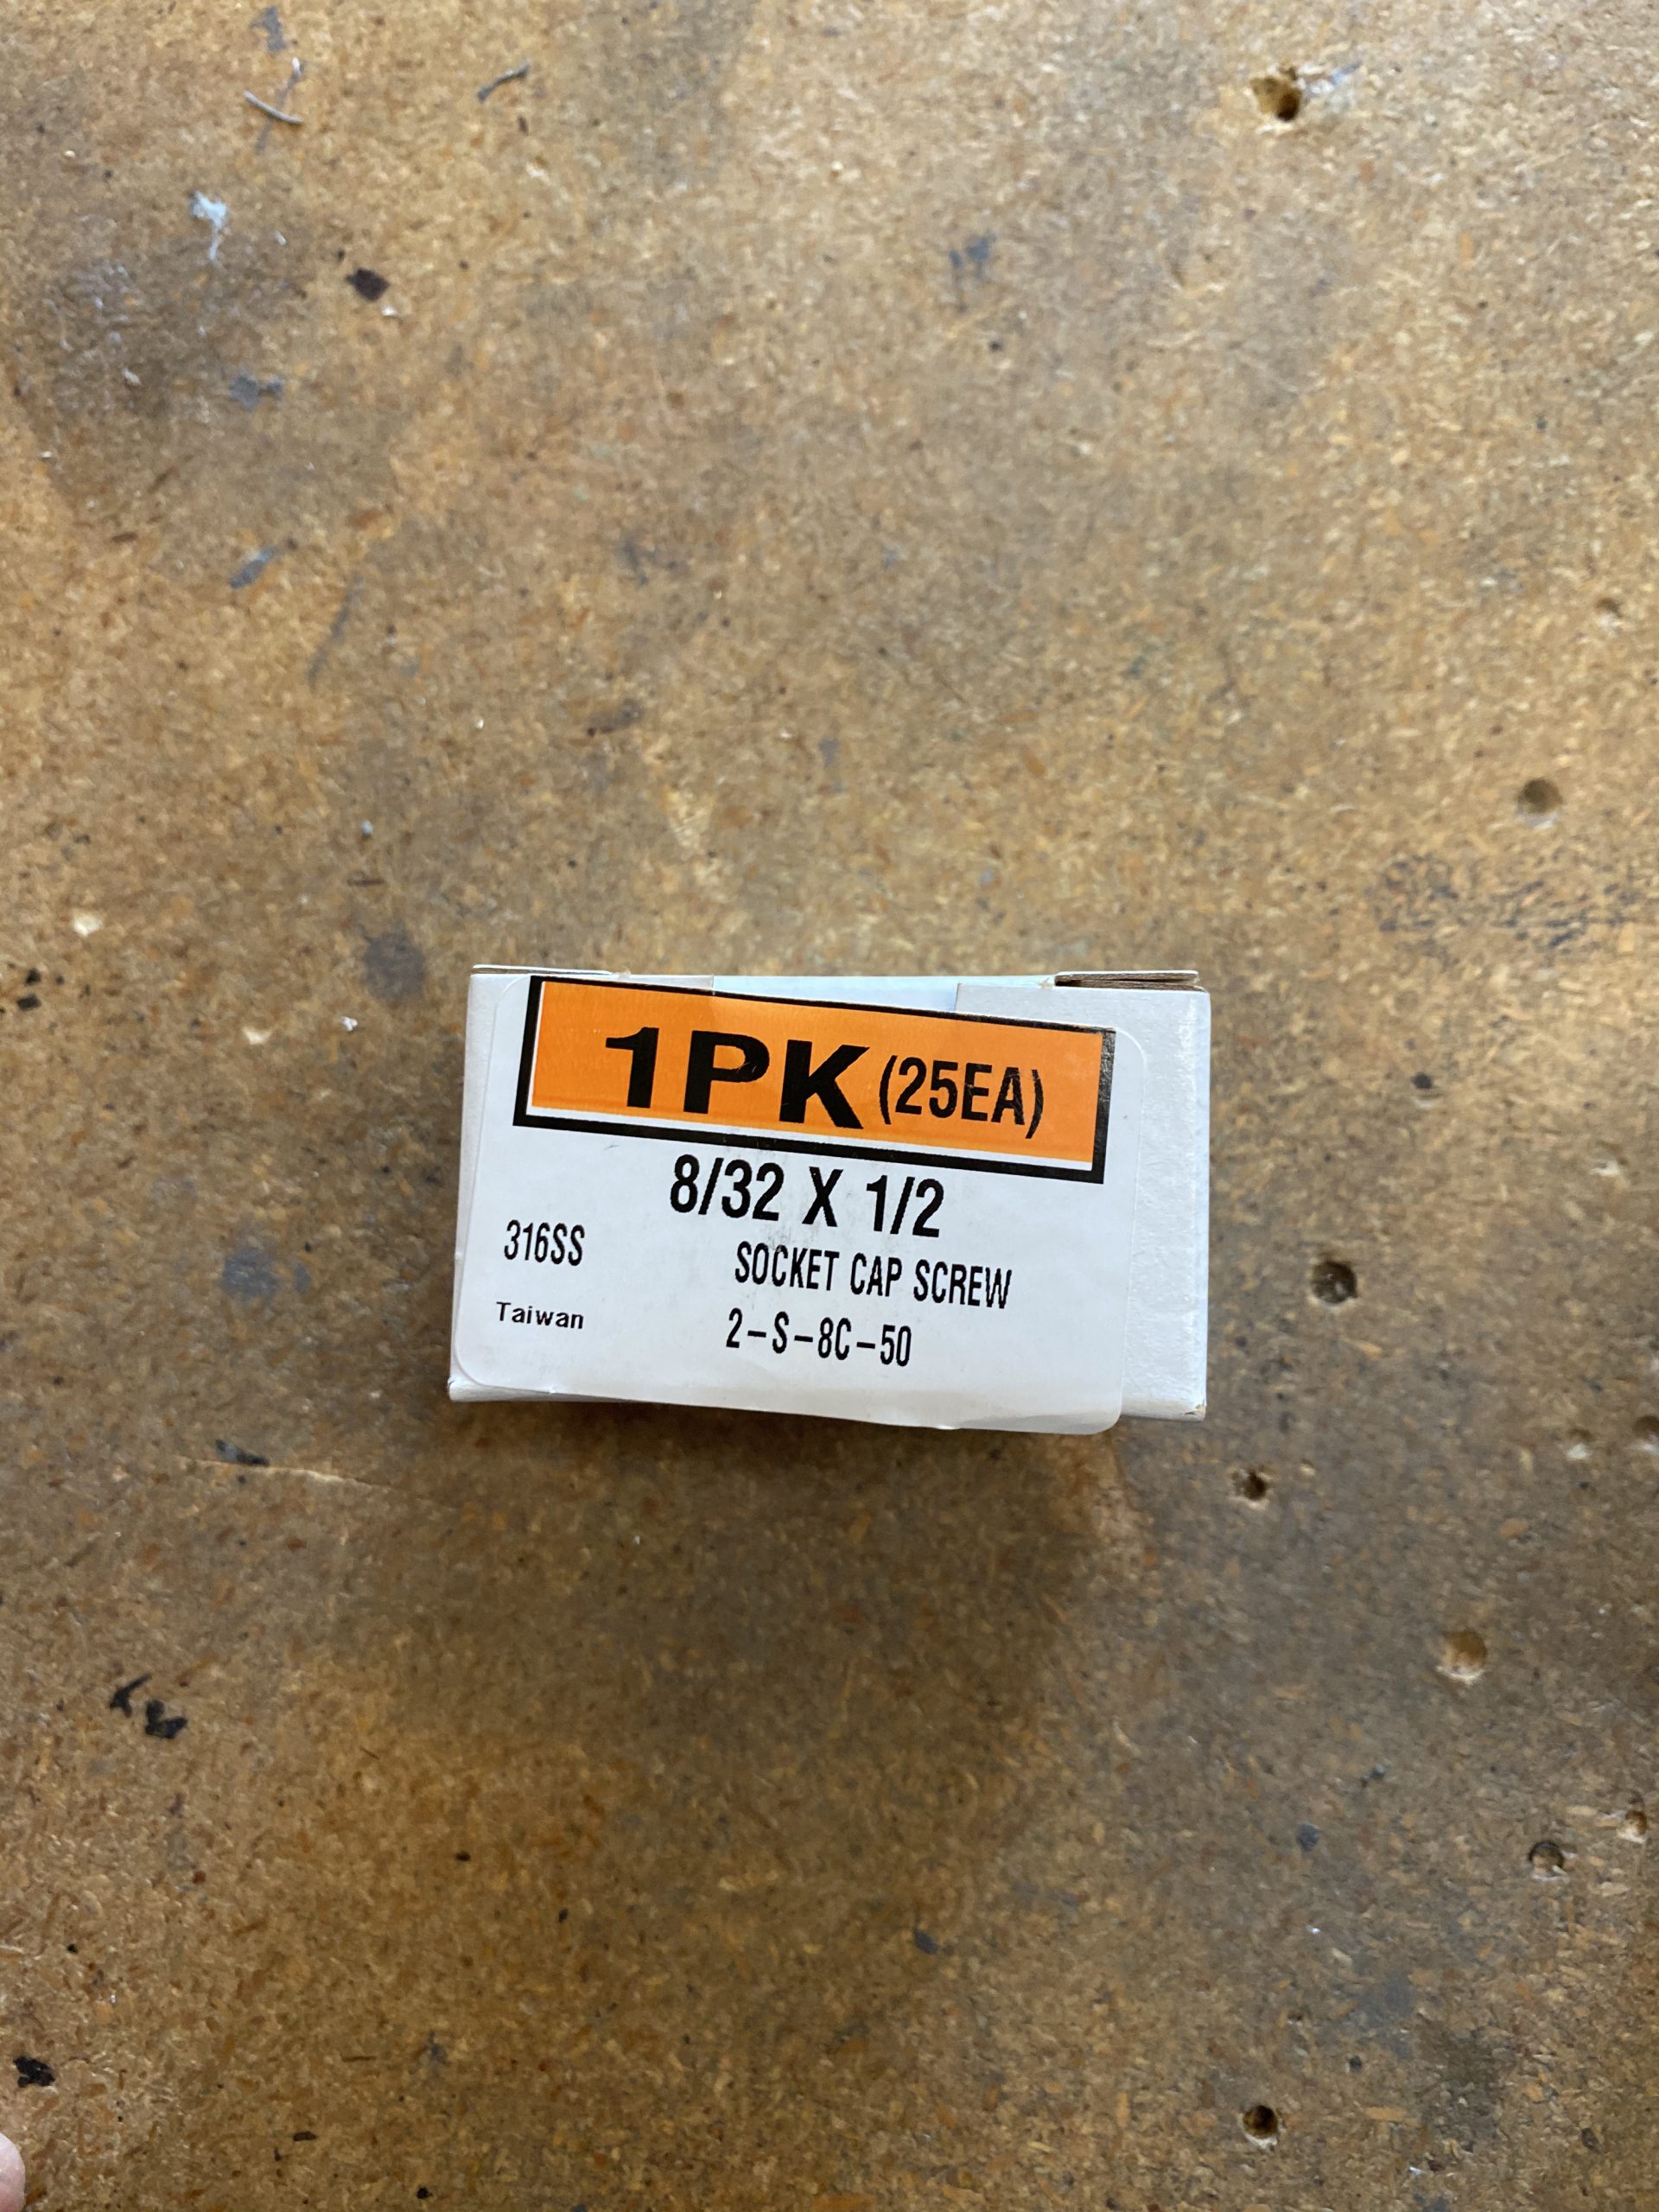
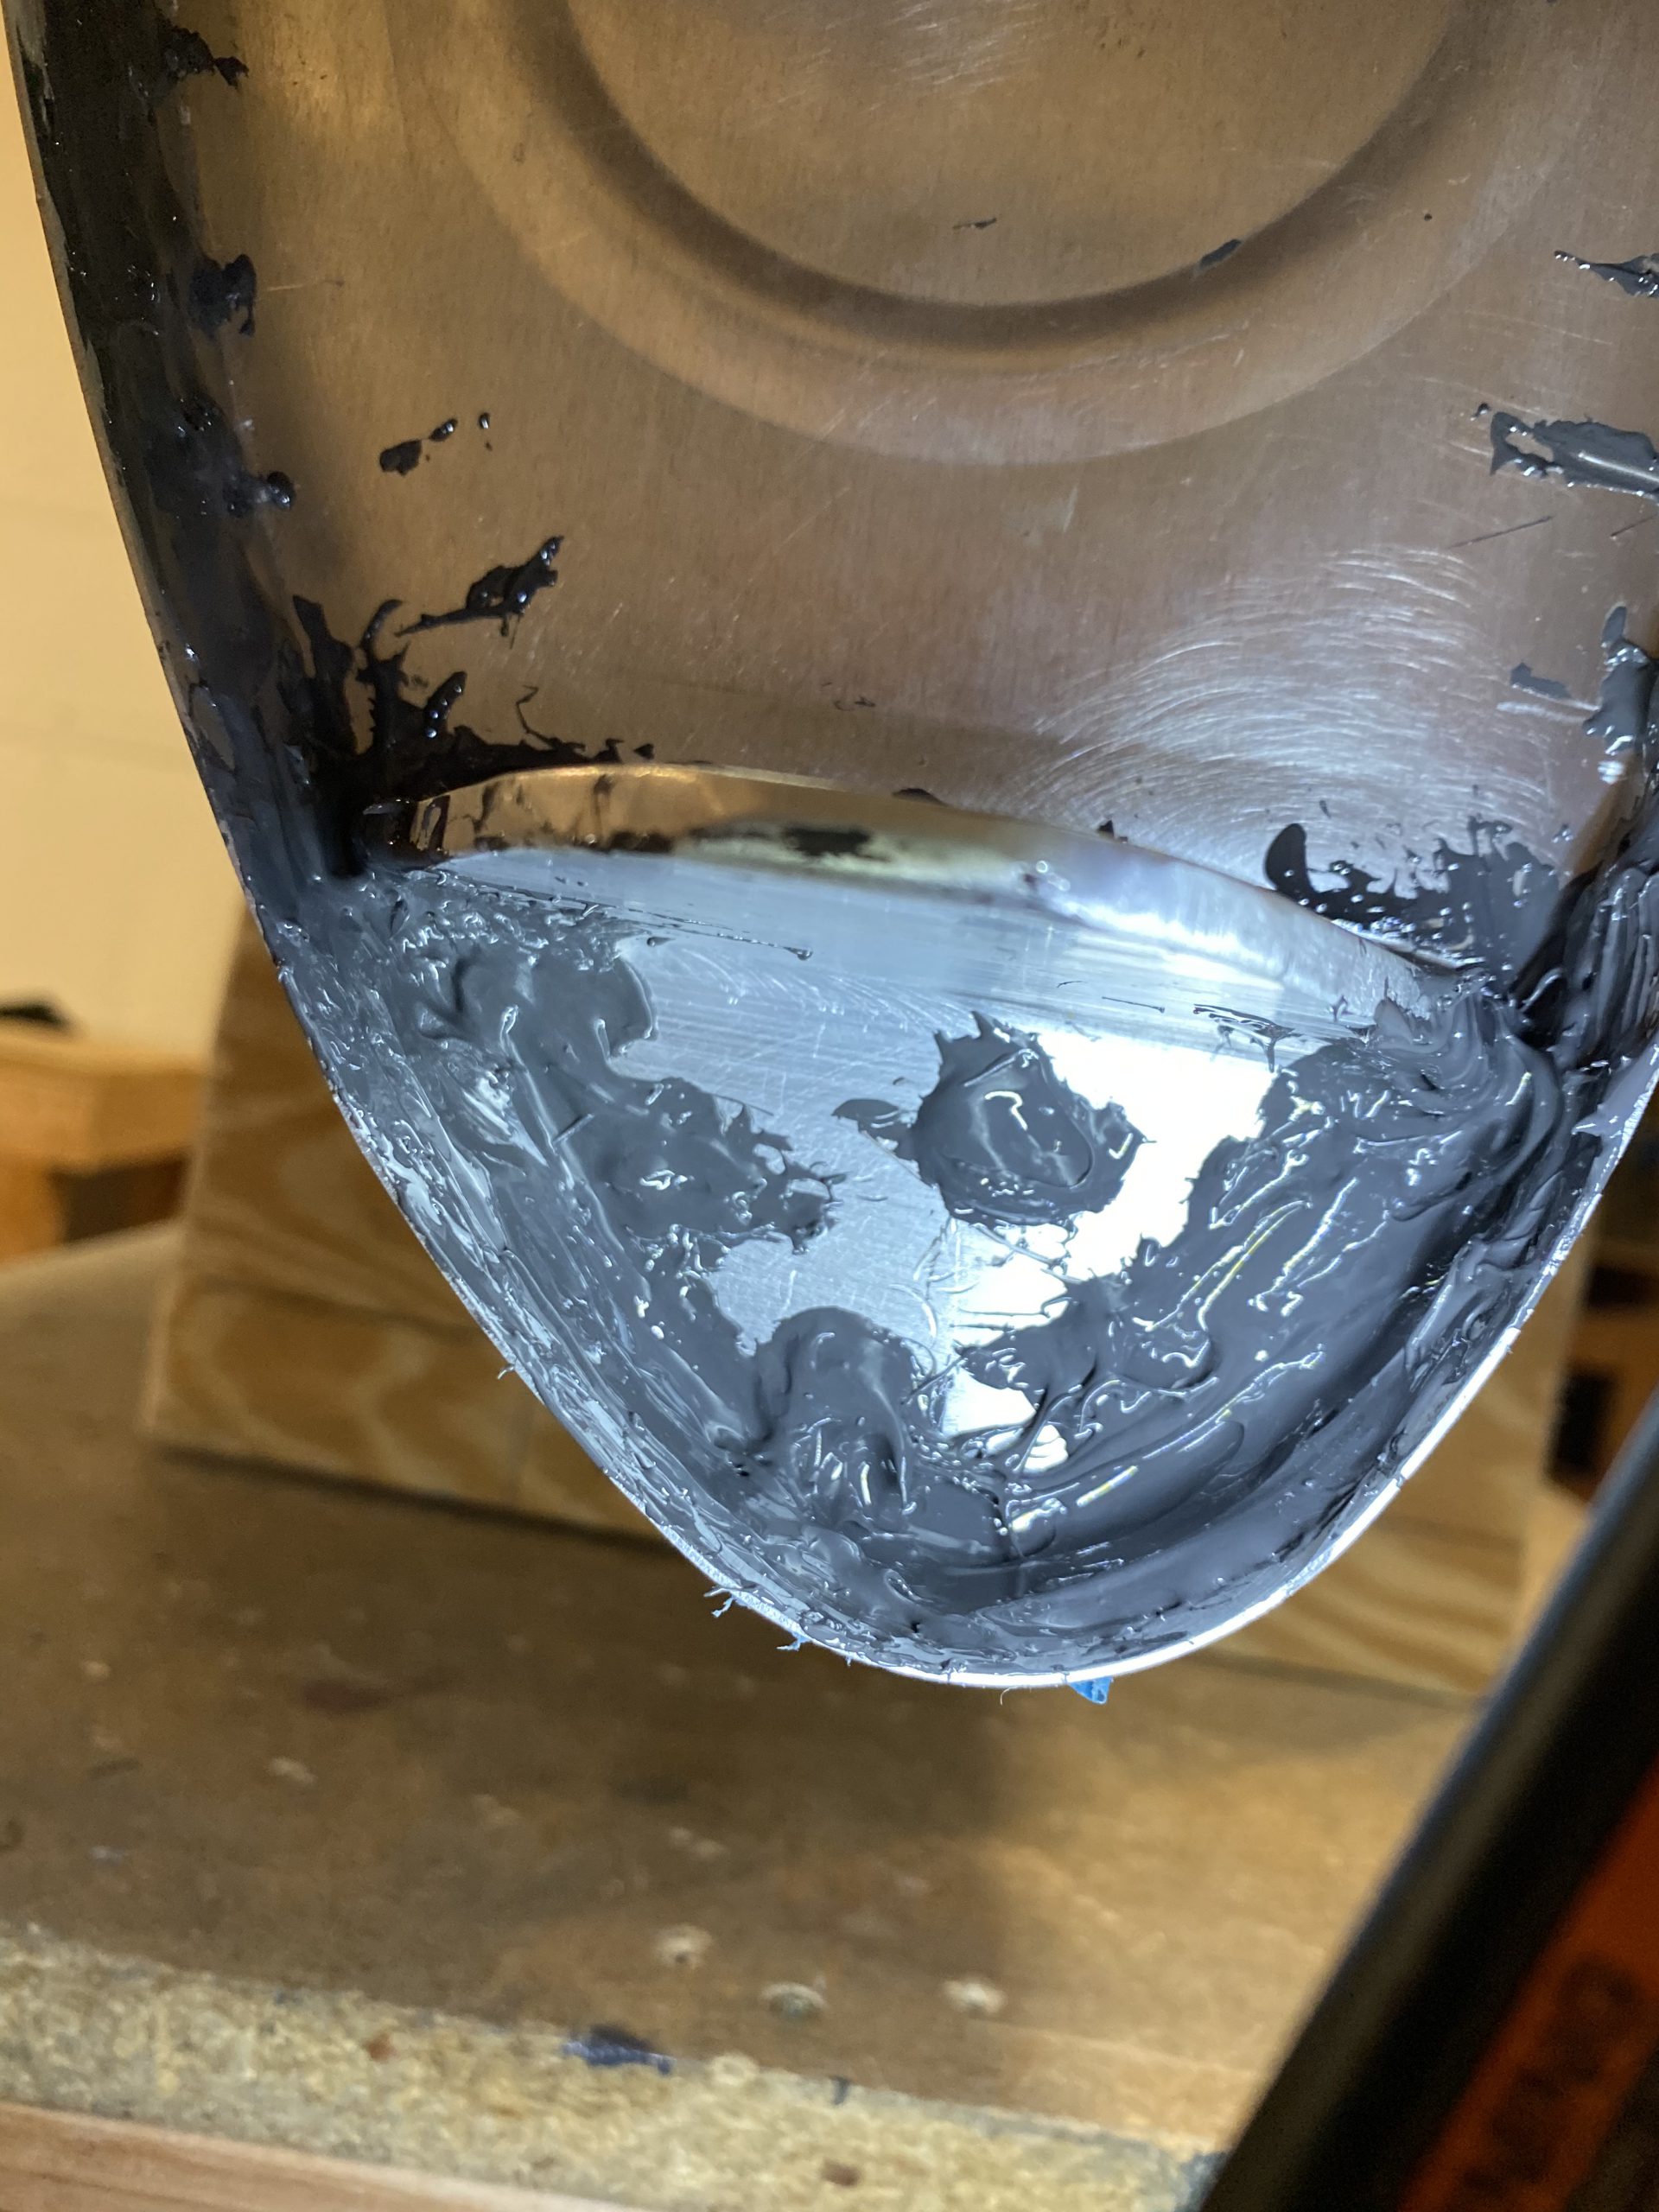
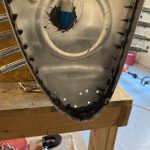
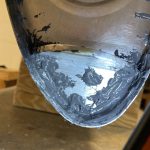
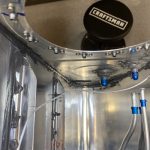
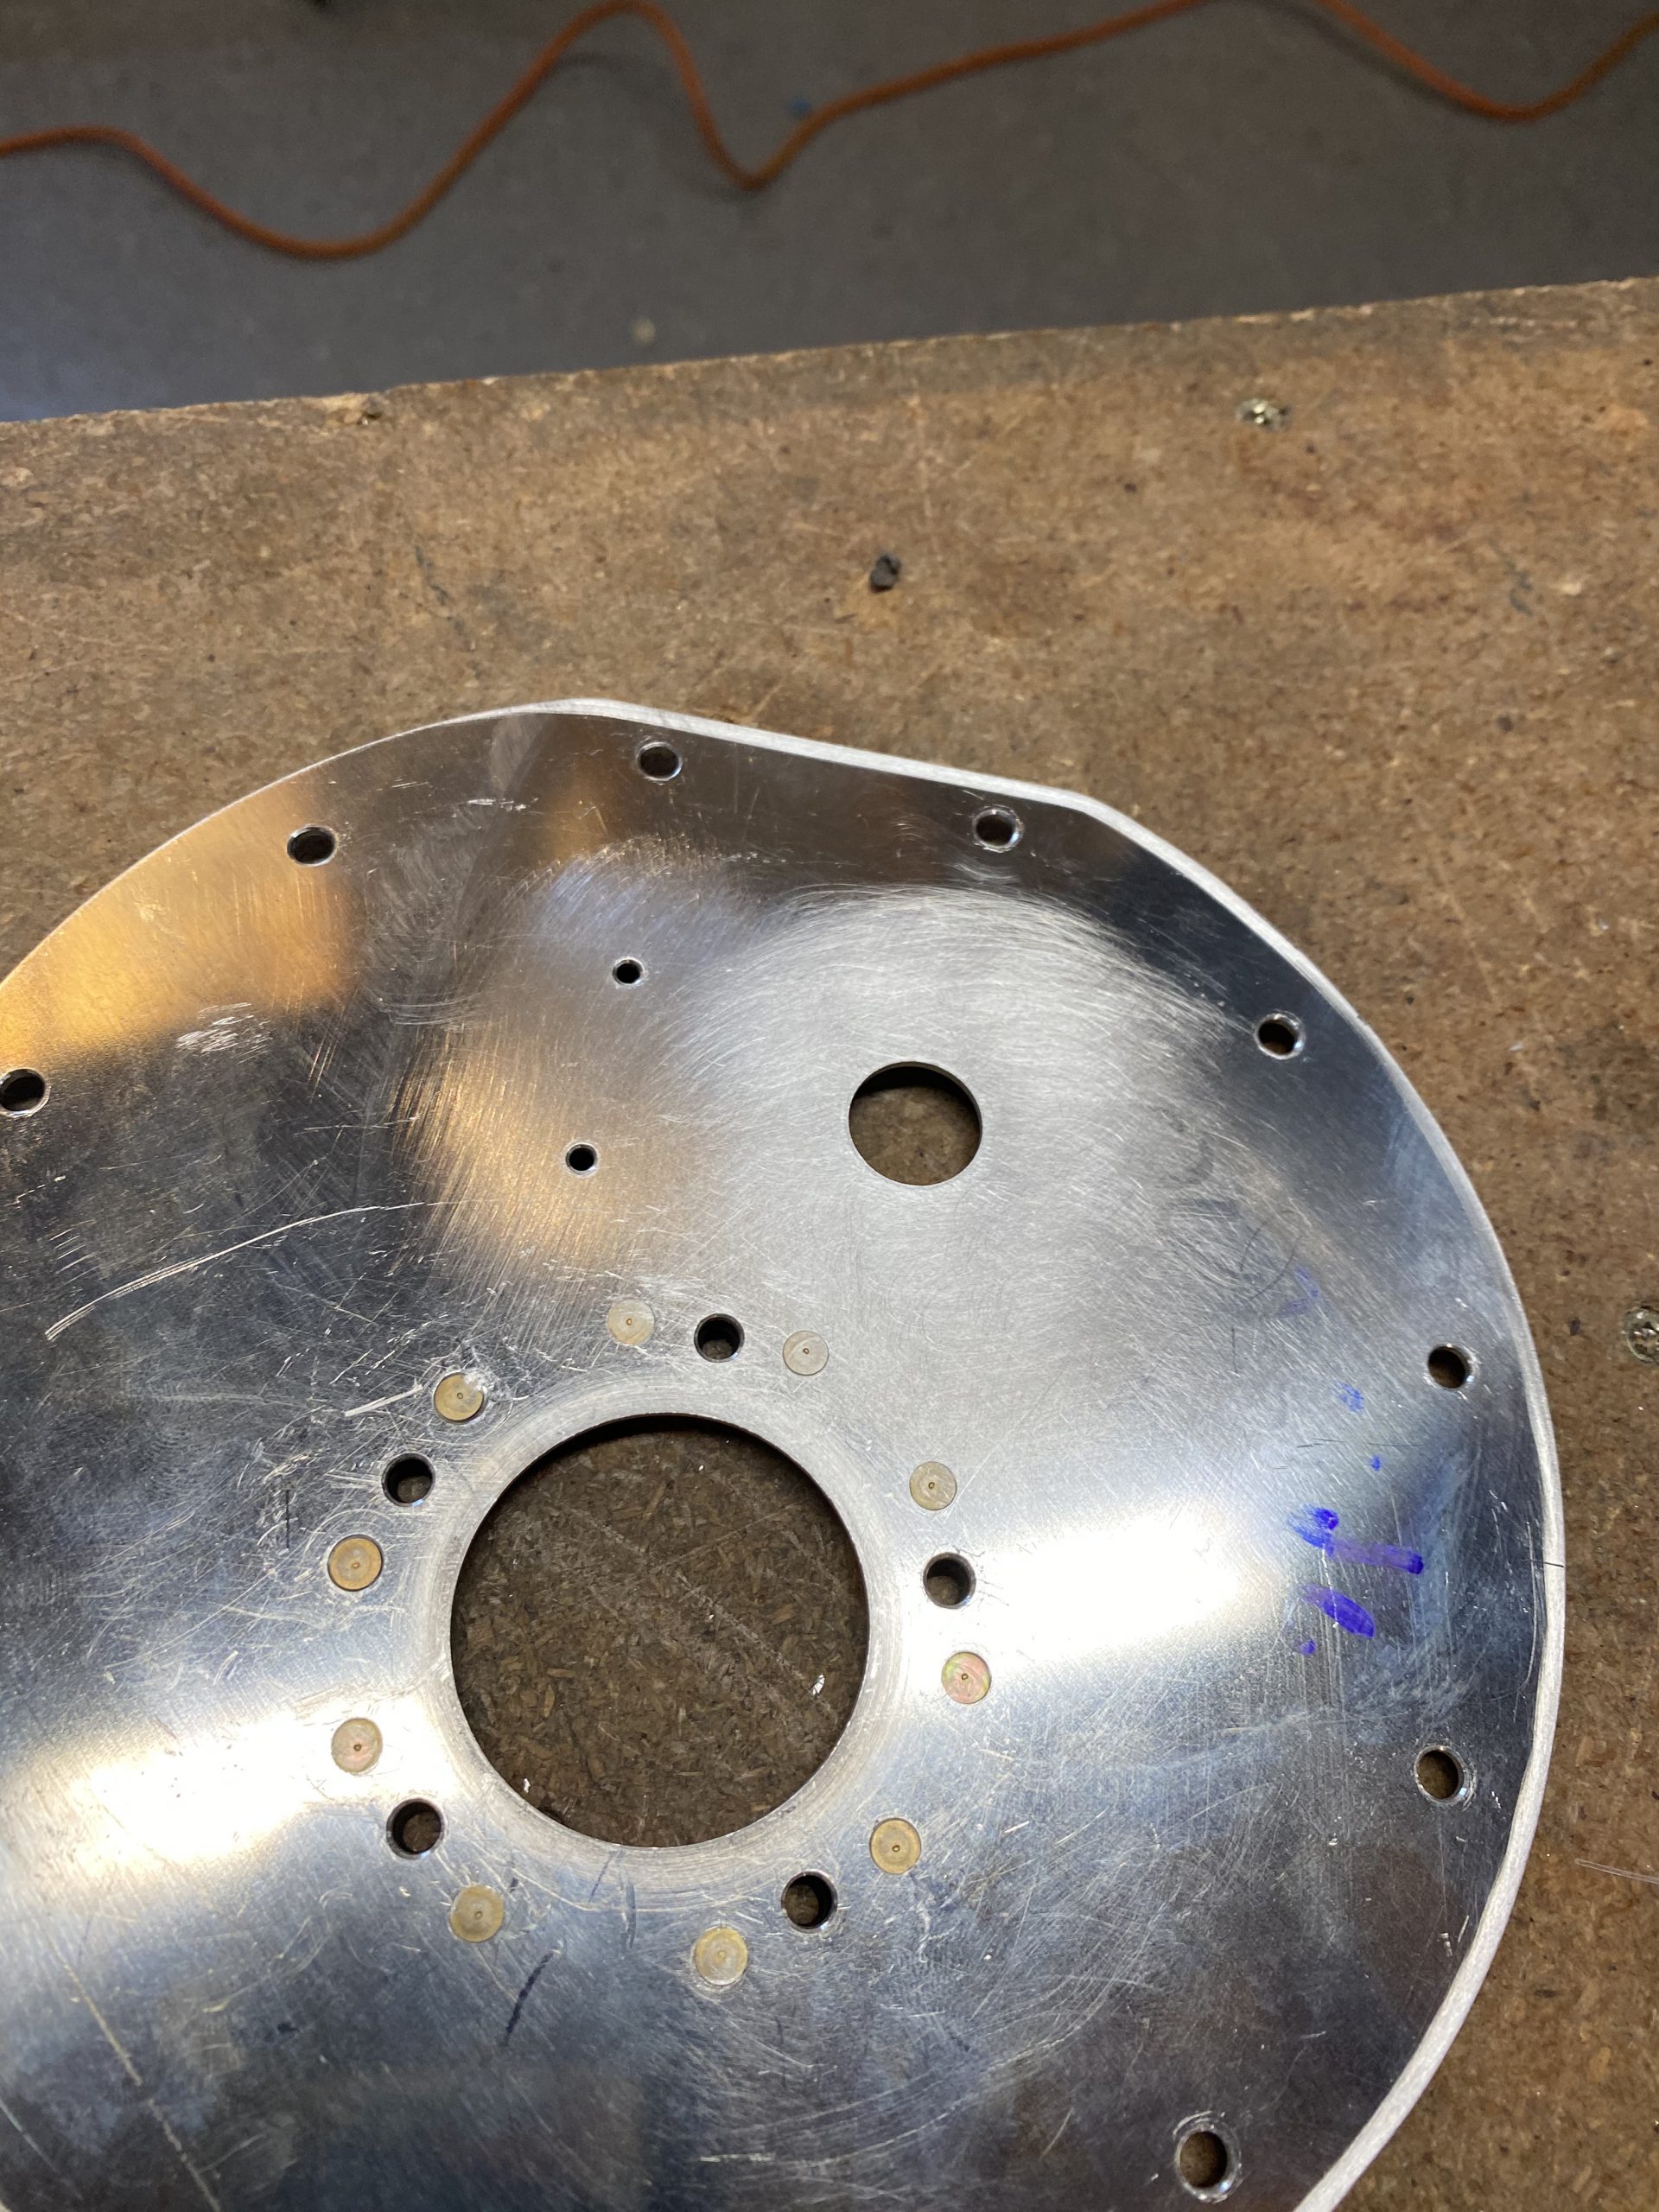
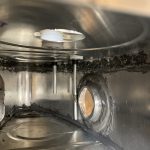
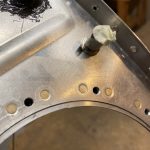
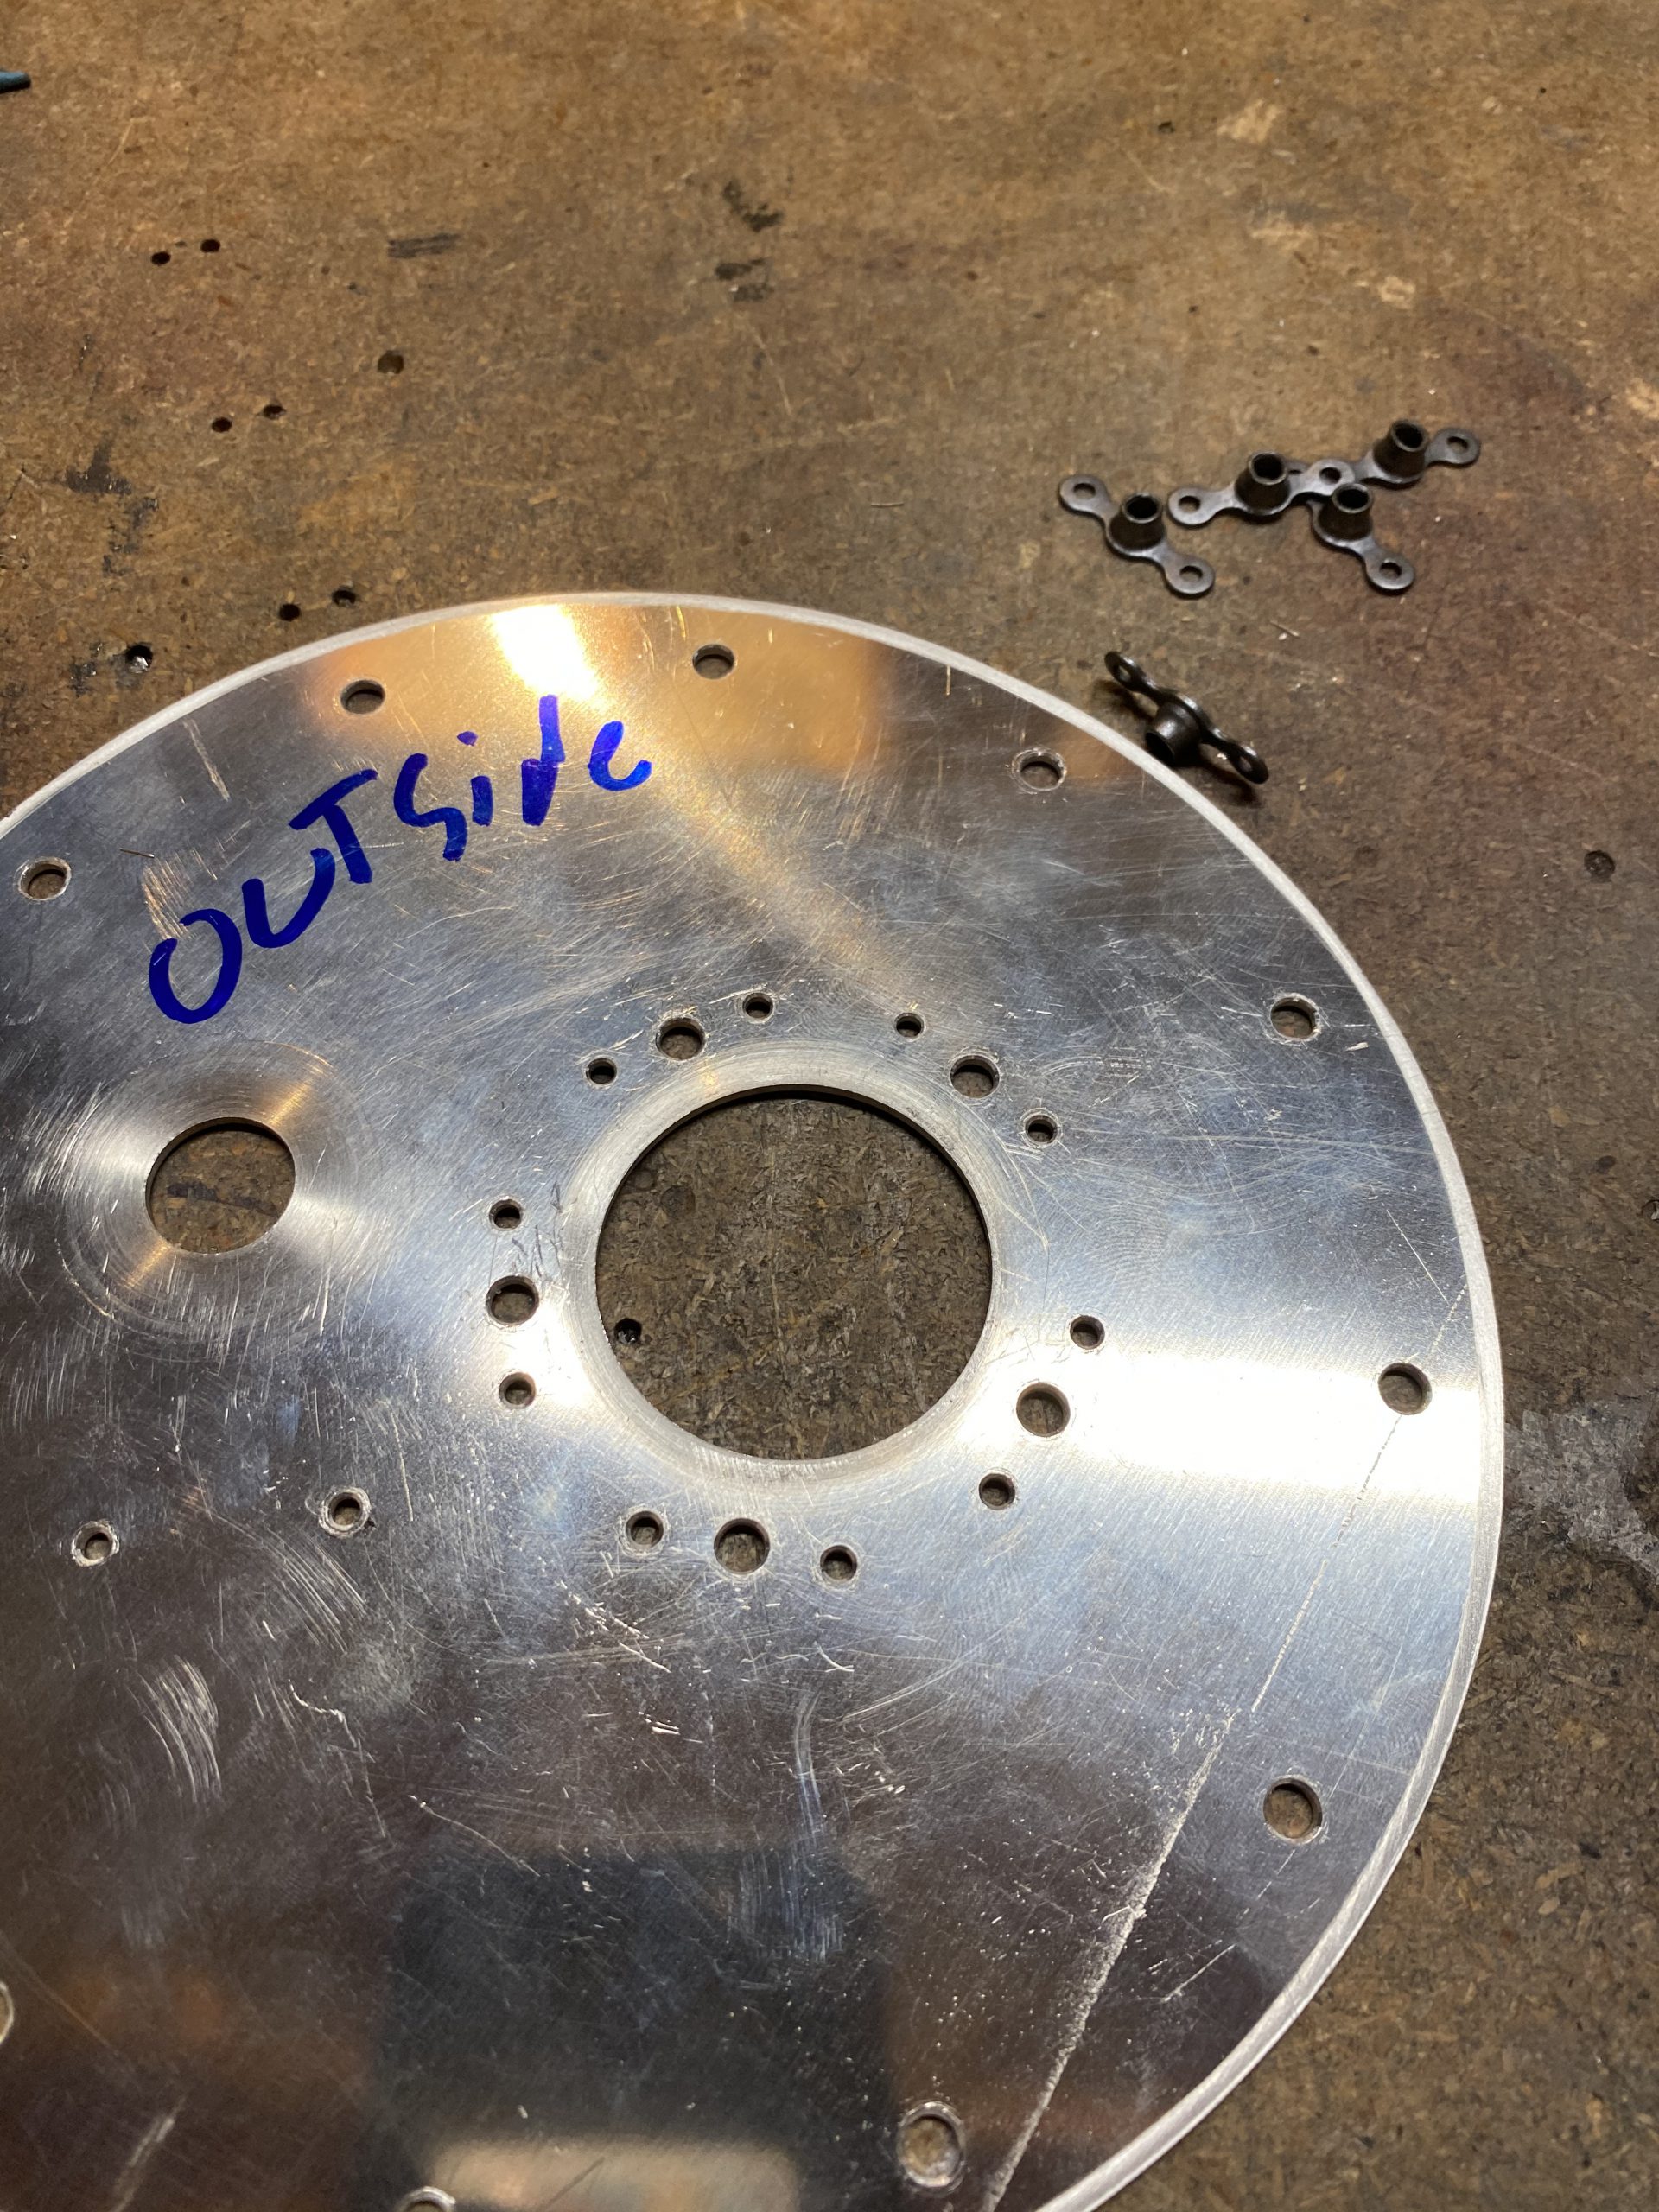
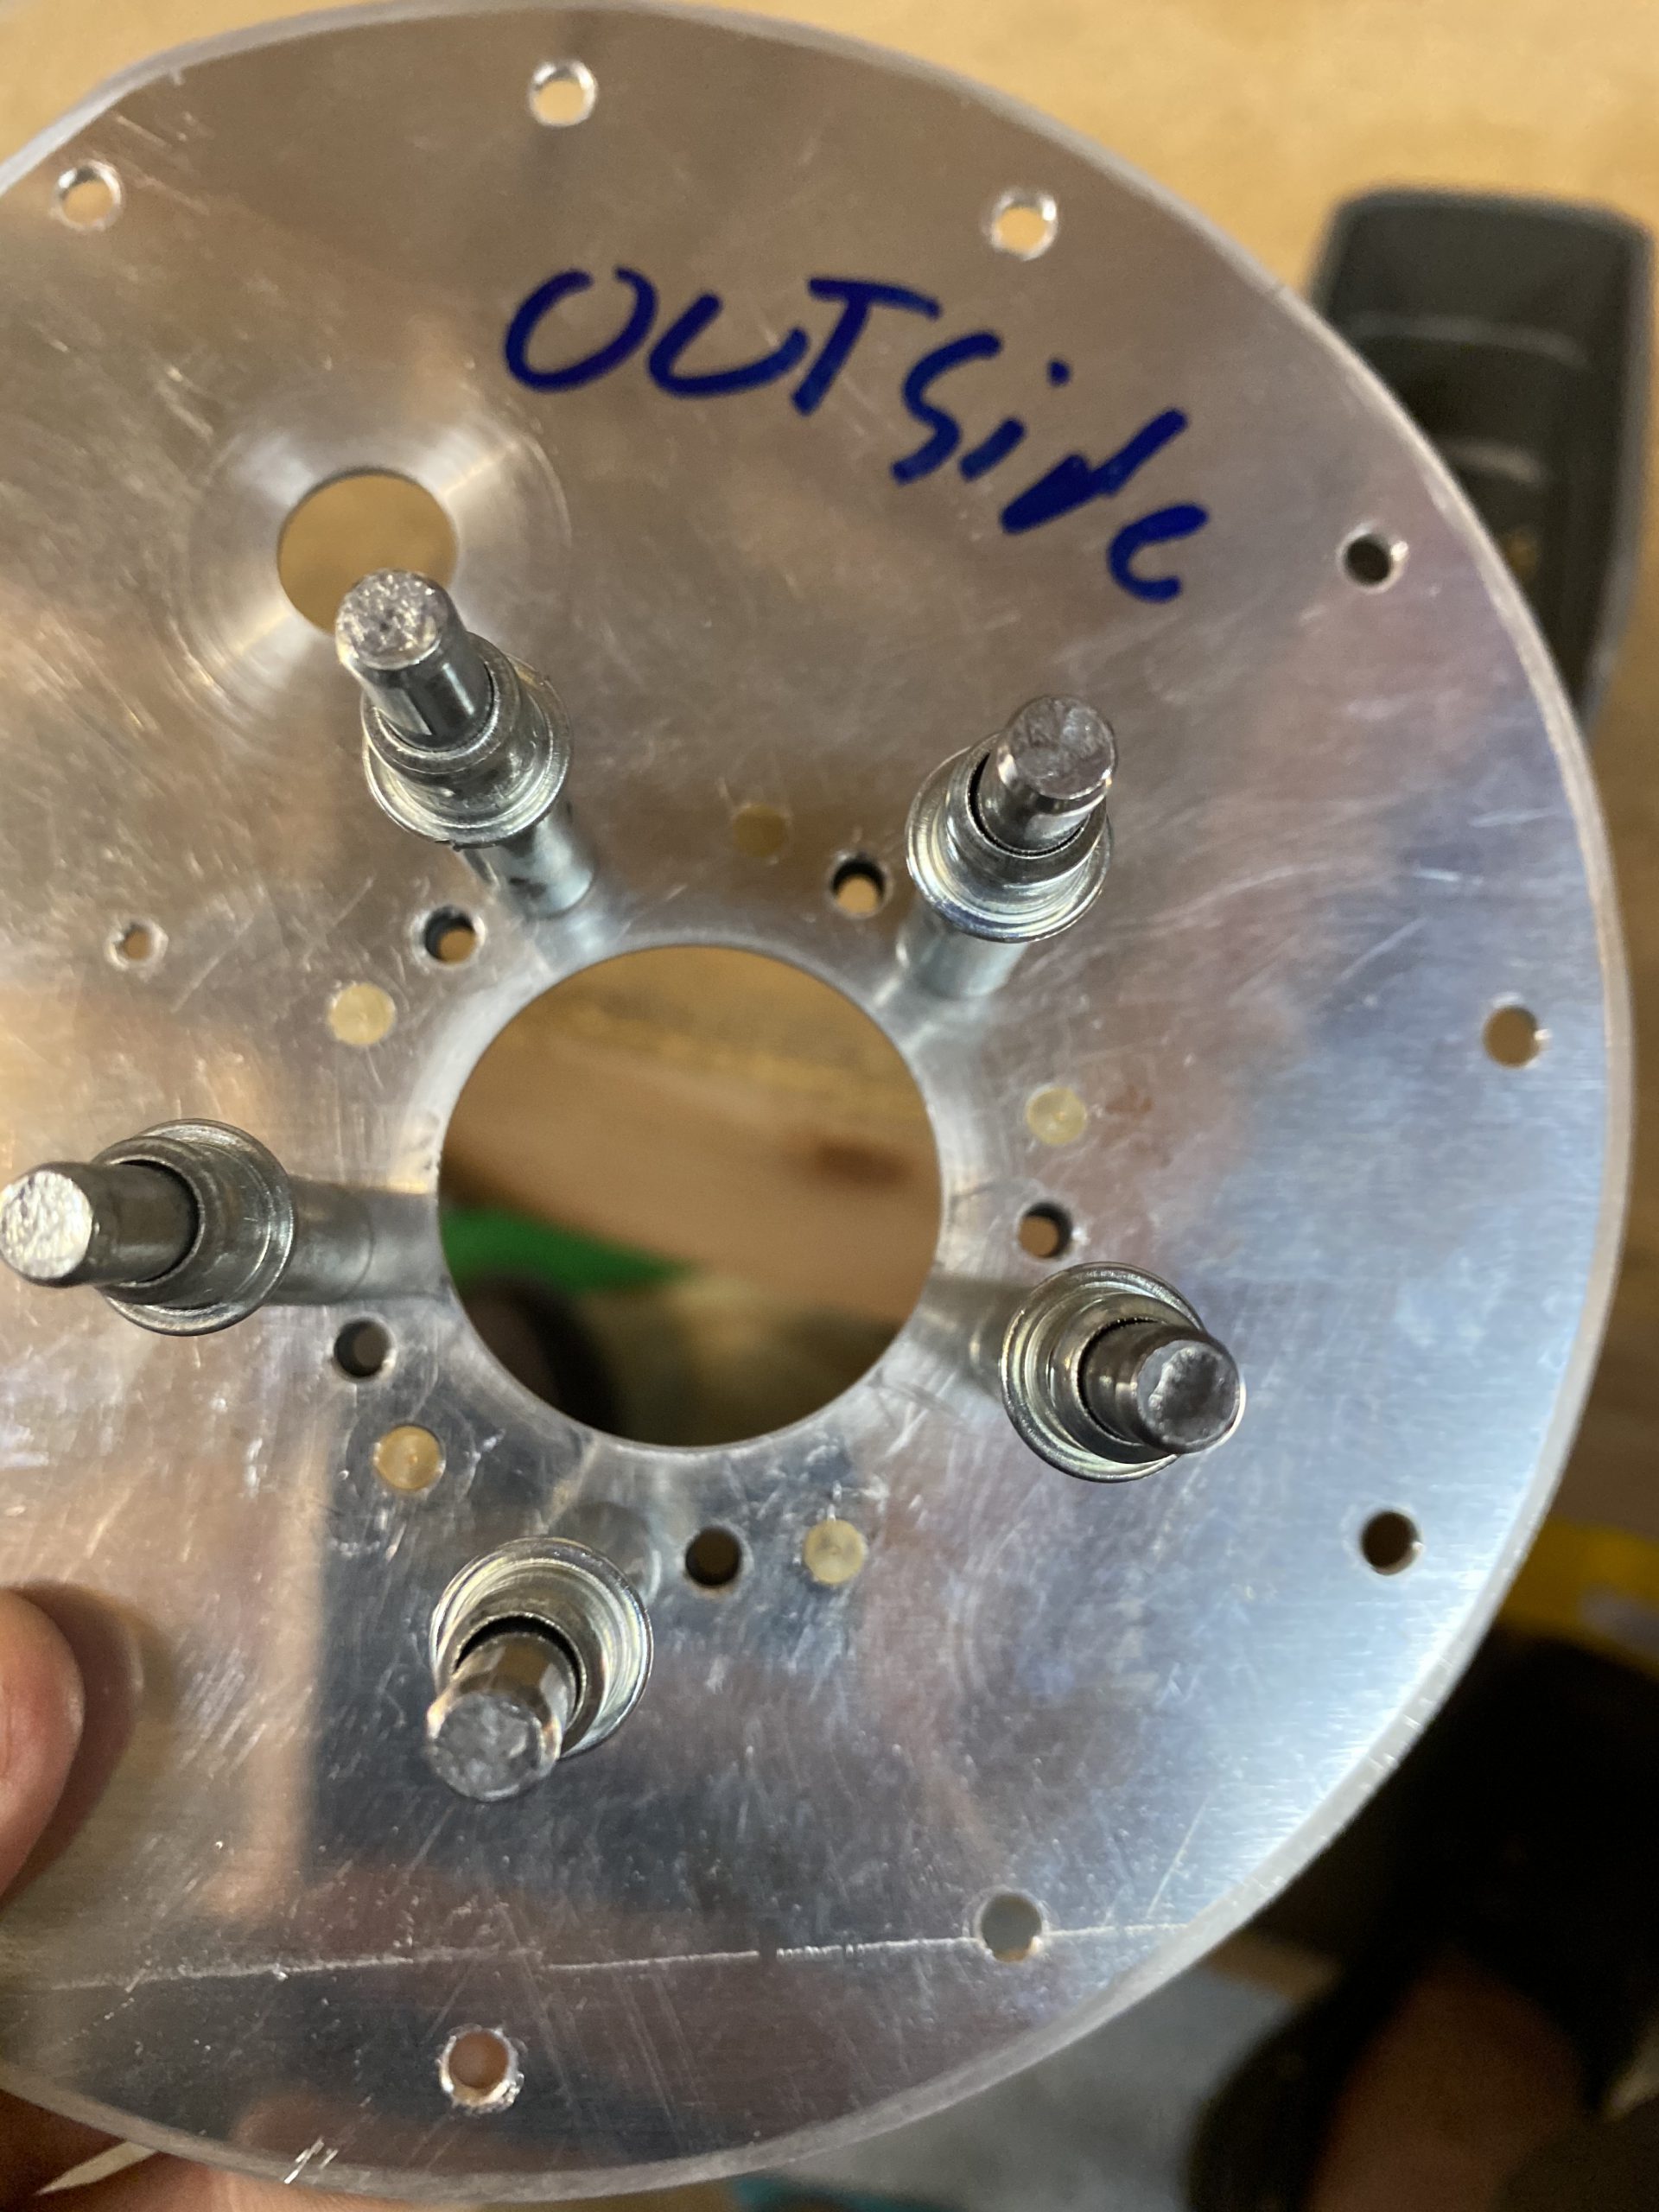
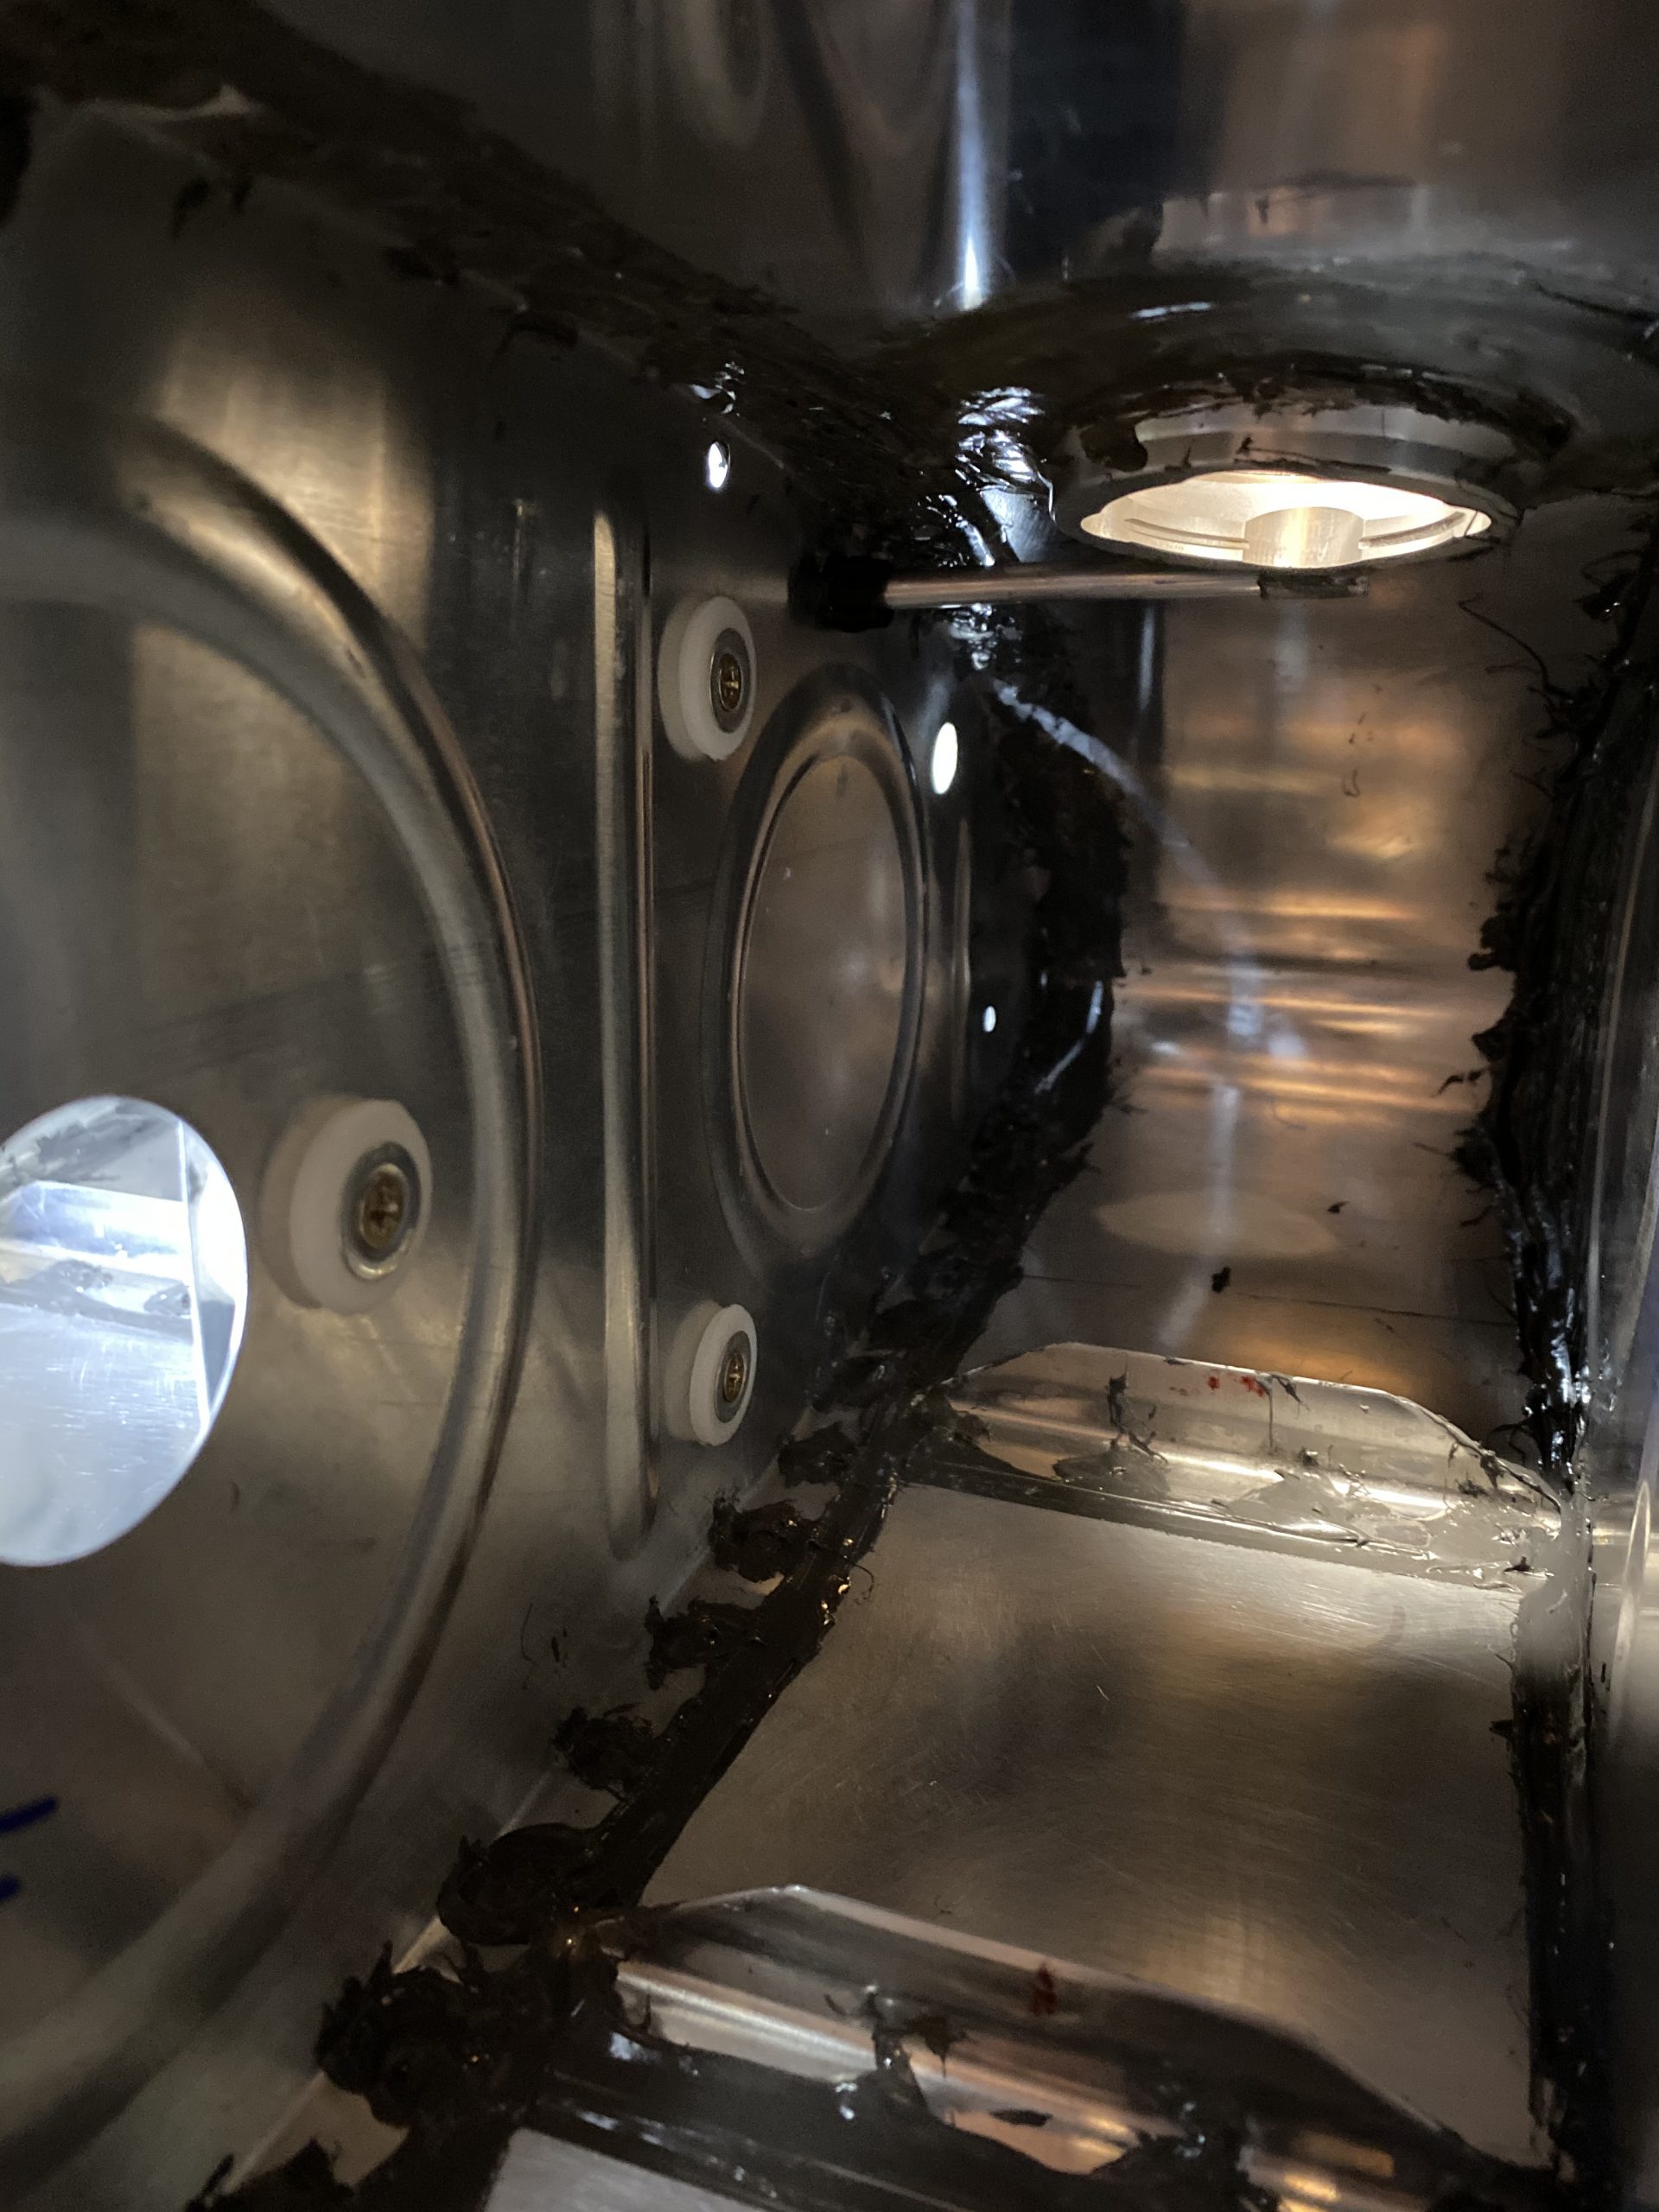
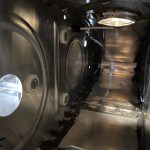
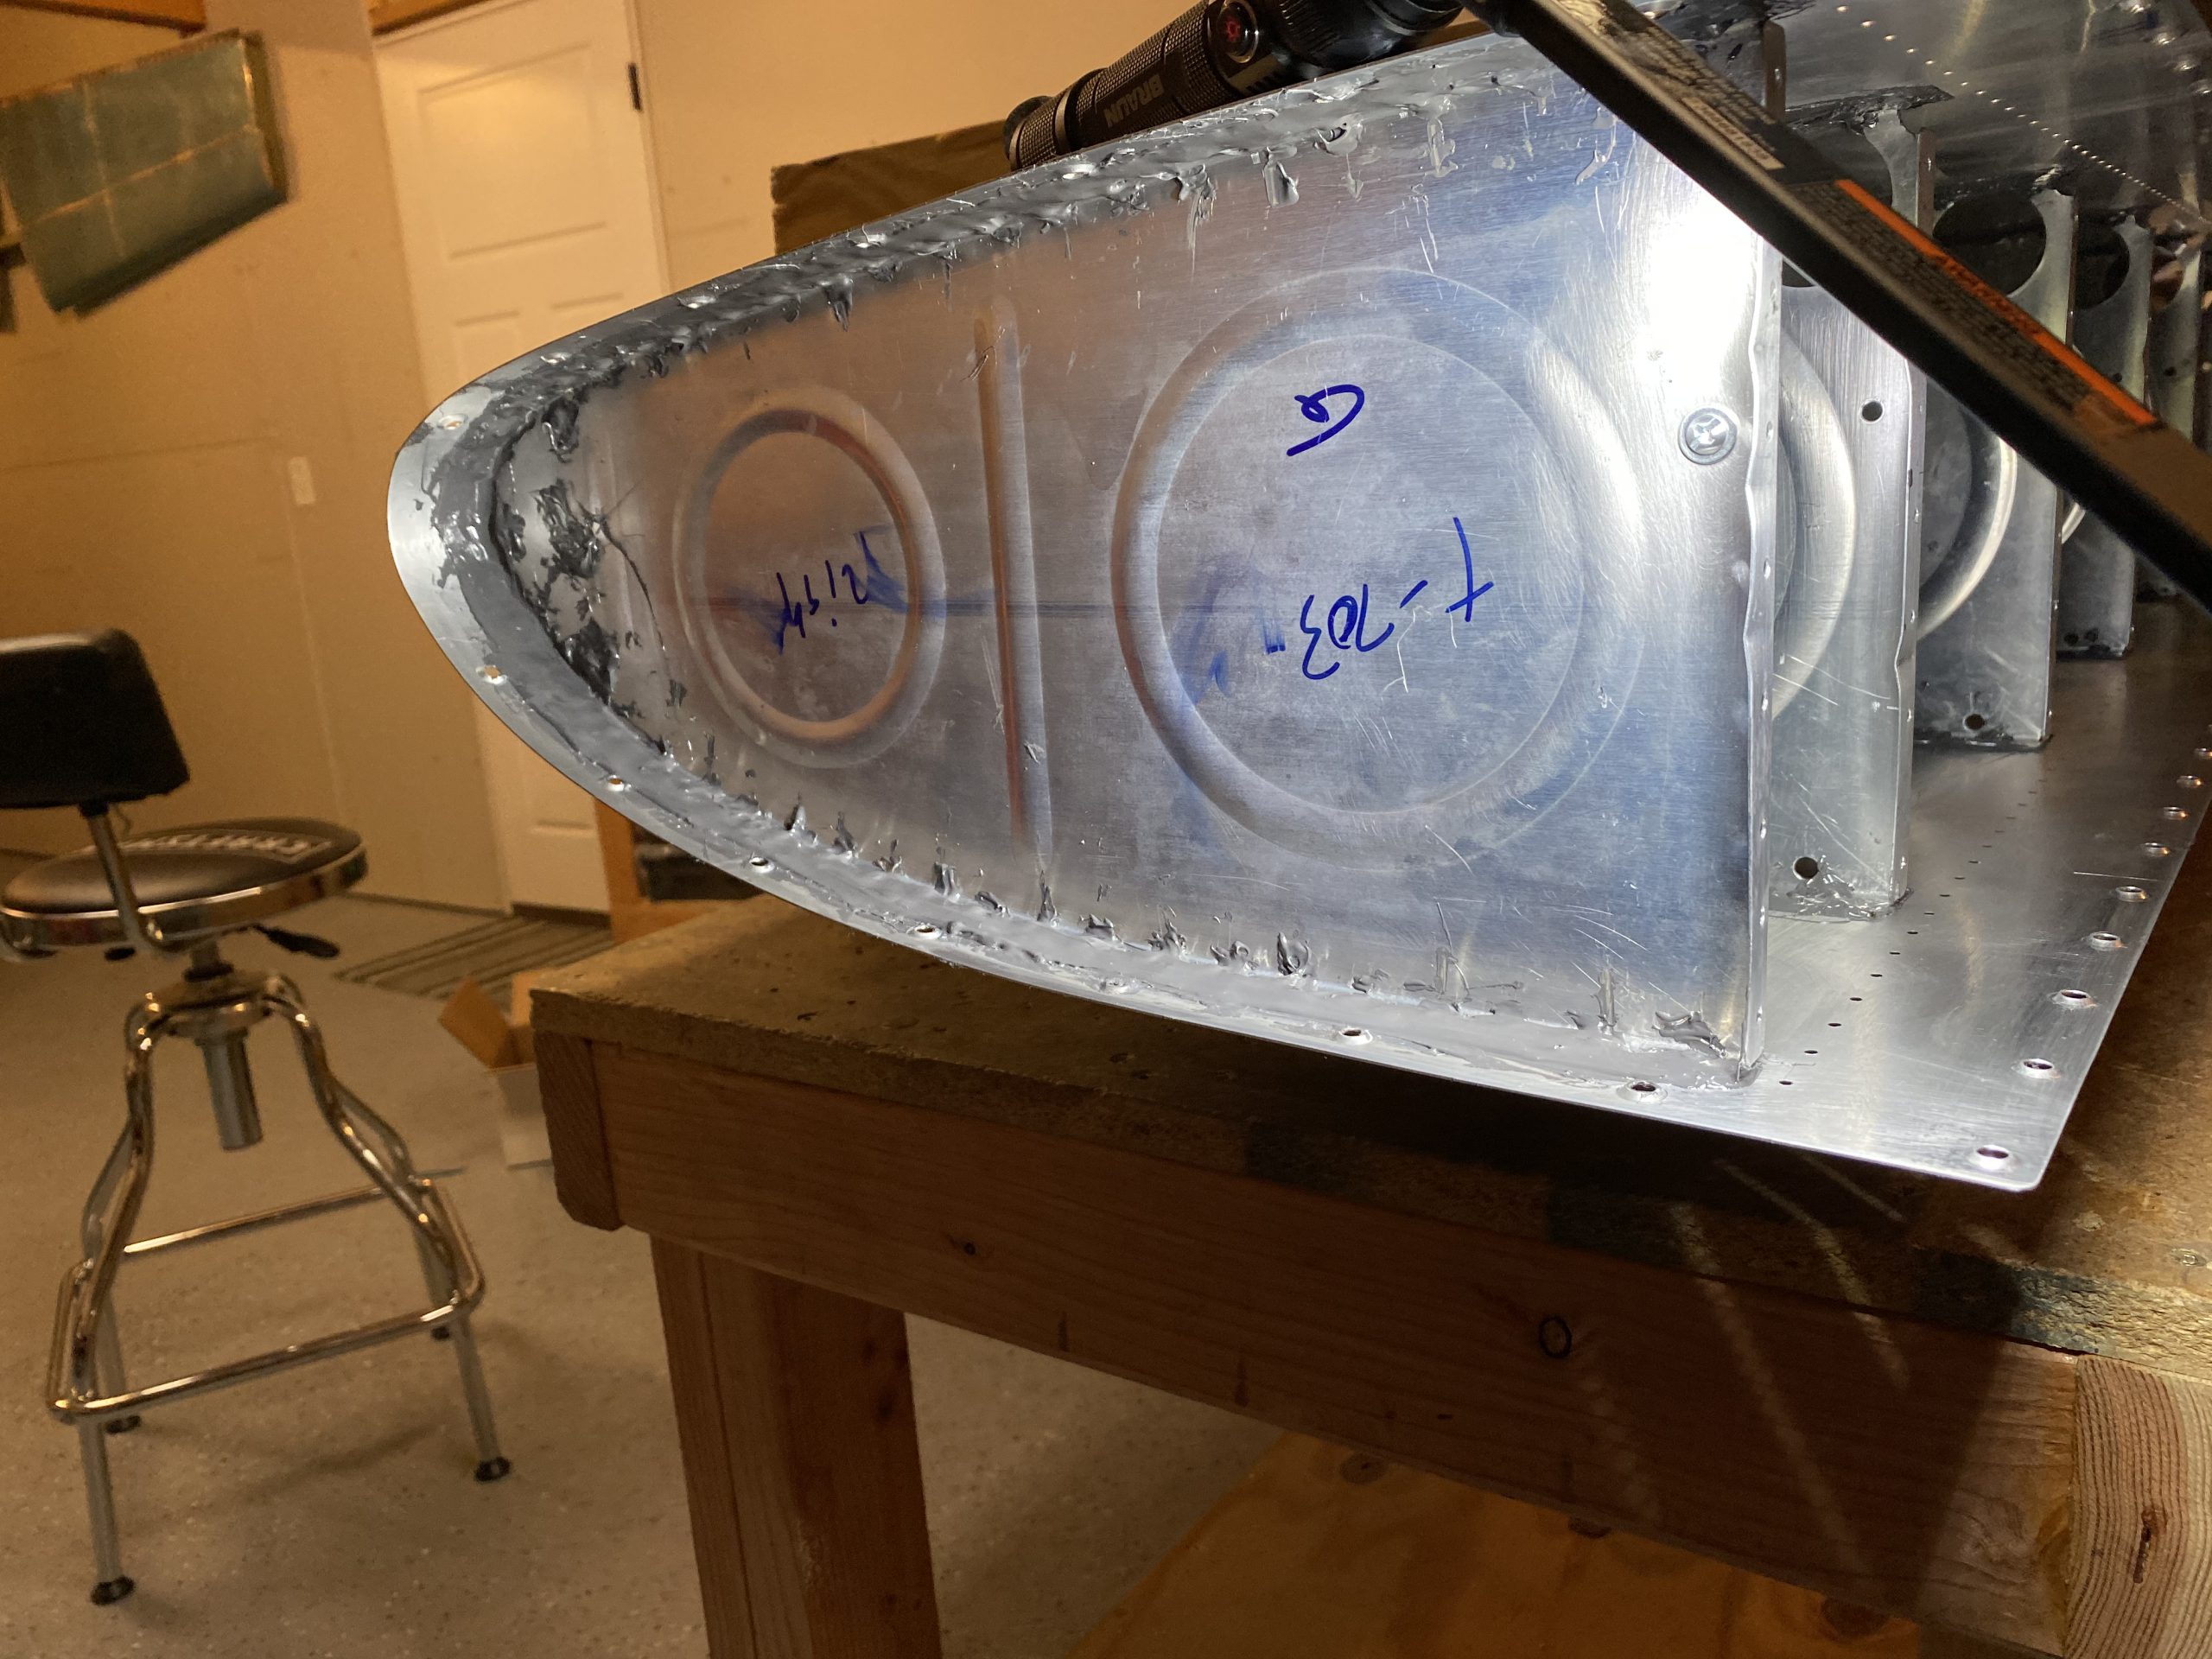
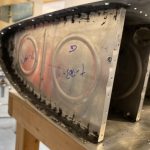
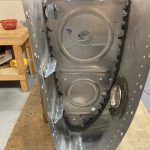
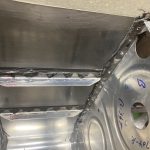
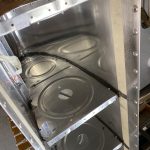
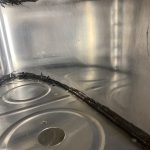
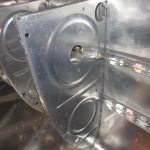
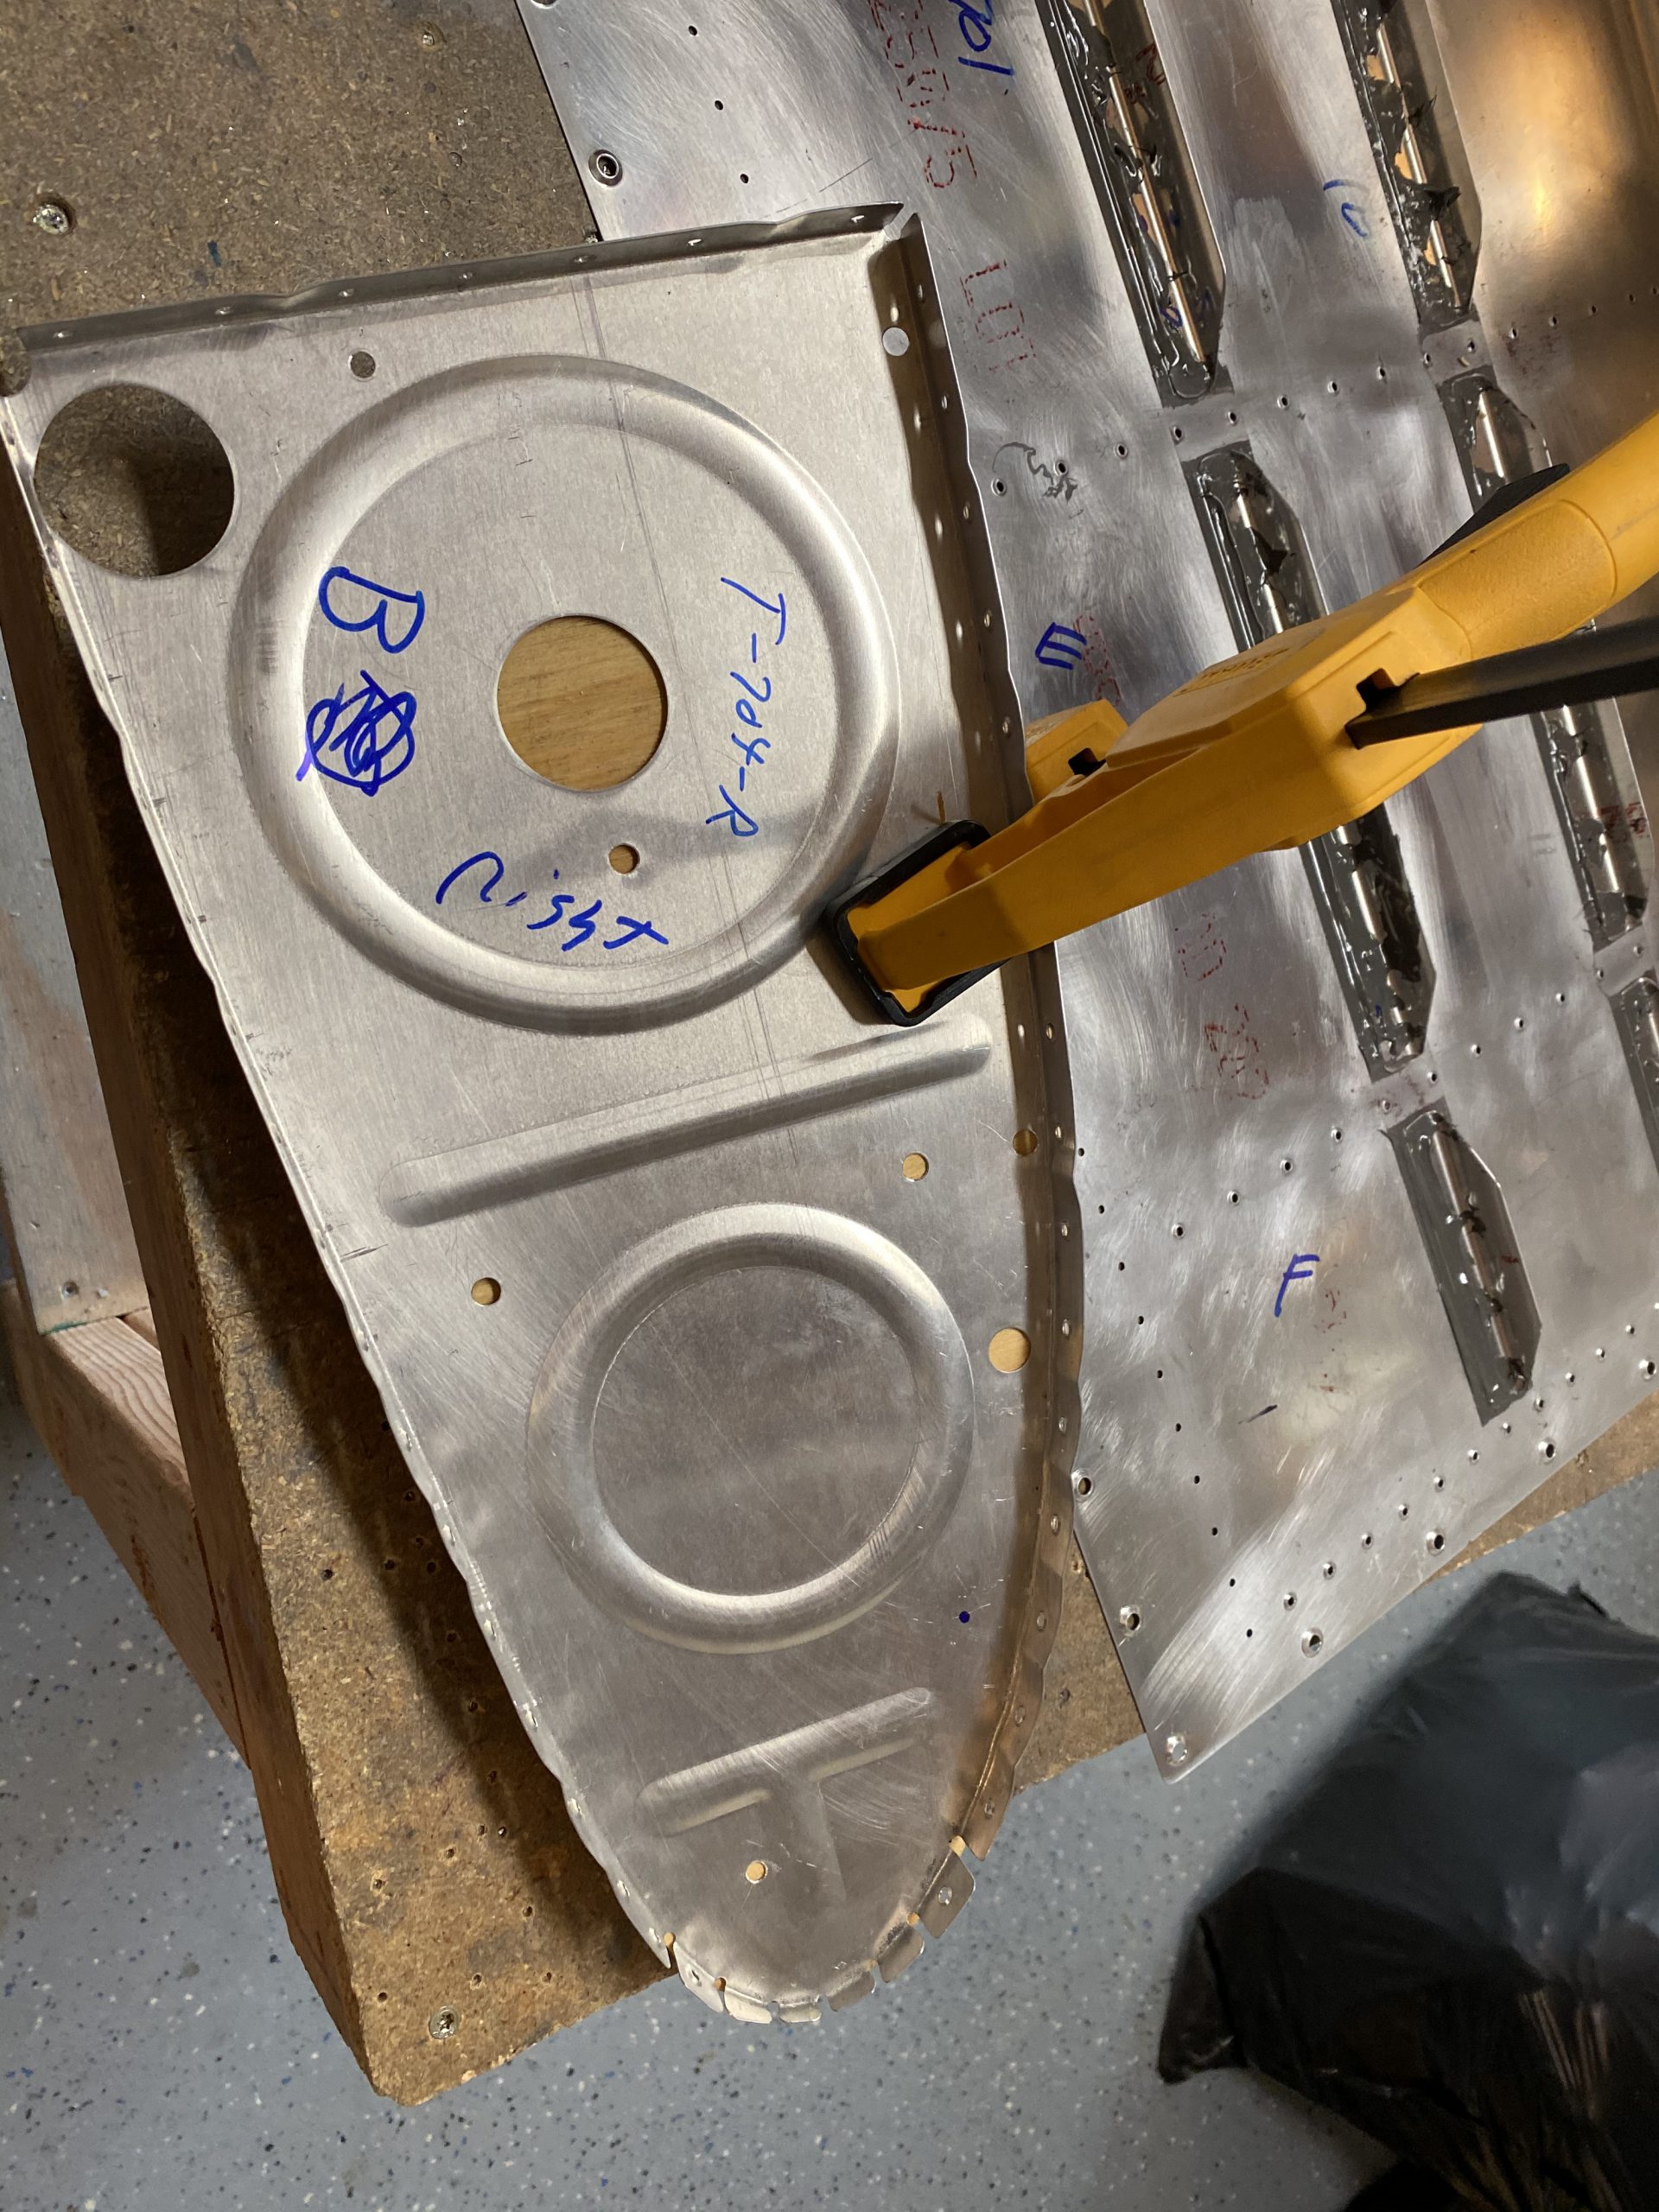
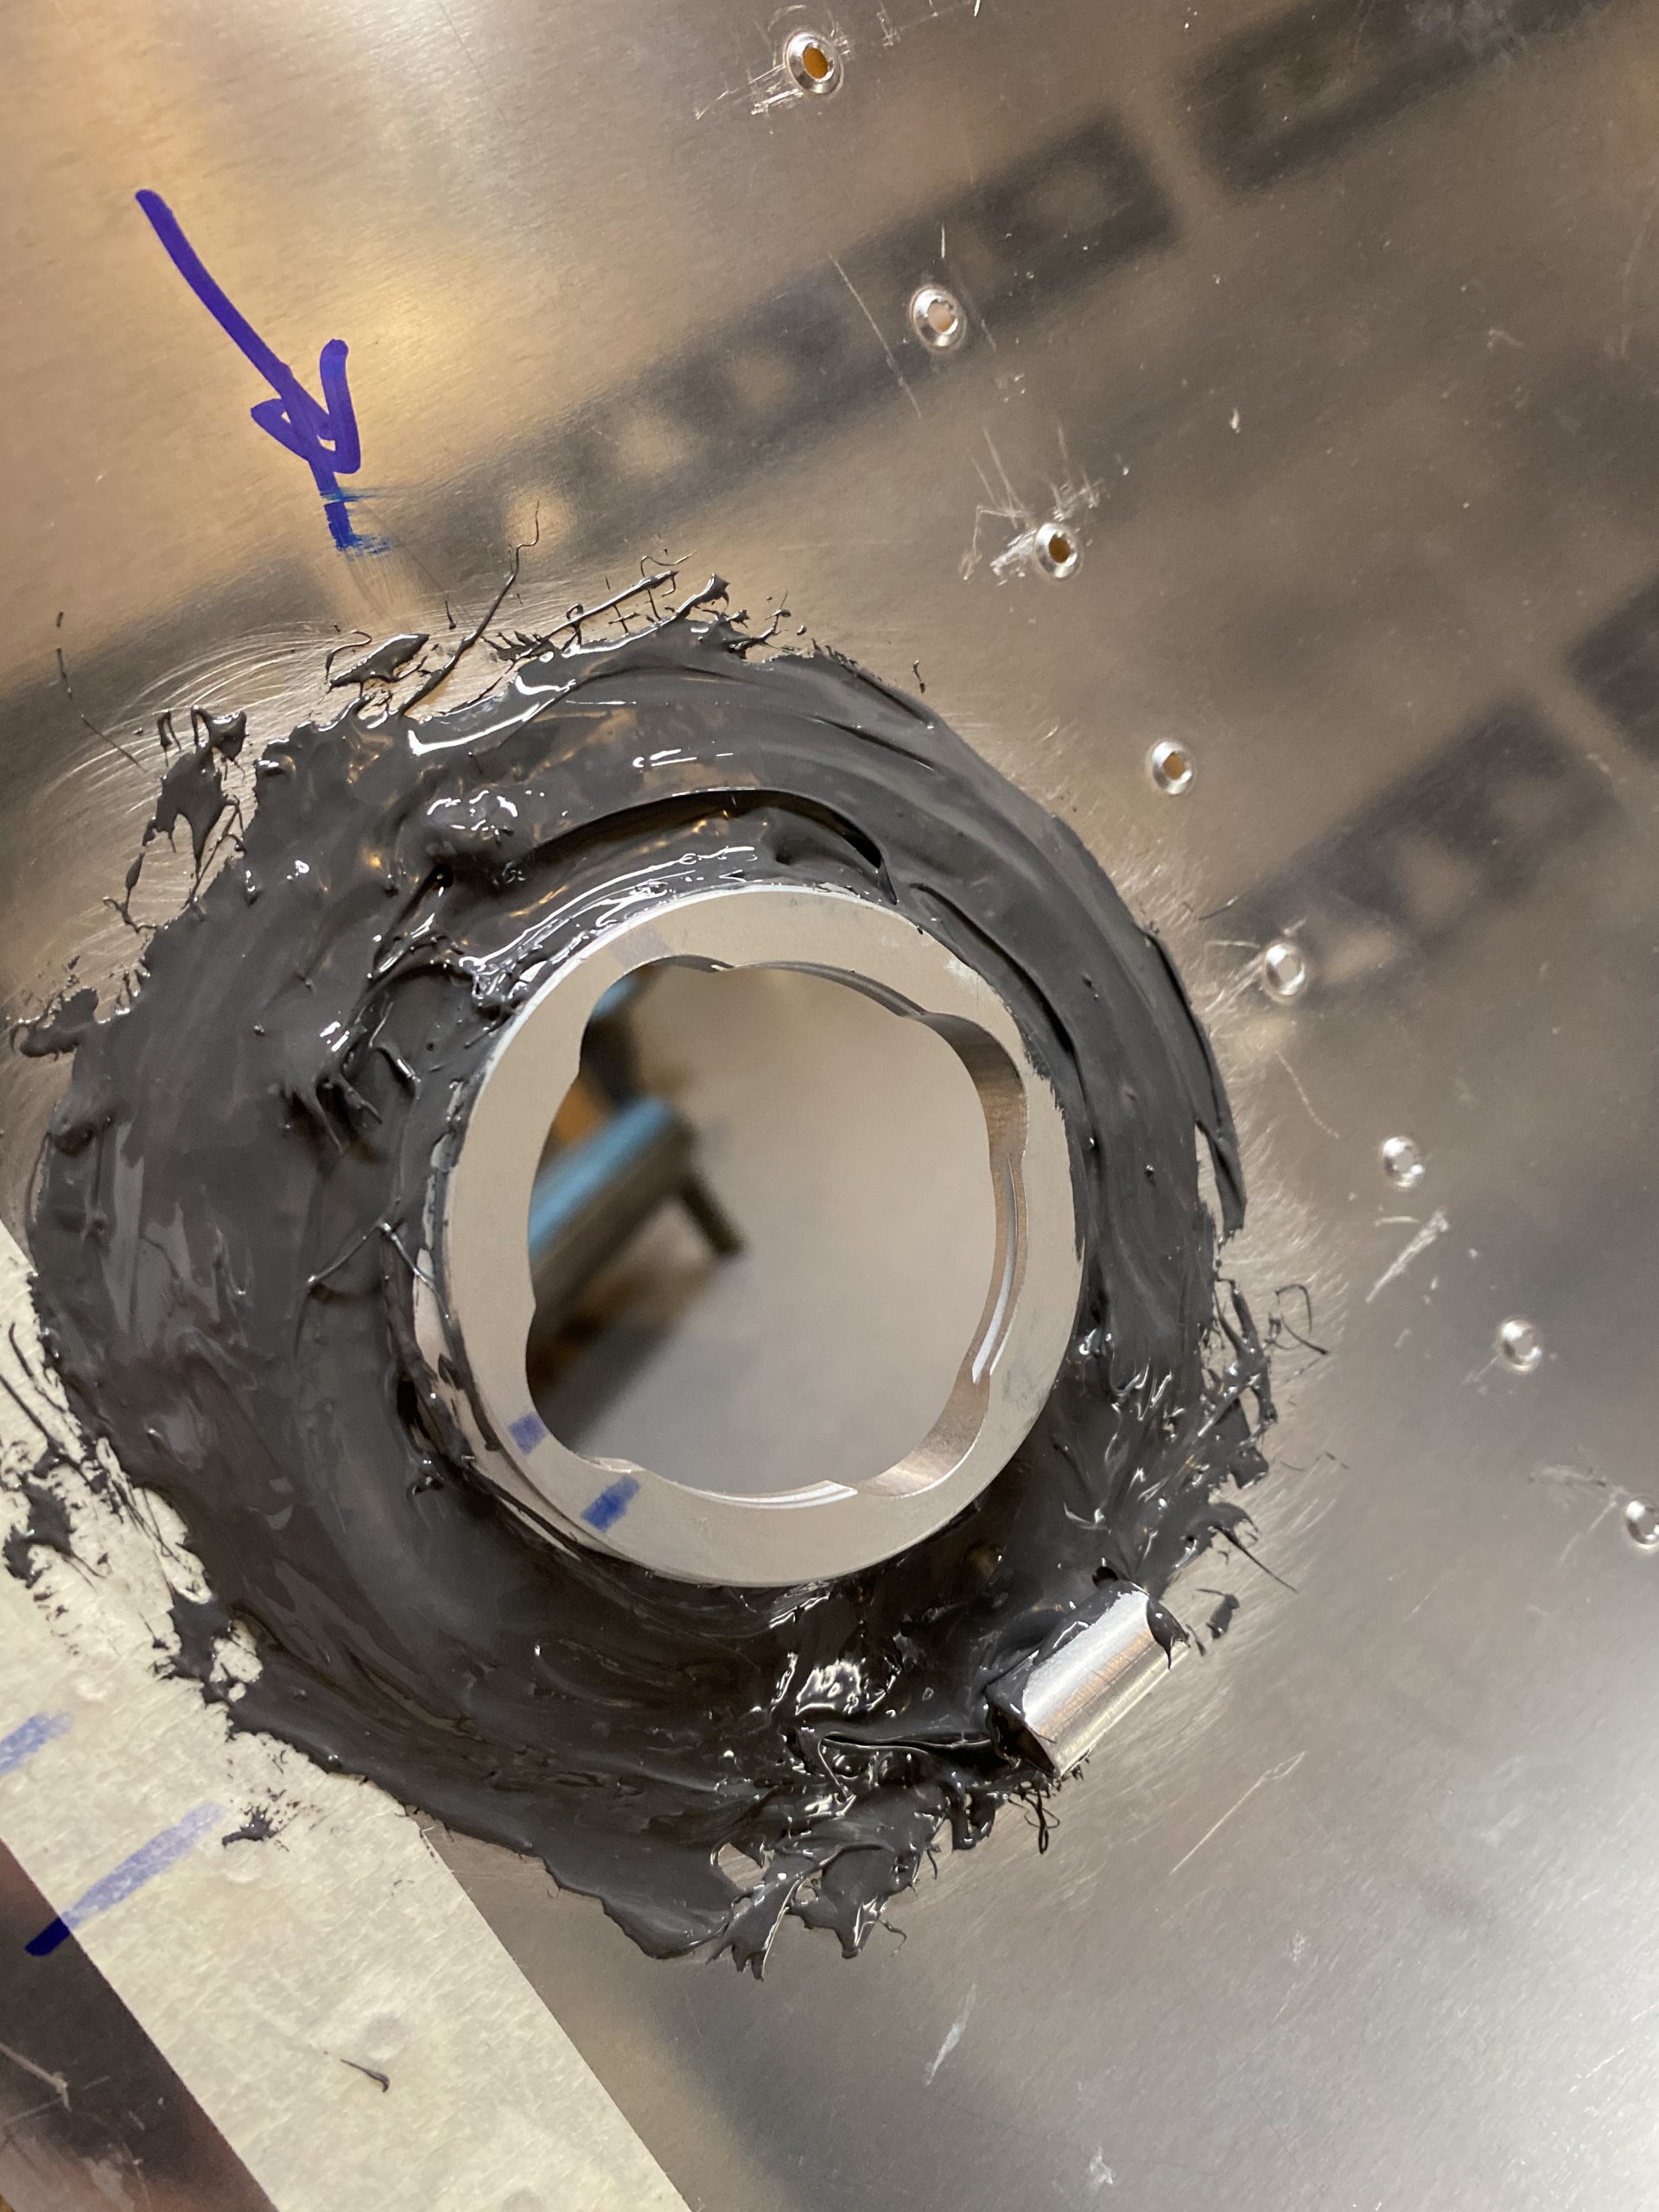
With the fittings gooped up with sealant, I smeared a decent amount of sealant on the inboard rib, where the access plate would be mounting, making sure to get enough on there for a good squeeze-out.  I mounted the access plate, and threaded some of the stainless cap screws in place to hold it.  I only threaded these screws a few threads, that way I could get a good covering of sealant under the head of the screws by swirling sealant around the screw had with a popsicle stick.  Then I torqued down the 12 screws for the access plate. I got a good bit of squeeze out, which I made into a nice filet with a popsicle stick.

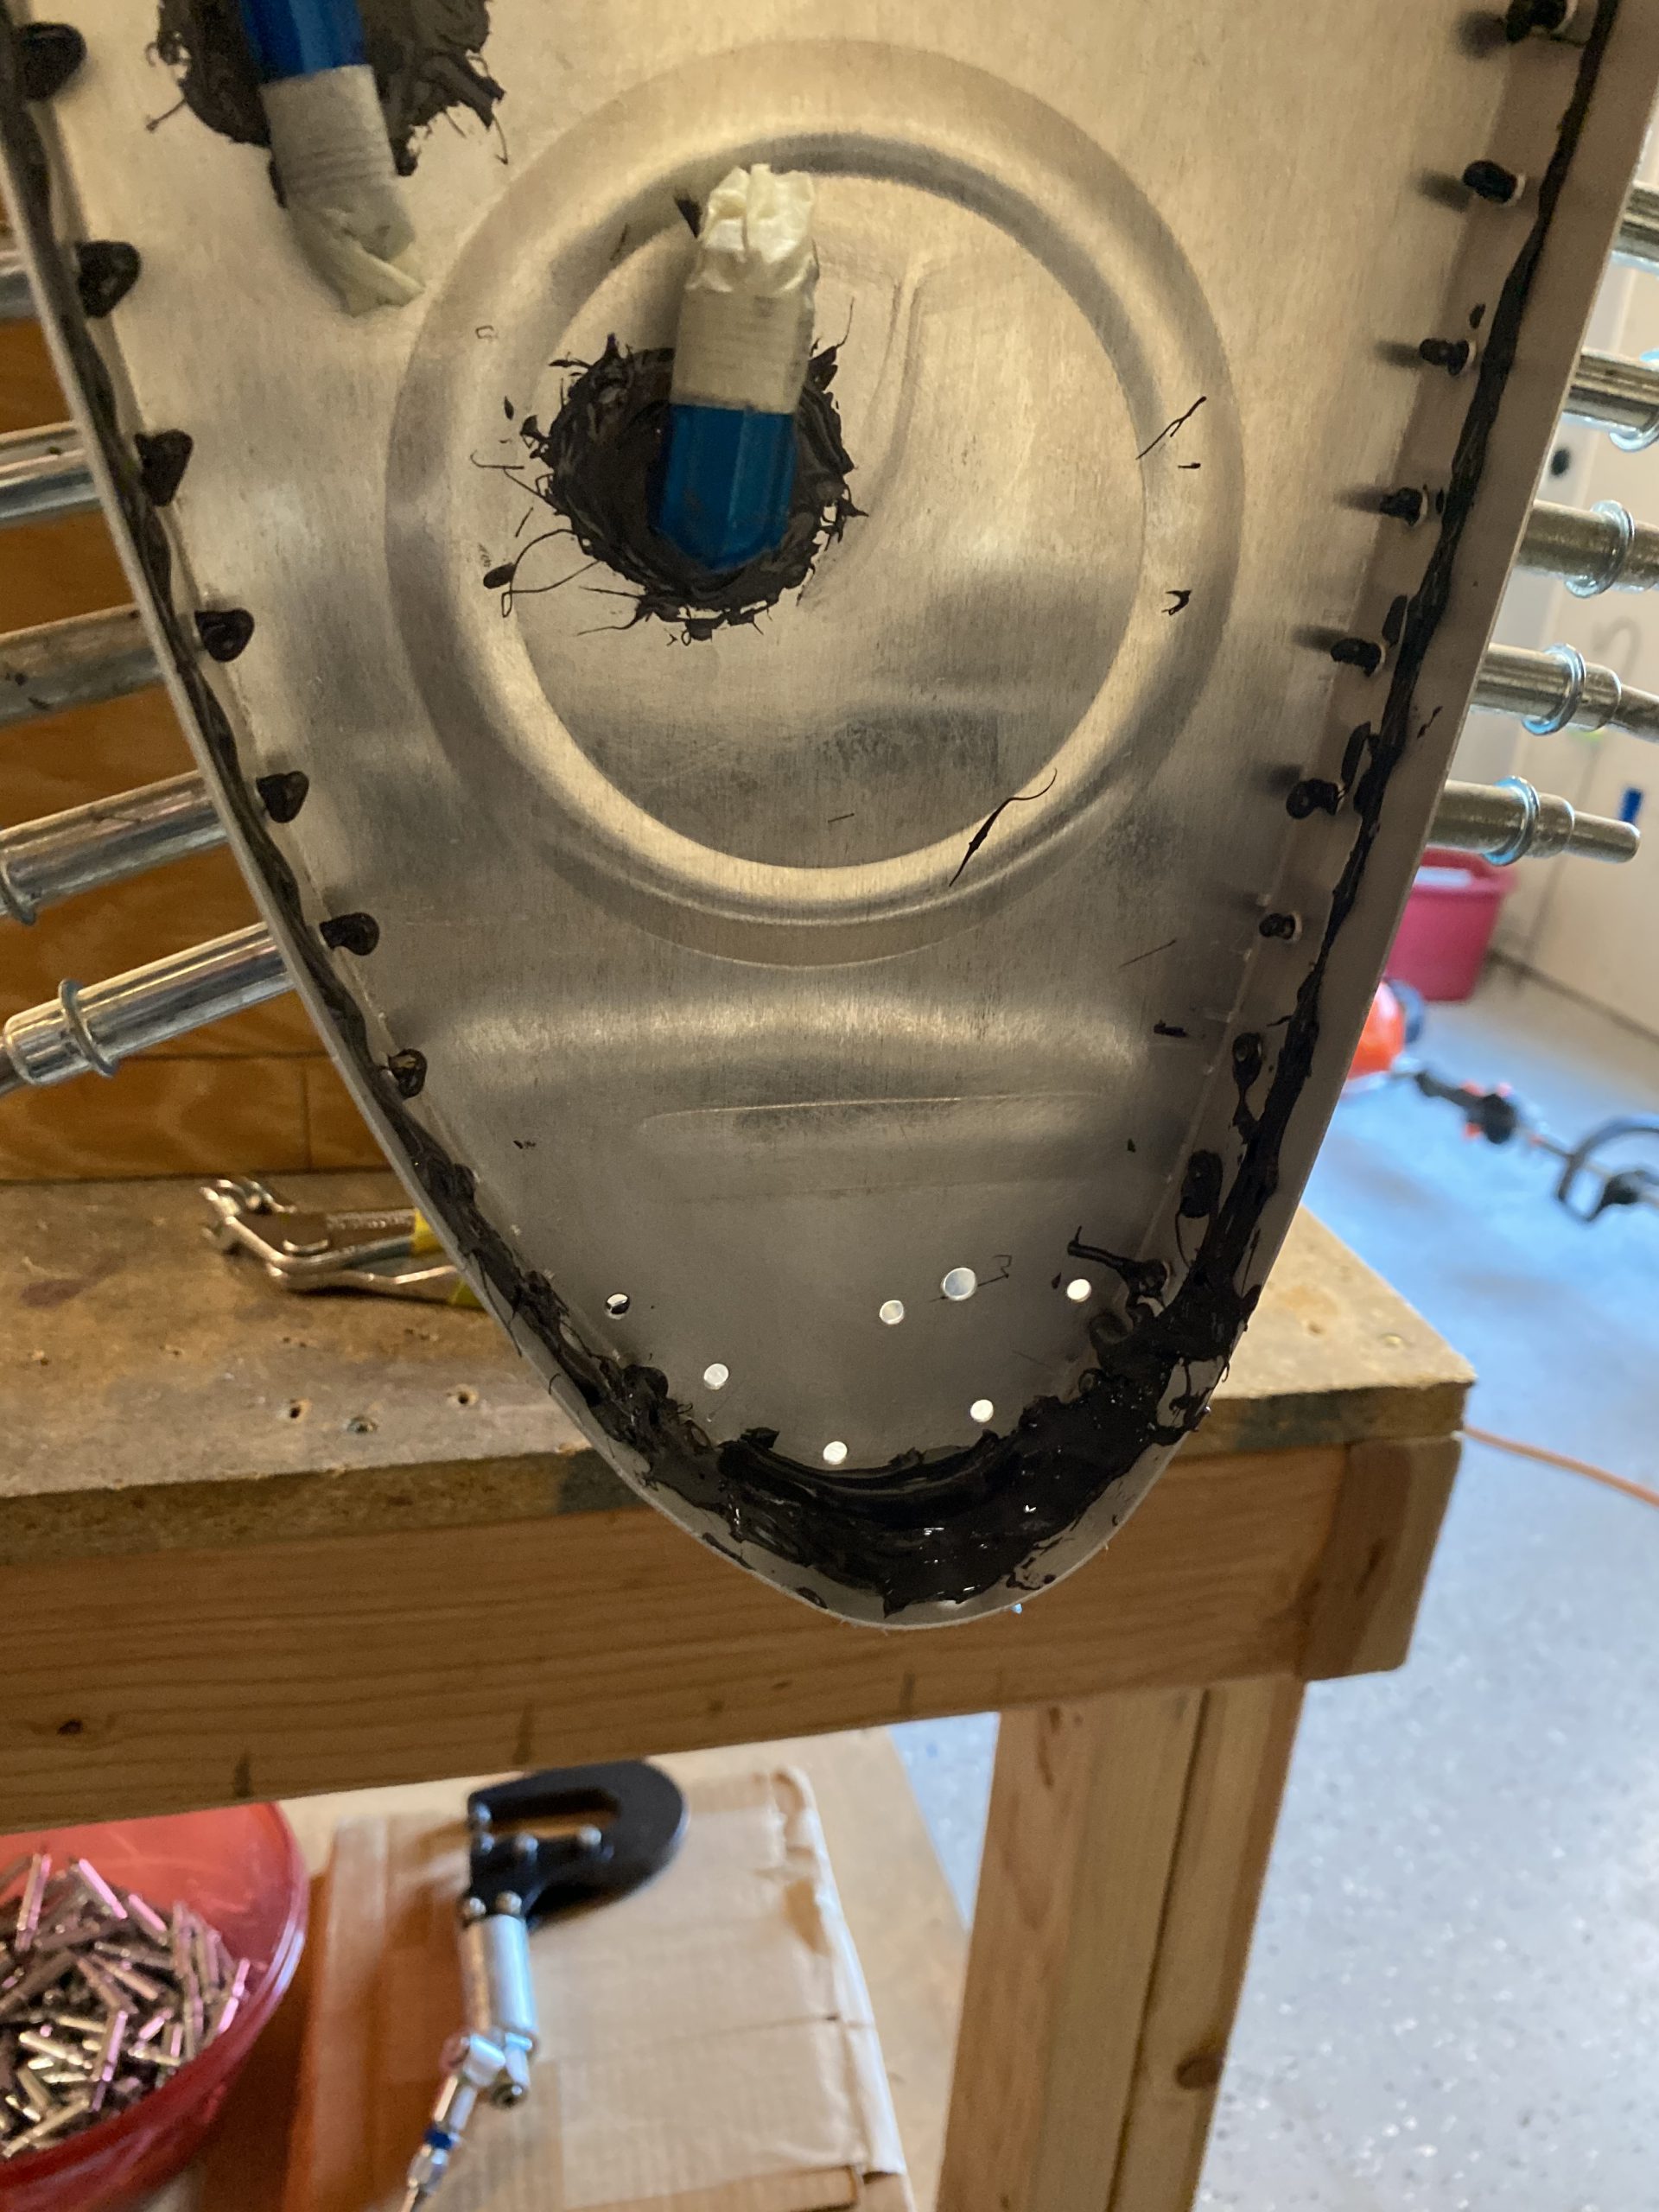
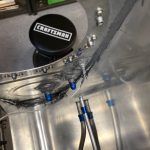
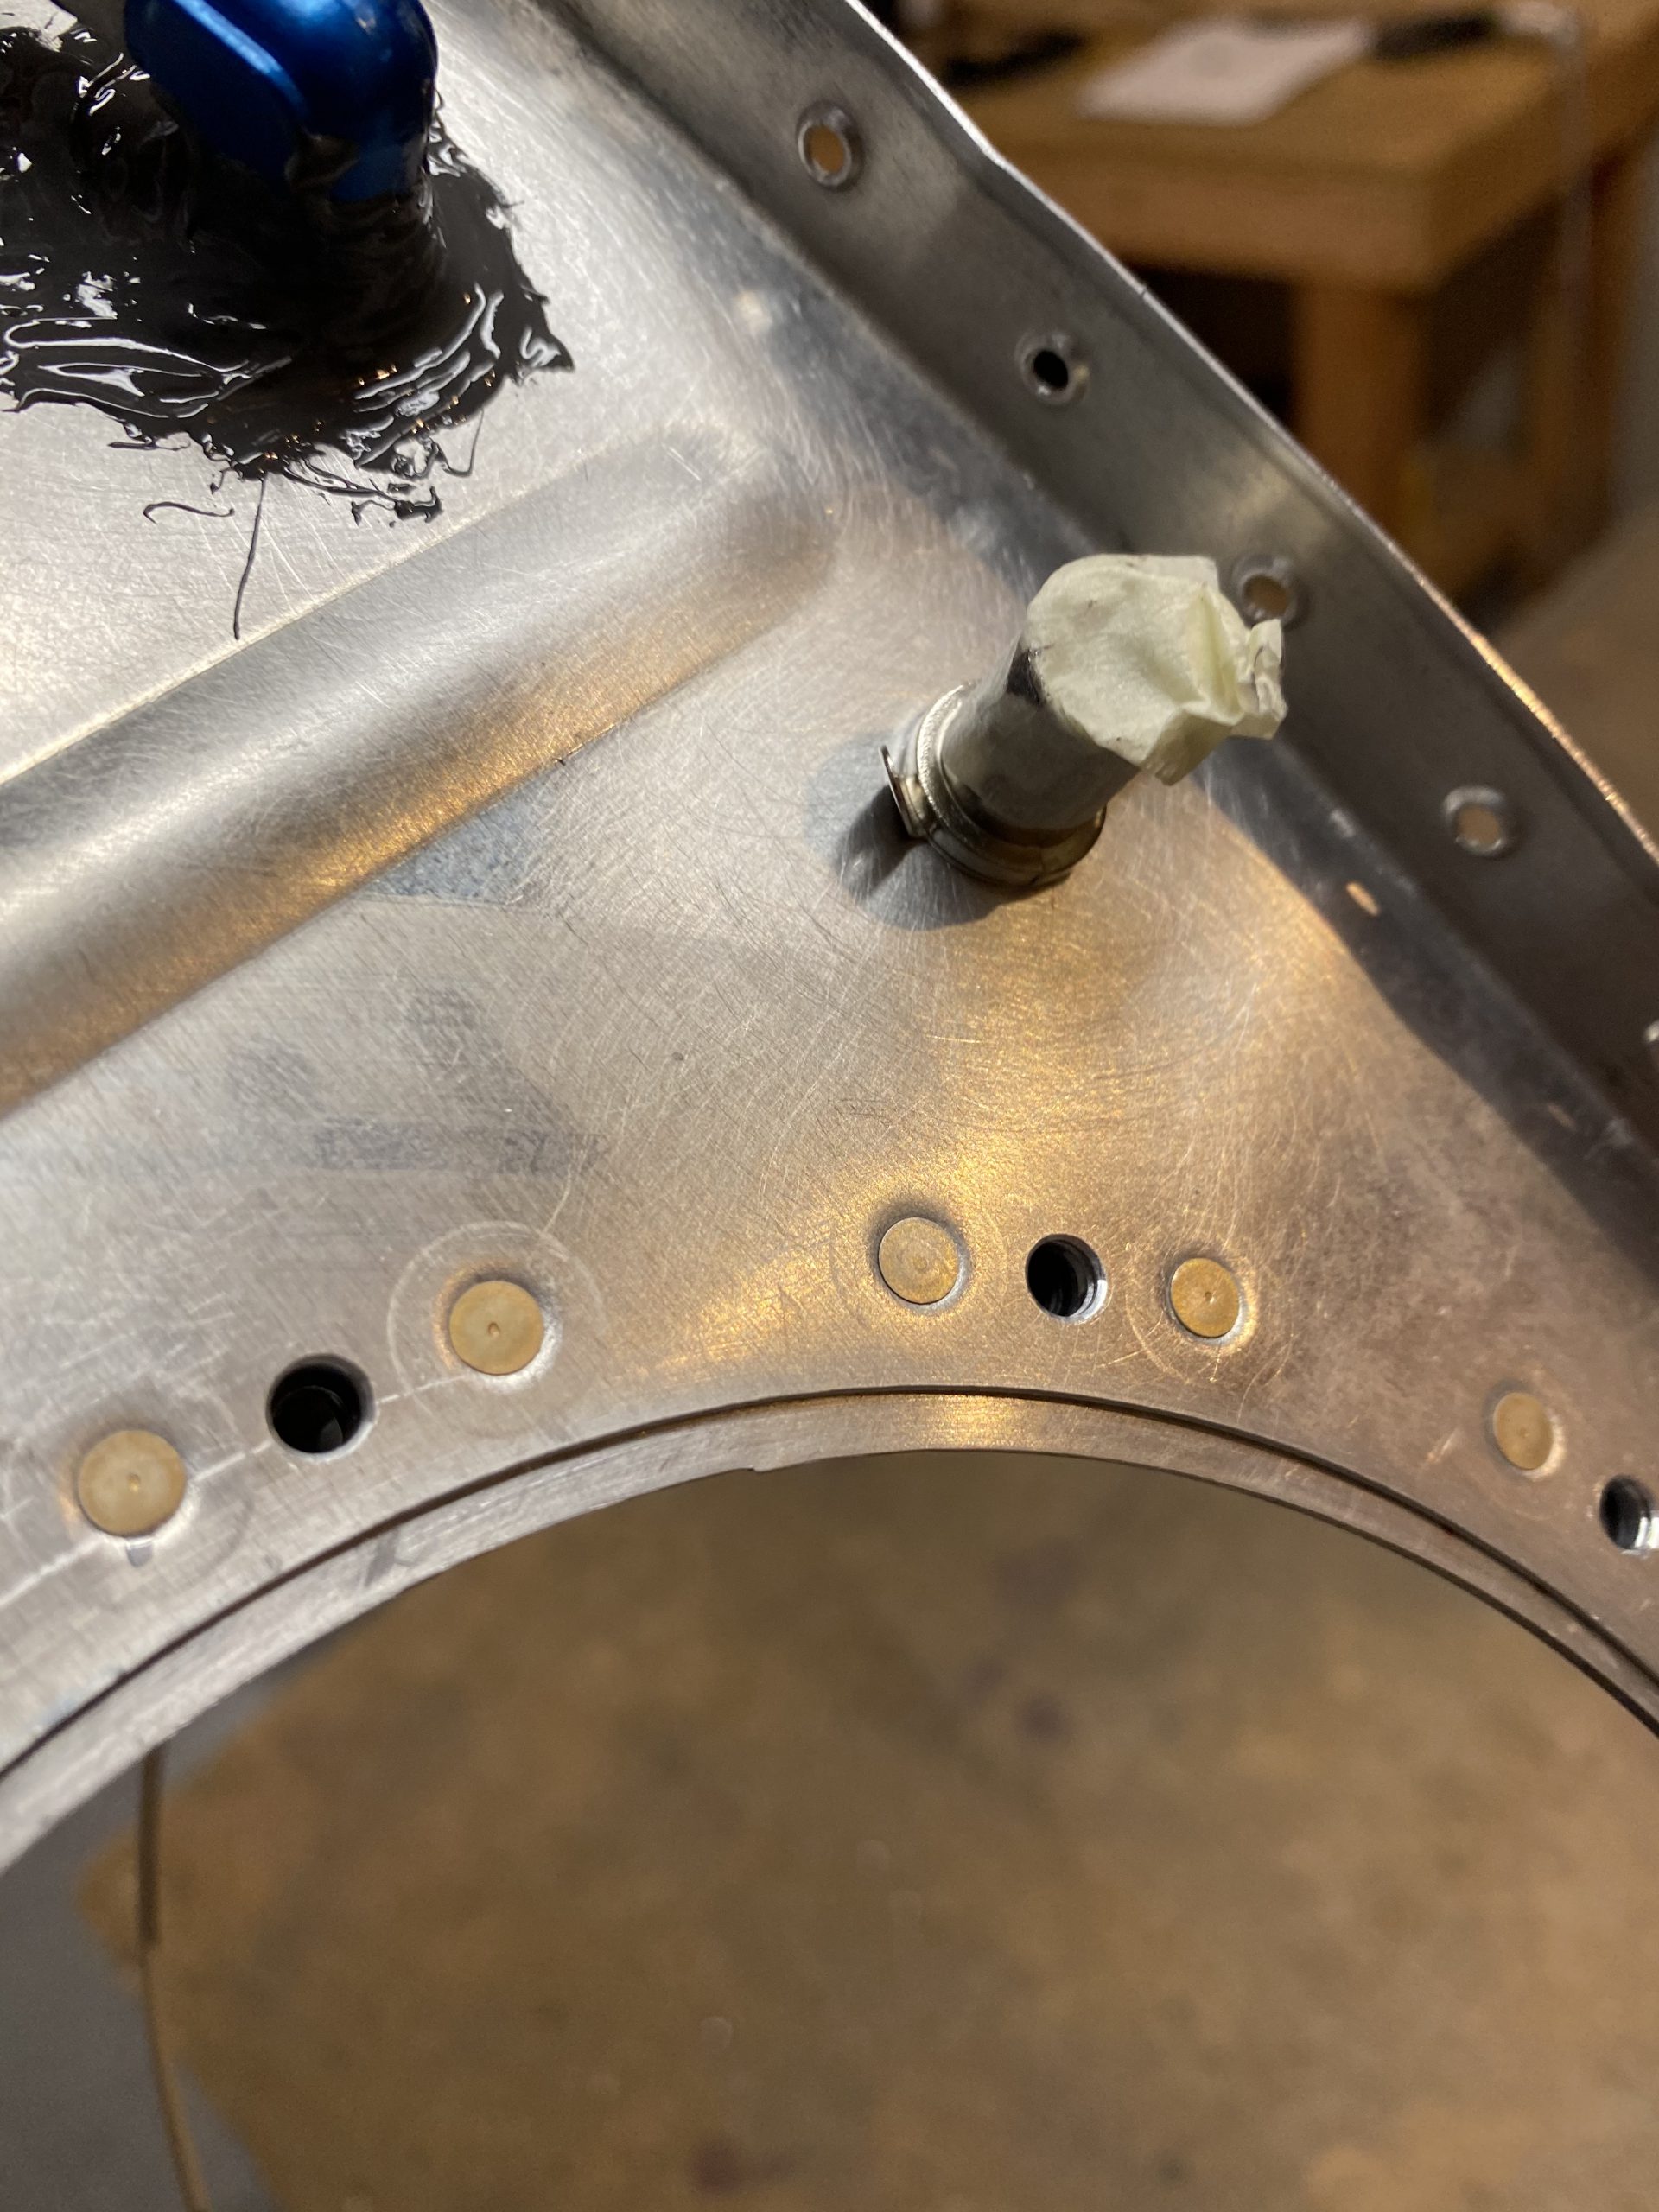
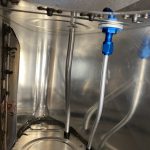
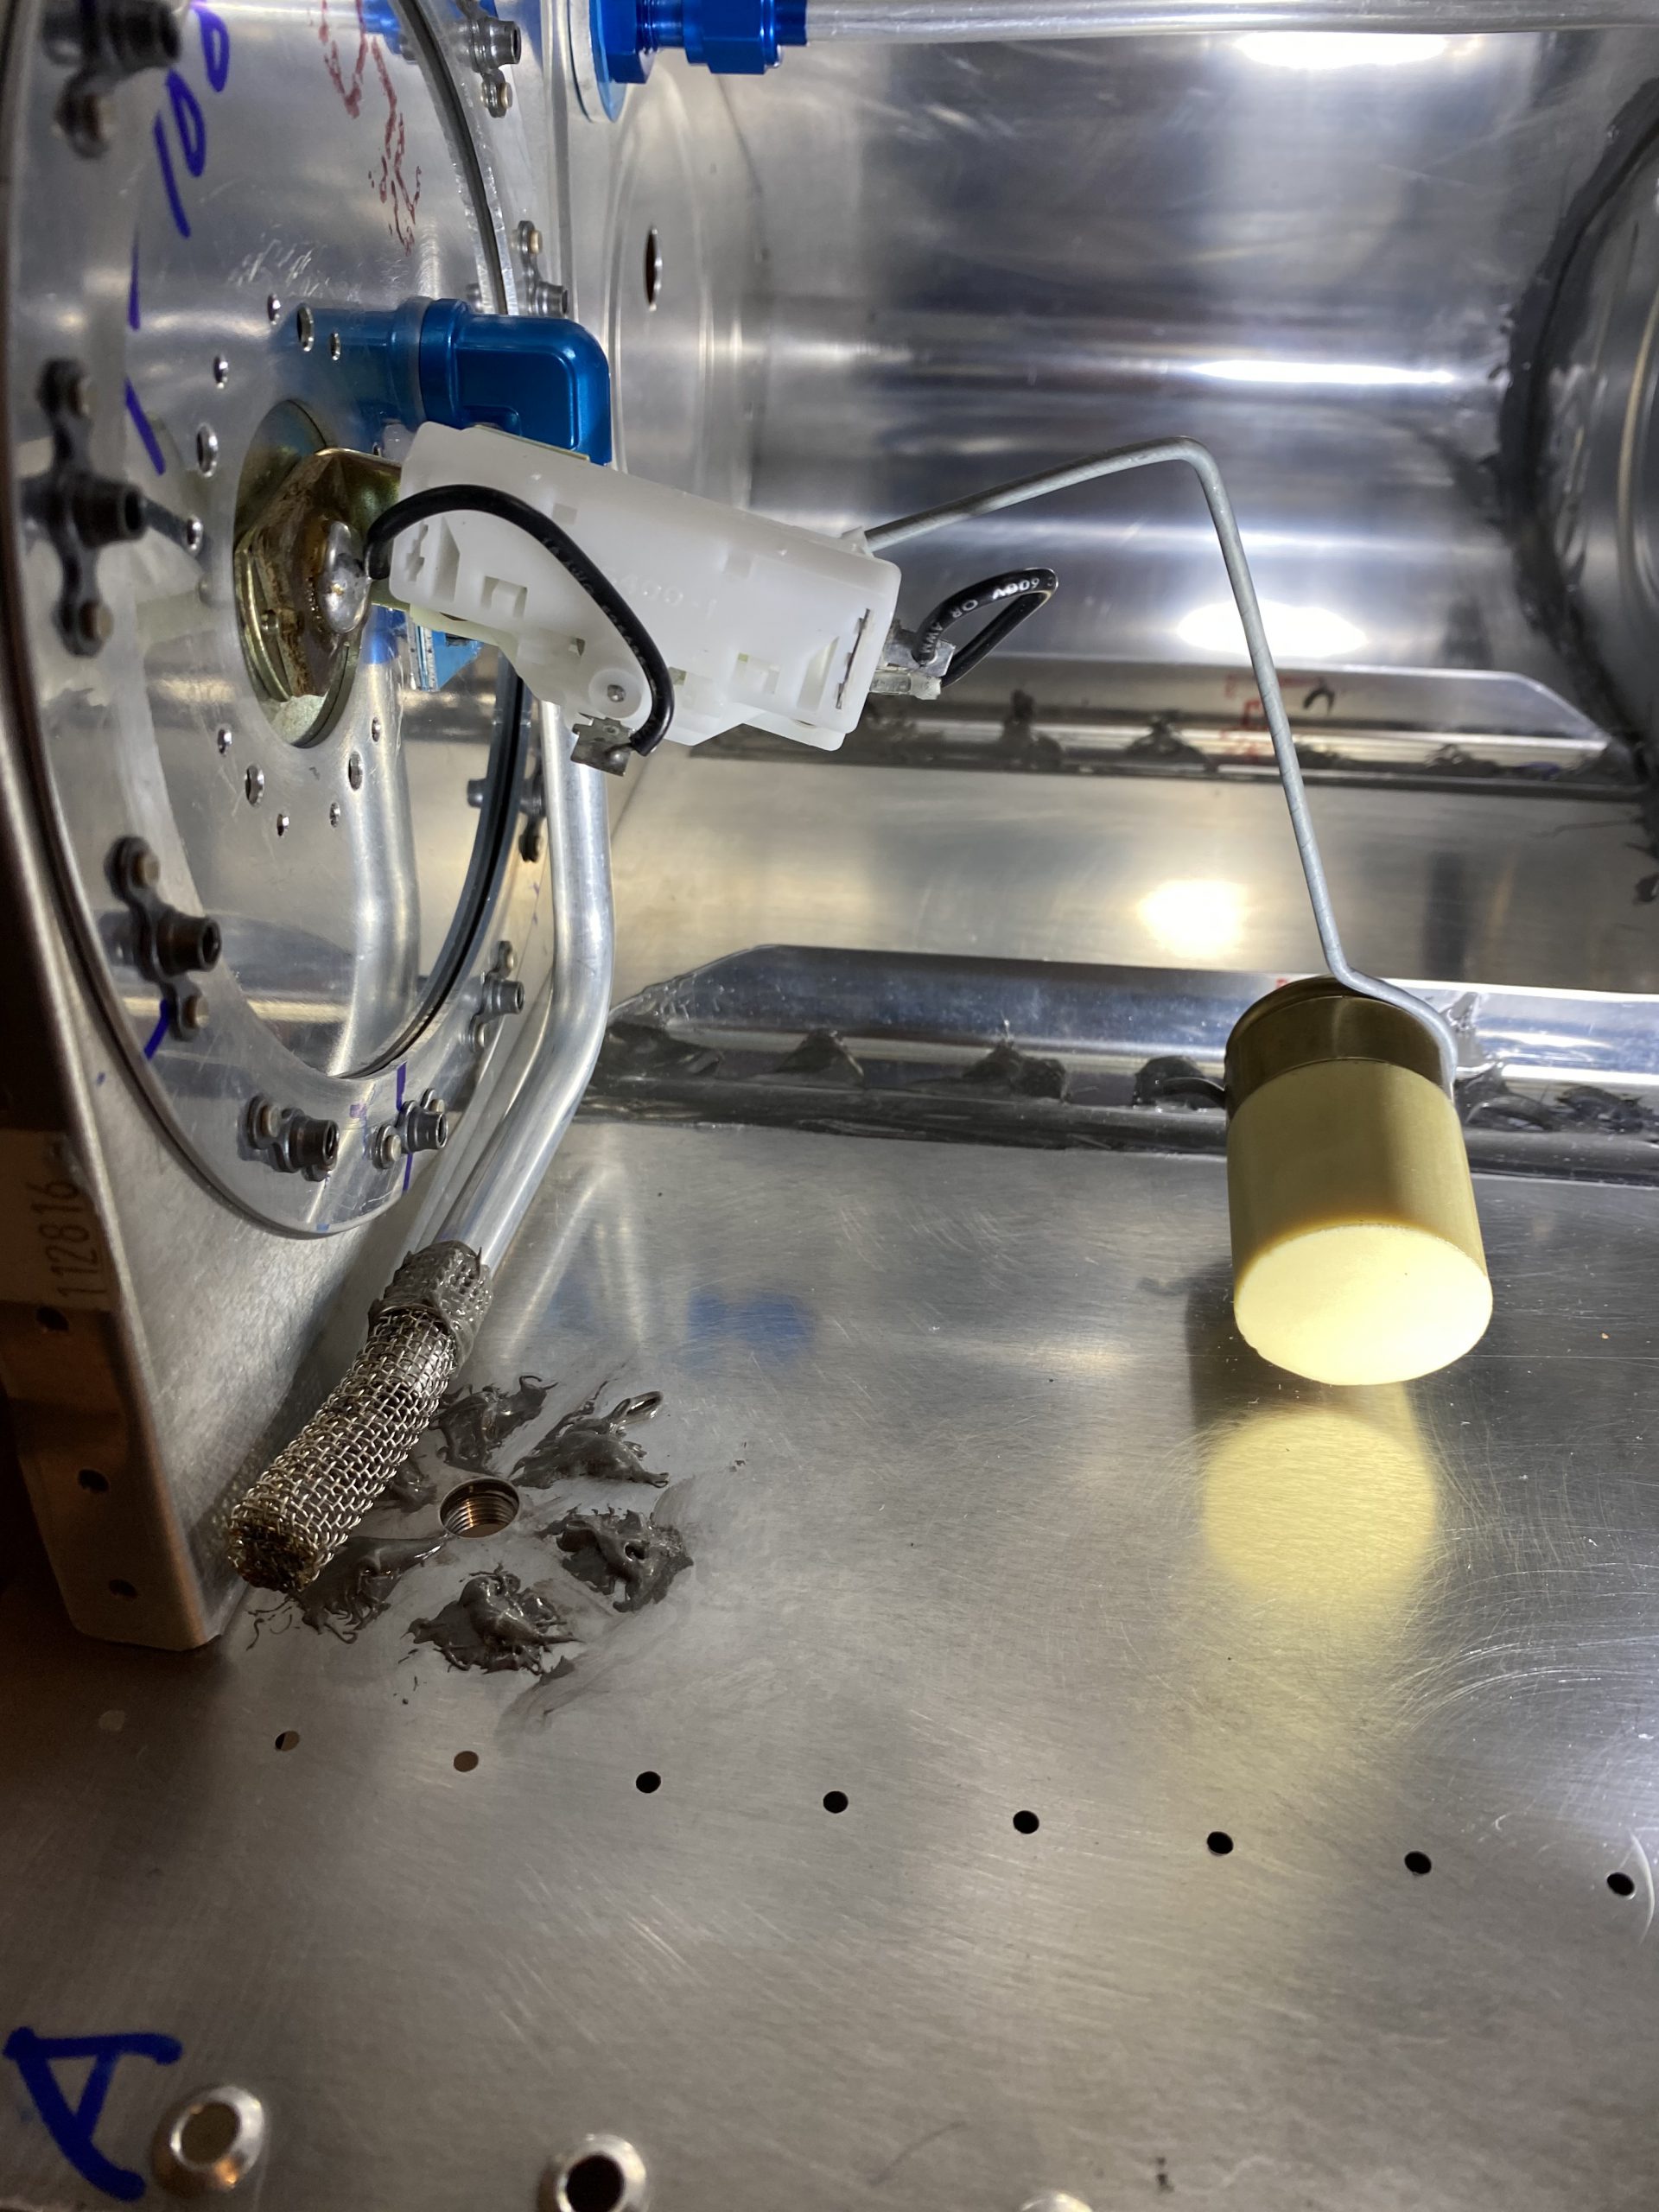
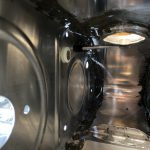
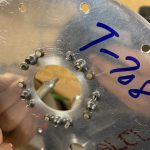
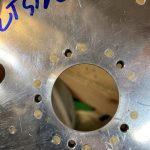
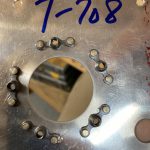
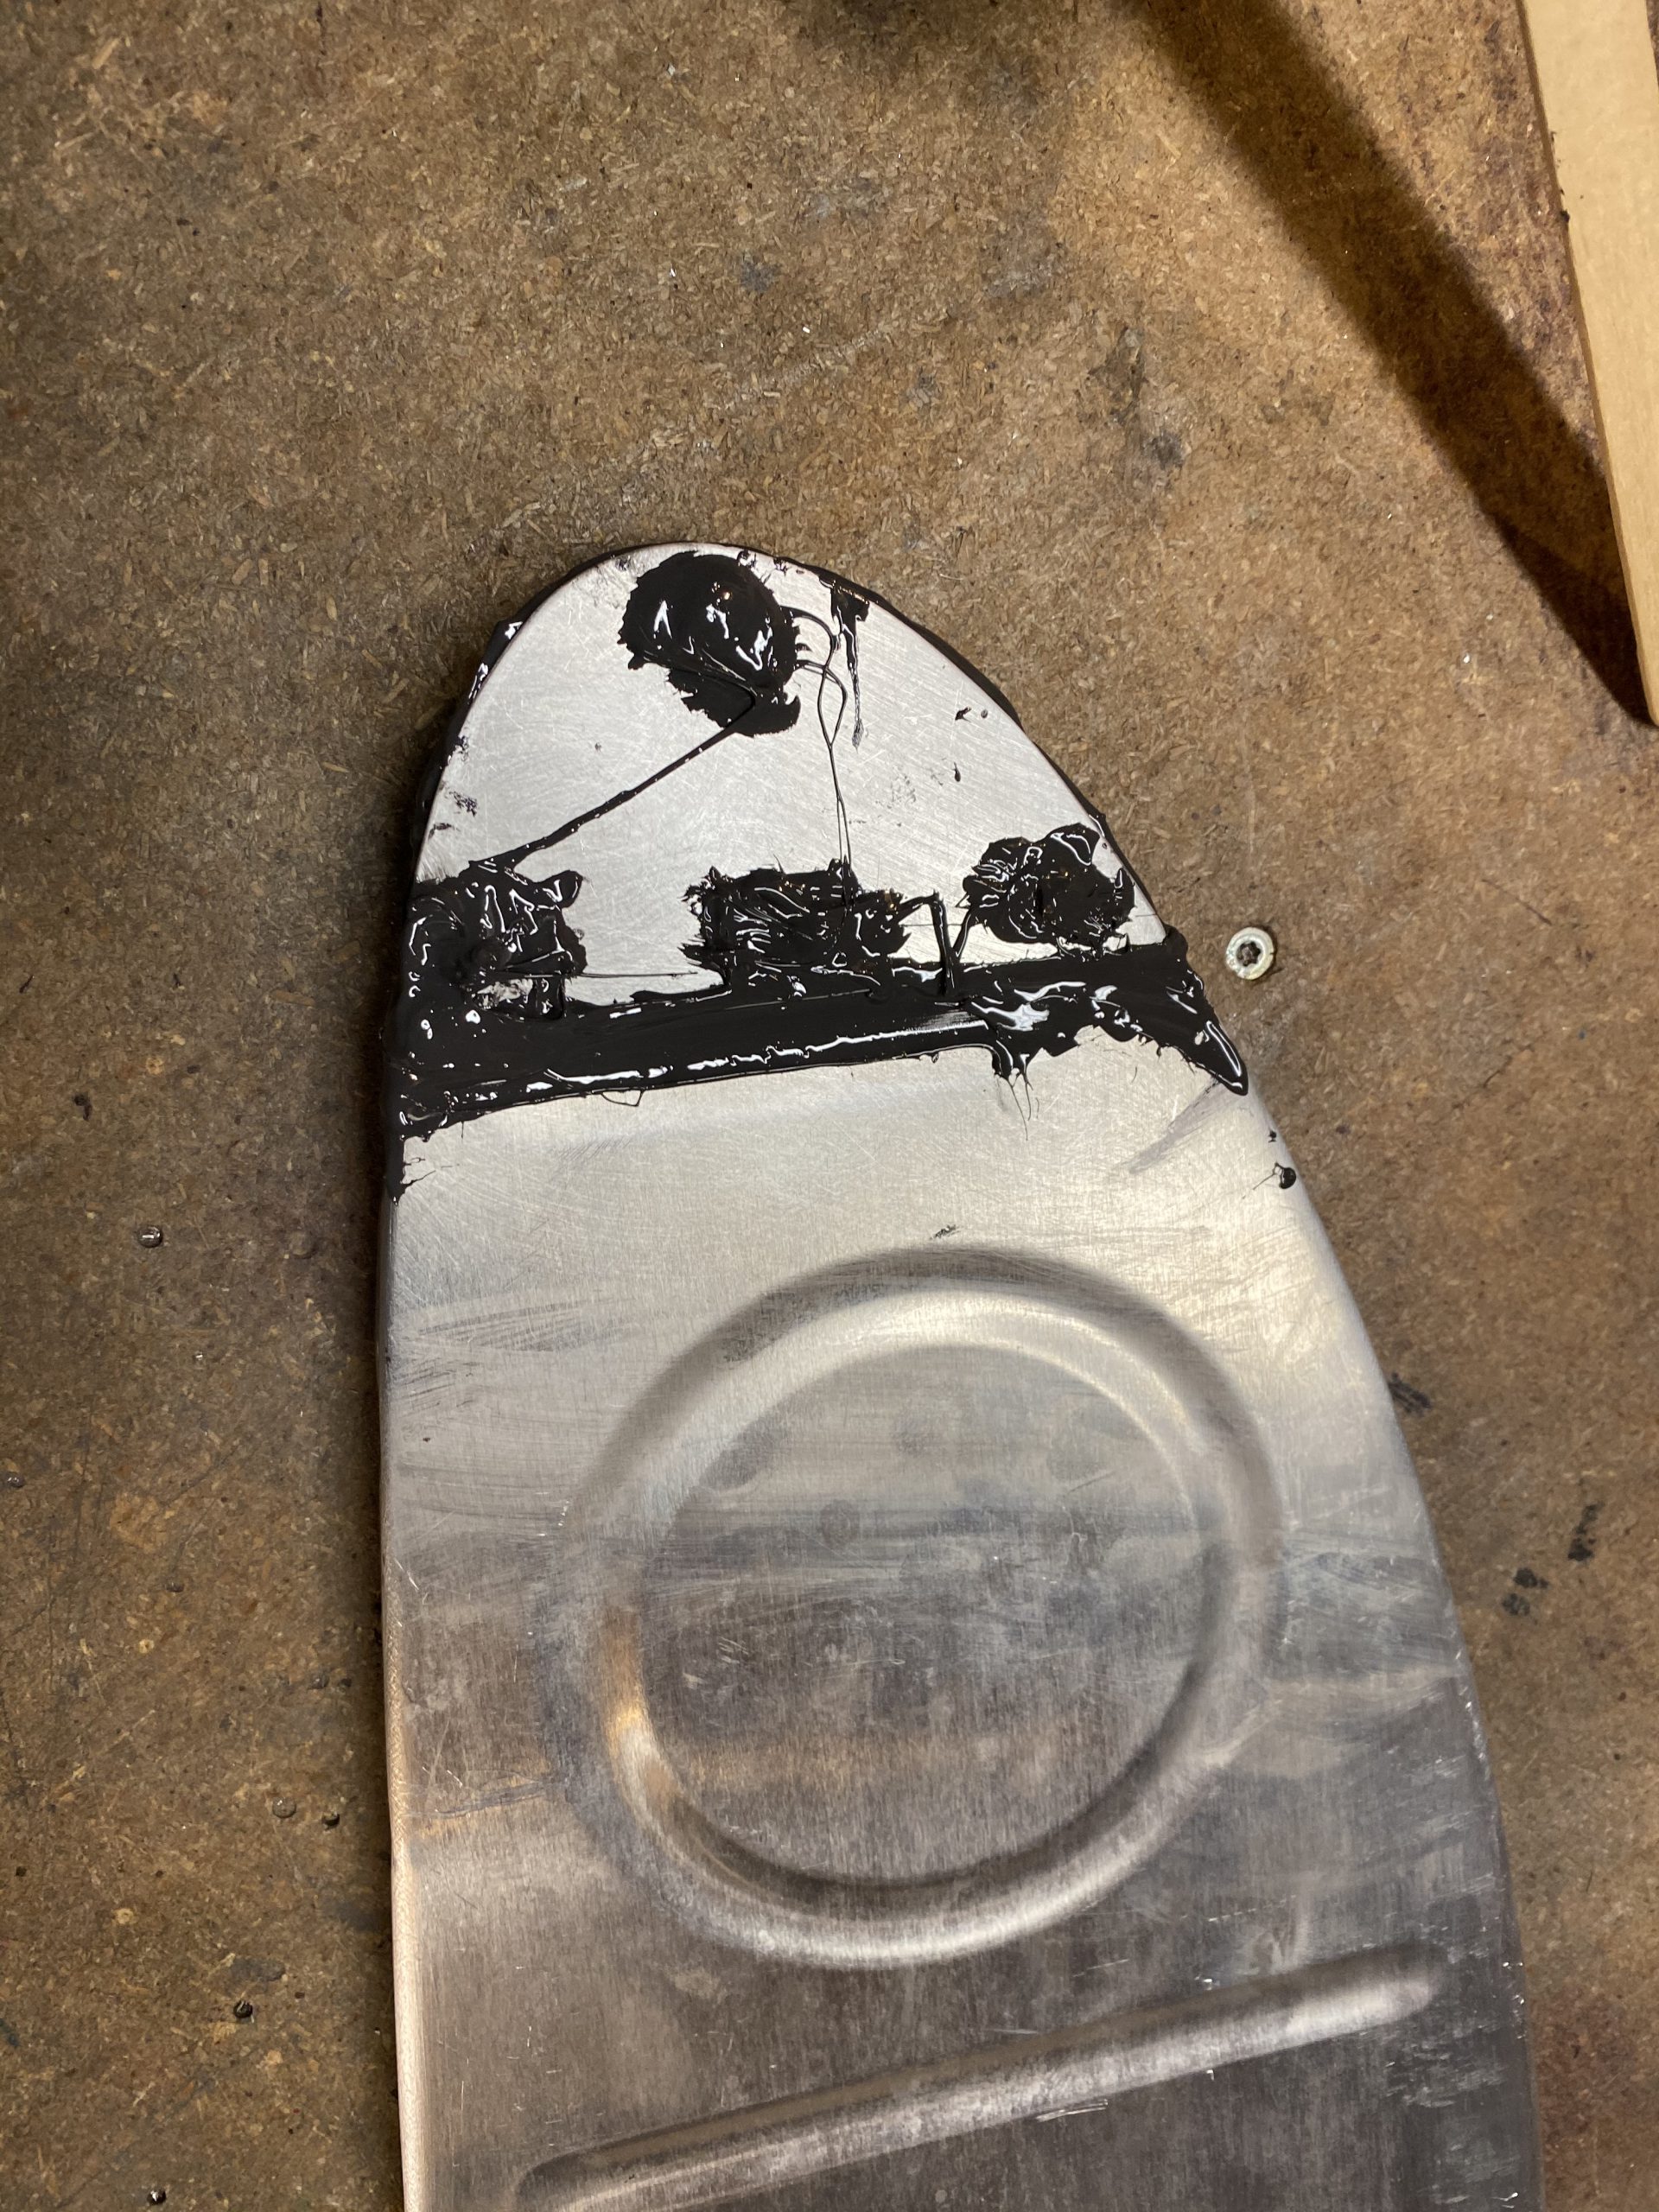
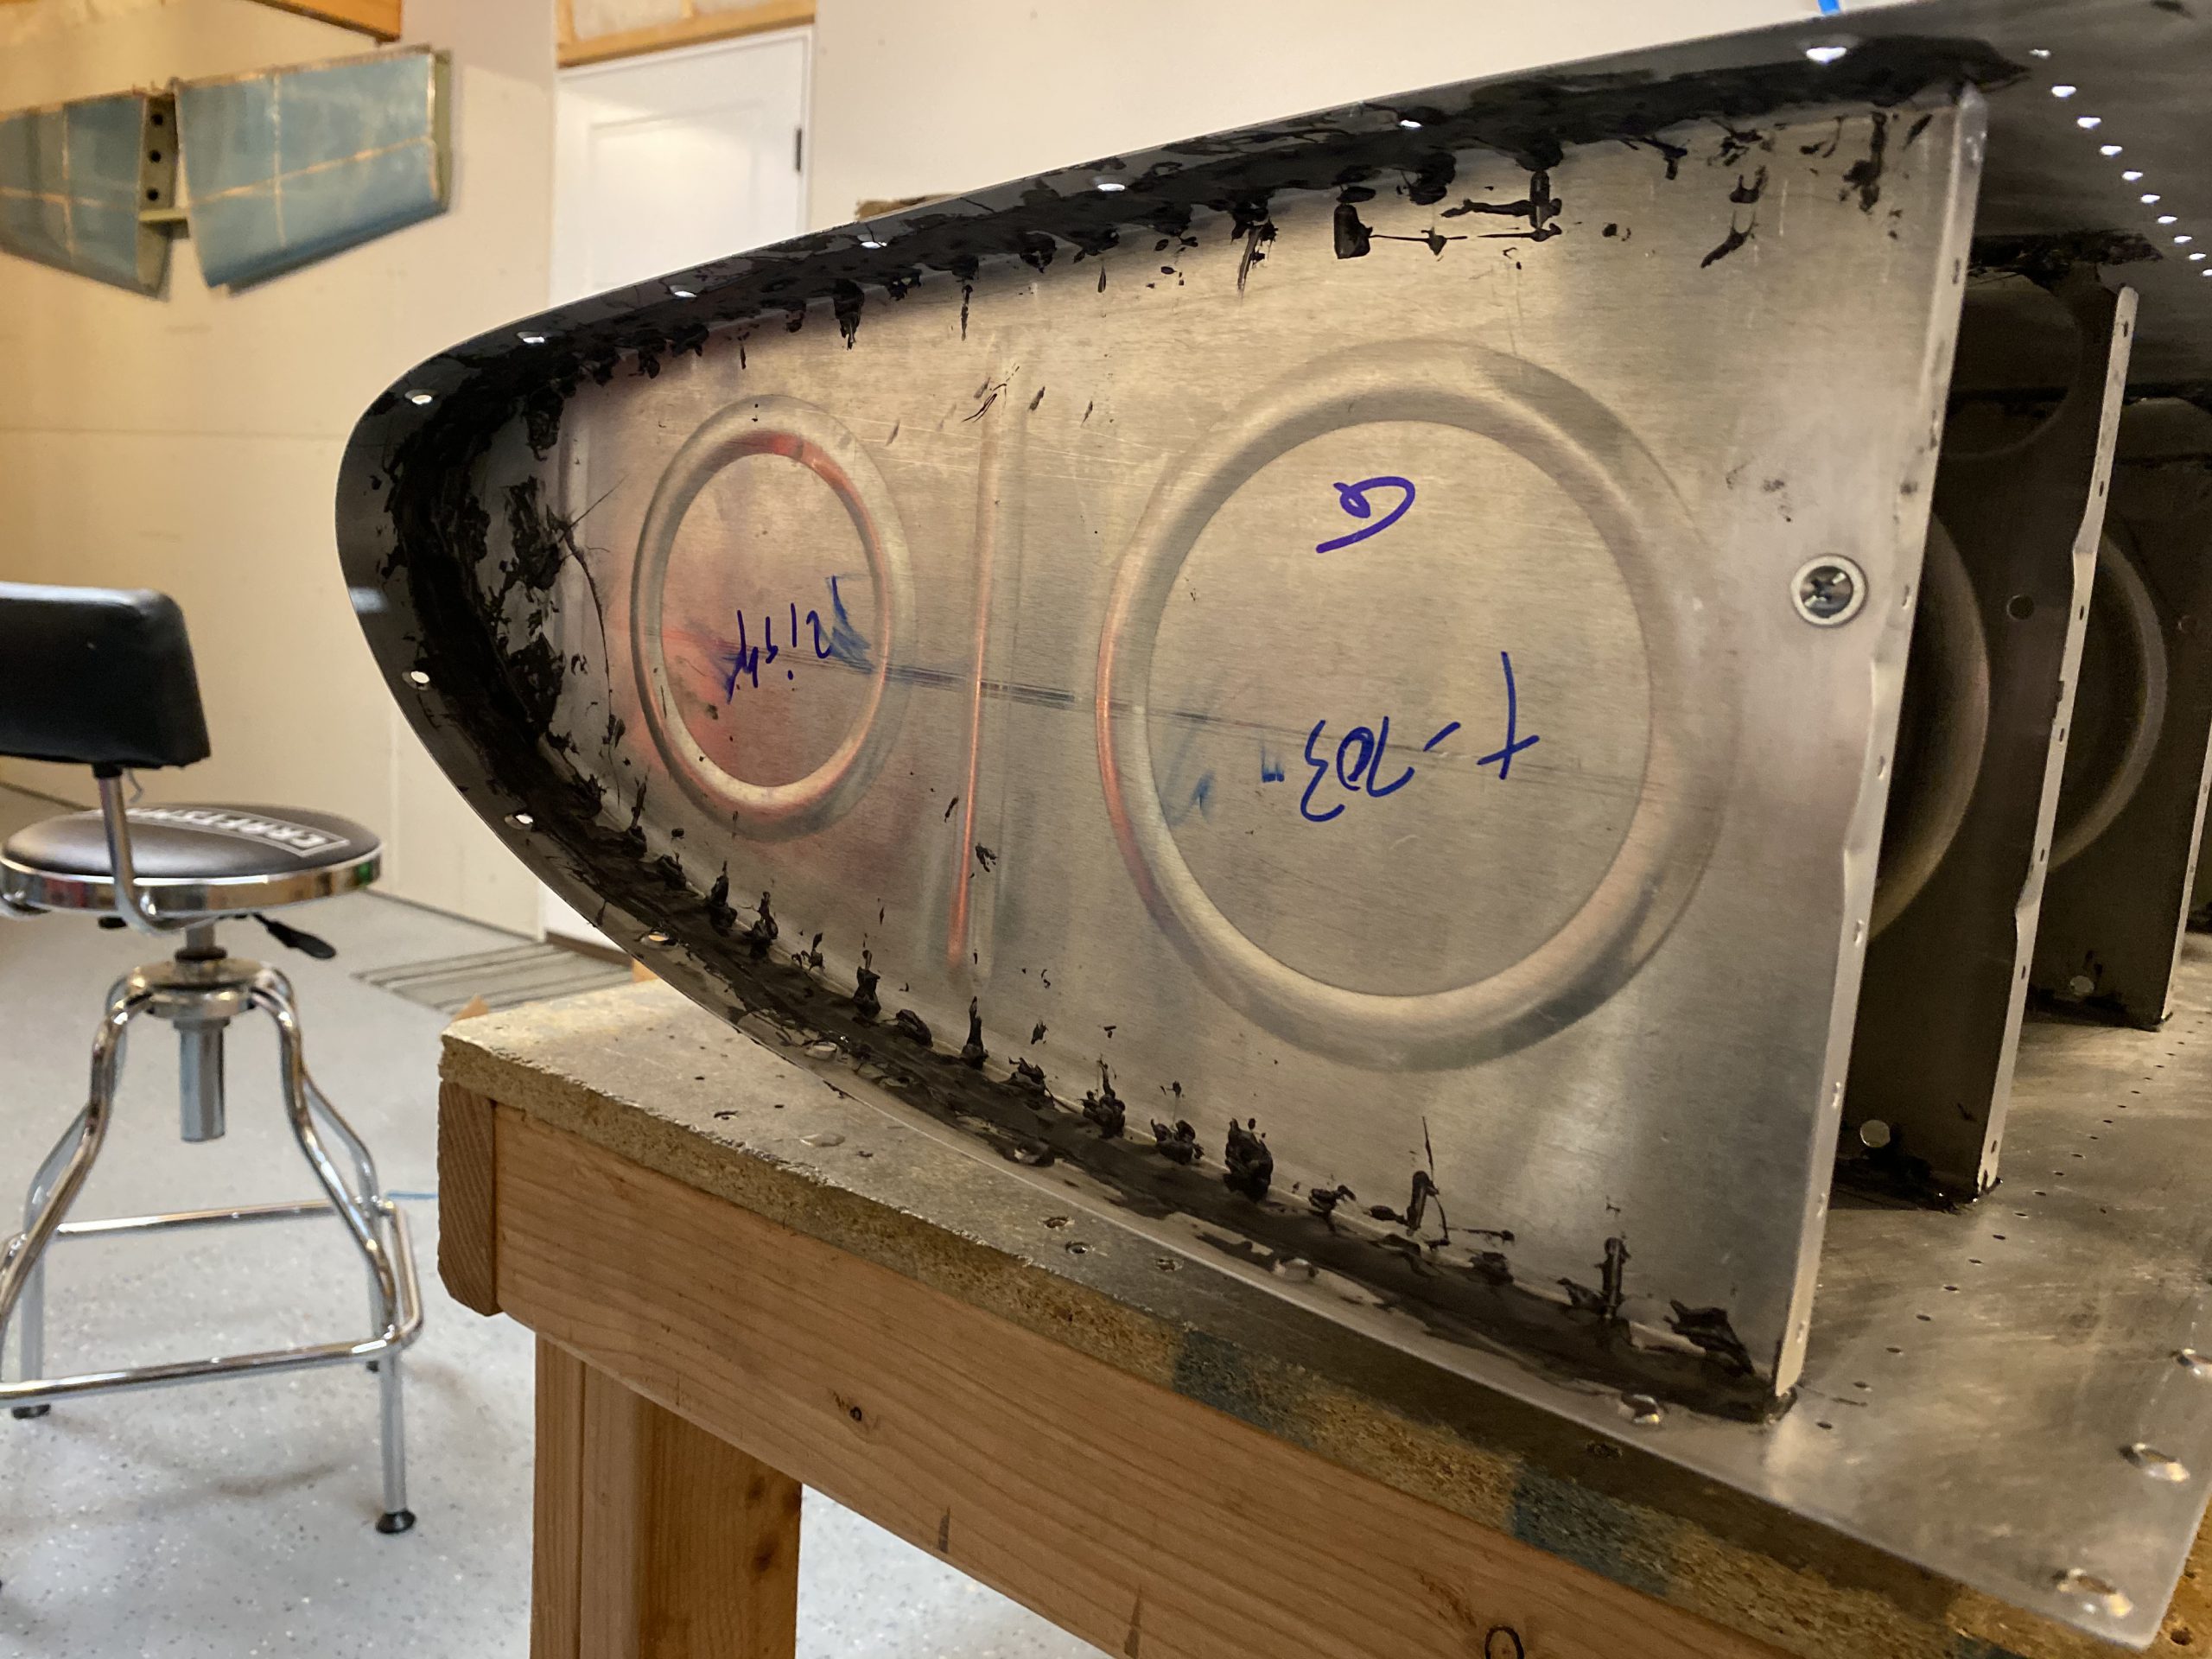
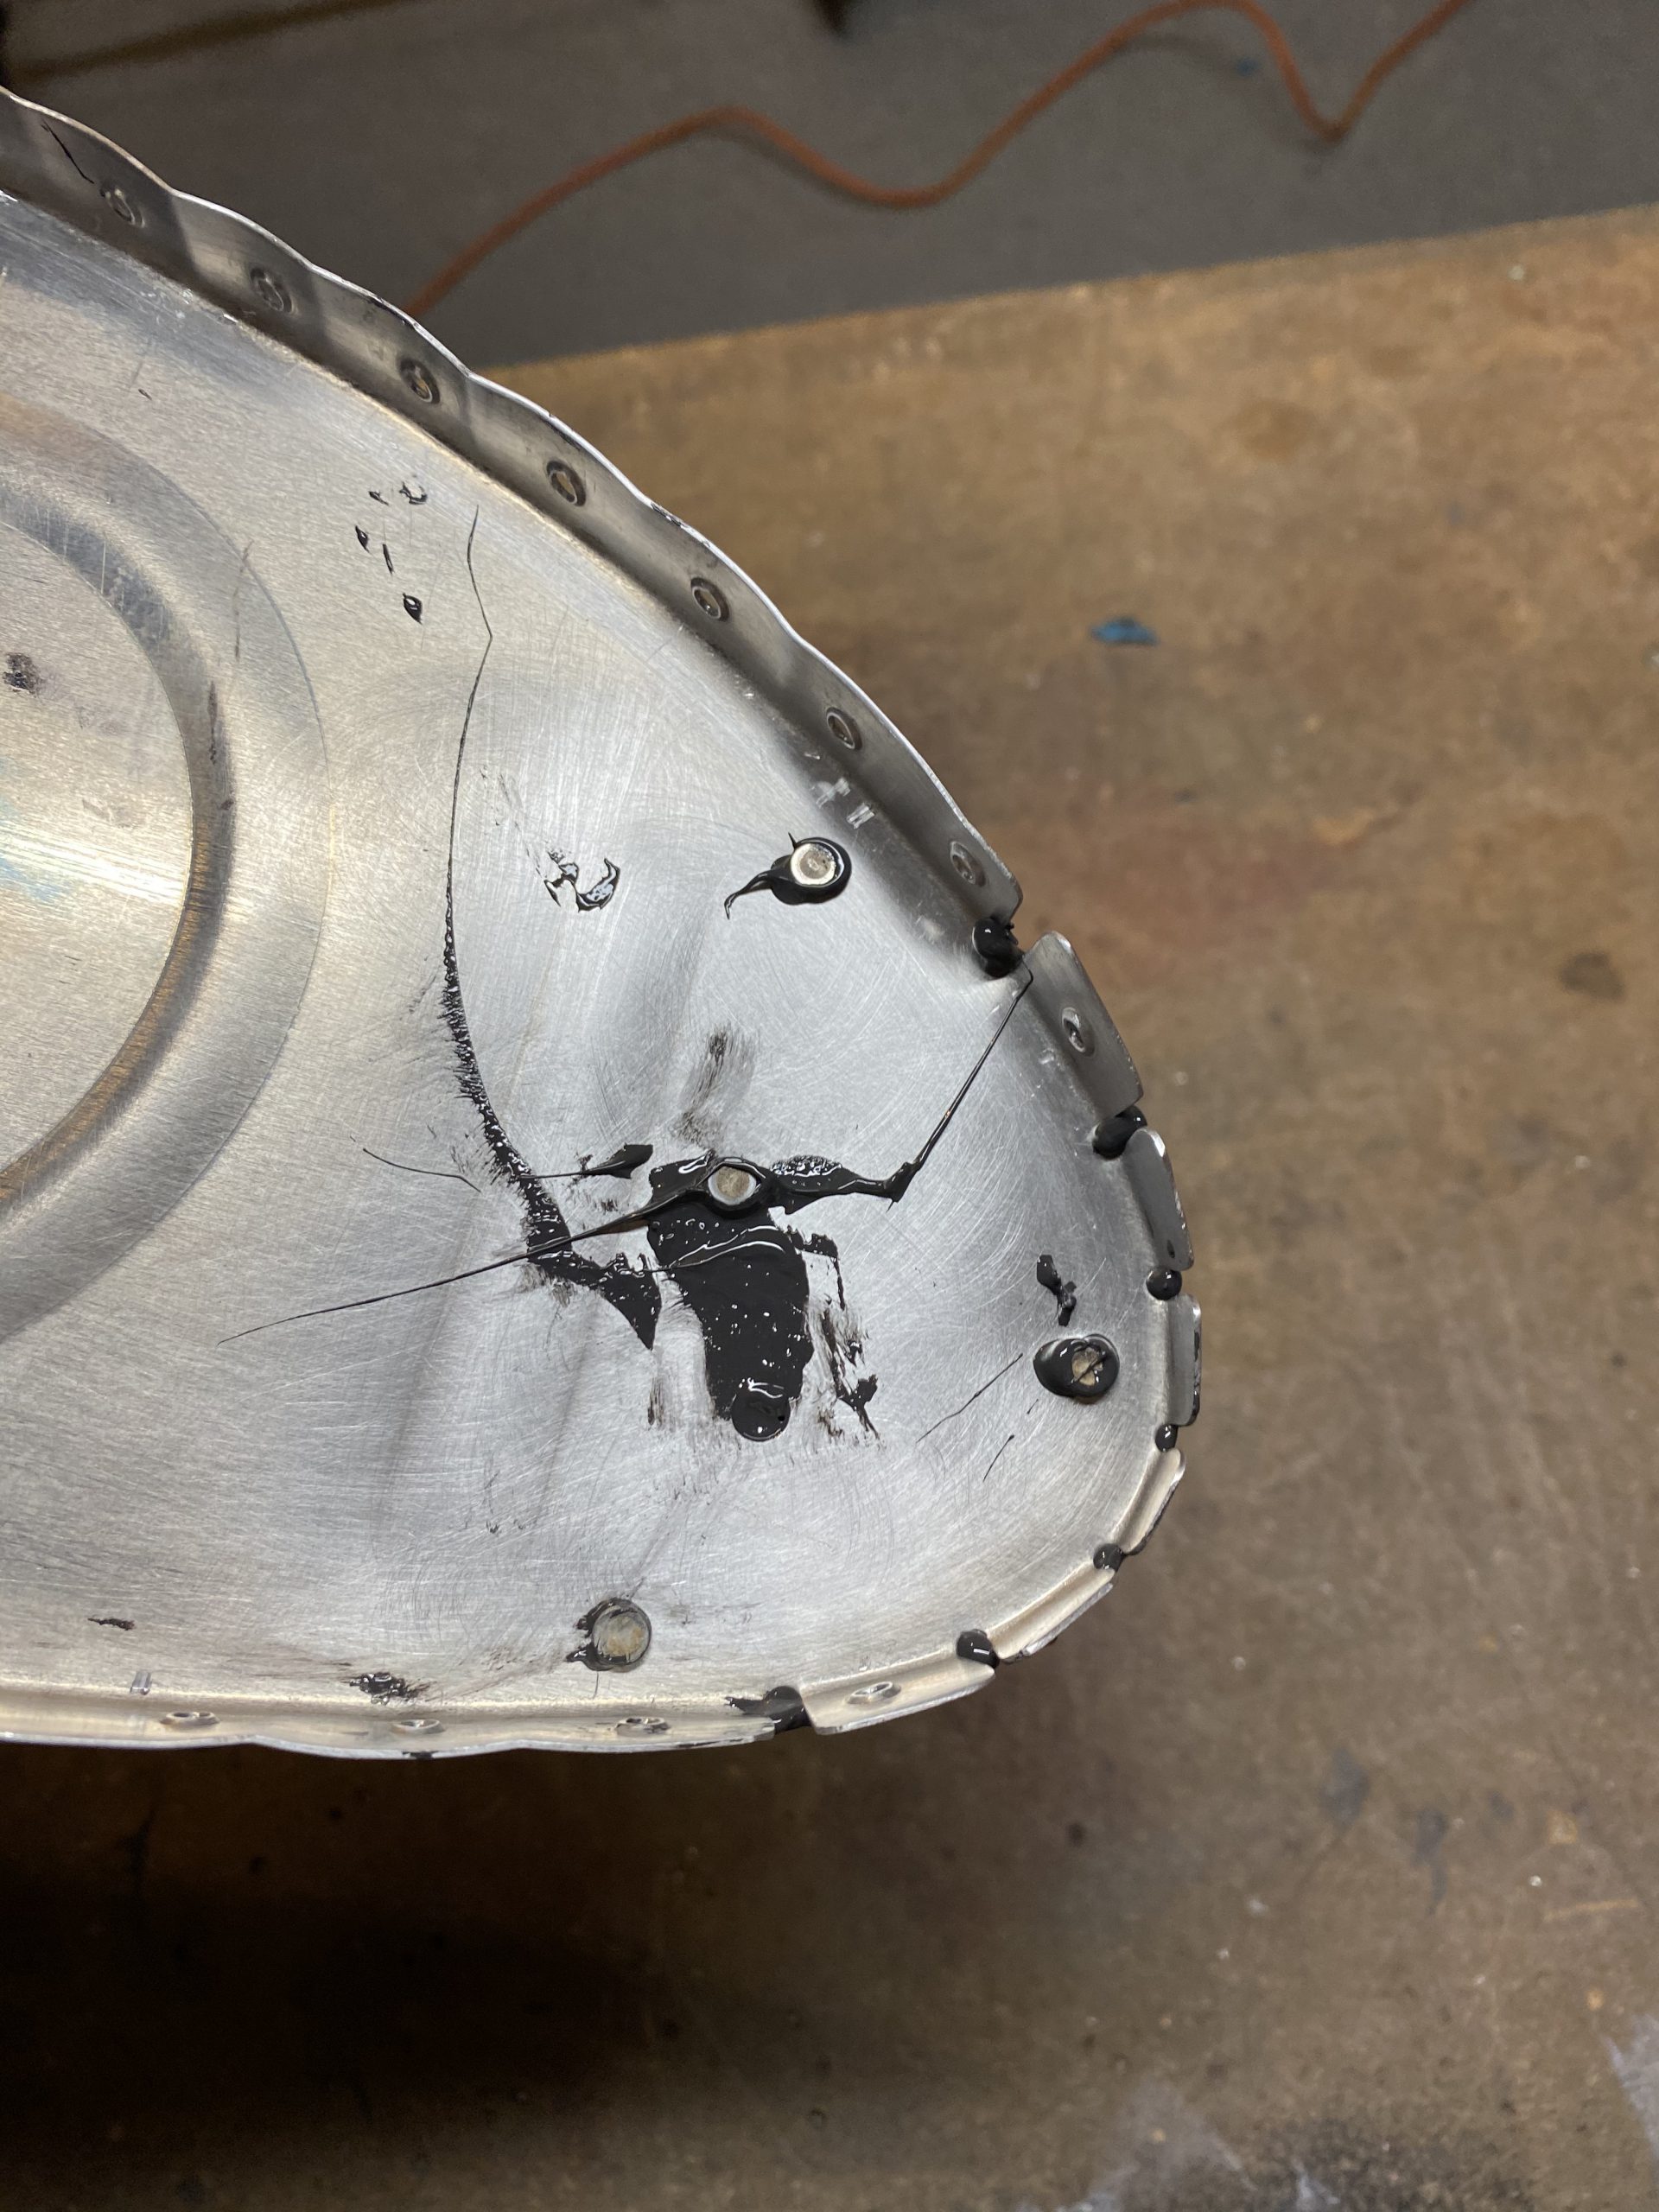
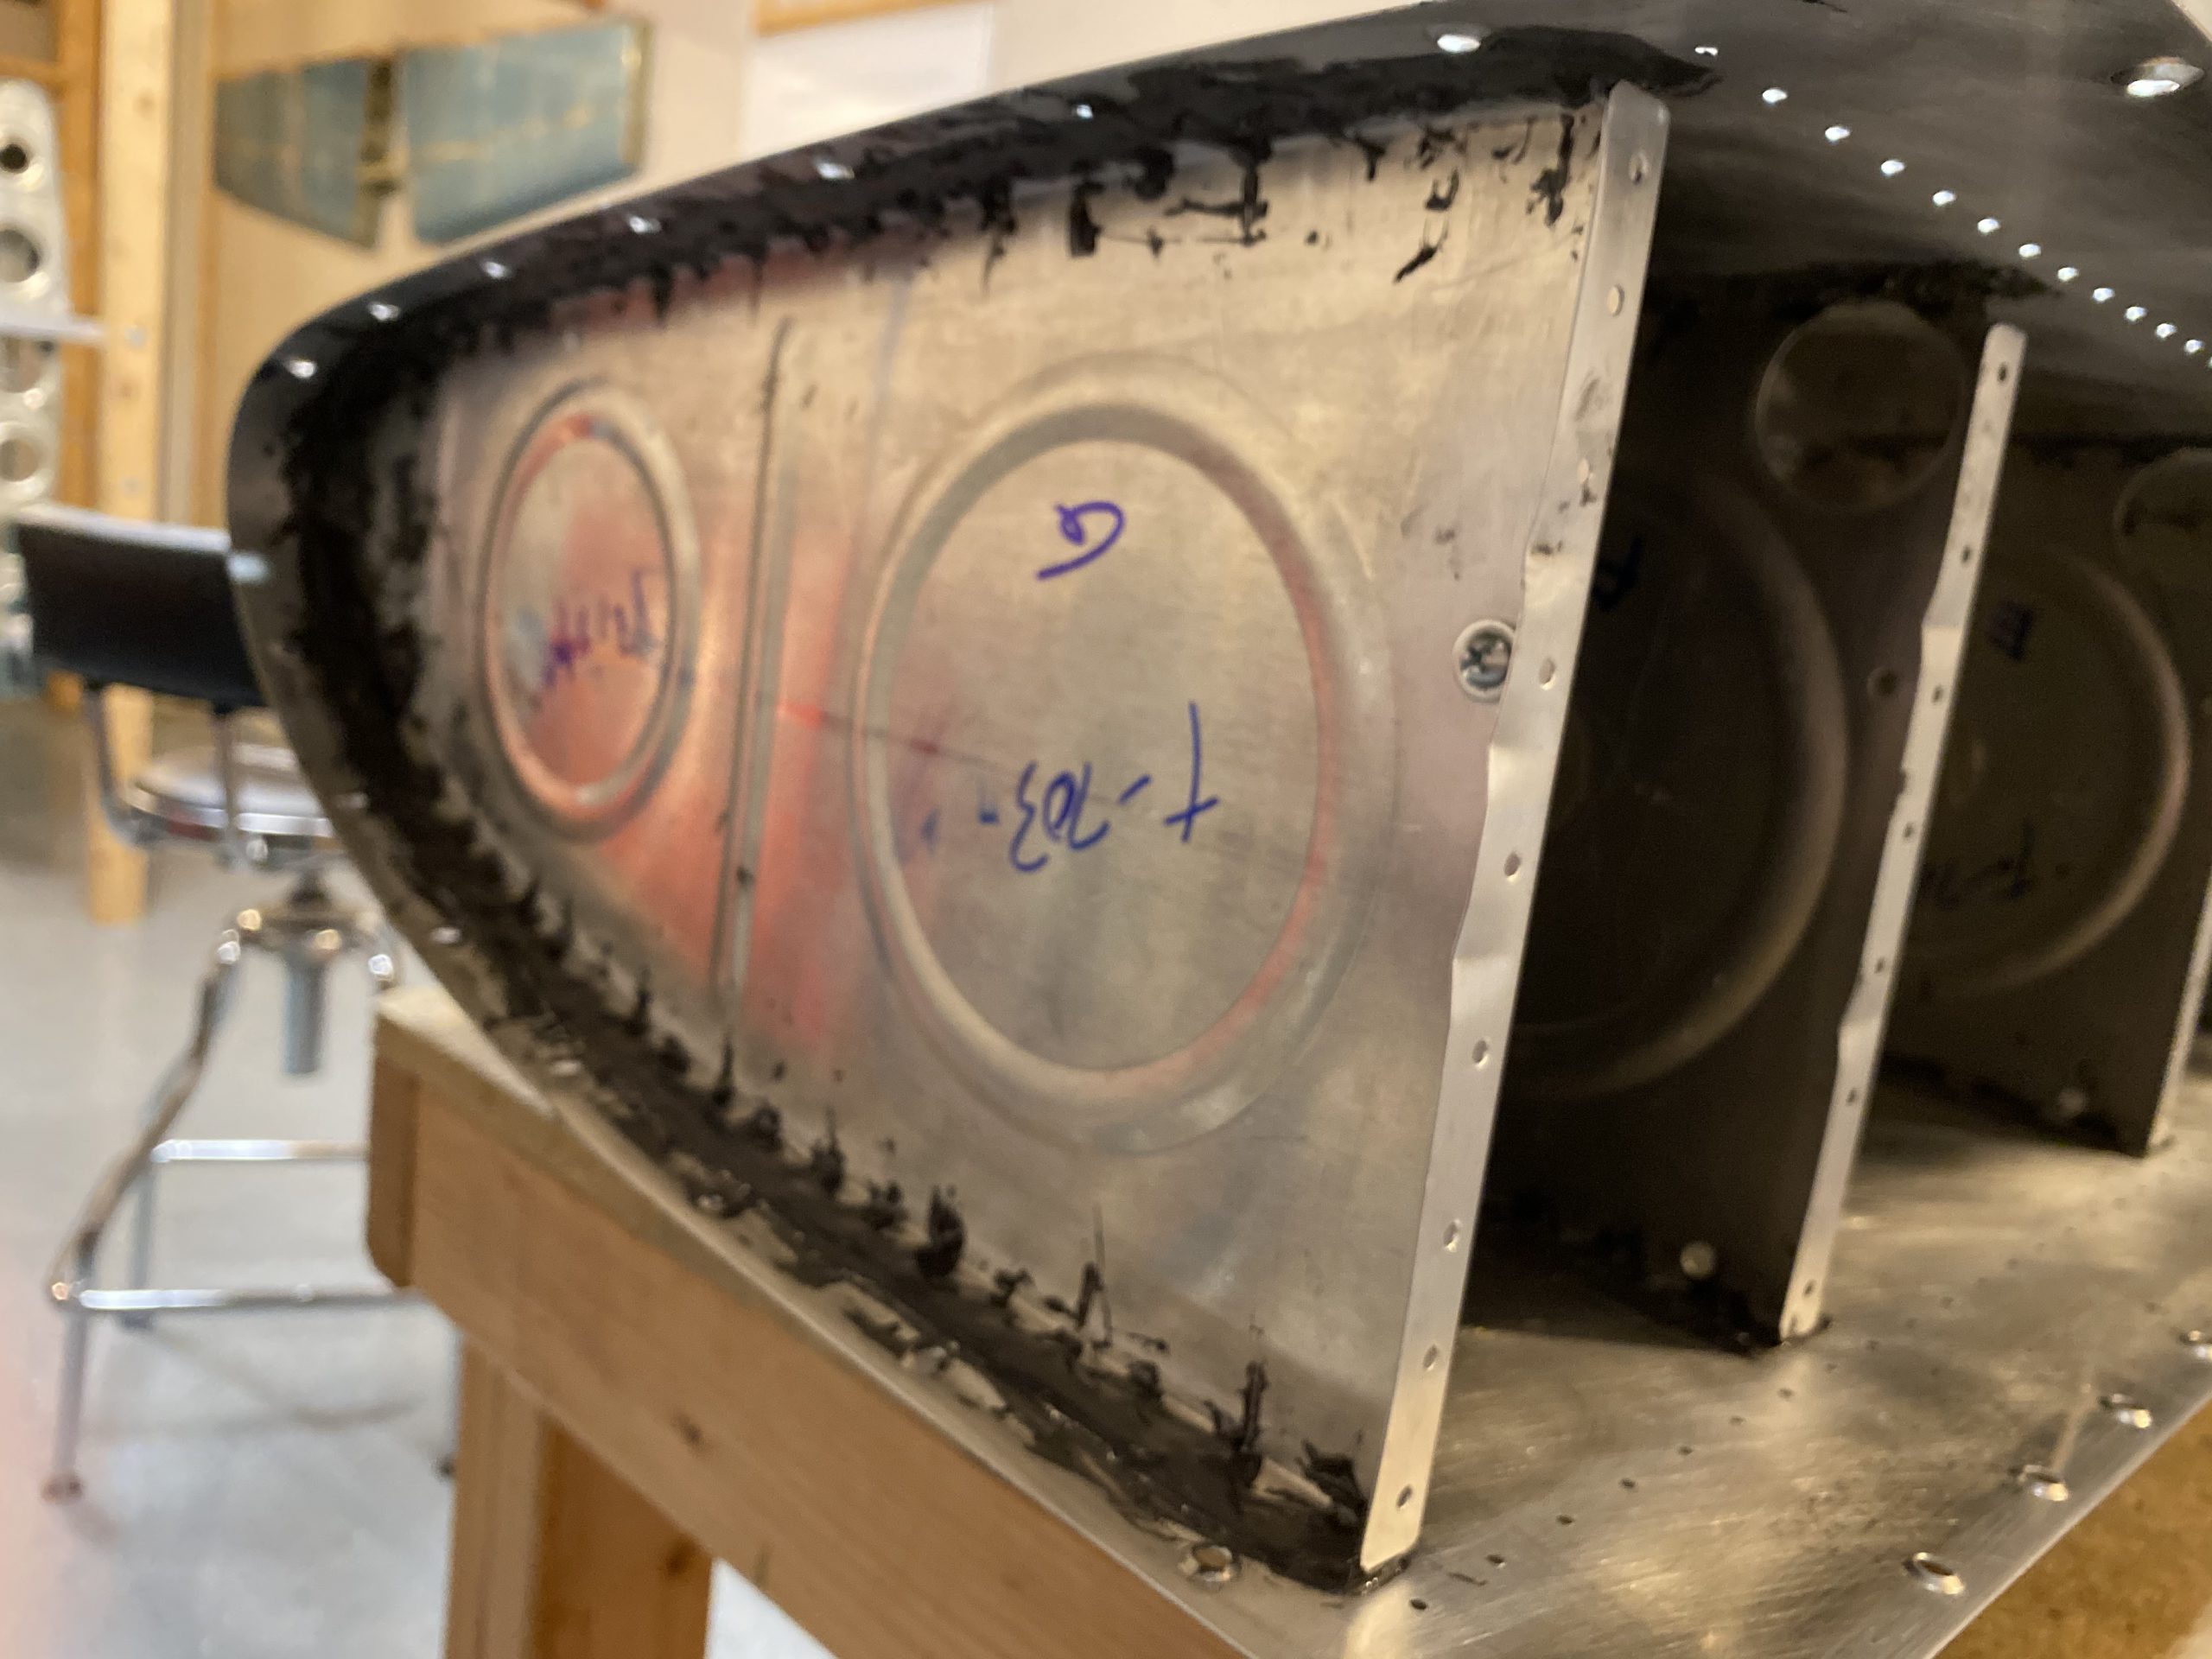
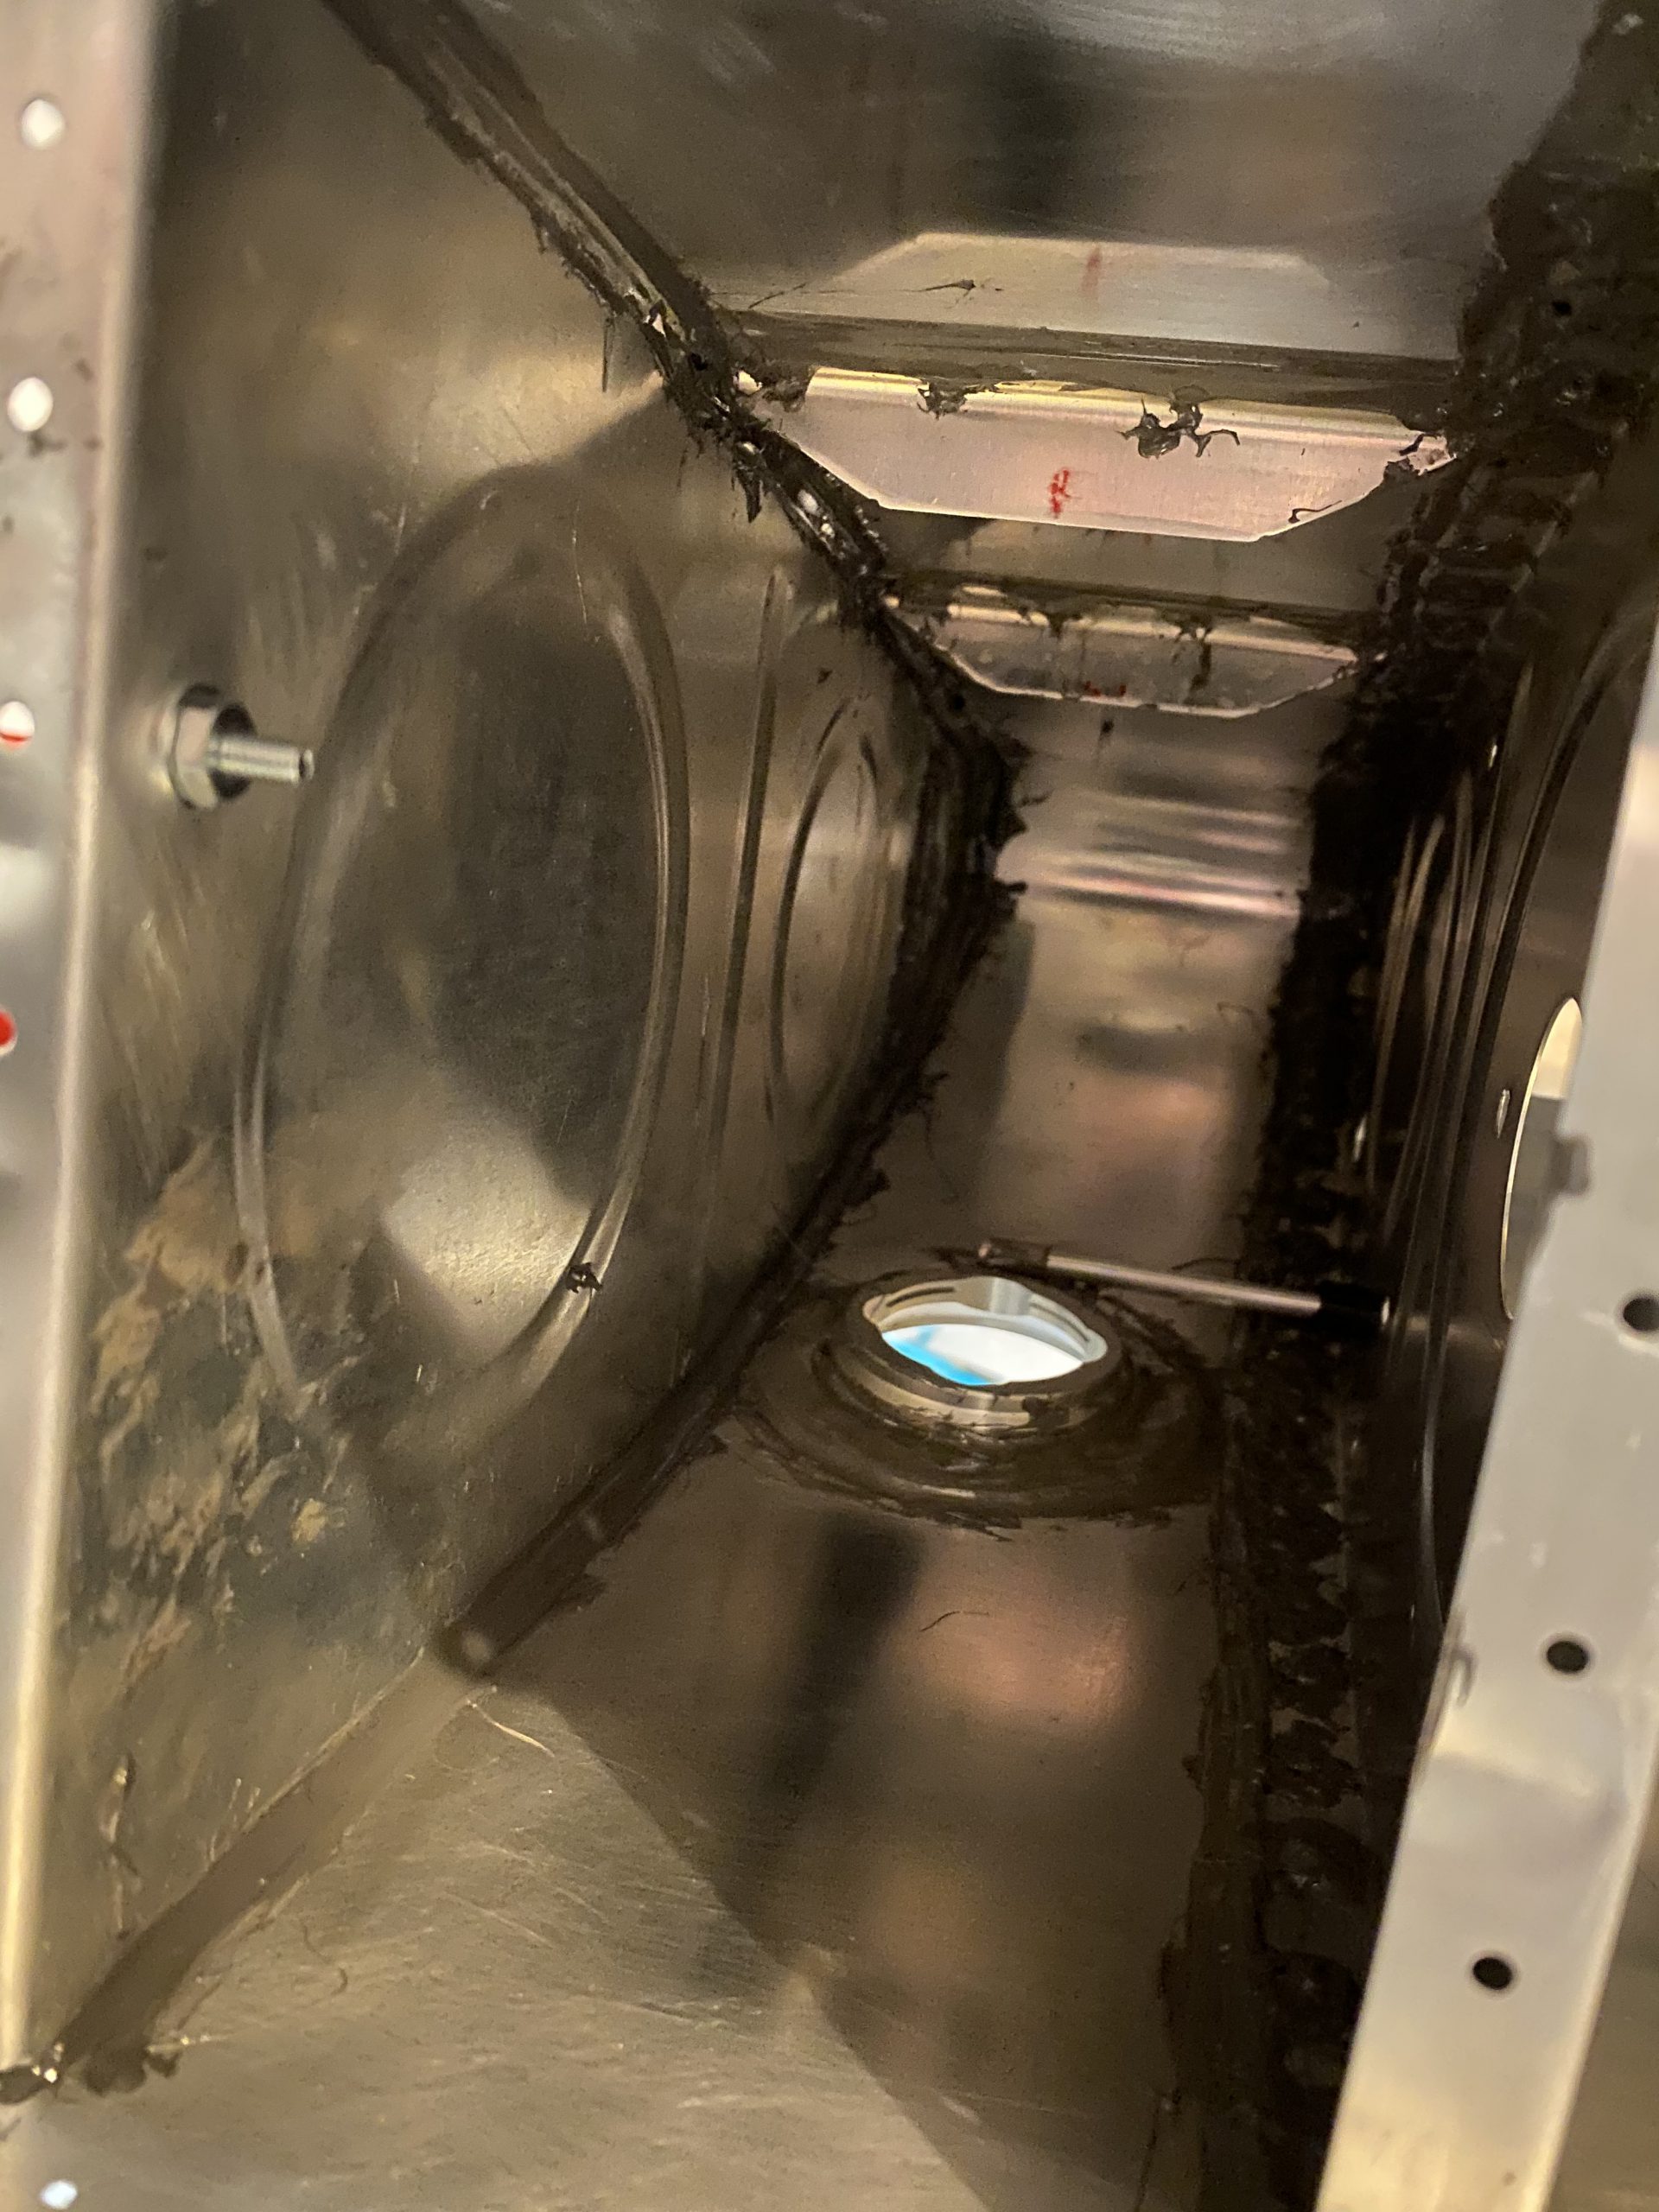
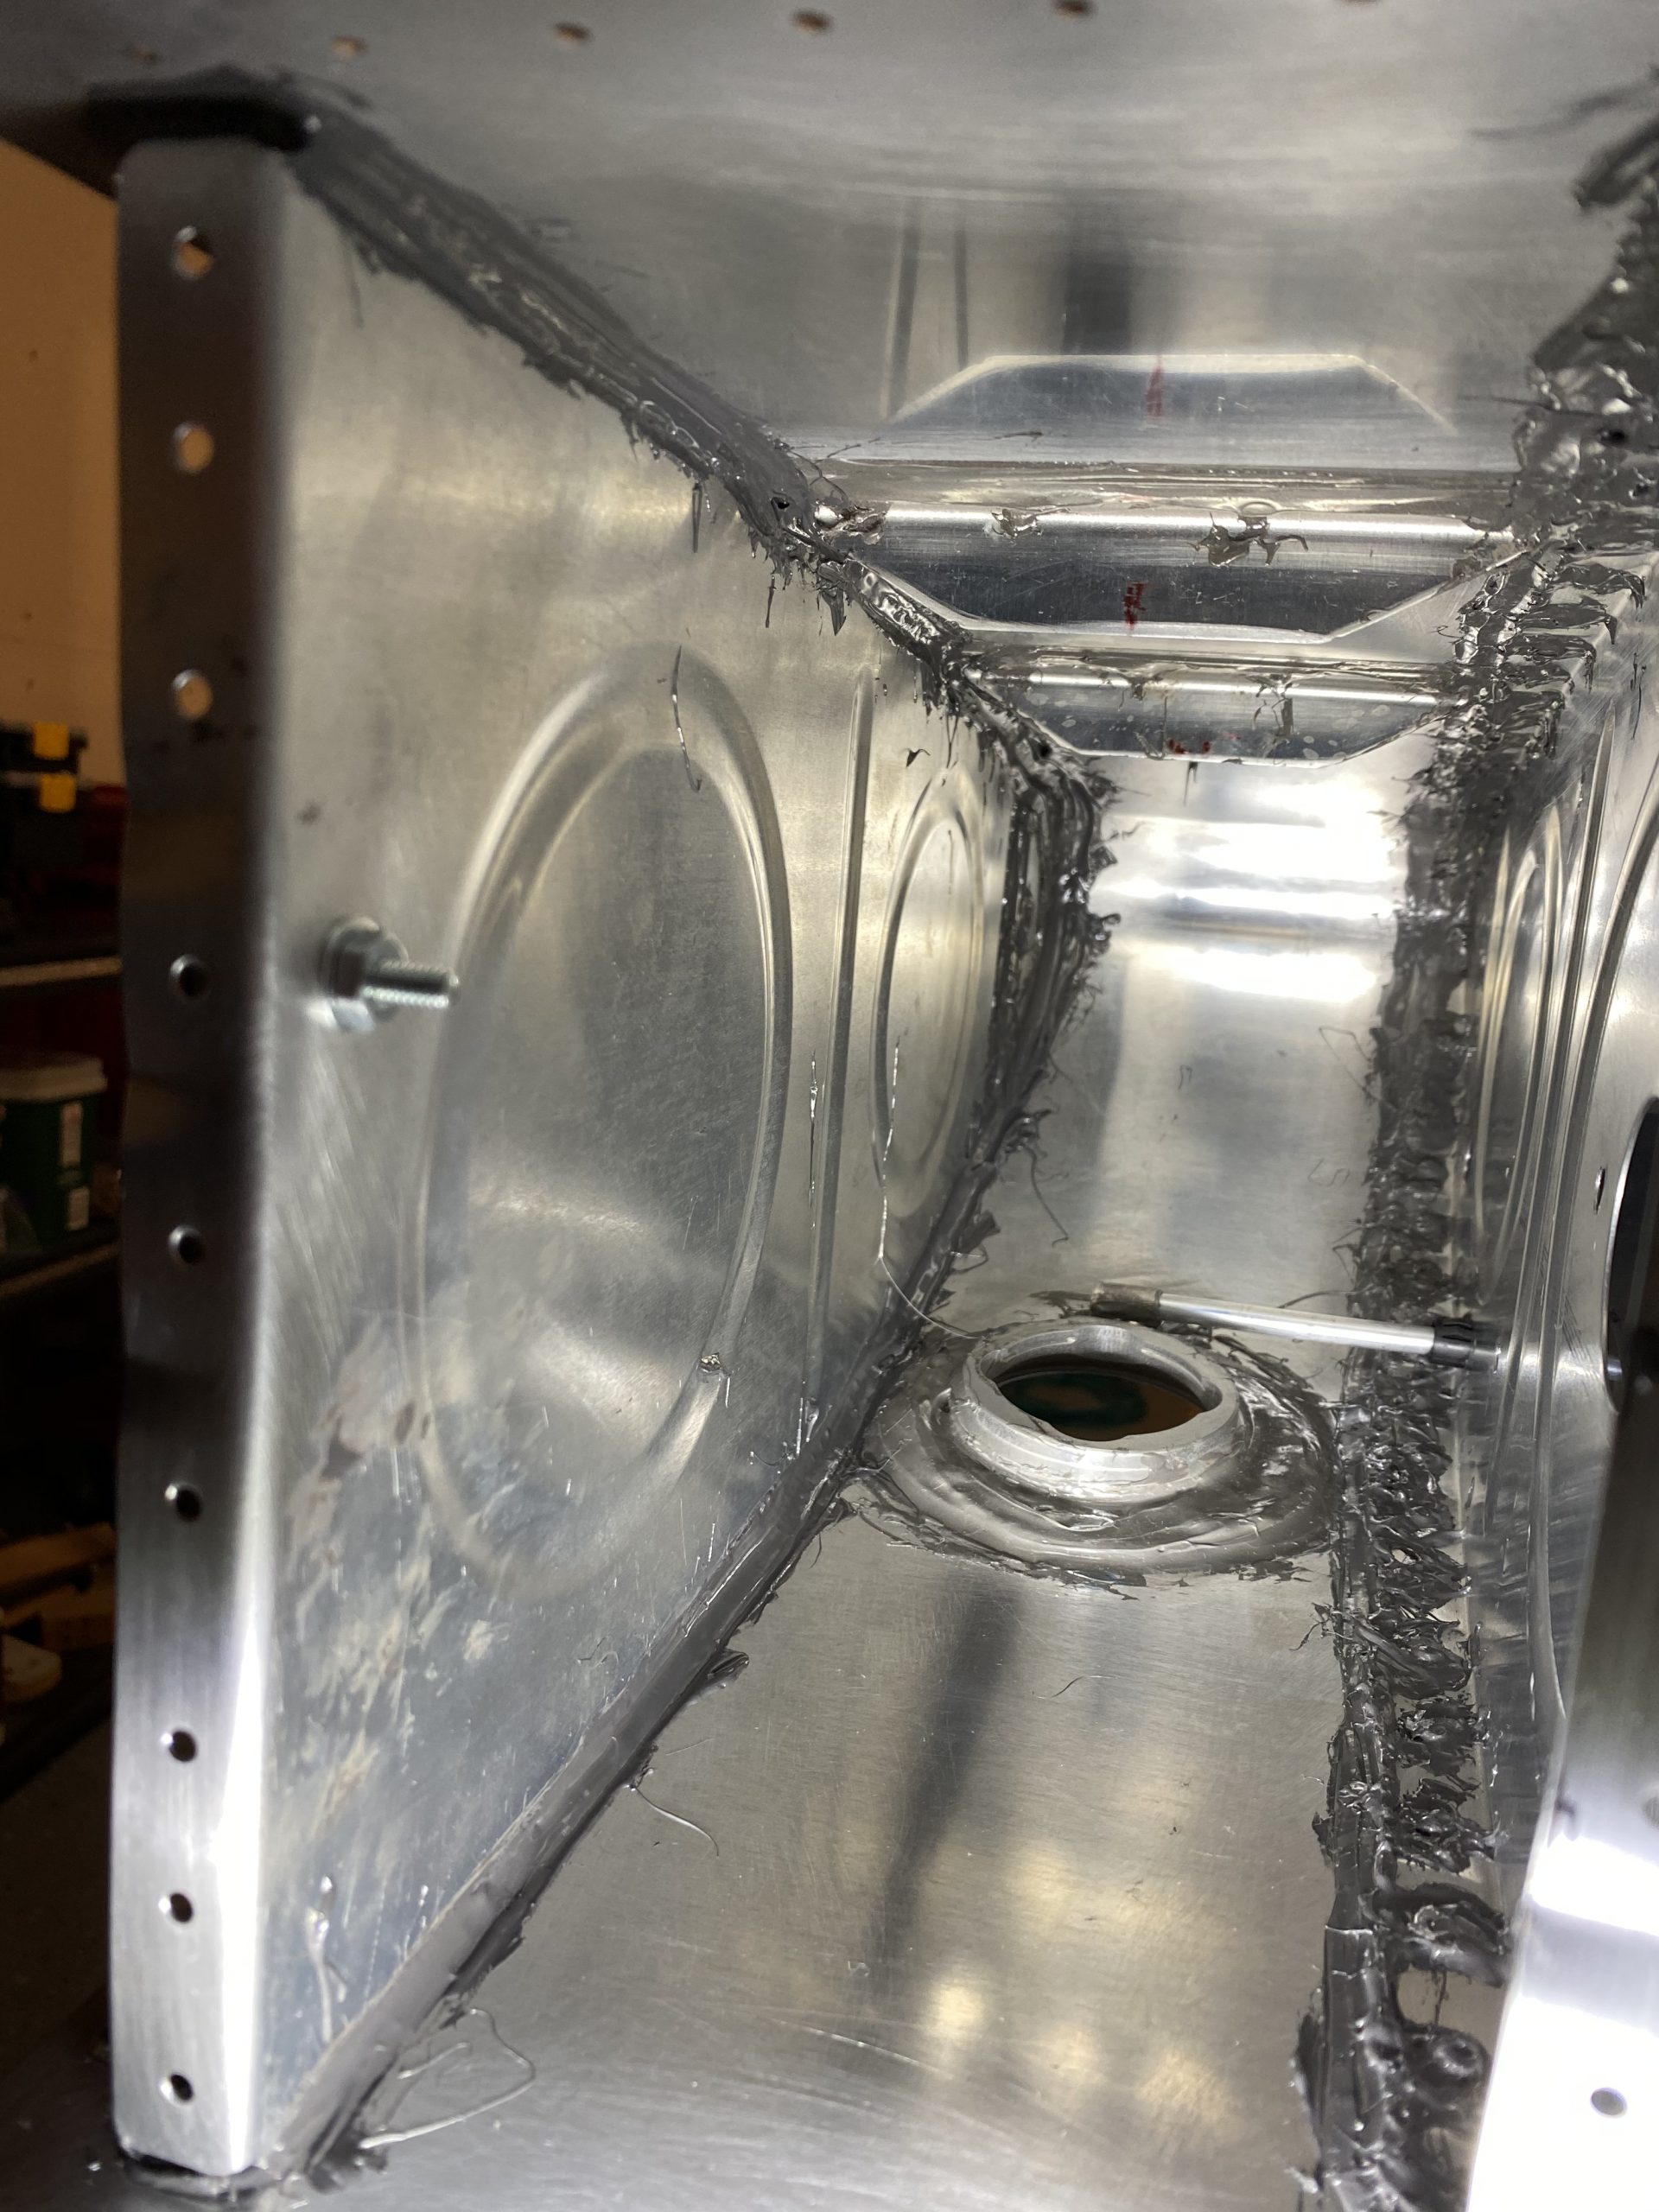
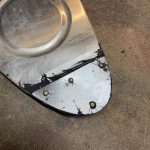
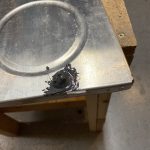
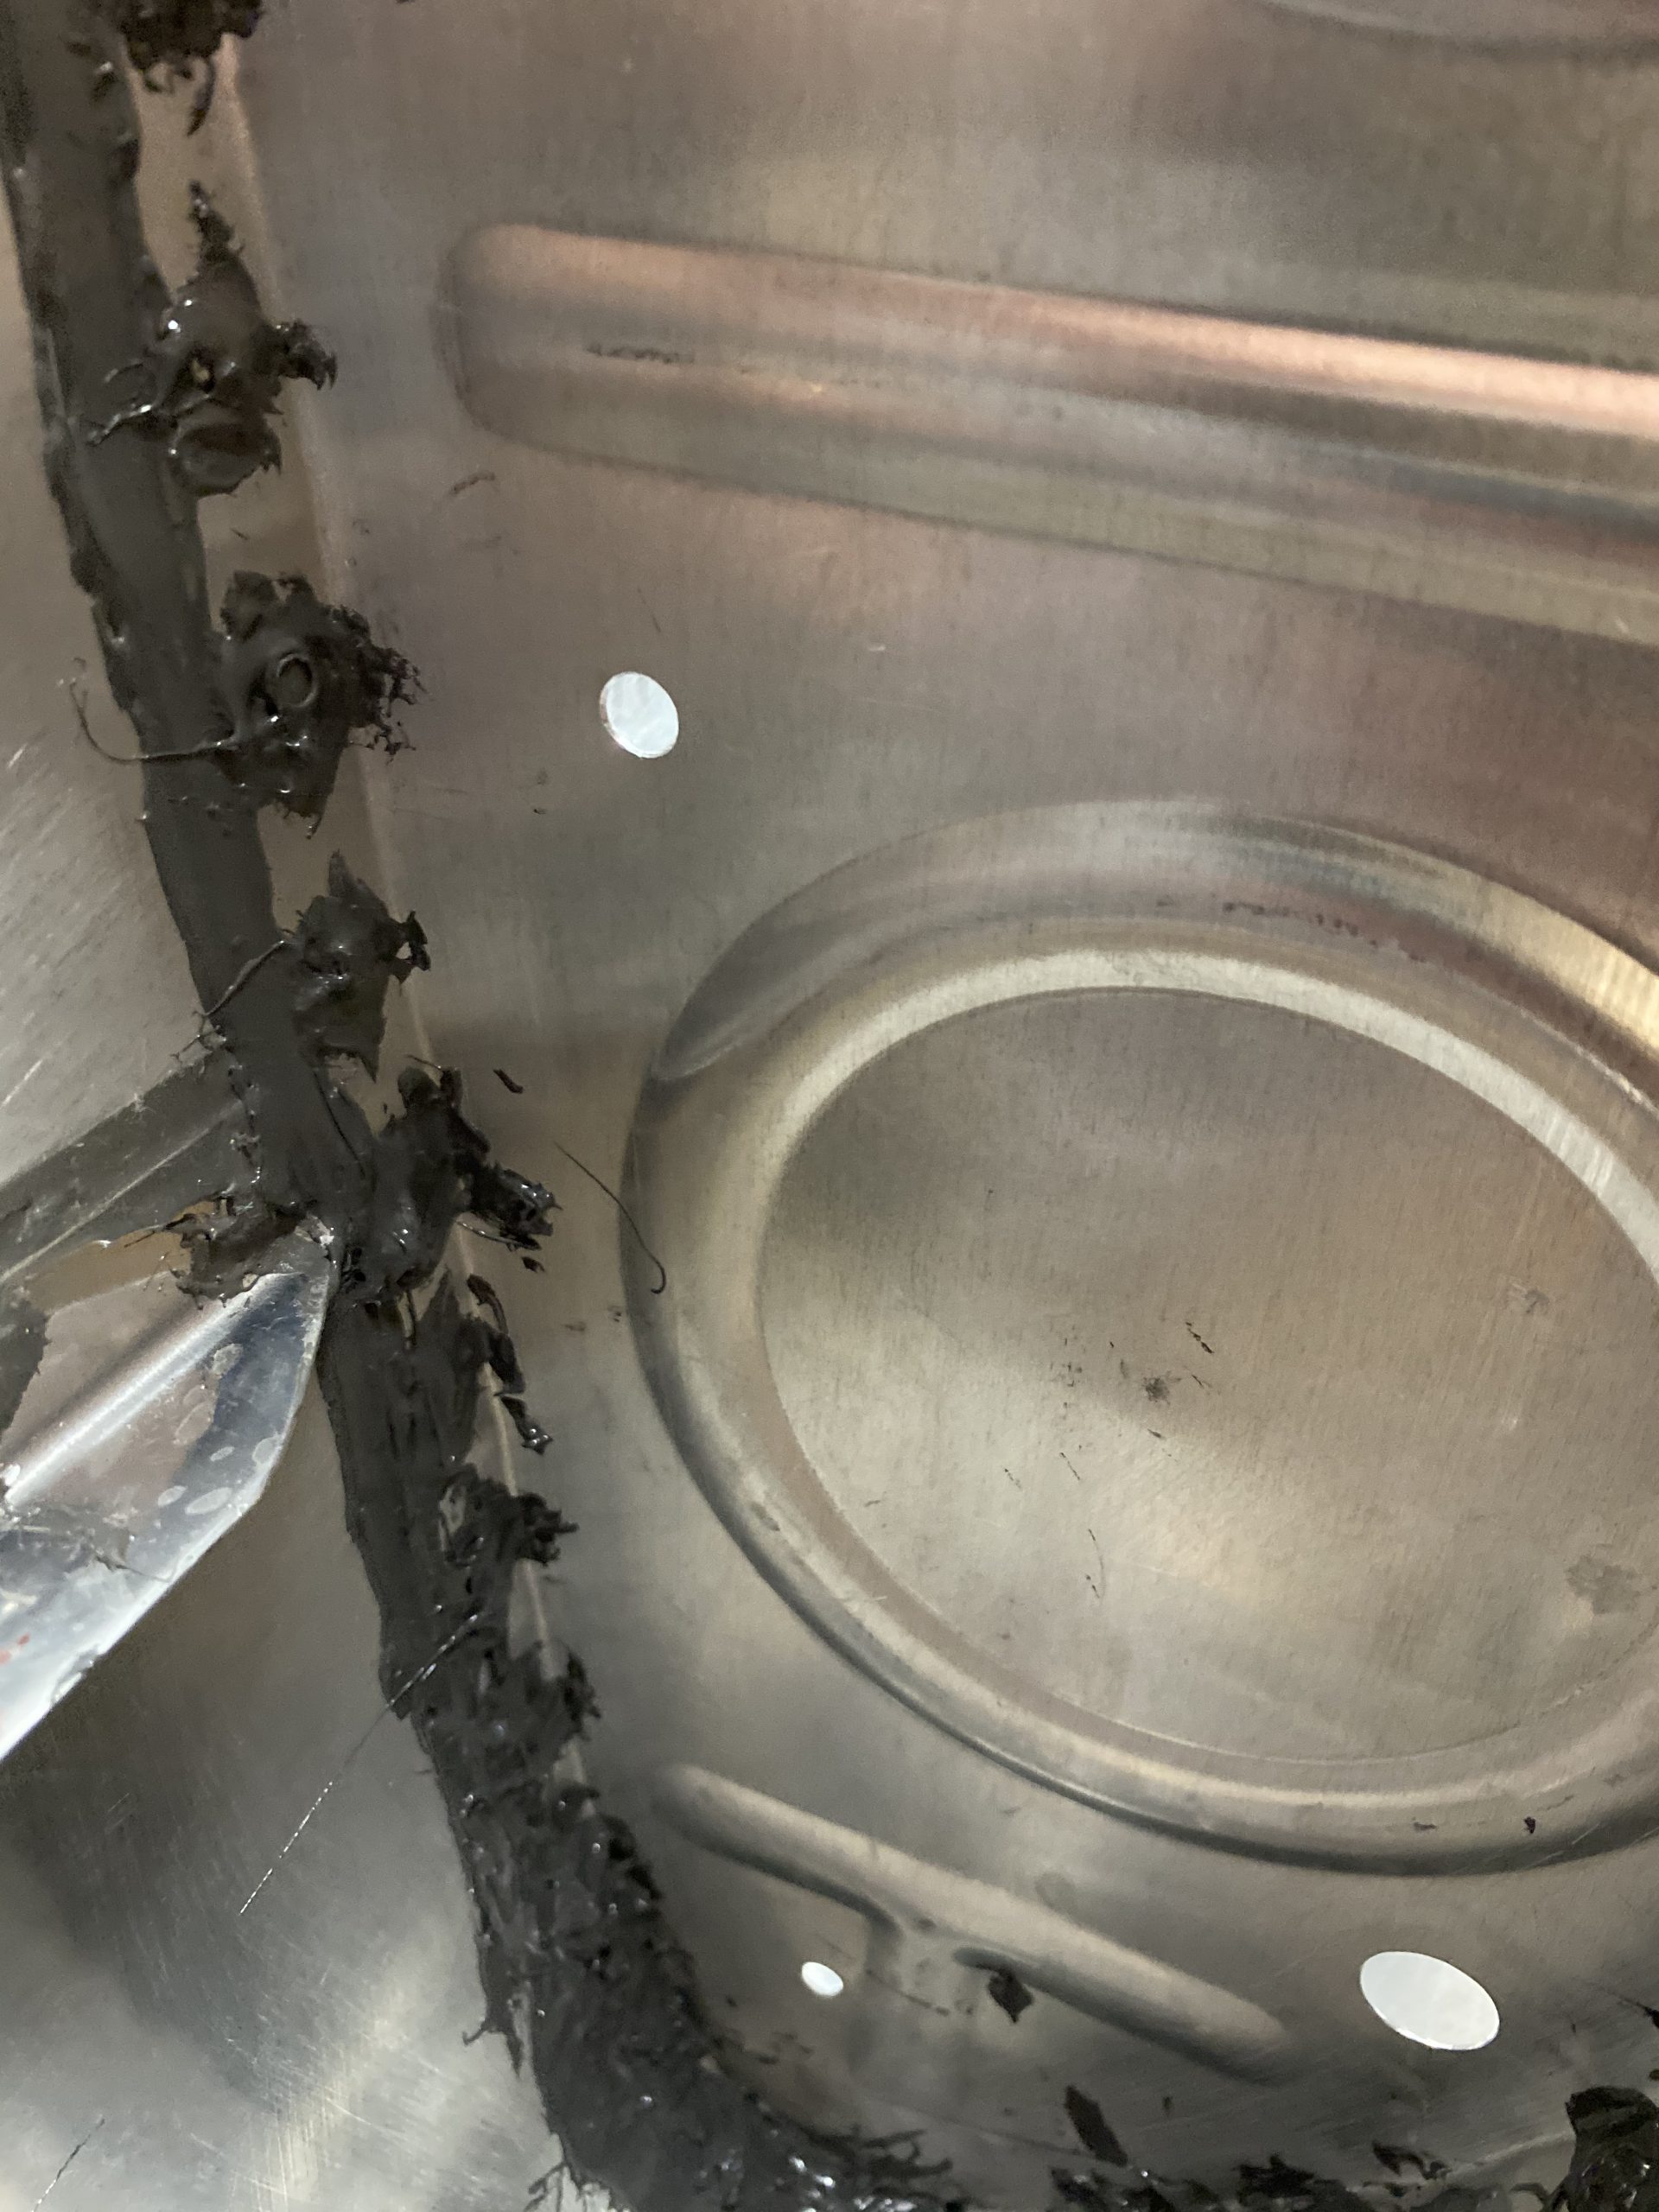
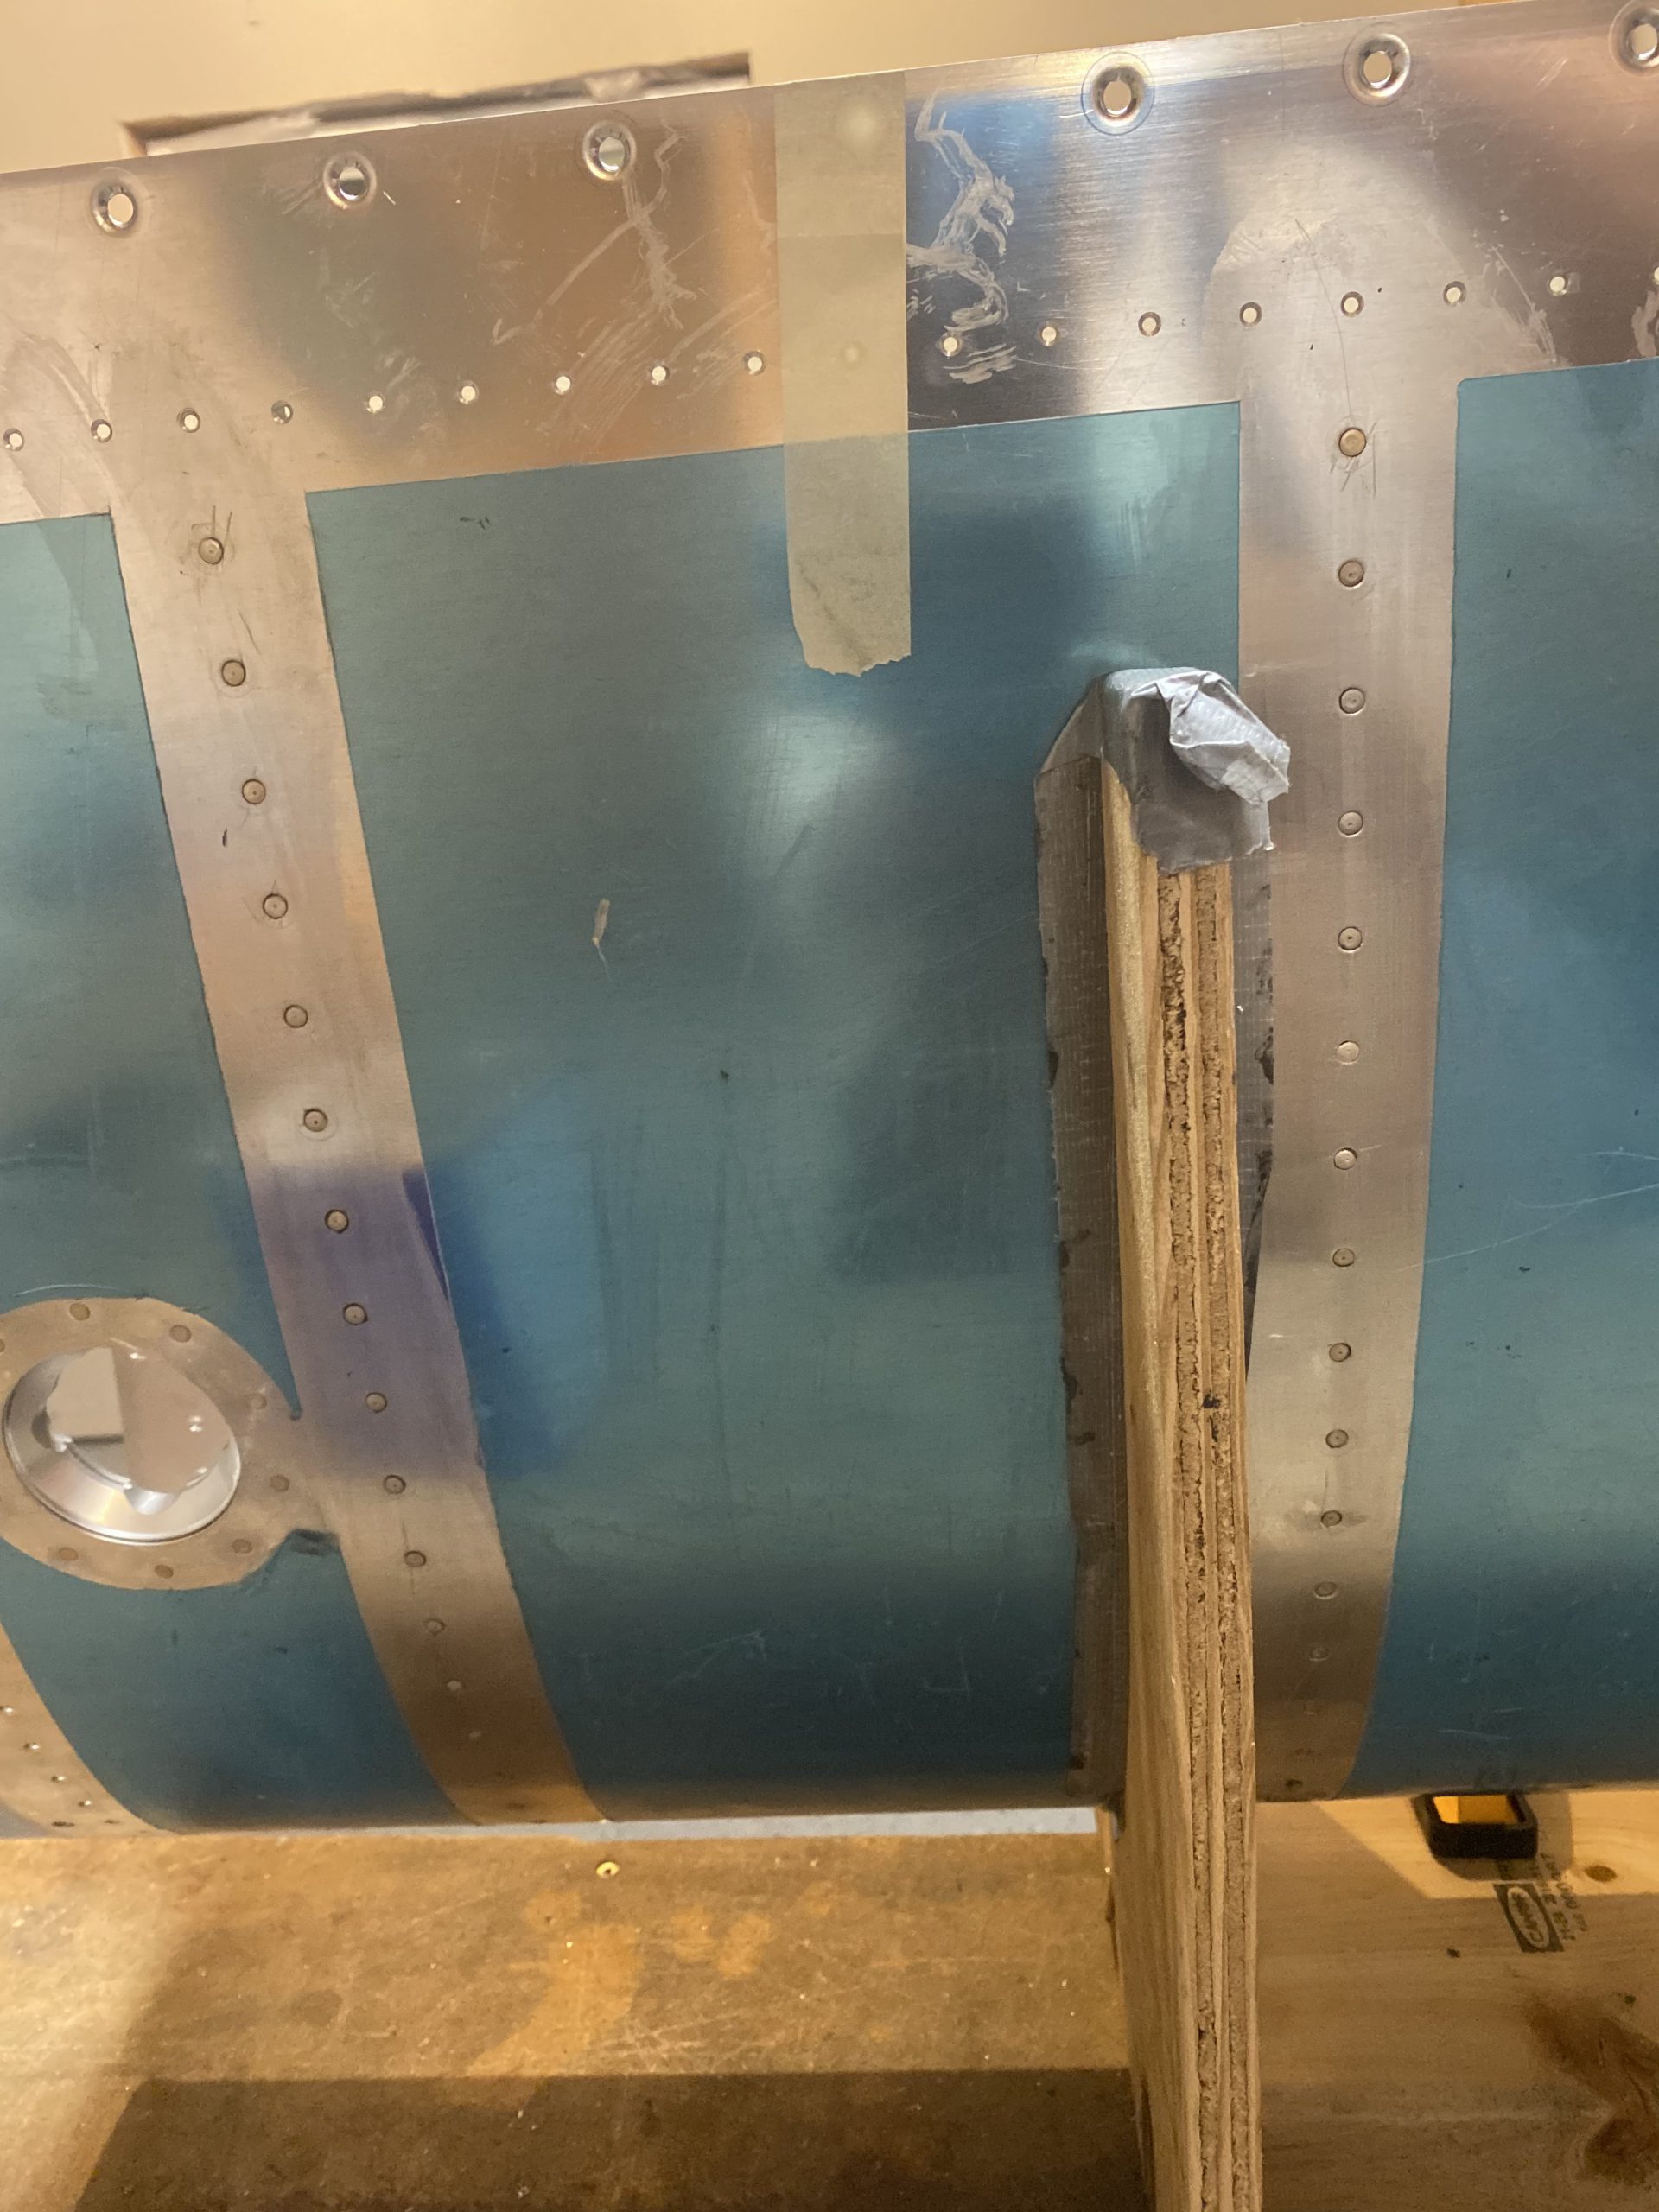
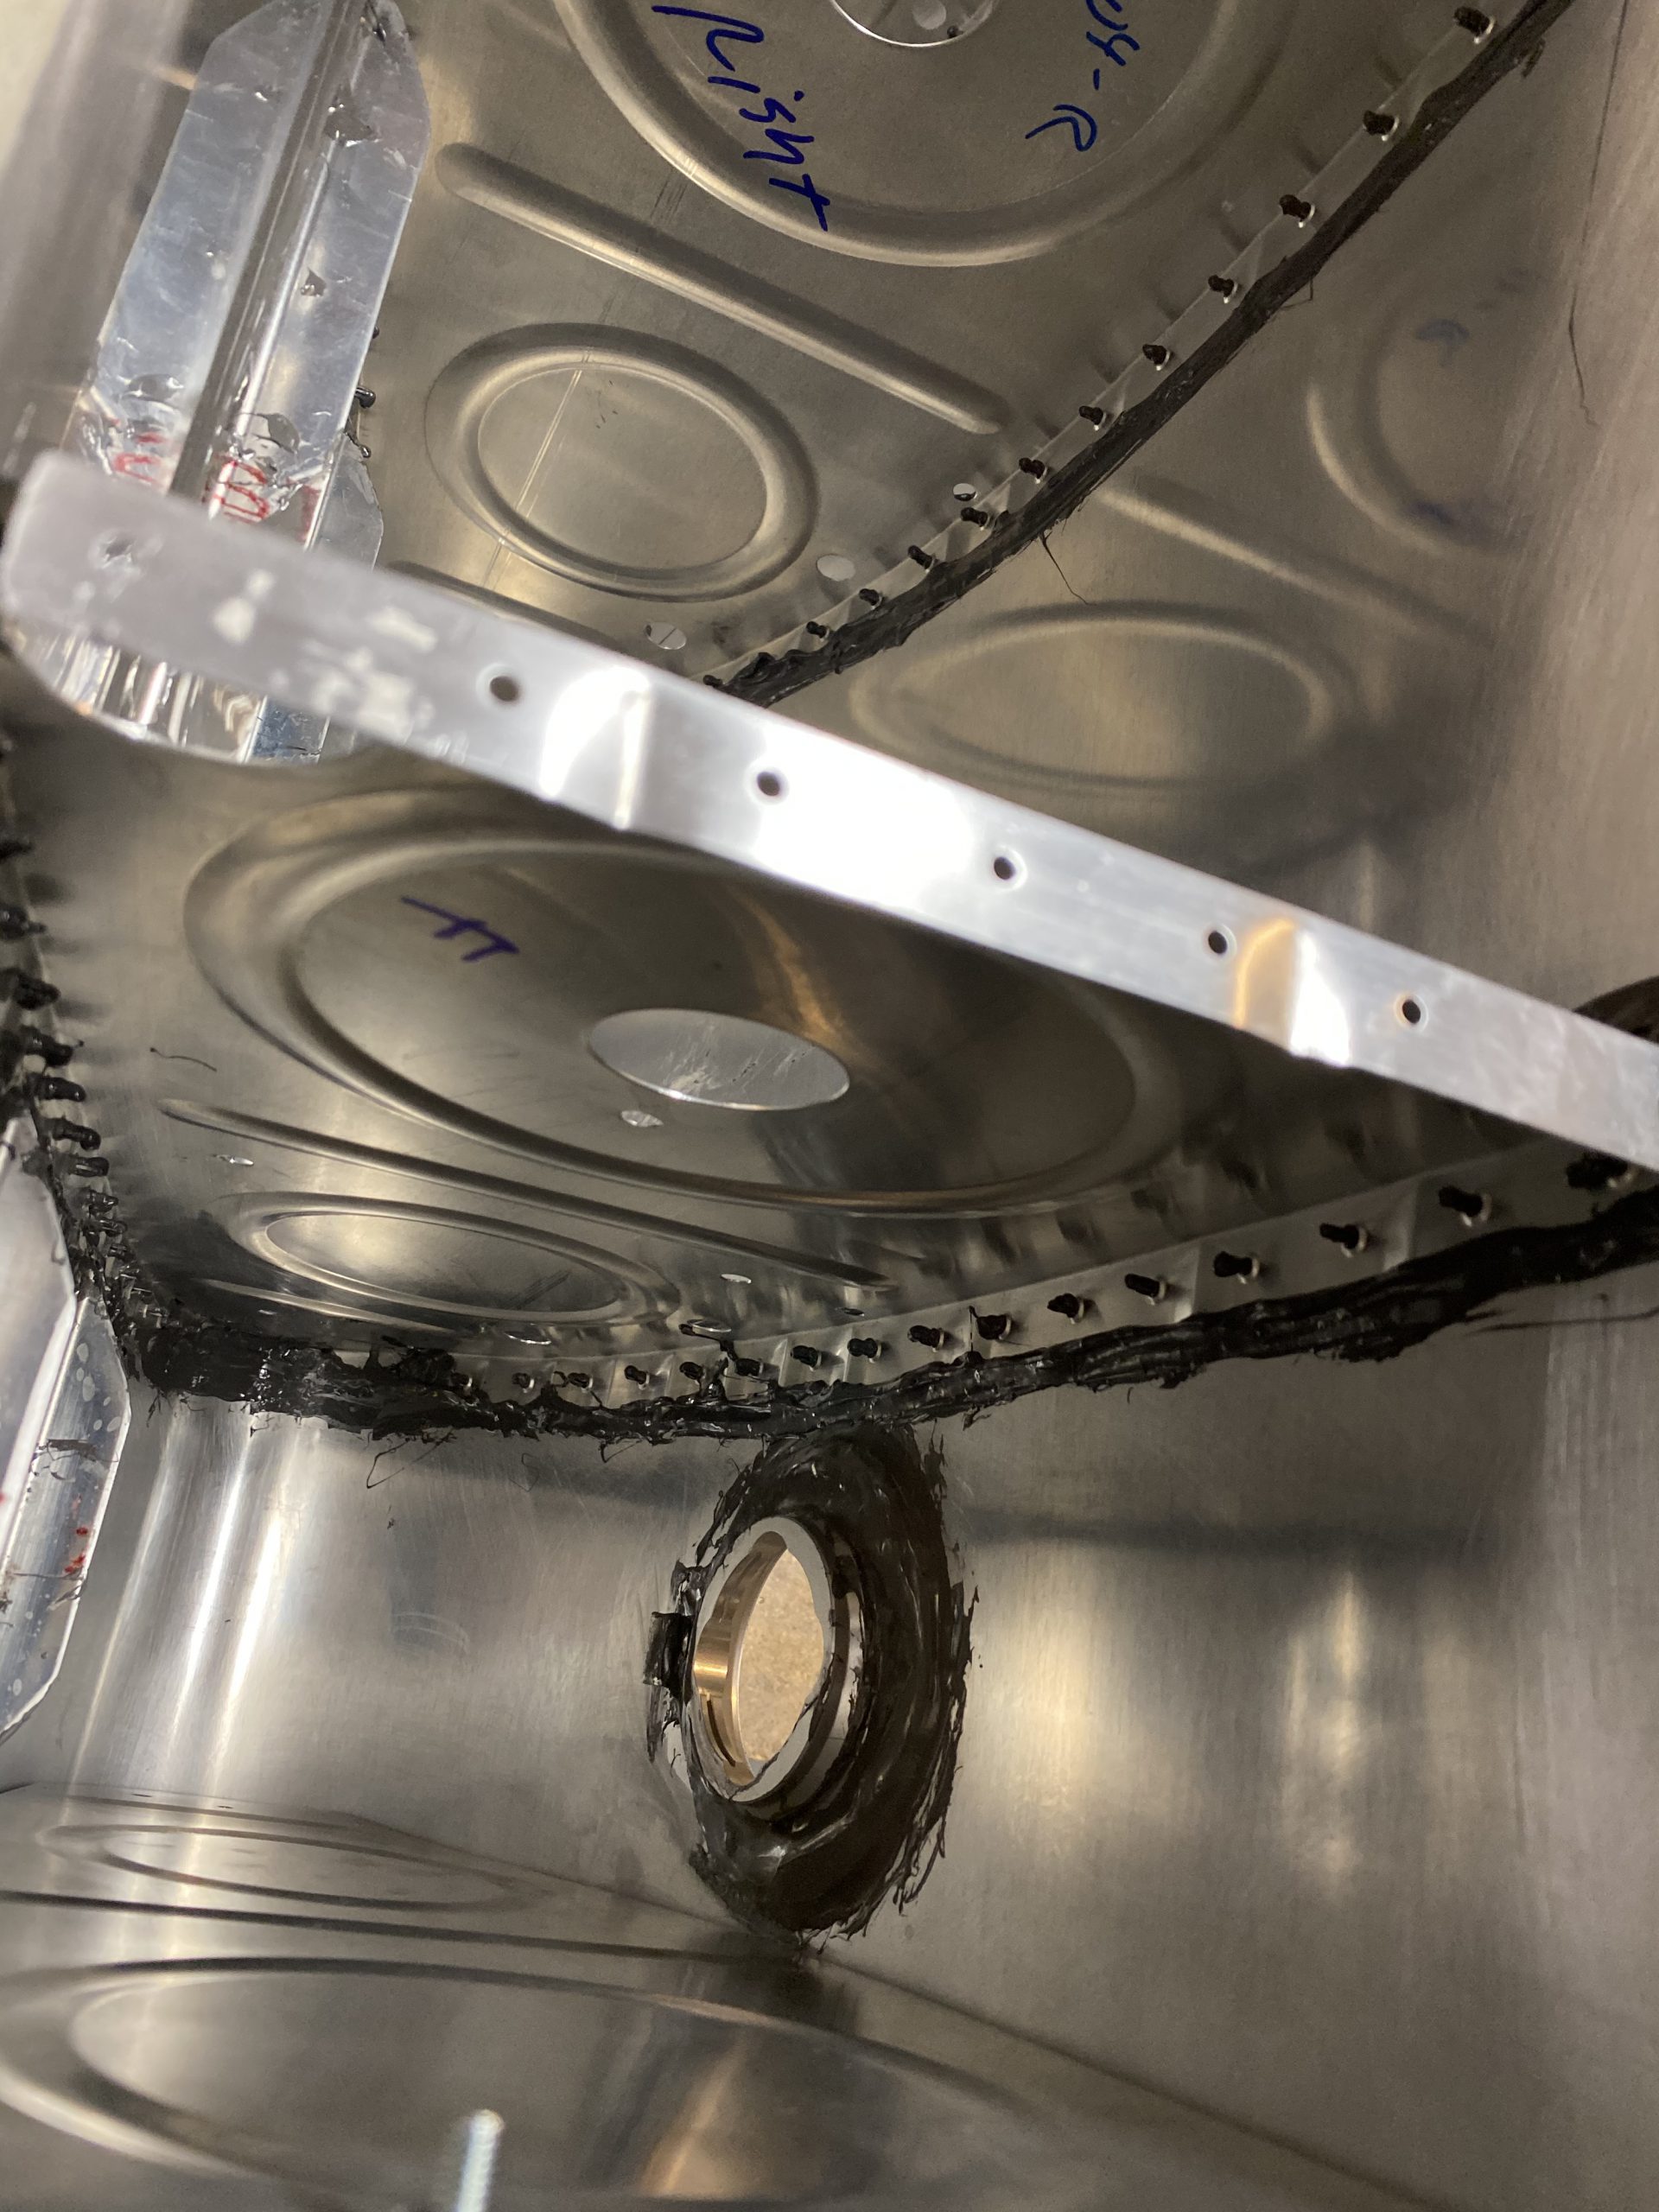
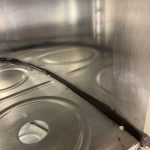
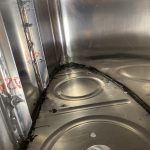
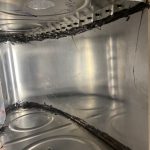
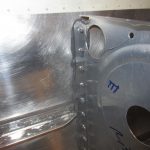
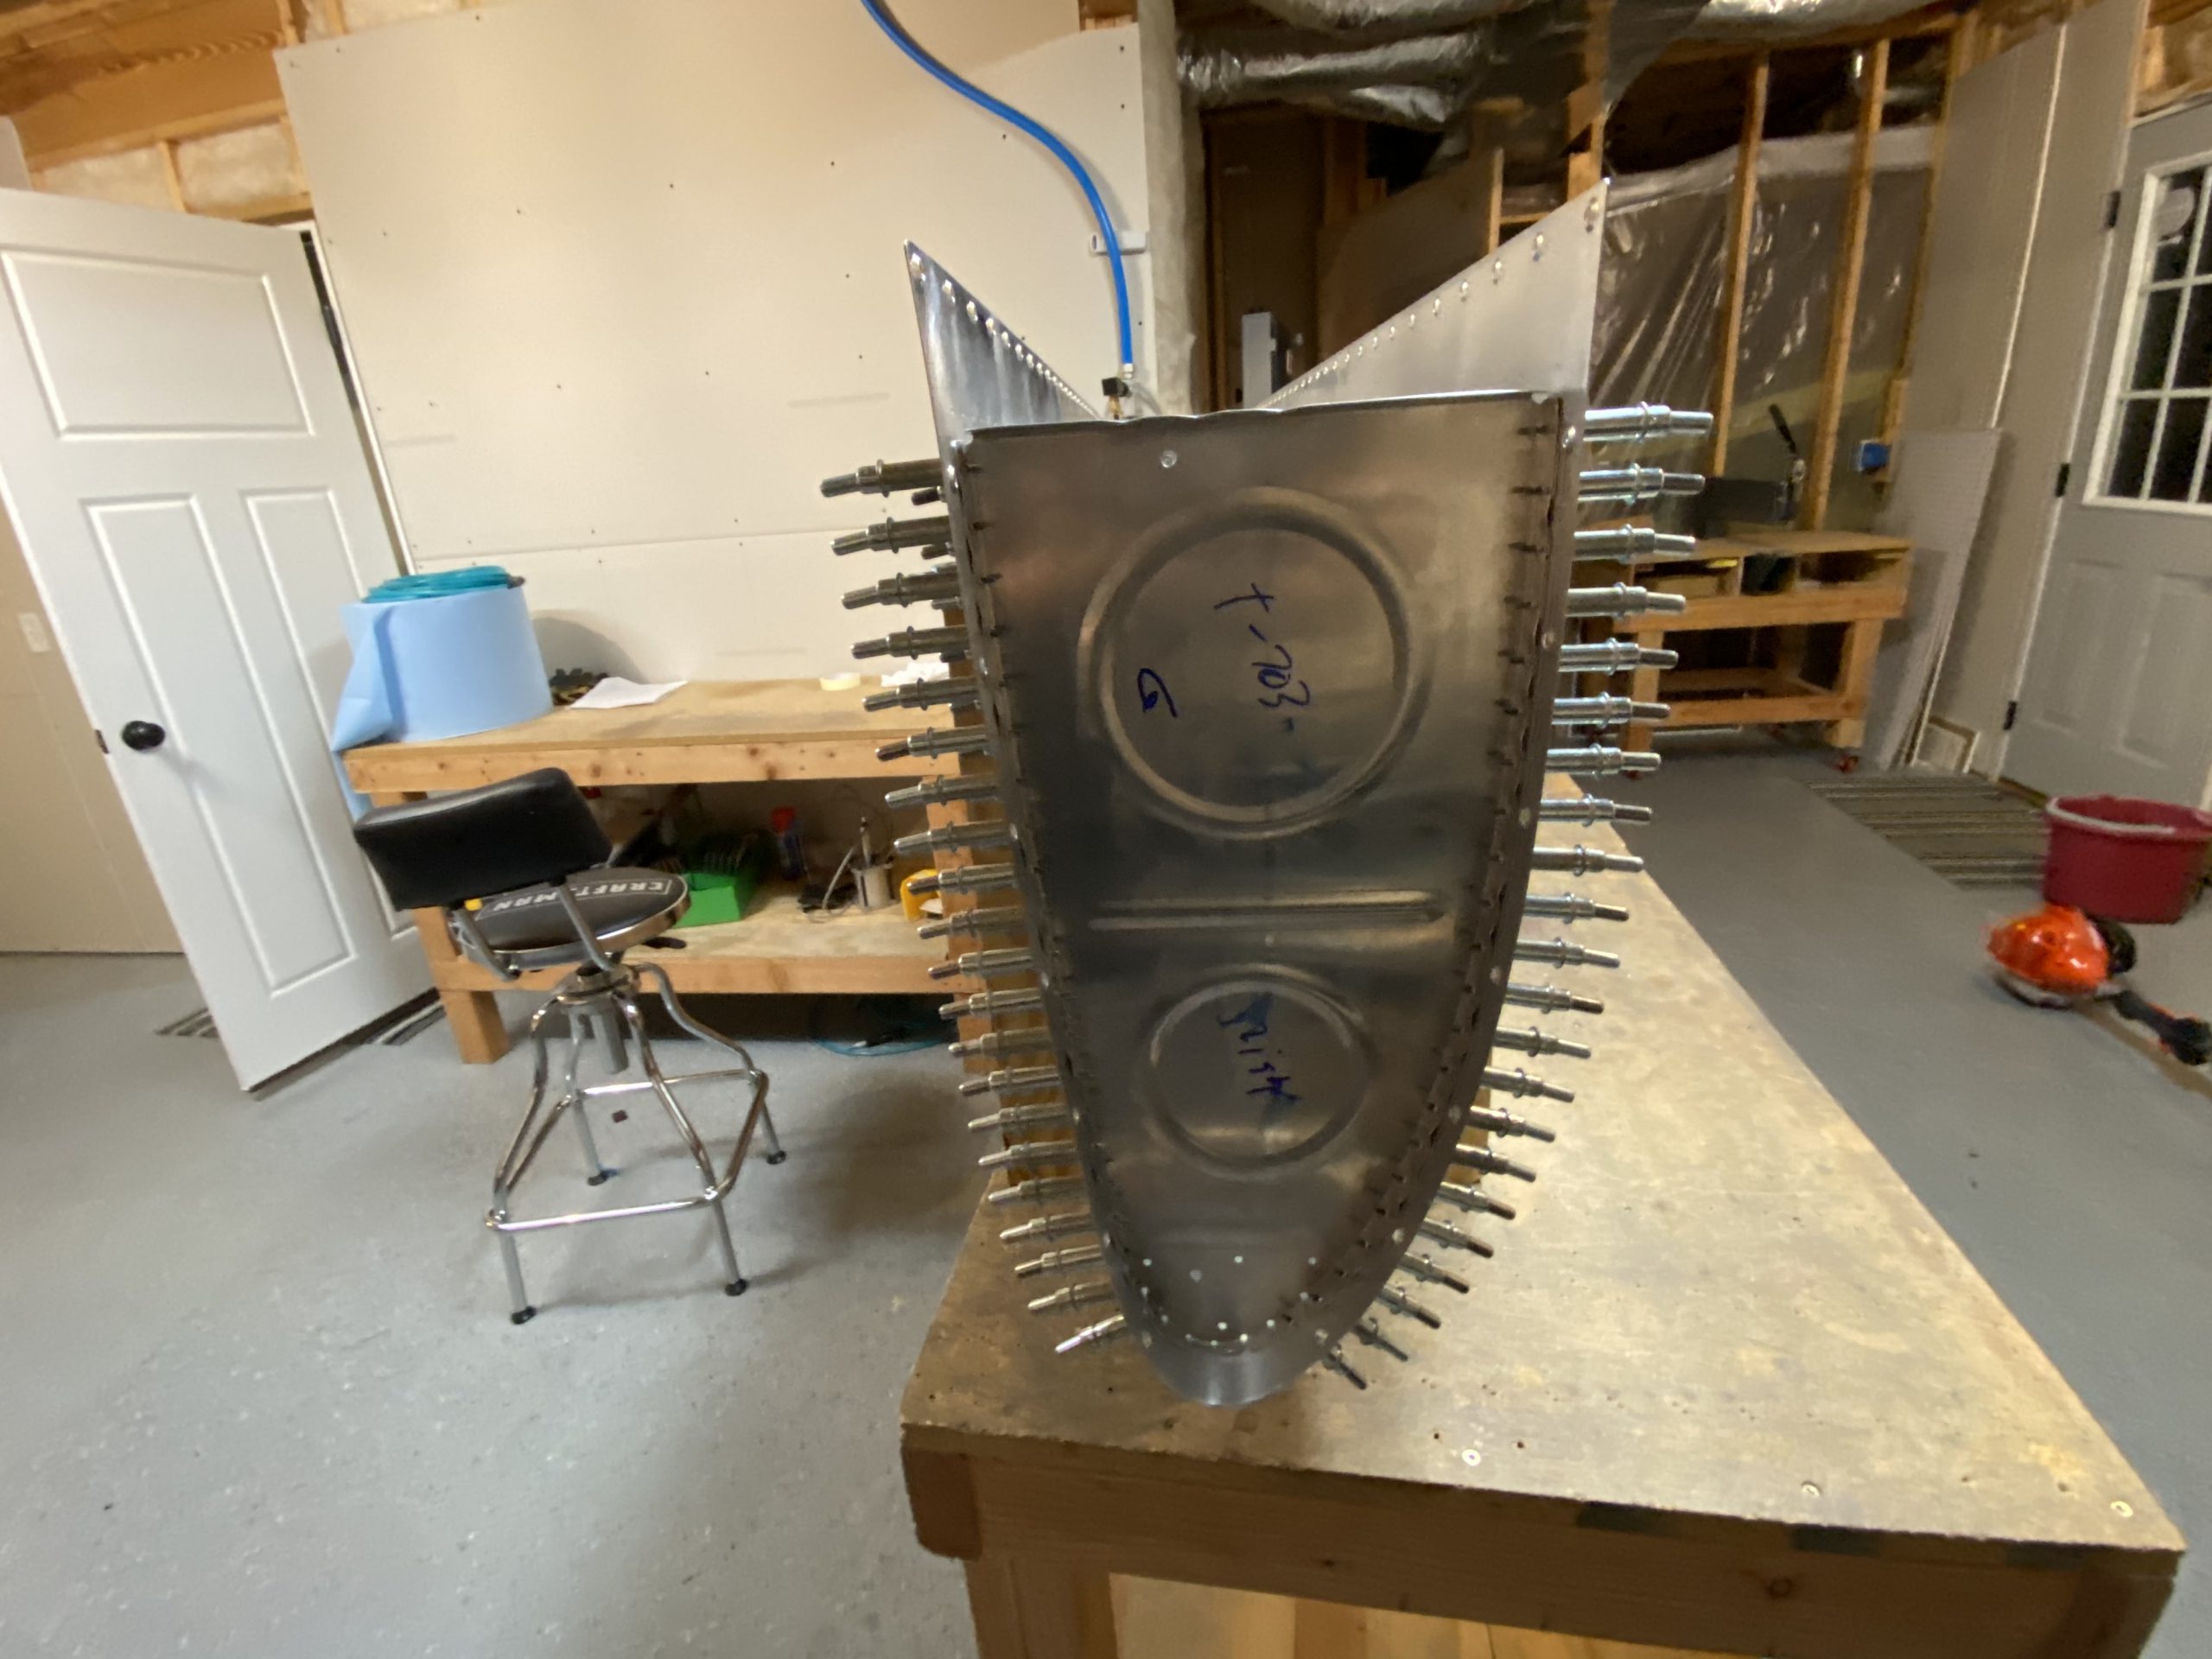
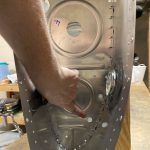
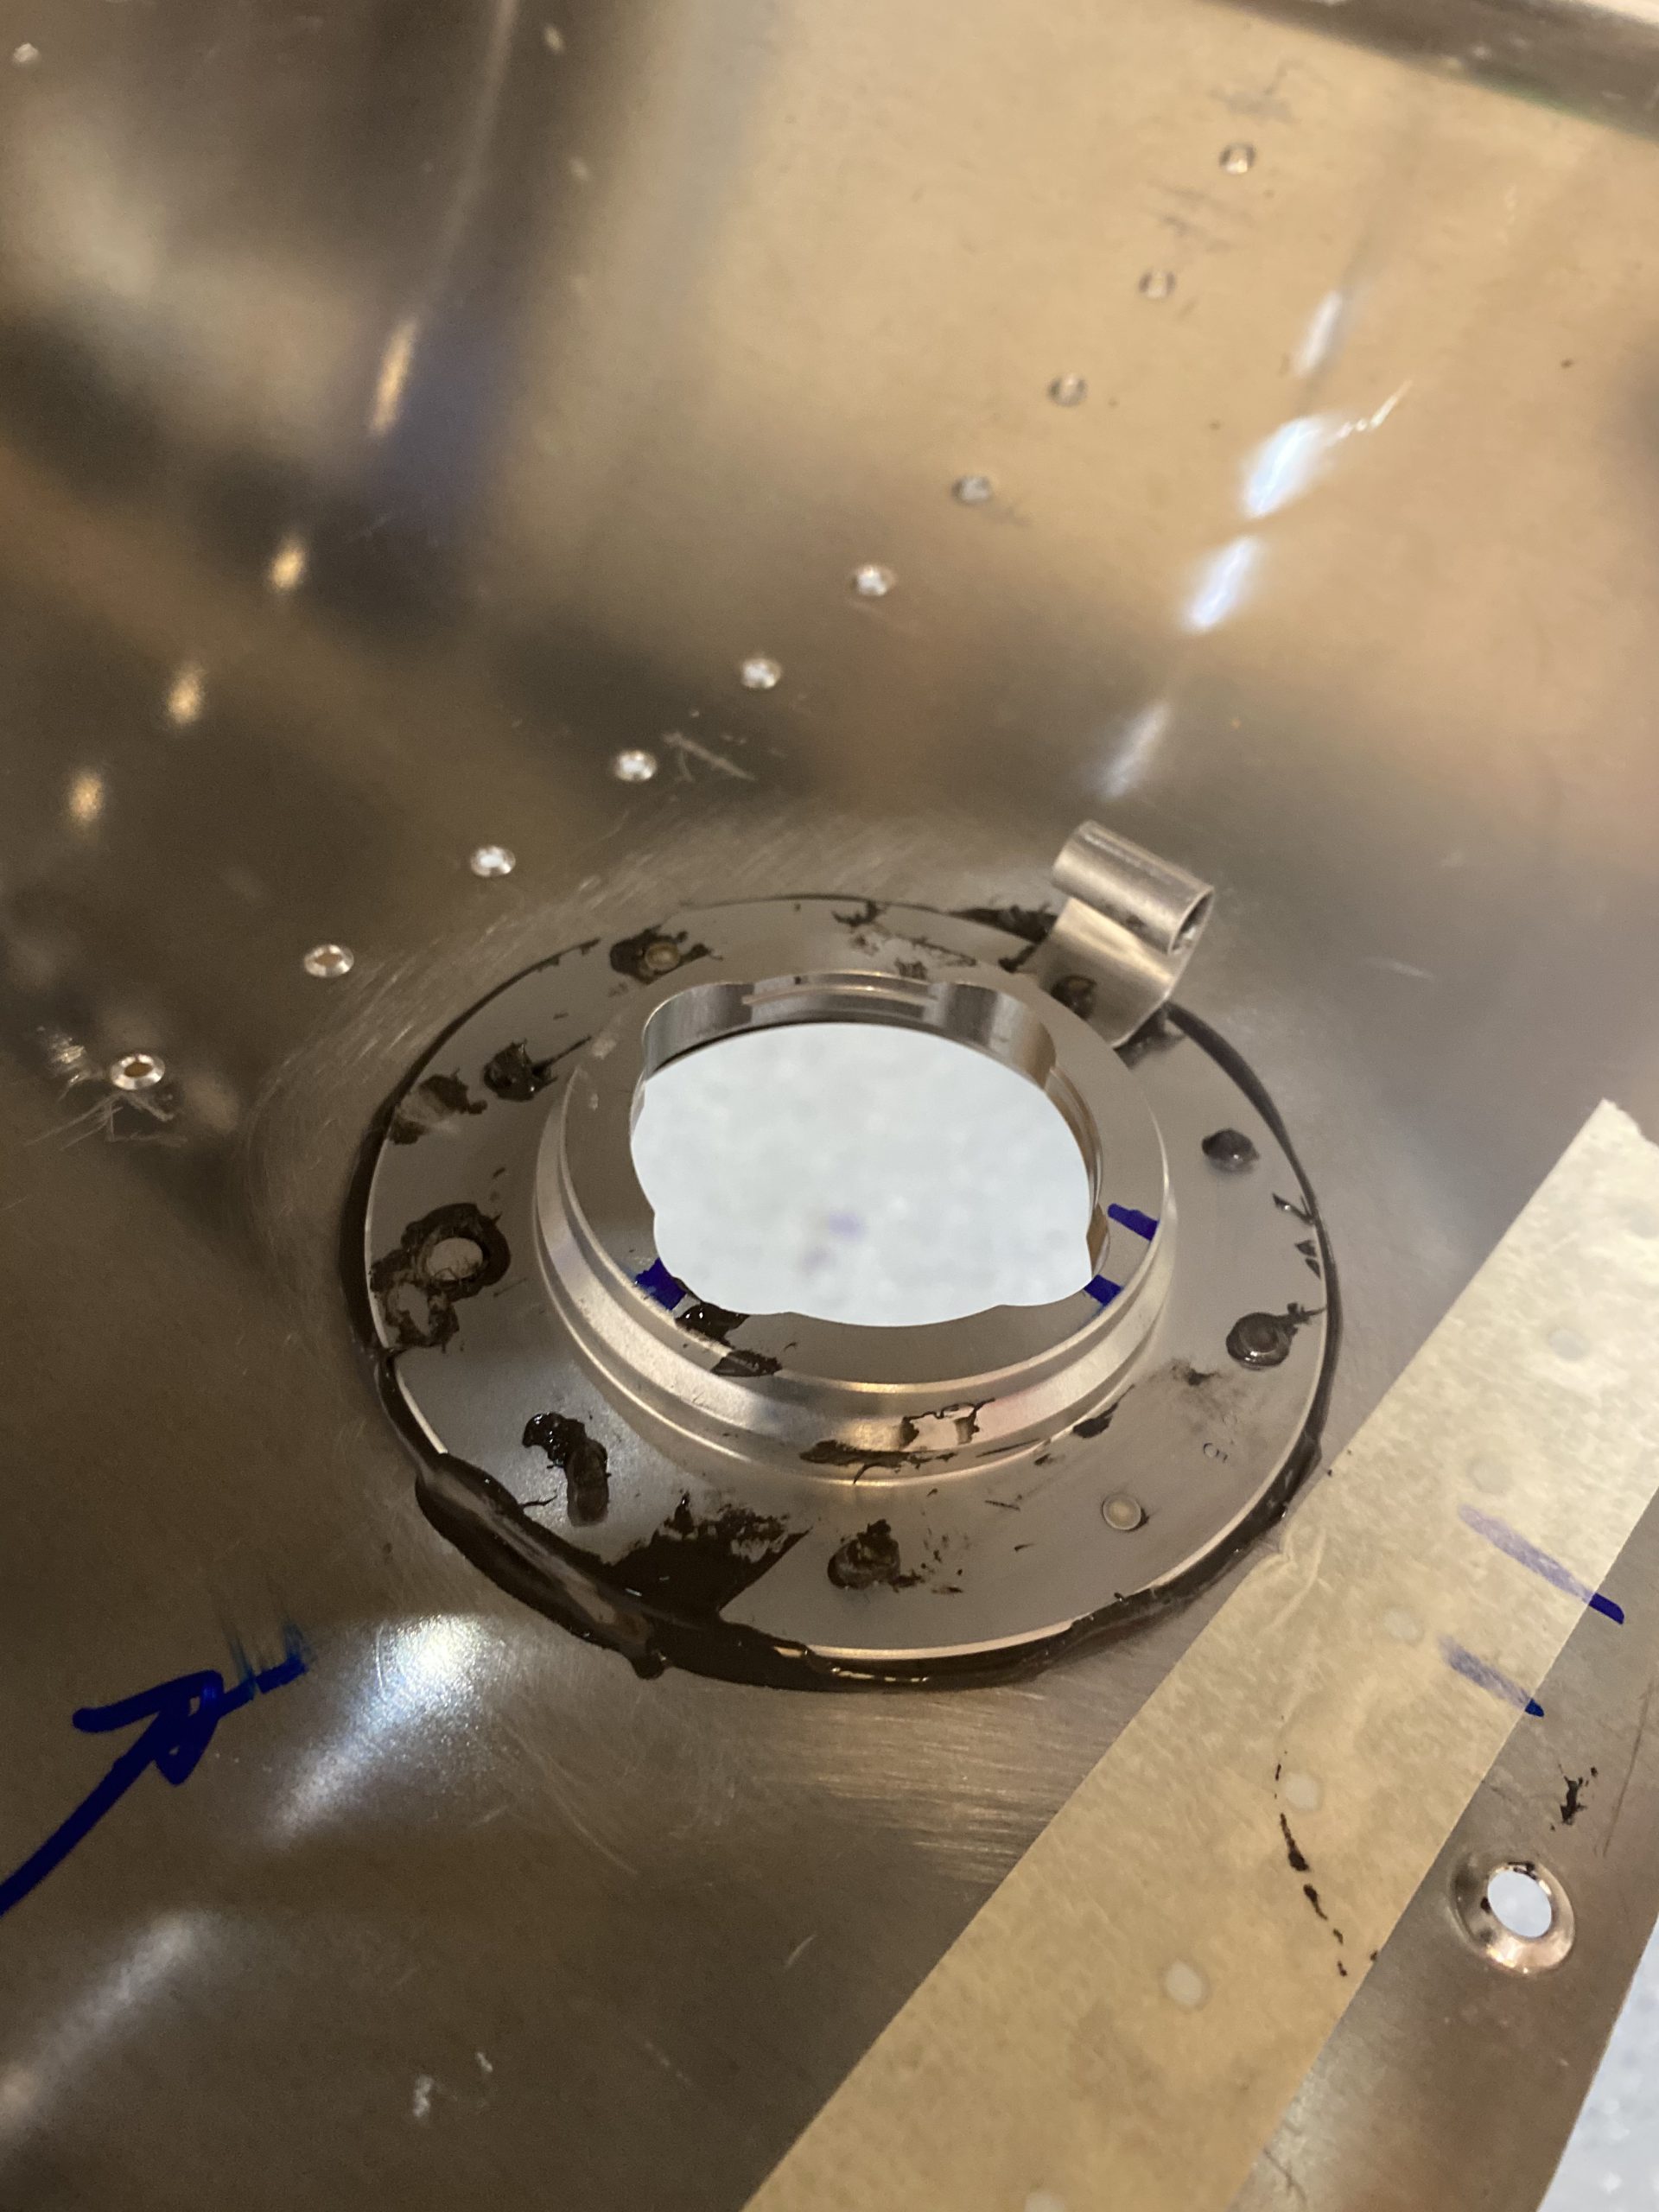
After I had the access plate on, it was time to install the float sender and get it sealed up.  I scuffed up the back of the senders mounting flange, cleaned it with MEK and then gently inserted it into the tank and screwed the stainless cap screws in place.  I torqued them down and smoothed out the squished out sealant into a filet. here is what the end product looked like:

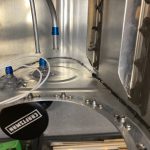
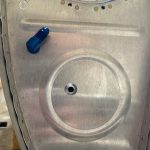
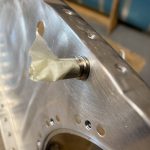
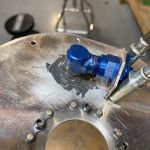
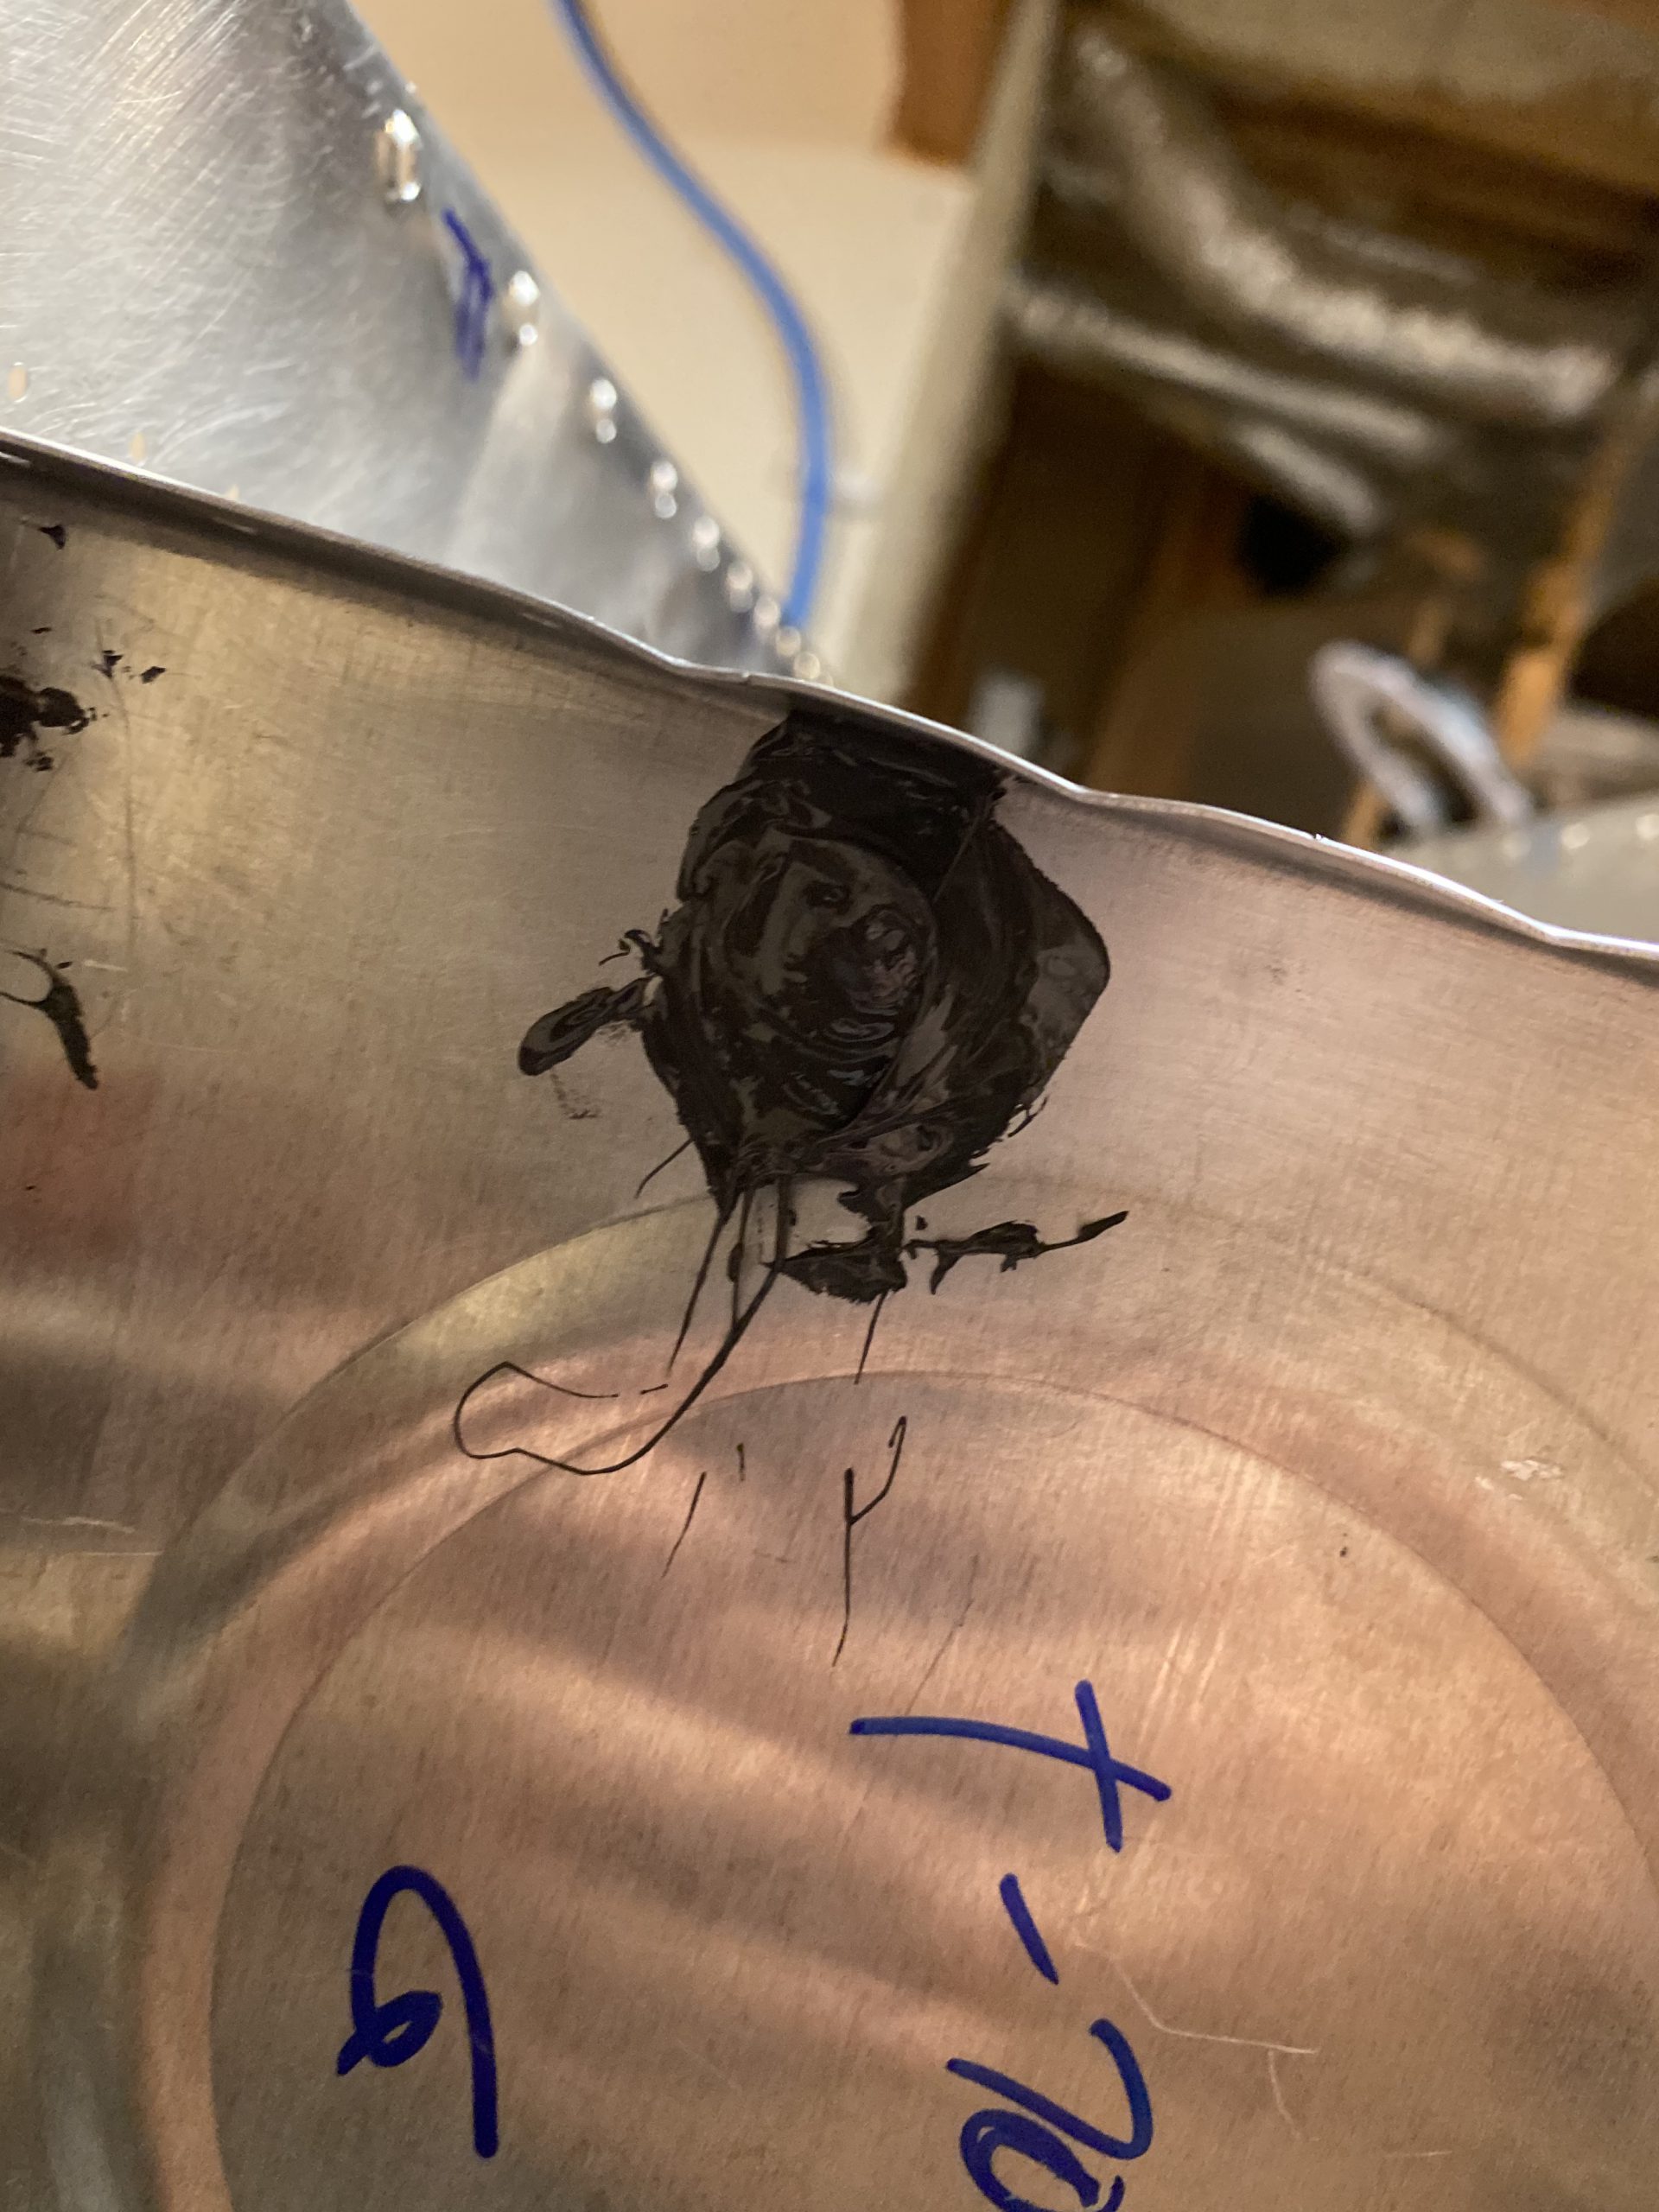
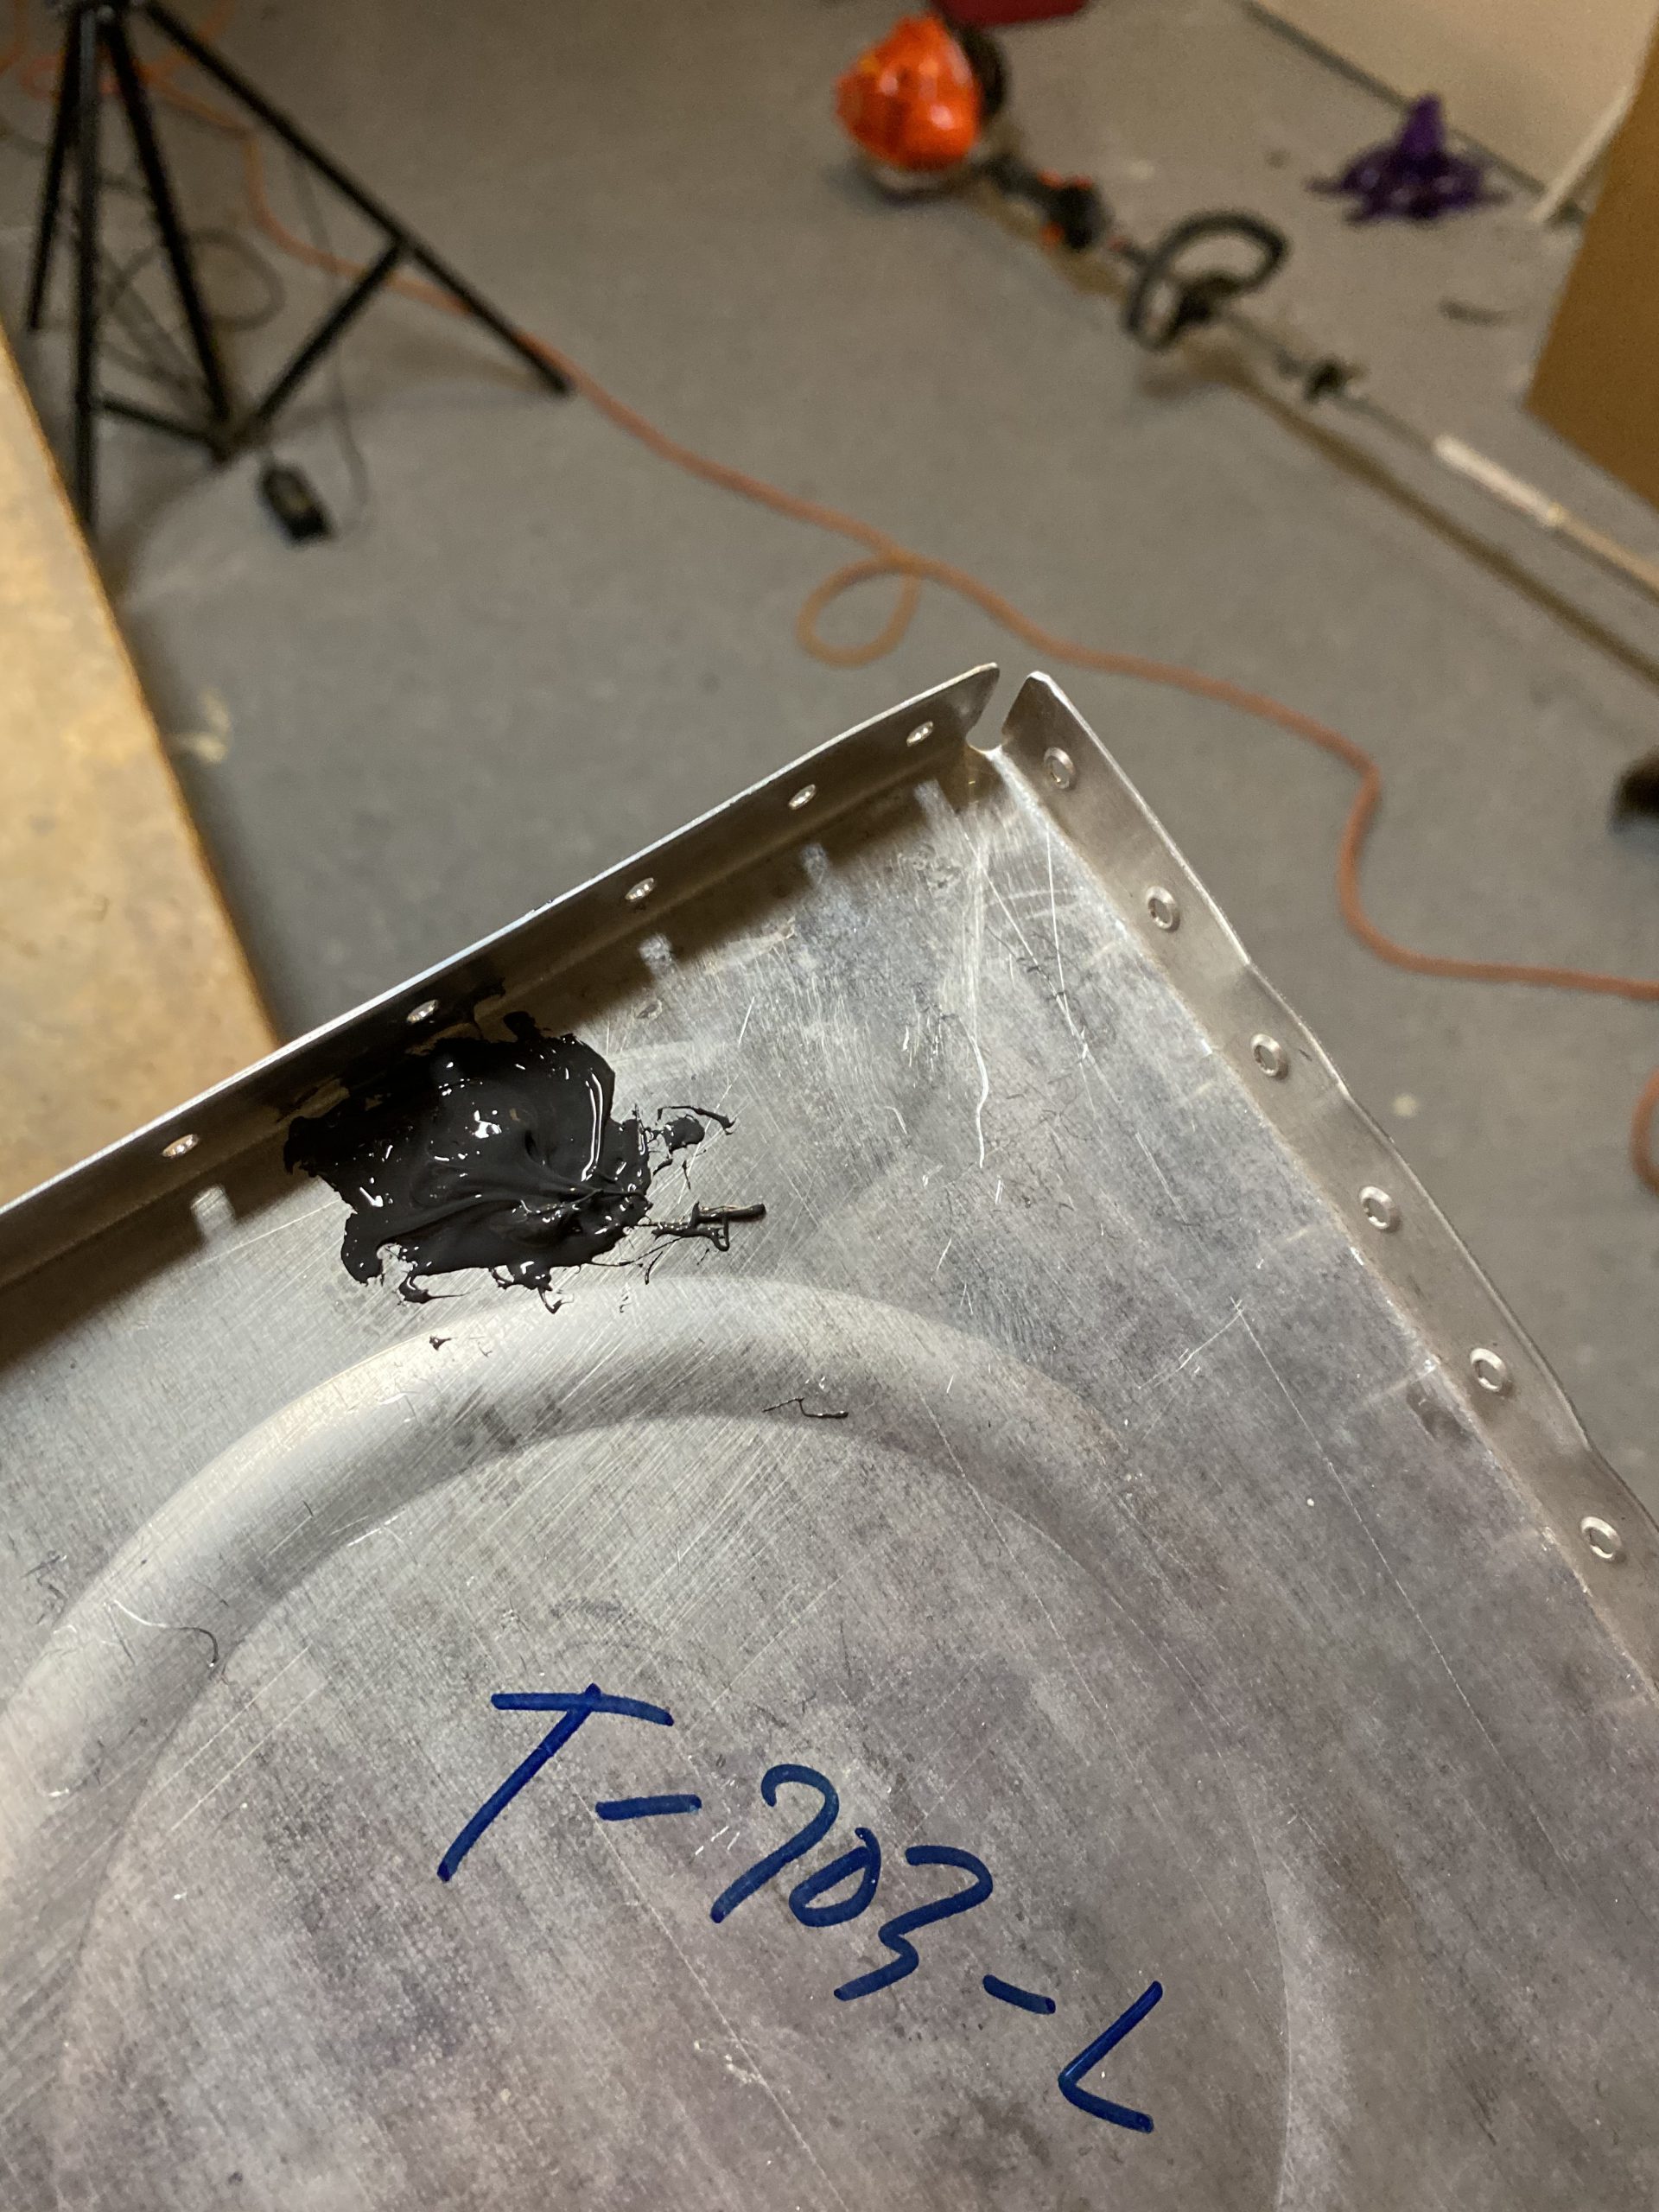
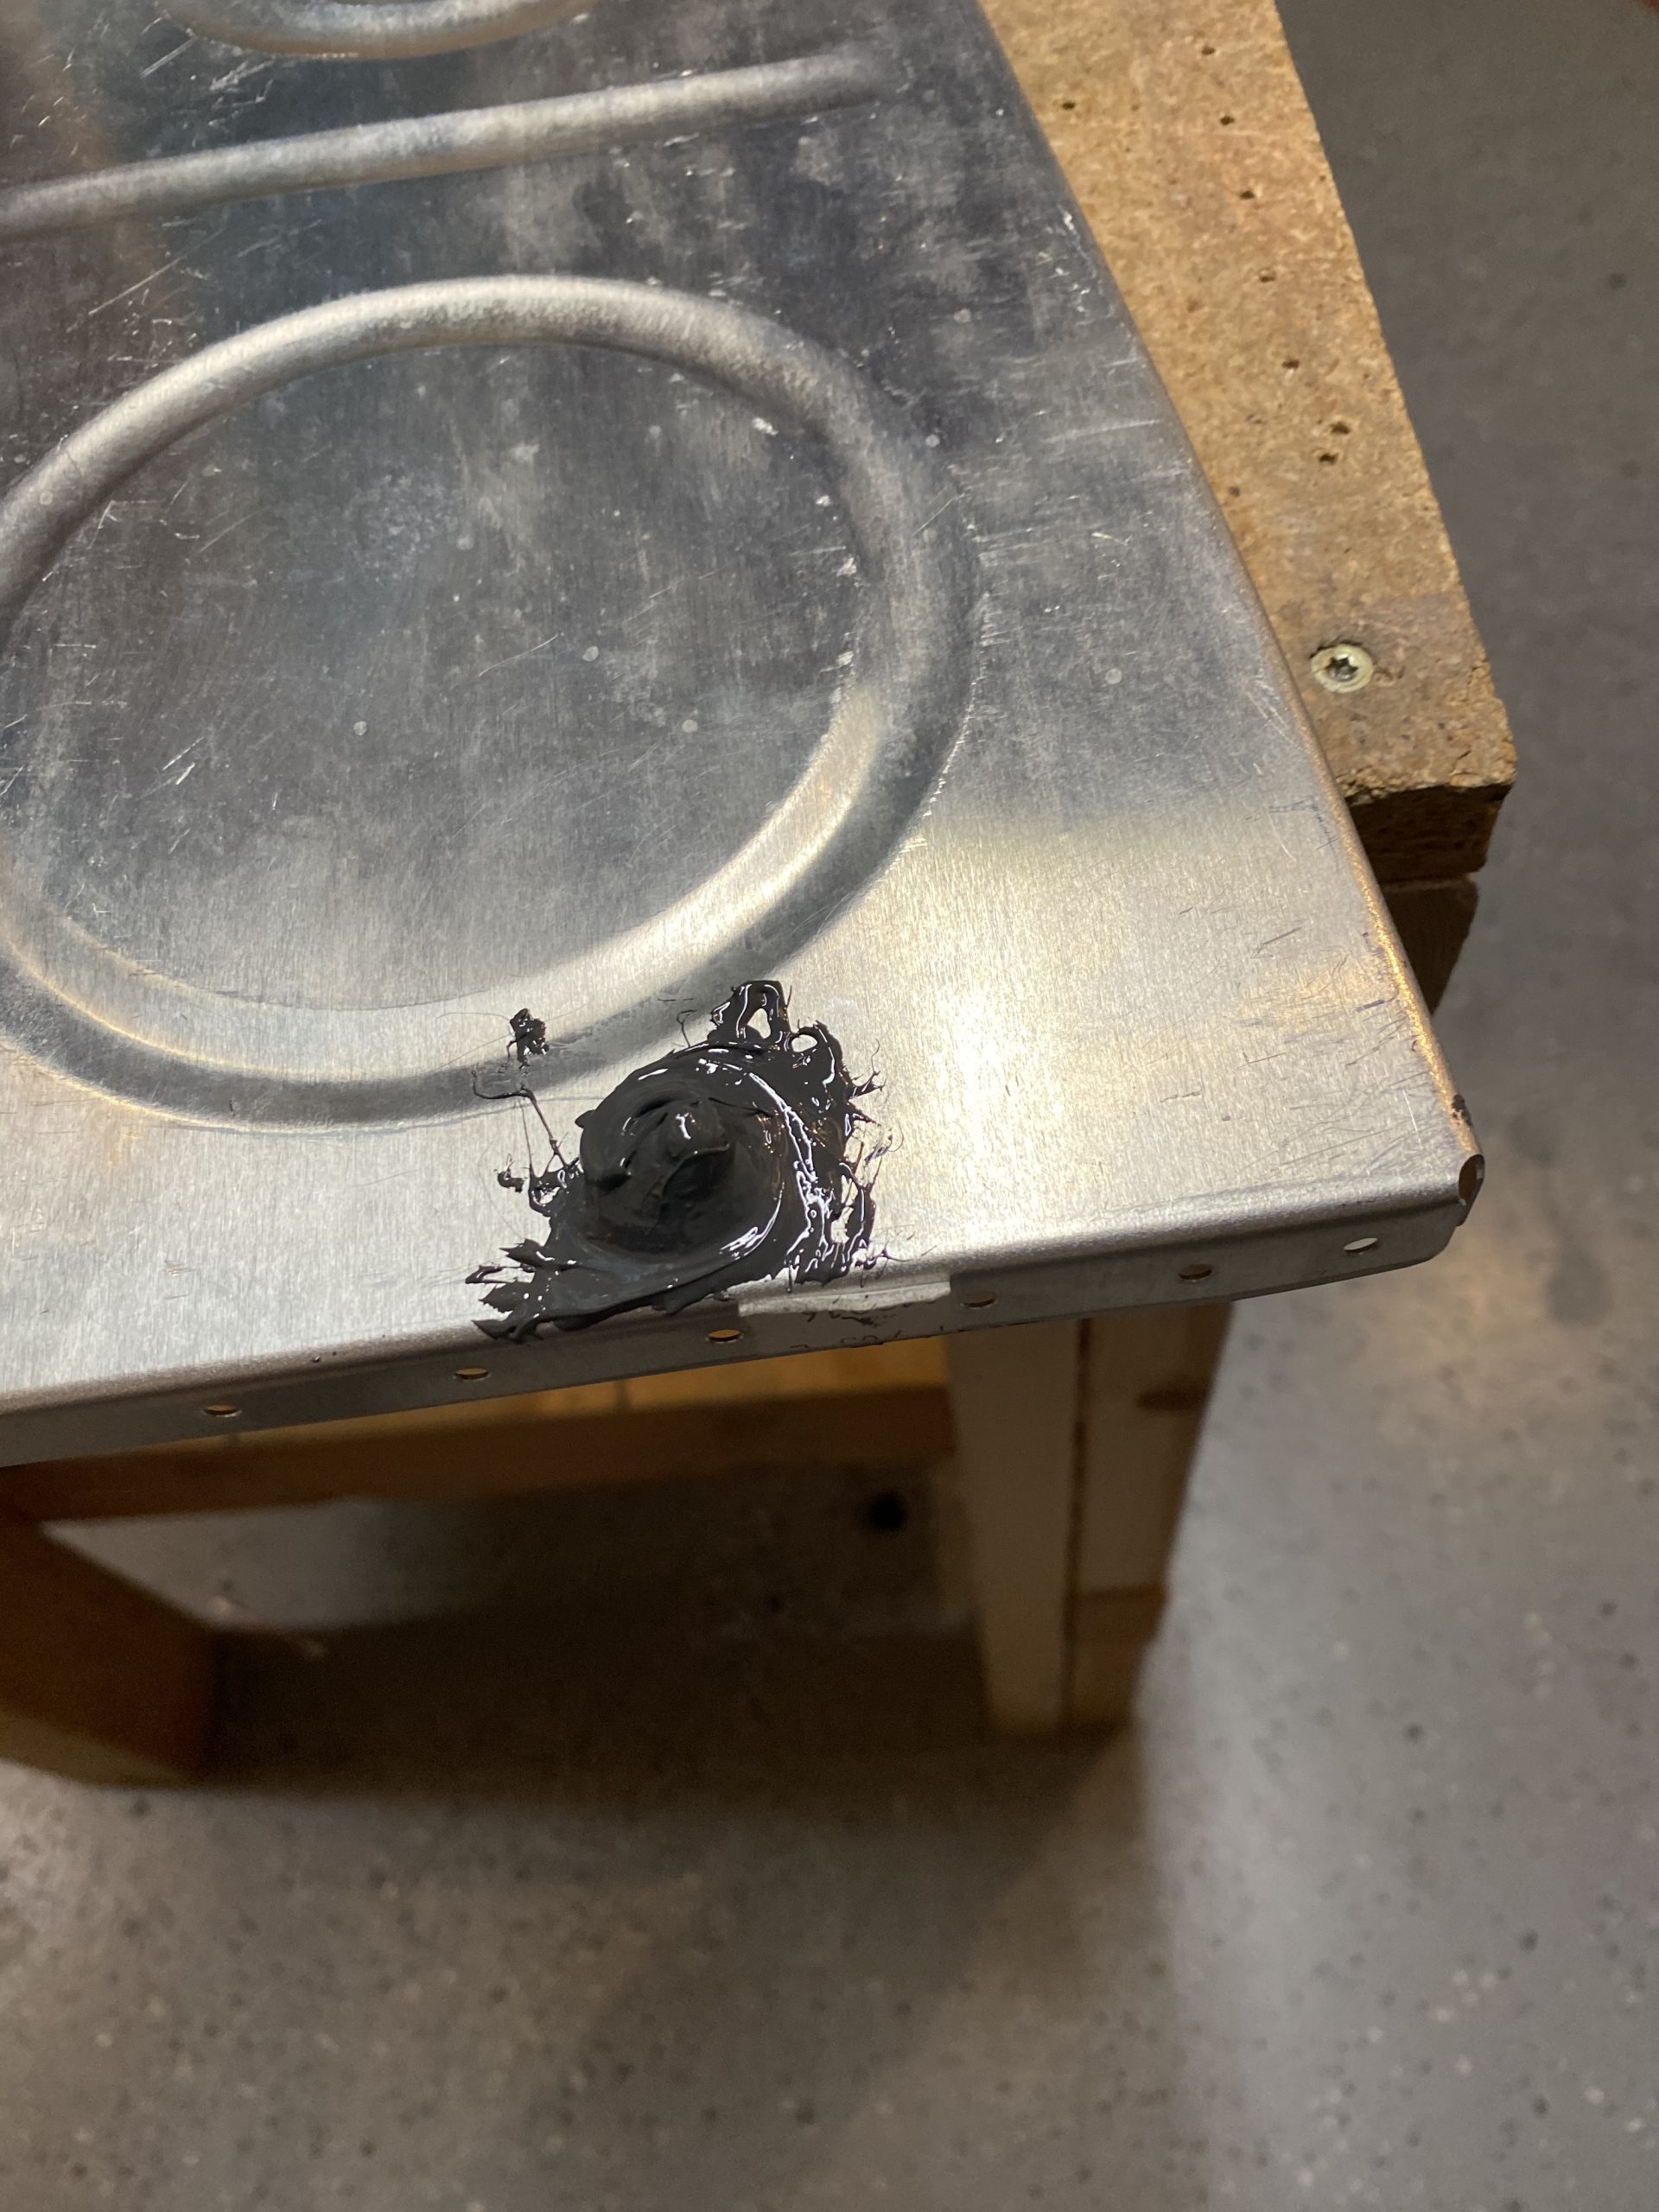
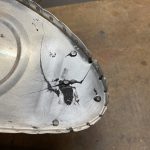
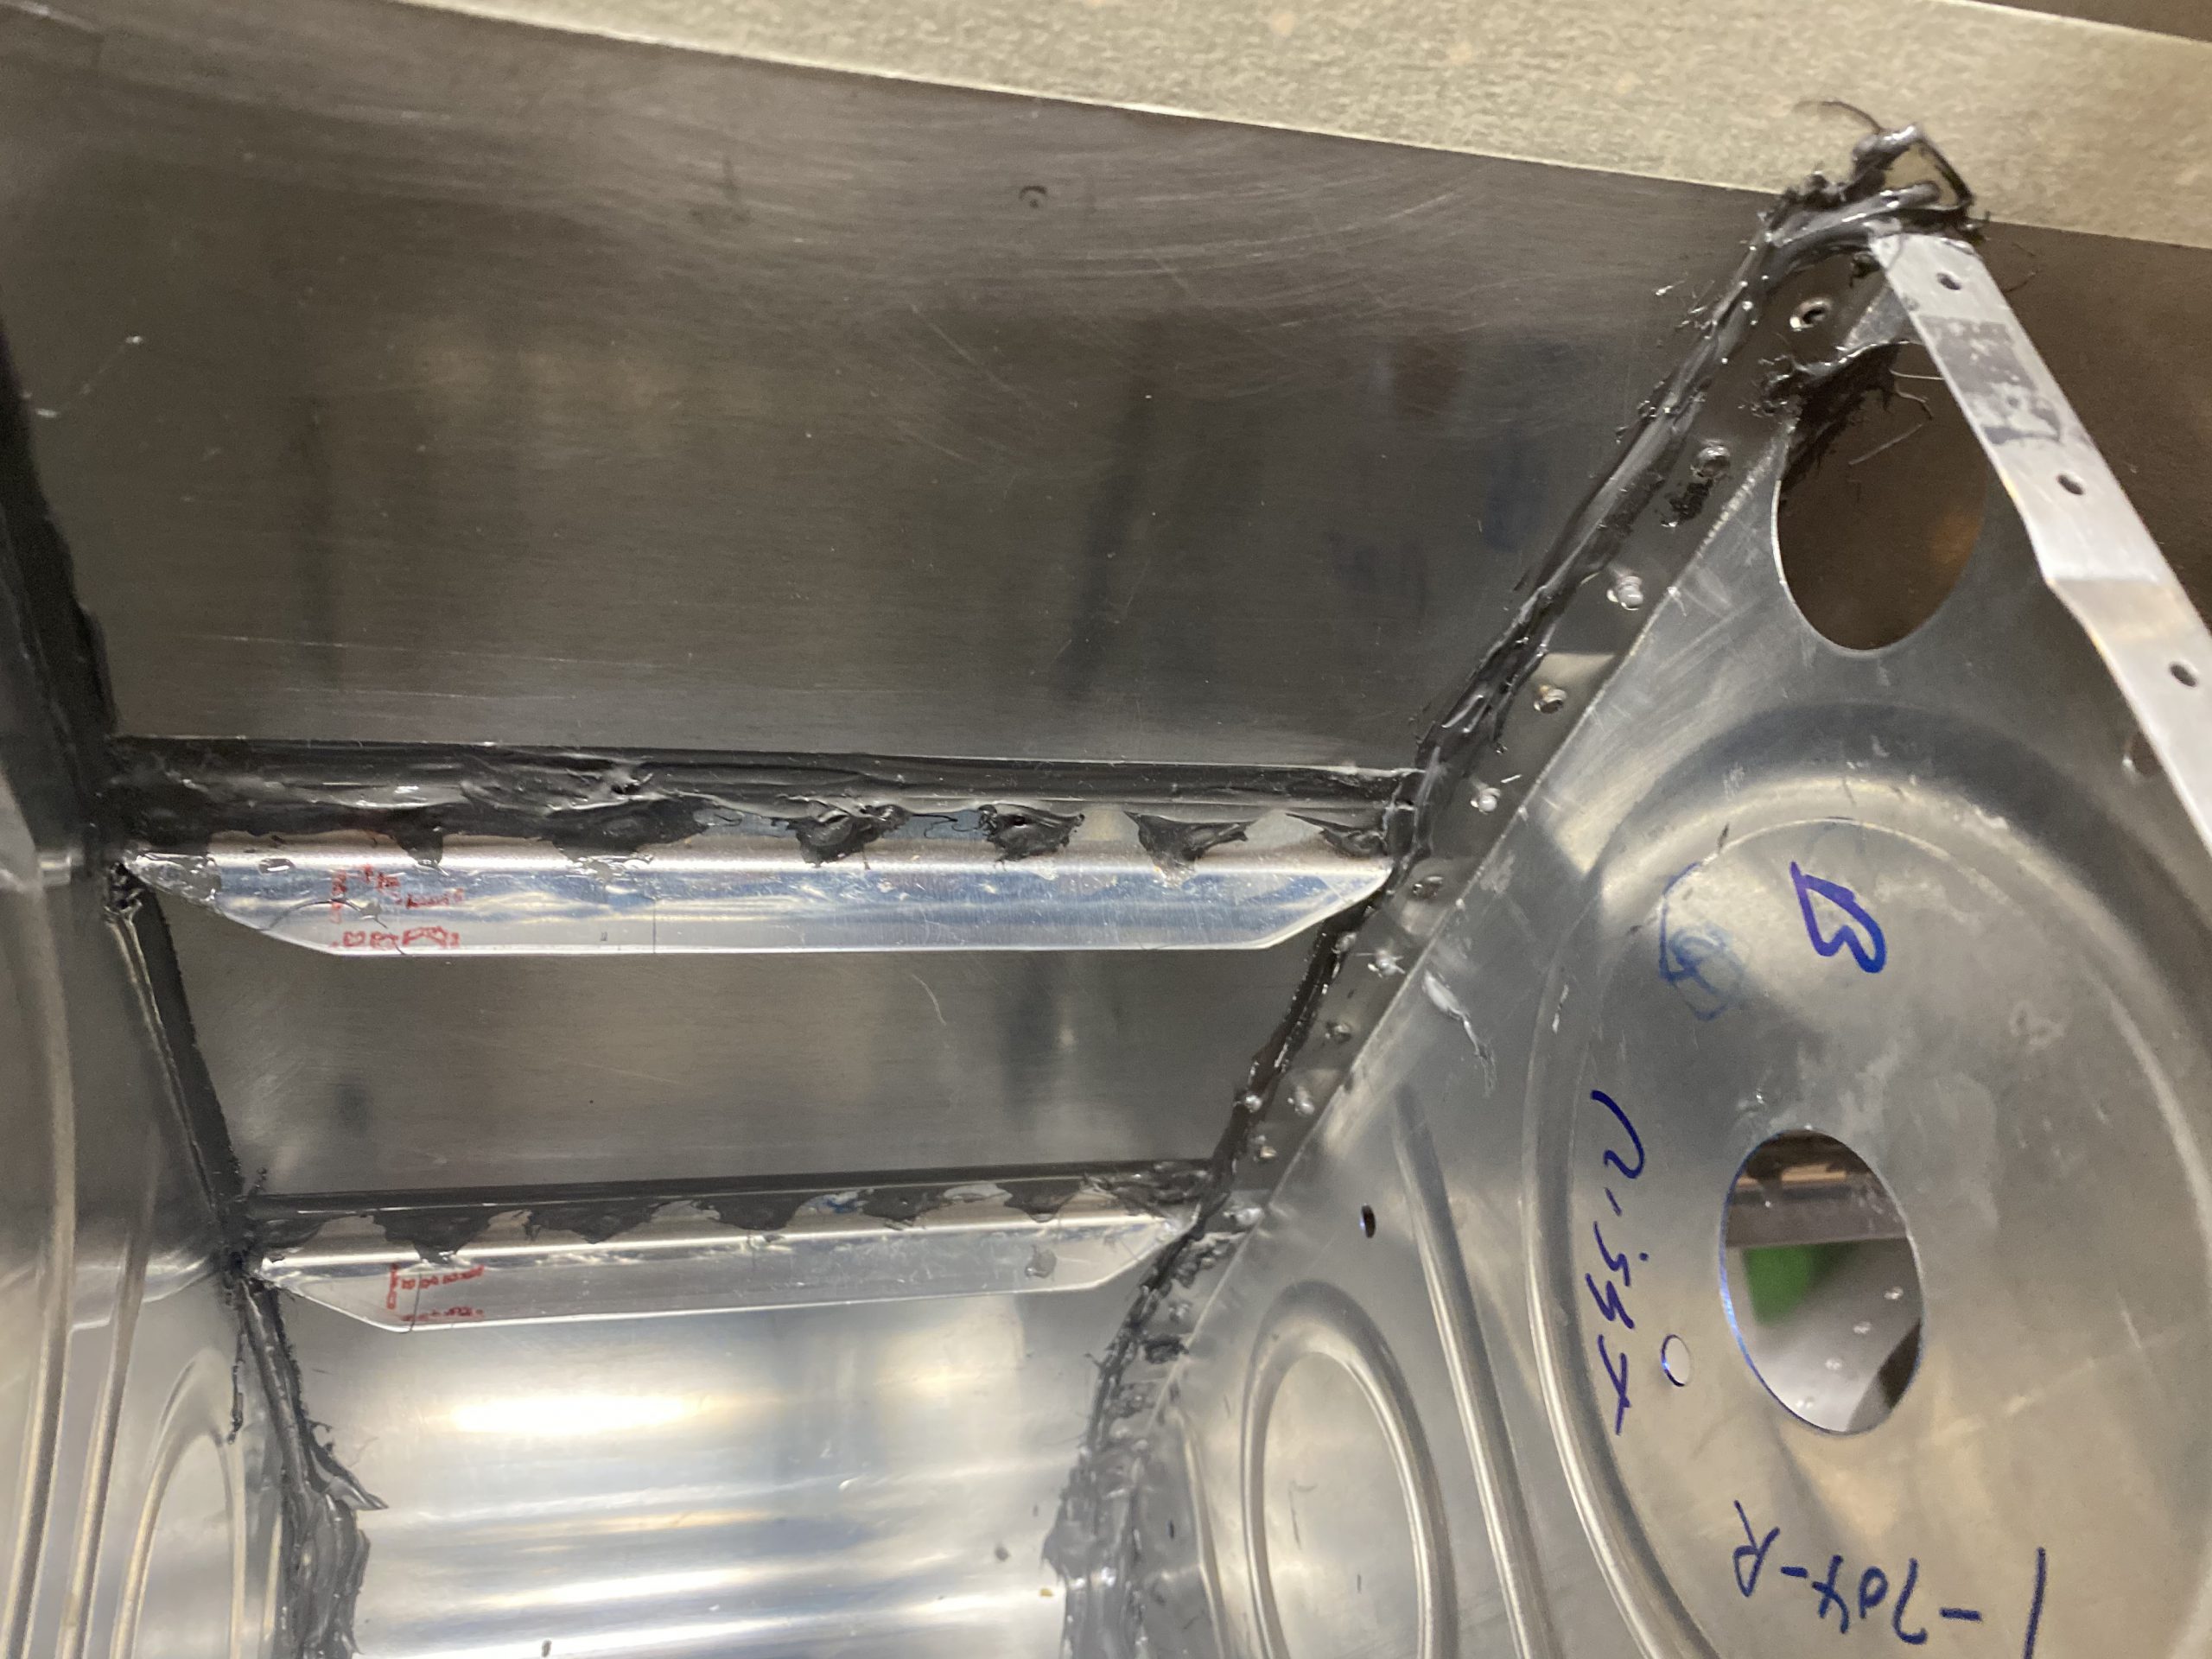
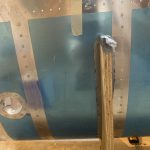
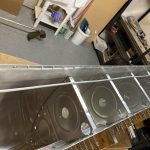
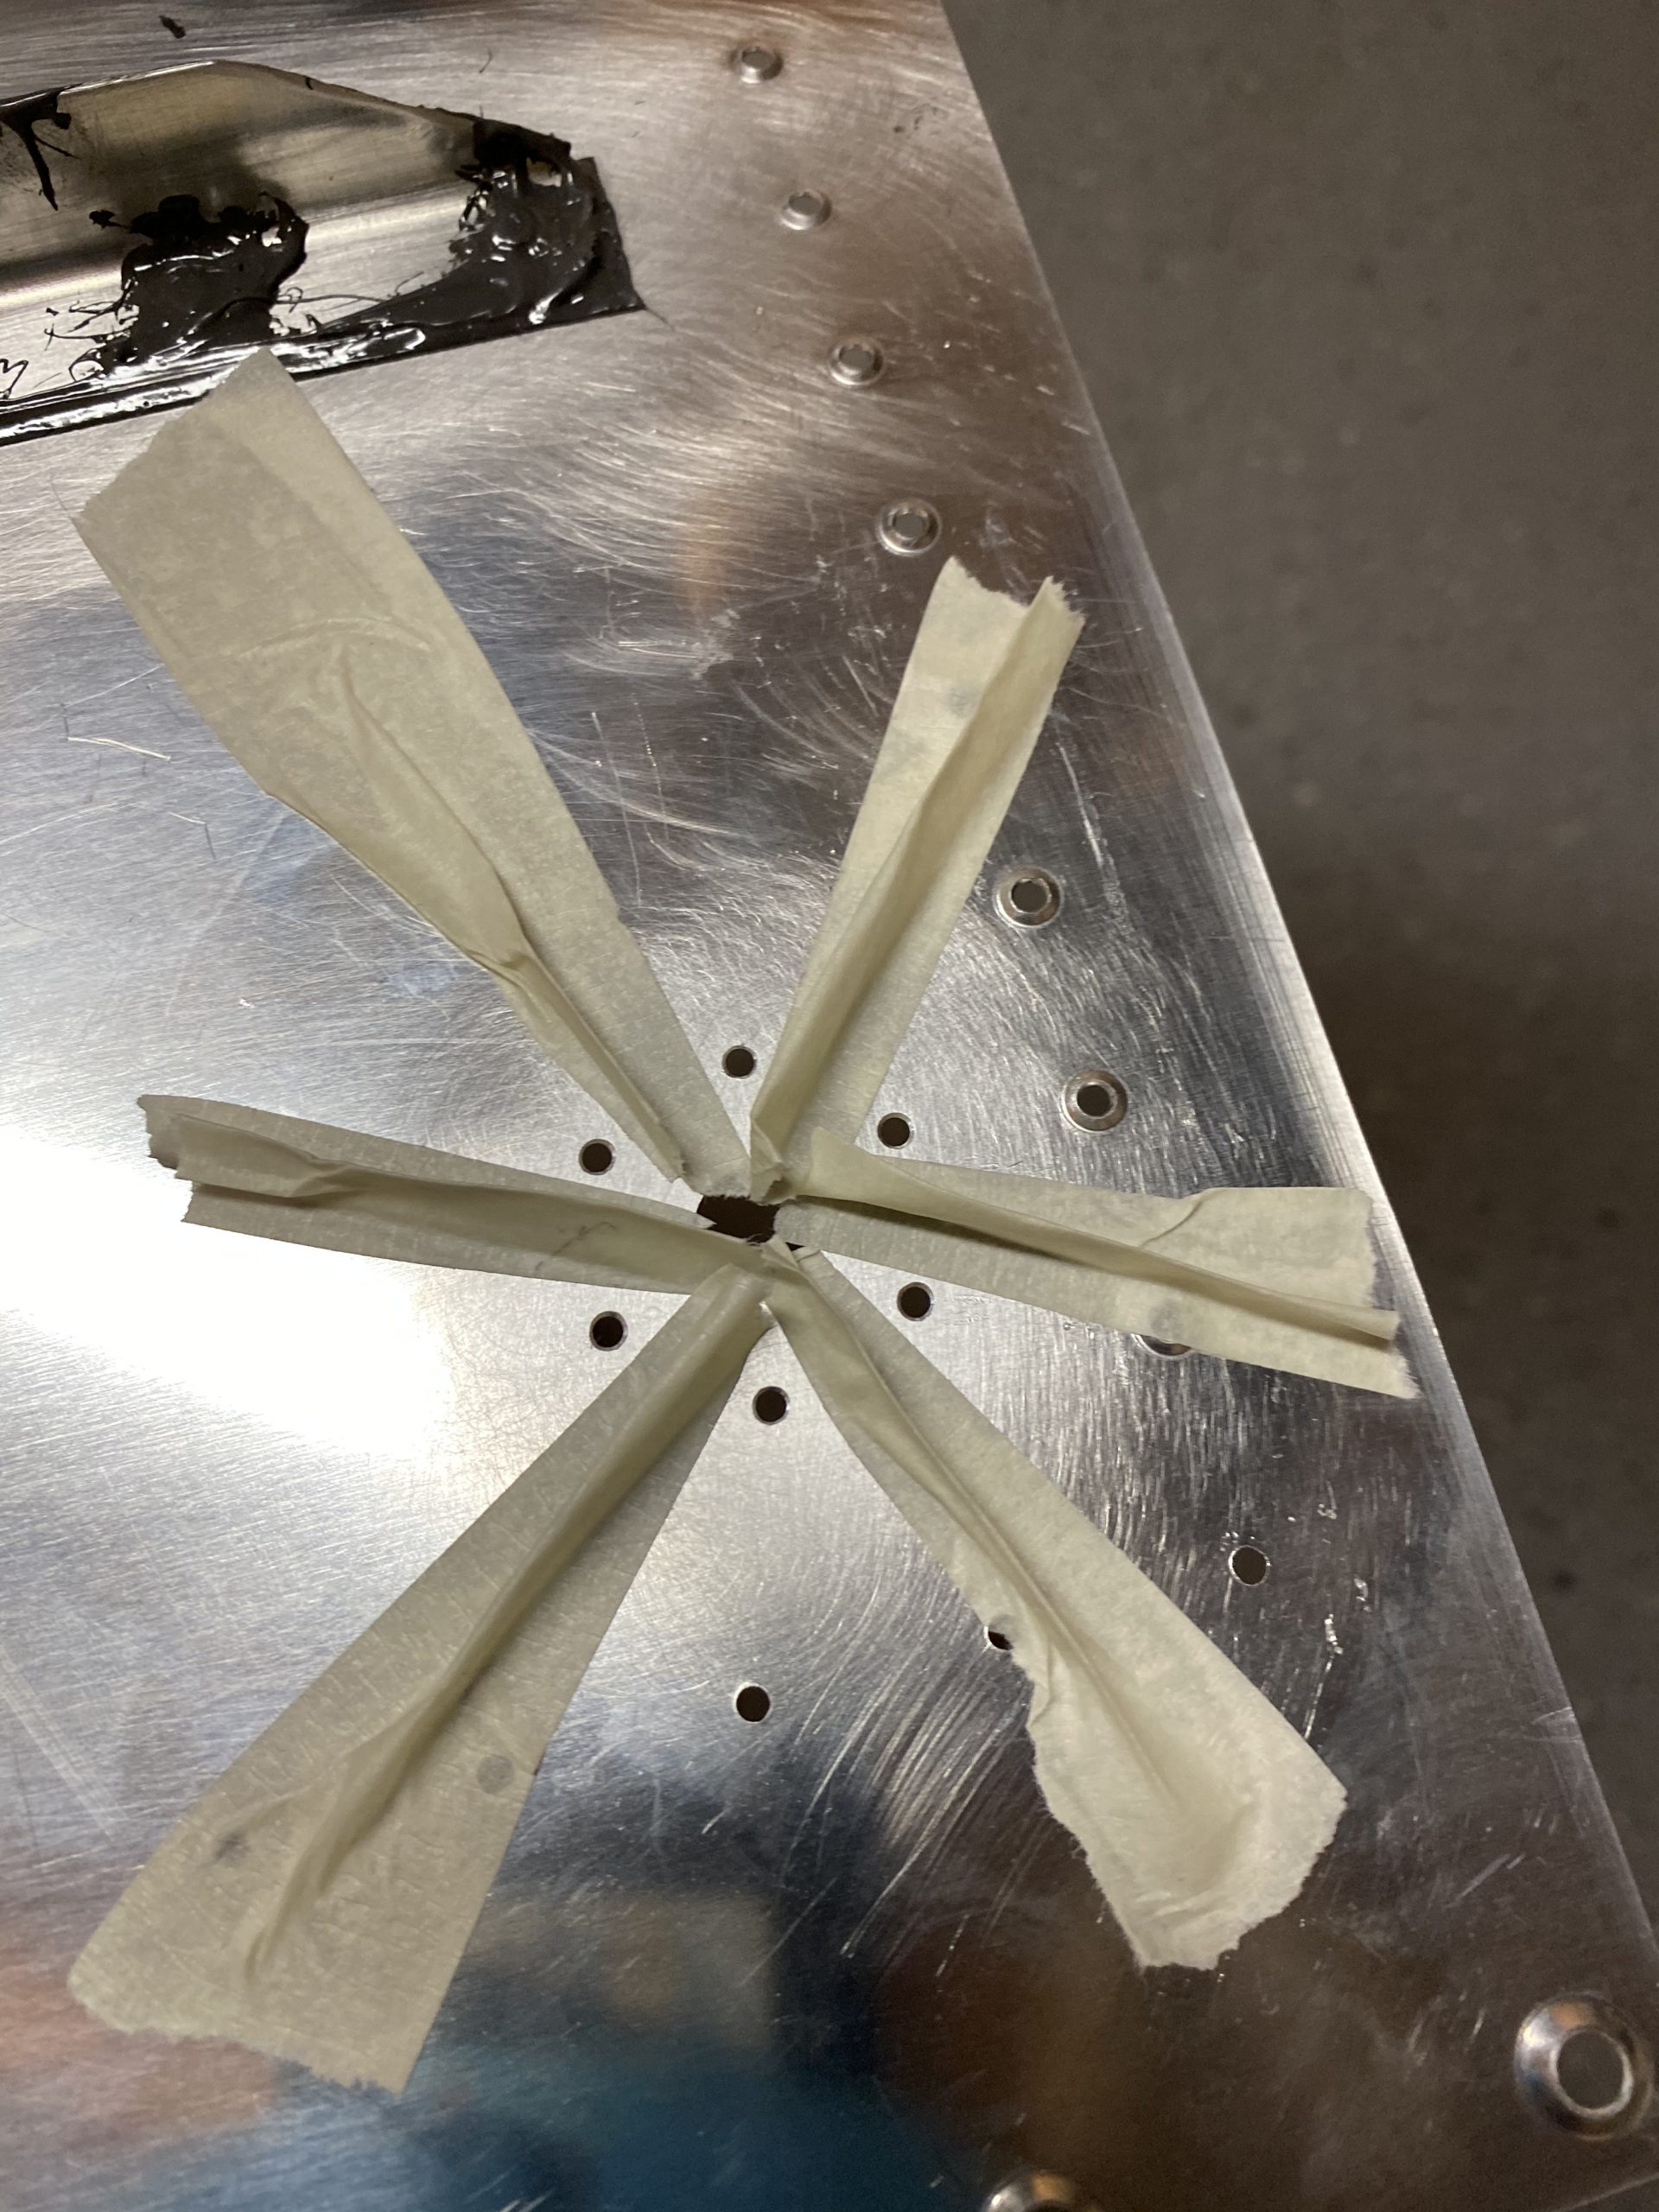
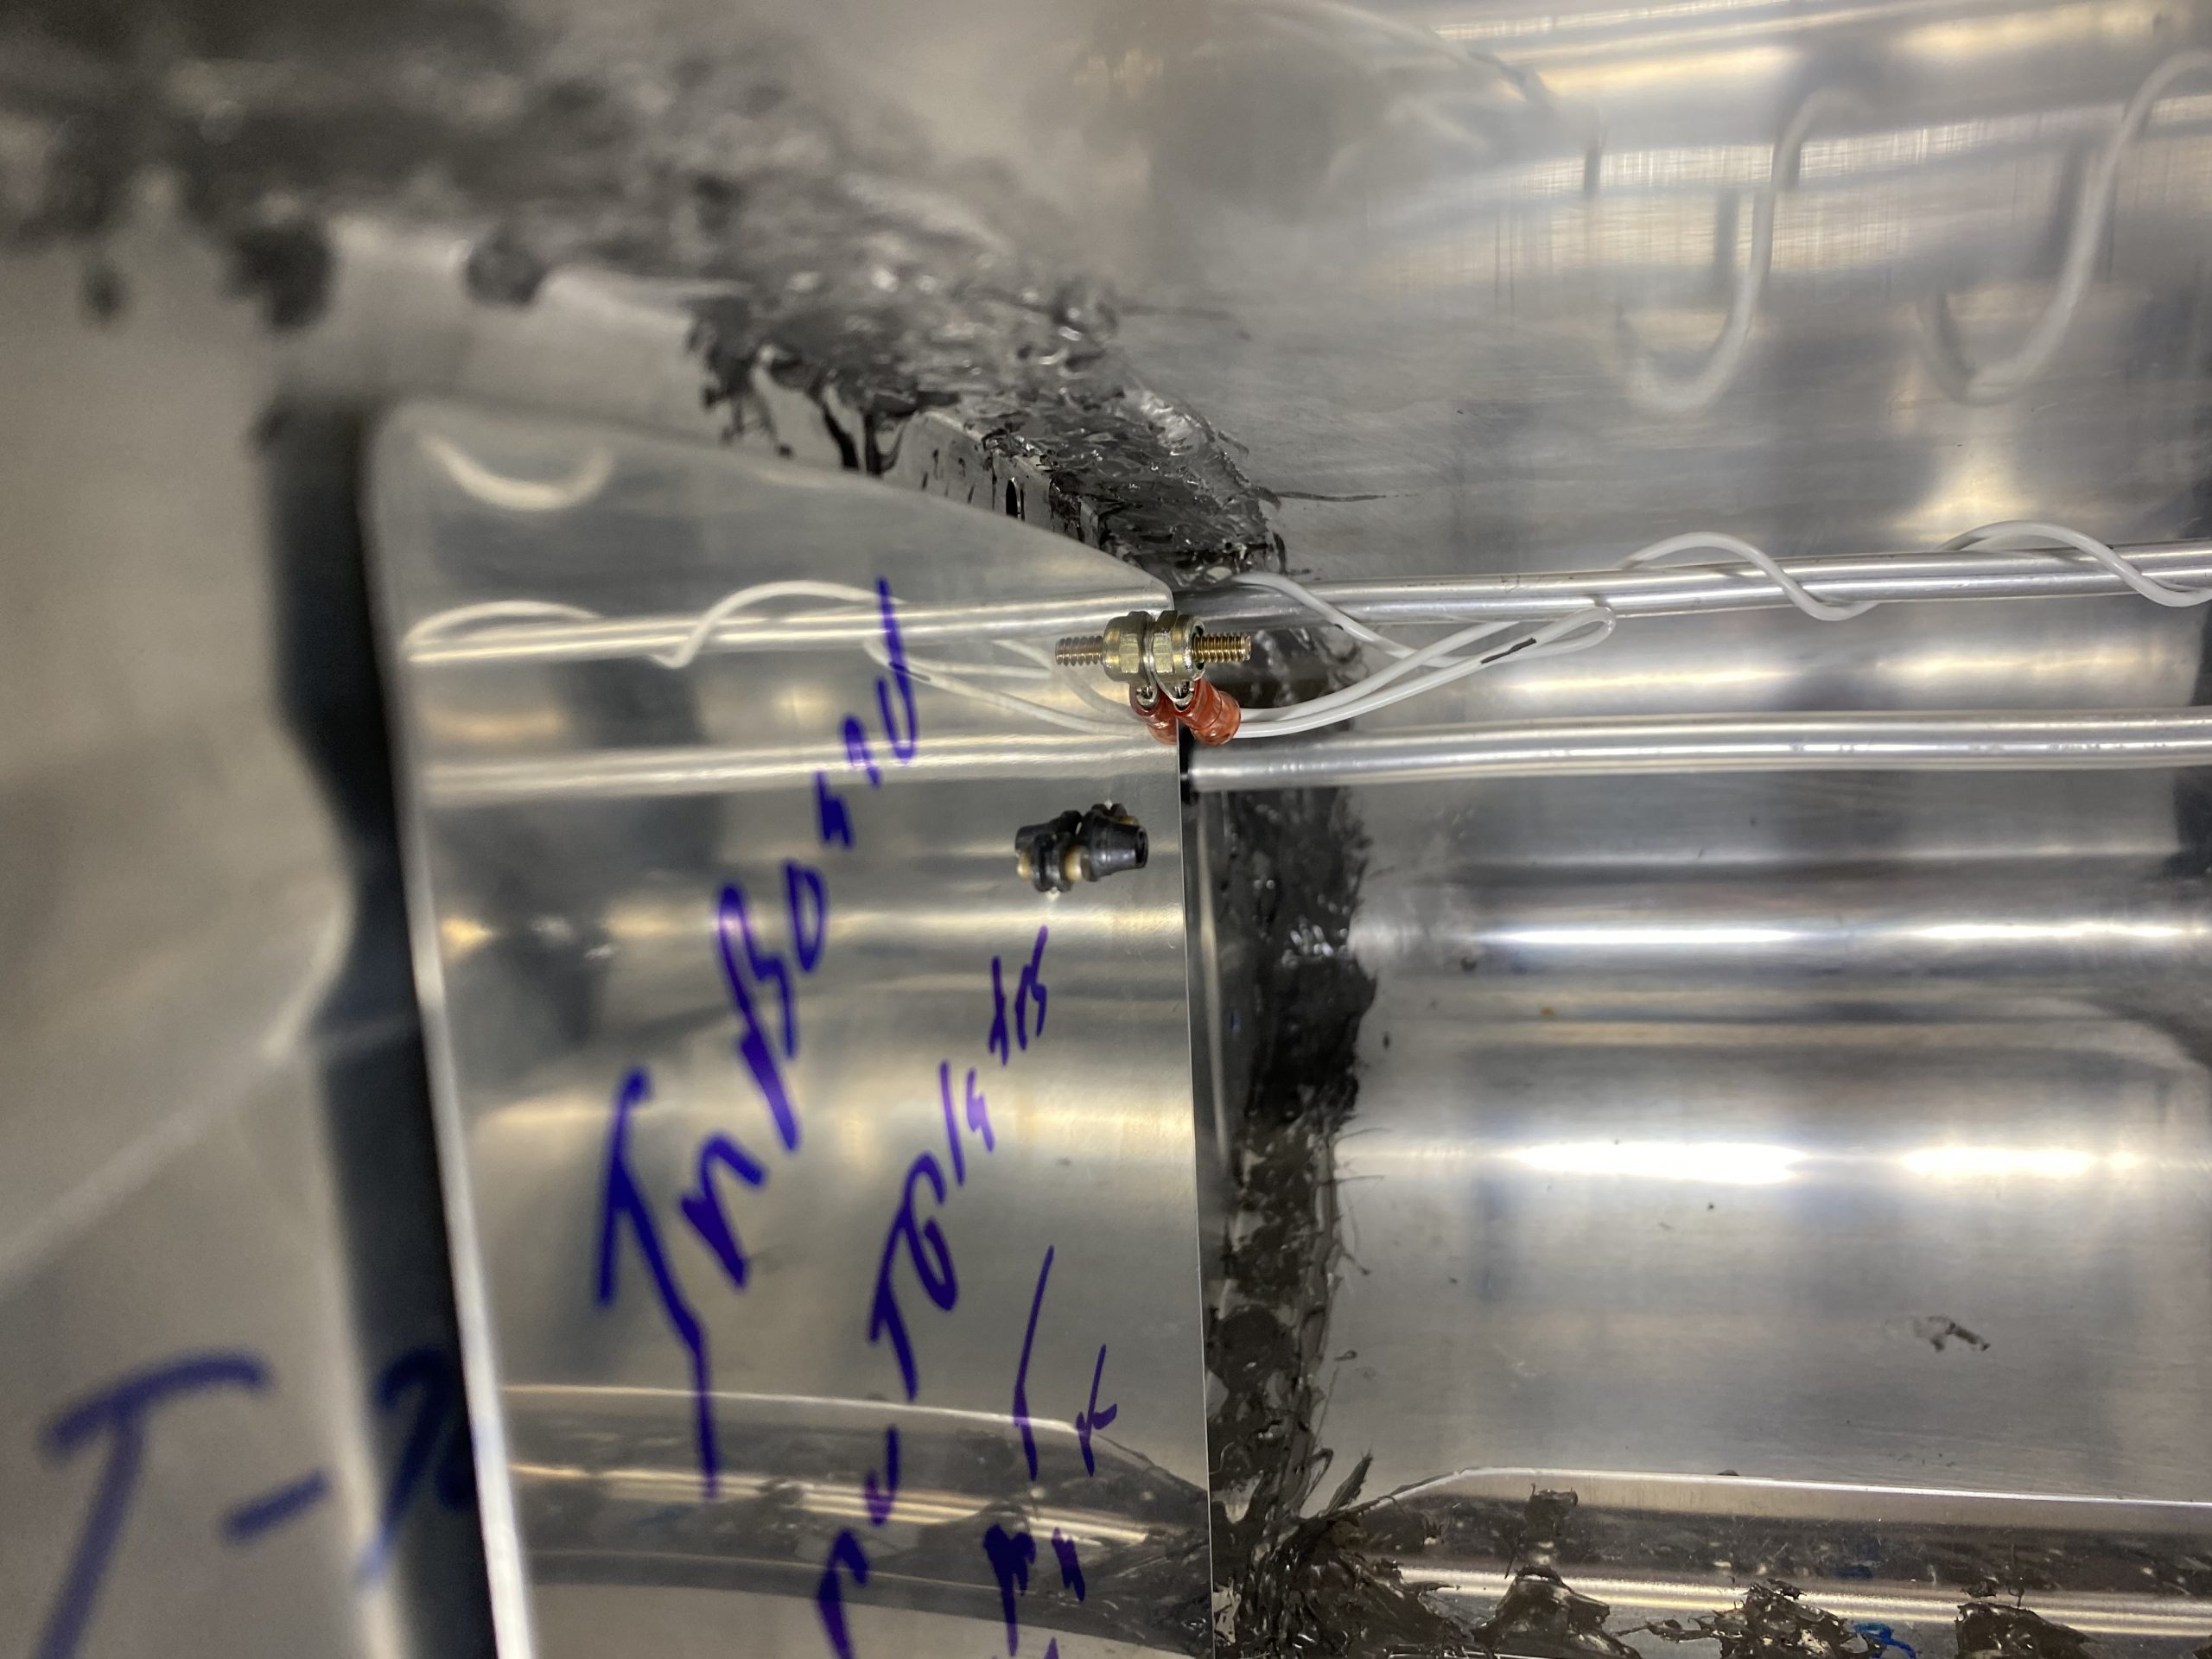
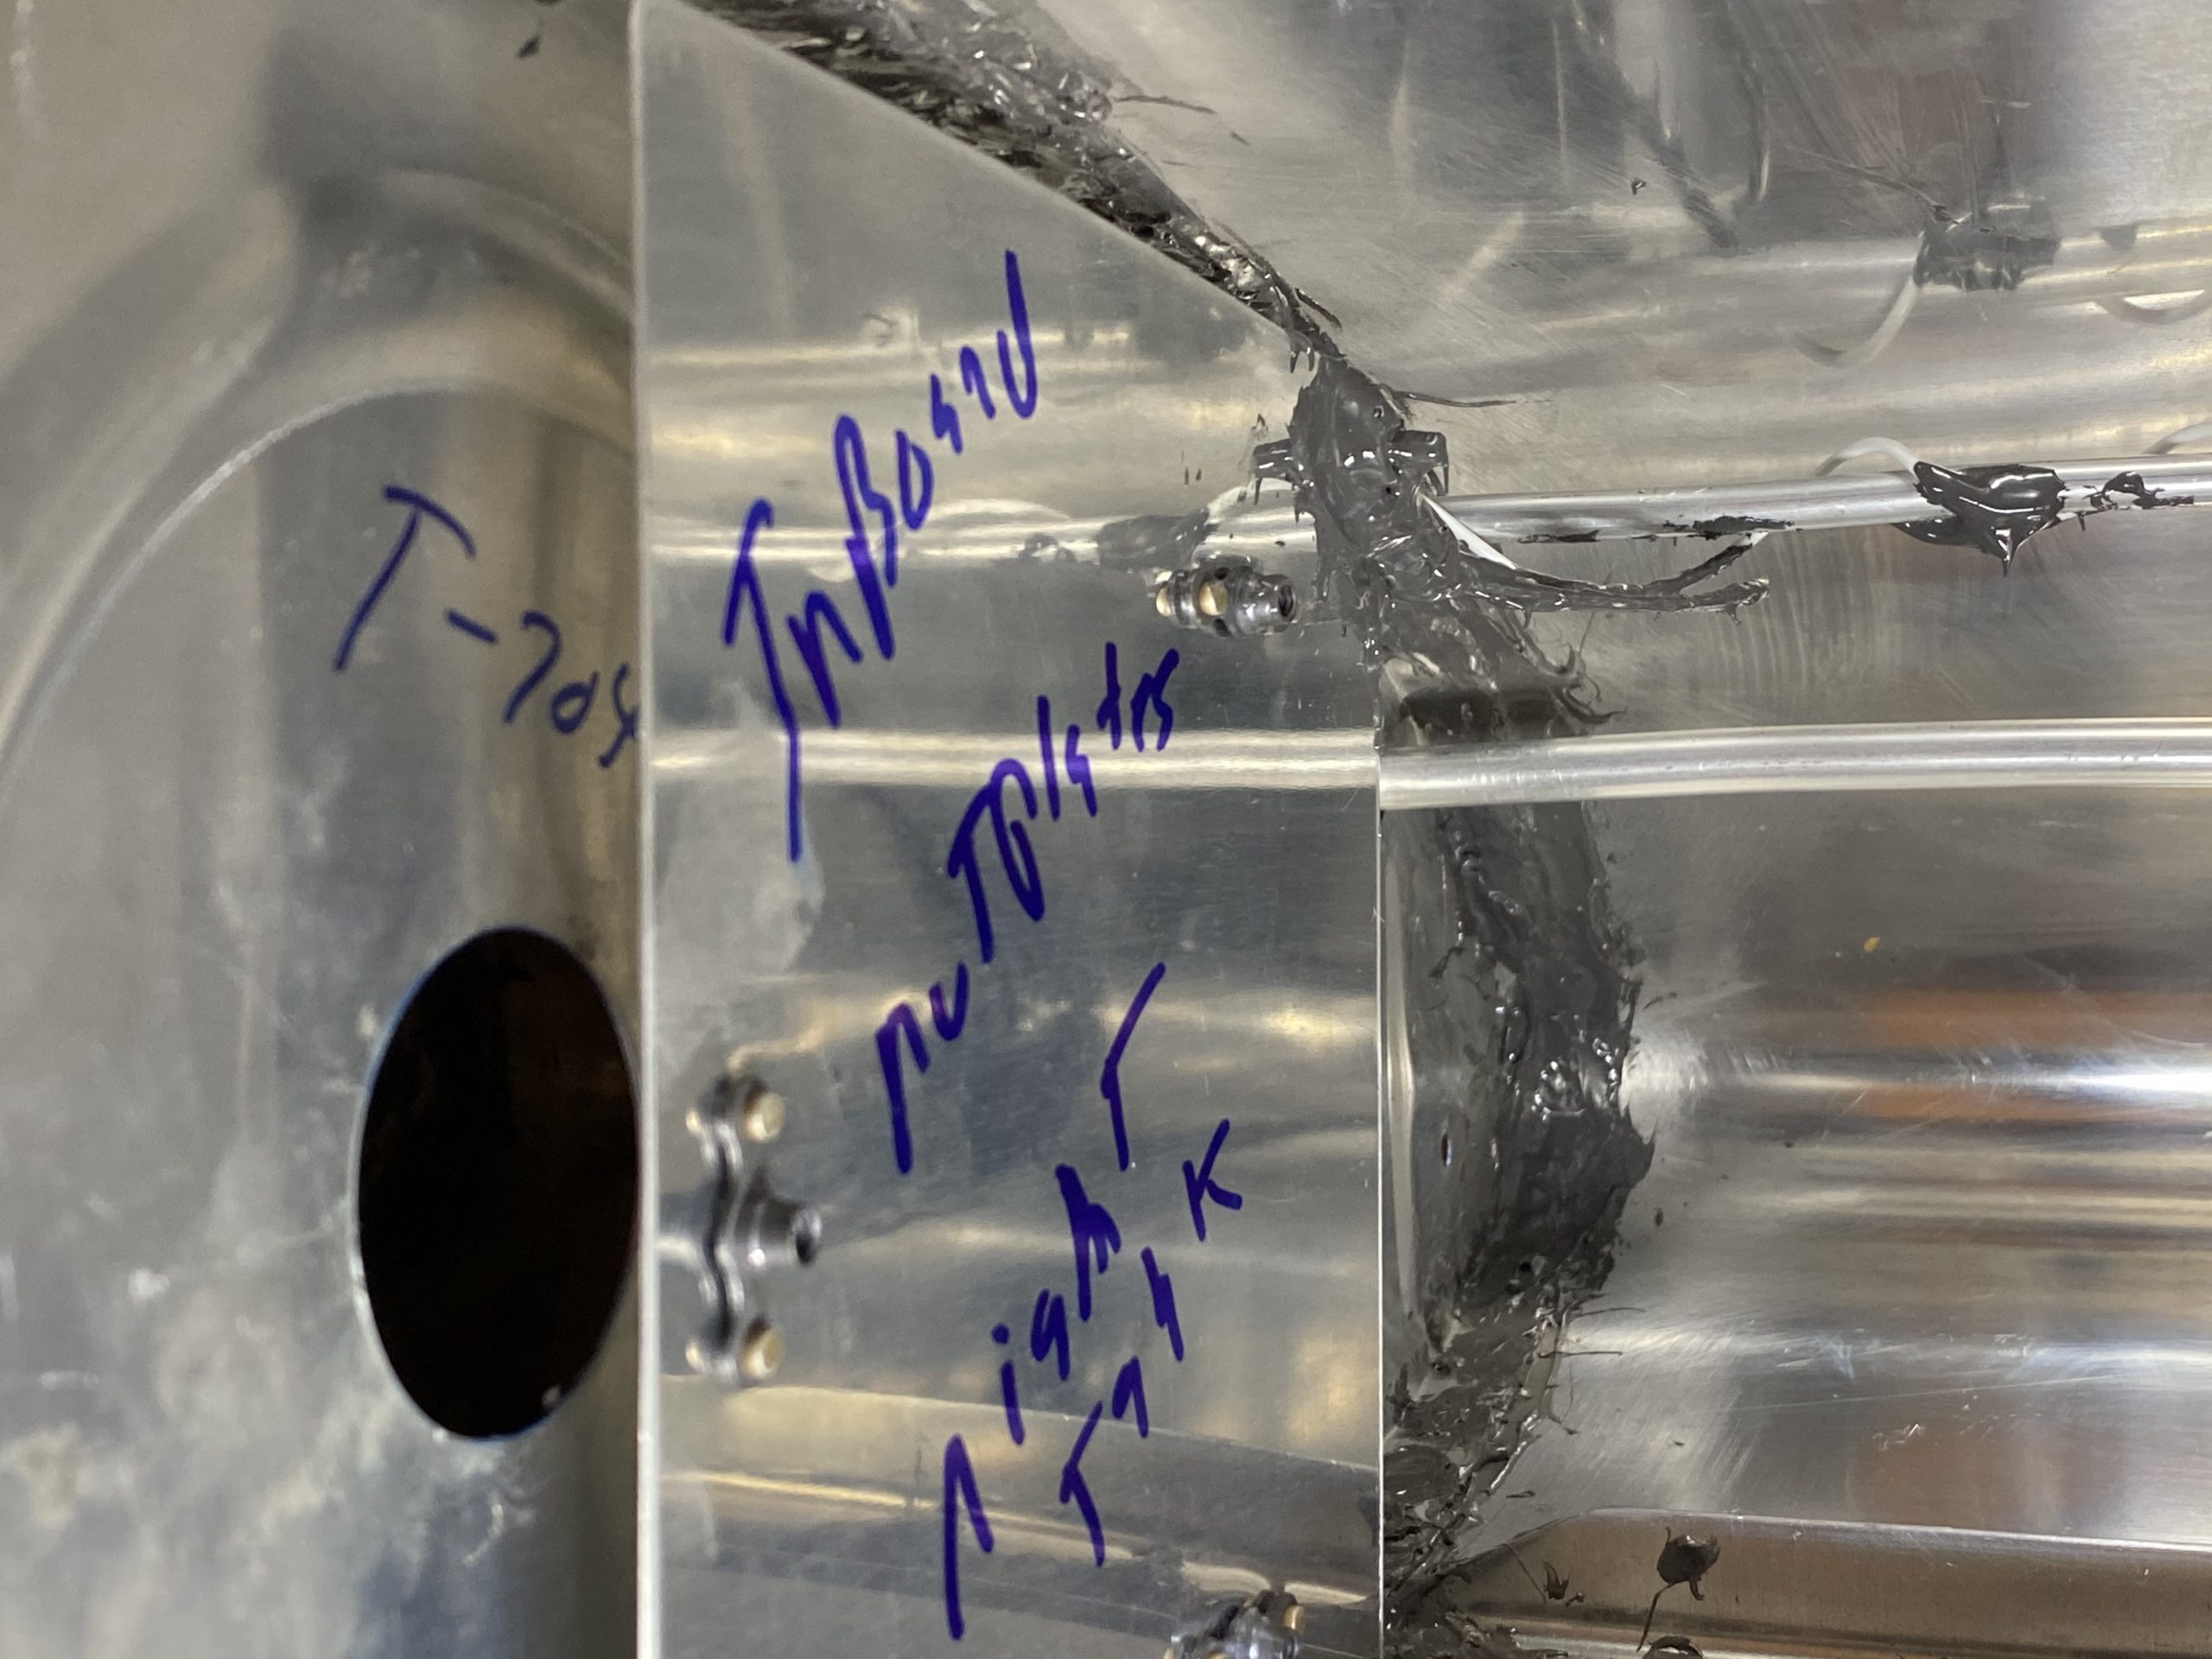
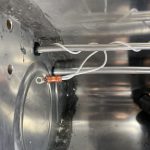
Lastly,  I needed to cover the capacitive sender plate’s connection with sealant to prevent fuel from wicking up the wire, as well as using it to prevent the screw from moving.  I slathered the connecter and its wire with big ole glob of sealant.  Then I fitted all the spacers, washers and bushings to mount the plate to the rib, and torqued it down.  Then I dolloped a bit of sealant along the sender wire, where it wrapped around the vent tube to keep it from moving.

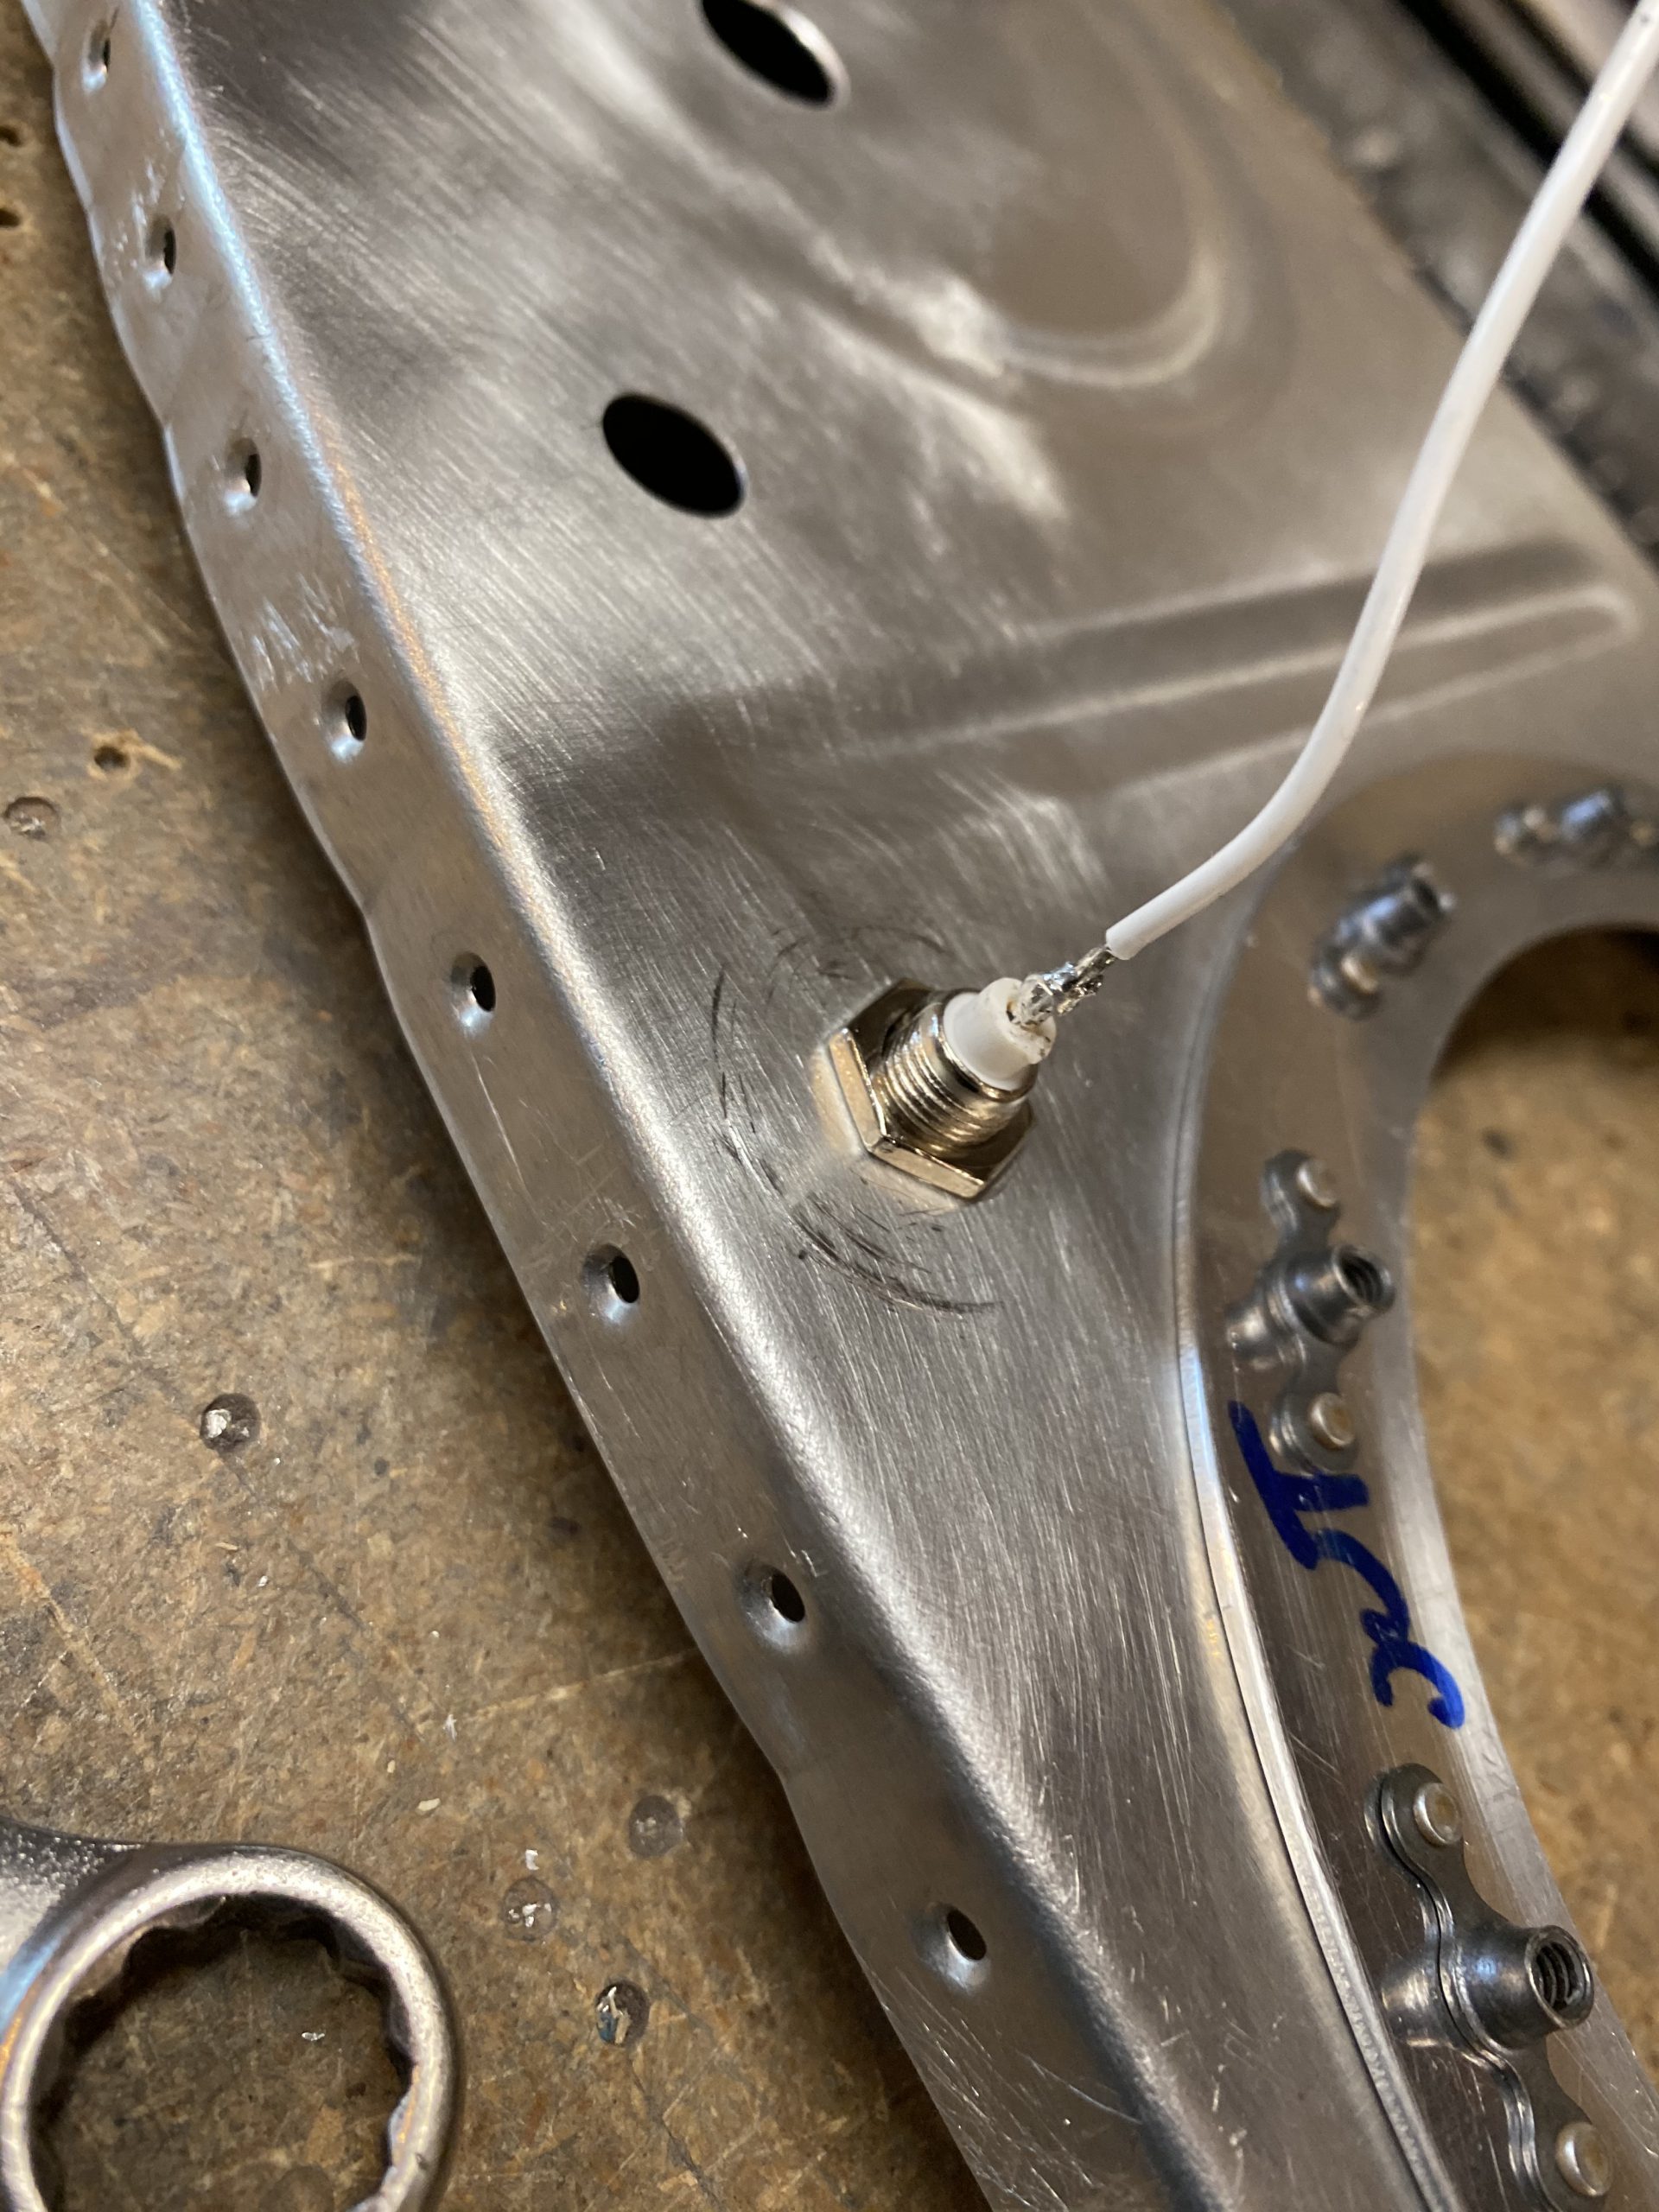
Lastly, I wanted to verify the electrical connections, and ground paths for everything.  I grabbed my Fluke 88V and set it to continuity.  I probed the center conductor on the BNC and each plate to make sure I had good connectivity.  It was like .2 ohm.  Then I checked the shoulder of the BNC with the tank skin to make sure the ground path was good.  Lastly, I checked the plates against the skin to make sure I didn’t have the plates shorted to the skins.  Everything looked good!  Then I did the same test for the float sender, making sure I had no shorts, good ground, and that the sender was reading 250 ohms when empty and 30 ohms when full.

Google Photos Link: https://photos.app.goo.gl/fssGp7qFunEAunWL6

  • IMG_1921
    IMG_1921
  • IMG_1922
    IMG_1922


Hours Worked:  2.75

Sealing the Inboard Rib on Right Fuel Tank

I had some more parts arrive yesterday for the build.  The 8/32 x 1/2″ socket head stainless screws that I’ll use for the access plates and float senders.  I’ve heard these screws make it MUCH easier to remove and install the access plate, as compared to the stock phillips head screws that Vans supplies in the kit.  They were cheap from McMaster Carr (around $6 bucks), check out my “Links and Other Interesting Things” page for a link to order them and the details.

I needed to scuff and clean with MEK, the T-703-R inboard exterior rib, the T-410 reinforcement plate and the T-405 tank mount.  So, I grabbed some scotchbrite and scuffed up and then cleaned them really well with MEK. Making sure I also got the flanges of the rib done on both sides.  They’re ready for sealant!

I am also running VERY low on sealant.  I bought the quart kit, but I barely have any left! I know I am overusing this stuff, but I’d much rather have a leak free tank.  I ordered another quart from Van’s, hopefully it will be here this week.  However, I thought I might have enough to get the inboard rib sealed and riveted, and maybe enough to install the access plate.  So, I grabbed the can and was able to scrape out enough sealant from both containers for about 80 grams worth, which should give me plenty for the rib, filets, dollops and access plate.  After getting it all mixed up, I buttered the flanges of the rib, making sure to put some extra sealant around the nose, and slipped the rib into place, clecoing every hole.


After I had all the holes clecoed, and the rib fully secured, I needed to fit the T-410 and T-405 to the nose of the rib and get it riveted.  But first, I have to squeeze the few rivets around the ribs nose / leading edge.  Once I put the T-405 mounting bracket angle on, I won’t be able to get to the rivets around the nose, there won’t be enough clearance.  So, I got my squeezer and set the first half-dozen or so rivets on both the top and bottom of the leading edge. You can see below the missing clecos where I set the rivets.

Next up was to butter up the T-405 and T-410 with some sealant and cleco them in place on the nose of the rib for riveting.  This was a messy, sticky job, and I actually needed to run a 1/8″ drill bit in the holes to clean the holes a little bit more.  It didn’t take much, but it did need it.  Possibly too much sealant squished into the holes making it hard to get the clecos and rivets in?

I didn’t get many more photos of the work at this point, my gloves were covered in sealant.  But it went pretty easy.  I clecoed on the T-410 and T-405 into place, then used the called for AN470AD4-7 rivets.  I had to buck these rivets with a gun and bucking bar, but they actually set really easily.  You can see in the time lapse video in this post, I had to get creative with some clamps to hold the jig down to the bench to make it easy to rivet.  Once I had those riveted, I made nice thick filets all around the nose on both inside and outside of the tank to get a really good seal. I also dolloped some sealant on the rivet heads and tails.

Finally, all that was left was to make some really nice filets on the inside and outside edges of the flanges, and then dollop on some sealant on the rivets.  I used my sealant spoon to make really nice filets.  I only had to add a few tiny blobs here and there, as I had a really decent amount of smoosh-out.  After I had made the filets, I used a popsicle stick to swirl sealant on the shop head of the rivets.

I still had a small of sealant left from my 80 grams, but I didn’t think it was enough to install and seal the access plate, and I didn’t want to come up short since I had zero sealant left.  So, I used what I had left to do some “touch ups” around the inside of the tank to get a few places that looked like it needed some more.  I ended up tossing a couple of grams in the trash. Oh well.  Then it was time for the cleanup.  I used MEK to clean up the outside of the tank skin and also get any spots where I had smeared sealant or didn’t want sealant.  I am very messy with any sort of goops! I’ll let this cure overnight, and then finish up installing the other capacitive sender plate, and then install the vent and return lines to their bulkhead fittings on the tank.  I’ll probably do the access plate during that session as well.

I recorded a time-lapse for this session again.  I think I like doing these as they really show the build, and also help to prove that I did the work when I apply for the repairman certificate:

Google Photos Link:  https://photos.app.goo.gl/2f5FHgkrVZUGduTa6

  • IMG_1894
    IMG_1894
  • IMG_1895
    IMG_1895
  • IMG_1896
    IMG_1896
  • IMG_1897
    IMG_1897
  • IMG_1898
    IMG_1898
  • IMG_1899
    IMG_1899
  • IMG_1900
    IMG_1900
  • IMG_1901
    IMG_1901
  • IMG_1902
    IMG_1902
  • IMG_1903
    IMG_1903
  • IMG_1904
    IMG_1904
  • IMG_1905
    IMG_1905
  • IMG_1906
    IMG_1906
  • IMG_1907
    IMG_1907
  • IMG_1908
    IMG_1908
  • IMG_1909
    IMG_1909

Hours Worked: 2.5

Right Tank Return Line and Fittings

Knocked out a bunch of little tasks on the right fuel tank tonight.  I received my Van’s order which contained all the parts and fittings I needed to install the fuel return line.  I decided to go with -6 line instead of the -4 I had originally planned, thankfully I made that decision before I ordered the parts :-). Heres all the new parts.  I also picked up some of the stock Vans tie-down rings while I was ordering stuff.  They were only a few bucks, cheaper than the shipping for them by theirselves.

I also shot a time lapse of this build session.  Heres the video:

I needed to go ahead and get that fuel return installed so I can get the inboard outer rib on and done.  So I unrolled the 8′ feet of 1/8″ tubing, and cut it down to two 4′ lengths which is about the perfect size, deburring the freshly cut ends.  Next I installed the SB500-6 plastic bushings into the ribs, which is where the new return line will be going.  Then I inserted my return line and clecoed on the inboard outer rib to start making the bends on that fuel return line to meet up with the hole for the fitting.  I think I got it lined up pretty well (You can see the tube is centered in the hole):

Now it was time to slip on the compression sleeve and nut, then flare the end for the fitting.  I used my flare tool to make this a breeze, double checking the flare wasn’t too big for the sleeve and nut.

I gathered up all my fittings, did one last test fit to make sure orientations were correct and that I had all the pieces I needed, then scuffed the rib, and the washers really good with scotchbrite, and cleaned everything with MEK.  Making sure the threads were clean.  I even cleaned the BNC for the capacitive senders with MEK to give it a good chance of sealing.  Then I masked off the threads with masking tape to prevent them from fouling with sealant.  This later proved to be a bad idea, since I would need to thread the nut down anyways.  Cleaning the threads with MEK turned out to be an easier path.

I decided to go ahead and thread the BNC into the rib without any sealant, getting it tight so it would have a good grounded connection.  Once I had it tightened I would cover the entire back of the BNC and its wire thoroughly with sealant anyways, which should prevent leaks as it would be totally encapsulated, while still maintaining a solid connection to the tank for its ground.  I hope this works and doesn’t leak, if it does, I can easily blob some sealant on the outside, even after the tank is fully done.  I still masked off the BNC connector because I know I am messing with sealant.


Now its time to mix up some sealant! I mixed up 30 grams, and that was about the right amount for what I needed to do.  I only had a little bit left over.  Here’s my setup, since I don’t think I have ever shown this process because I am usually gloved and messy by this time. Notice I have some scrap paper and my mixing cup and popsicle sticks on the scale and tared out.  The paper helps keep my scale from getting covered in sealant. HAH!

The rest of the work session was pretty straight forward.  I slathered on some sealant to the backside of the washer, smeared a small amount on the other side of the ribs hole, and inserted the fitting, threaded the nut and tightened it down.  I got a decent amount of ooze-out from the washer, and a nice amount around the other side of the fitting, assuring (I hope) a good seal.


Then I use some popsicle sticks (the smaller ones seemed to work really good here) and smeared on a decent covering on the interior tank side of the fittings totally covering them from the rib, washer and nut.  The masking tape prevented sealant from fouling the threads on the fitting themselves. I made sure to get a really good blob and good coverage over the interior side of the BNC connector, also extending it up on the wire to prevent fuel from wicking into the wire itself.  On the tank exterior, I smeared some nice filets around the fitting to help get a good seal.


I also wanted to get the fuel pickup fitting installed and sealed, and this was a good time since I had sealant to work with.  I had already scuffed and cleaned it earlier, so I did the same here.  I did use one of the anti-rotation brackets clecoed in place just to temporarily hold the assembly clocked in the right position until I got the fitting torqued properly.  When it cures, I’ll remove the fuel pickup and anti-rotation bracket until their final assembly, once I get ready to seal this access plate on.


That wraps up this work session.  I’ll let these cure, and then the last rib will be ready for riveting onto the tank! Then all that will be left for this right tank is to seal the access plate, and install the baffle!  I still have the left tank to do 🙁

Google Photos Link: https://photos.app.goo.gl/as1UHxTJ98WfA7t98

  • IMG_1861
    IMG_1861
  • IMG_1865
    IMG_1865
  • IMG_1866
    IMG_1866
  • IMG_1867
    IMG_1867
  • IMG_1868
    IMG_1868
  • IMG_1869
    IMG_1869
  • IMG_1870
    IMG_1870
  • IMG_1871
    IMG_1871
  • IMG_1872
    IMG_1872
  • IMG_1873
    IMG_1873
  • IMG_1874
    IMG_1874
  • IMG_1875
    IMG_1875
  • IMG_1876
    IMG_1876
  • IMG_1877
    IMG_1877
  • IMG_1878
    IMG_1878
  • IMG_1879
    IMG_1879
  • IMG_1880
    IMG_1880

Hours Worked: 3.0

Right Tank Miscellaneous Work

I managed to get down to the shop to do a little bit of work.  This was a short session, but I knocked out some needed things to get done.  I did manage to capture it on a timelapse, so heres that short video:

Now that the sealant was cured on the outboard capacitive sender plate, I wanted to get it mounted on its rib, and route the wiring around the vent tube.  So, I gathered up the three screws, washers, the delrin spacers and the piece of 15/32″ tubing I cut in the last build session, and mounted the outboard capacitive sender plate in its place.


Then I worked on spinning the wire around the vent tube per the instructions to keep it from dangling.  I got a few nice spirals on each of the bays, and then moved on to the rest of the work.  I wanted to test fit the access plate, and finish riveting it up.  So. I mounted the inboard rib and clecoed it in place, and finger tightened the vent tube connection.   Then I grabbed the access plate and installed the fuel pickup tube finger tight, and the float fuel level sender to make sure everything was in the proper orientation.

Notice that the fuel pickup is NOT resting over the tank drain hole.  This is per the recommendations so that the pickup tube doesn’t block the operation of the plunger on the tank sump when it gets installed.   You’ll notice in the photo above, there are not nutplates on the T-708 access cover plate for the float sender to be mounted with.  I wanted to DOUBLE check my oritentation before riveting it.  So, I marked the access plate and pulled out the K1000-8 nutplates and some AN426AD3-4 rivets.  I used my microstop countersink to do the countersink for these rivets, on the OUTSIDE of the cover.  This will assure that the fuel sender has a nice flat surface to mount against, when the sealant is applied.


Once I had the rivet holes countersunk, I clecoed on the K1000-8 nutplates, and used my squeezer to set them nicely, making sure that outside surface was completely flush.


And that wrapped up this build session.  I went ahead and ordered another quart of fuel tank sealant. I am going to need it for the other tank.  It should ship out by the end of this week.  I am also still waiting on my other Van’s order to arrive, which has the fittings for the fuel return line.  Hopefully it will be here this week and I can get that inboard rib sealed and riveted on!  I also placed an order with McMaster Carr for some hex head screws instead of the phillips head AN515-8r8 screws that Vans supplies.  These are used to attach the T-708 access cover plate as well as the float style fuel sender.  The hex heads make them MUCH easier to remove in the future, and they are completely stainless.  These came recommended by other builders, and they were cheap.  I got two boxes of 25 for around $8 shipped!  Here is the link to McMaster Carr if anyone is interested in buying the same:  https://www.mcmaster.com/92185A194/

Google Photos Link:  https://photos.app.goo.gl/hDGAhnwJ57dsdMMq7

  • IMG_1813
    IMG_1813
  • IMG_1814
    IMG_1814
  • IMG_1815
    IMG_1815
  • IMG_1816
    IMG_1816
  • IMG_1817
    IMG_1817
  • IMG_1818
    IMG_1818
  • IMG_1819
    IMG_1819
  • IMG_1820
    IMG_1820
  • IMG_1821
    IMG_1821
  • IMG_1822
    IMG_1822
  • IMG_1823
    IMG_1823
  • IMG_1824
    IMG_1824
  • IMG_1825
    IMG_1825
  • IMG_1826
    IMG_1826
  • IMG_1827
    IMG_1827

Hours Worked: 1.25

Sealing the Outboard Rib and Installing the Capacitive Sender – Right Tank

Its time to get the outboard rib sealed in place and start working on the capacitive sender for the right tank.  This was a pretty long work session, but it went pretty easy.  I started out by pulling out the plans and instruction for the capacitive sender.  I picked up where I left off, and this time I needed to trim a 48″ piece of 18 gauge wire and crimp a ring terminal on it.  All the parts were supplied in the capacitive sender kit, so this went pretty easy.  I captured another time lapse of this work session, but it actually stopped and missed the last 30 minutes or so.  I was just dolloping on the sealant on the shop heads so it didn’t miss much.  Heres that video:

So, I started out by cutting the wire and crimping the end.  I did this for both the left and right tank to save time.

Next up, I gathered up my hardware, and screwed on the terminal connector to the right tank outboard sender plate, orienting like the plans tells us.

After that I put the plate in the tank and ran the wire through the plastic bushing, making sure the wire went into the notch I had cut in the bushings several work sessions prior.  Then I inserted the vent tube into the bushings so I can make my last trim so it would fit in the tanks.  I also made sure everything was lining up and looking right. I twist the wire around the vent tube once I get the plates mounted and ready for final crimping.  I still need to install the inboard plate and crimp the wire from the BNC connector into this 48″ wire and and a terminal ring together.

With the outboard sender plate ready to go, I needed to mix up some sealant to blob onto the terminal connector and its screw and nut to act as locktite and strain relief.  Since I am mixing sealant, why not go ahead and install the outboard rib as well, since this is a good time to do it as well.  But first, I needed to scuff the outboard  T-703-L rib, and the T-410 reinforcement plate and get them clean, which I did, and cleaned them well with MEK.

I made sure to do the flanges on the rib as well.  Next I needed to find a rivet to use on the T-410 plate and T-703-L rib, so I used my rivet sizer and found that an AN470AD4-5 was a perfect fit.  I grabbed 4 of them and cleaned them in MEK. I mixed up 70 grams of sealant and smeared a decent amount on the nose of the rib where the T-410 plate would attach.

Then I clecoed on the T-410 and used a squeezer to set the rivets nicely.  I used a popsicle stick to make a nice filet around the edges of the T-410. The photo below shows the rivets before and after I dabbed on a dollop of sealant and did the filet.


Next it was time to dollop on some sealant on the sender plate’s terminal and screw to act as a loctite for it. I probably over-did this a little bit.  But it ain’t going anywhere!

With that done, Its time to butter up the rib flanges, and get it clecoed into place for riveting.  I used a popsicle stick to spread a layer of sealant on the flanges of the rib, making sure I had enough to cover the flutes in the flanges.  I also but a good bit on the nose of the rib, since this seems to be where most people end up with leaks.  My gloves got pretty messy on this part so I didn’t get any photos.  Once I had it buttered up, I gently dropped it into place on the outboard of the tank, and clecoed every other hole.  I am going to wet set these since I can use a squeezer and they are really easy to get to.  In the other holes, I stuck a rivet in place and then used the squeezer to set them.  There was a decent amount of ooze-out on both sides, which leaves me confident these wont leak :-). Heres what it looks like after the first round of squeezing.  I only had to wipe my squeezer set off about every 8 rivets.  Worked out nicely!

Then I removed the last of the clecos and riveted those last few holes up. After it was riveted, I used a filet spoon to make a very nice filet from the squeeze out sealant, only having to add a touch more here and there on the inside.  I did however, glob on a pretty good amount around the nose of the rib, just to be cautious and give it a bit more change of not leaking.  Once I had the filet on the inside, I moved to the outside and did the same with the filet spoon.  Again, only having to add a tiny amount of sealant here and there.

All that was left was to dollop on some sealant on the rivet’s shop heads, and then cover up the bolt and nut I am using to close off the tooling hole.  I had to mix up another 30 grams of sealant to have enough for the rivet shop heads, but then I used a popsicle stick to dollop it on all the rivet heads, and smearing another big amount for a thick filet around the nose.  I also dobbed on some sealant to the shop heads of those AN470 rivets that were holding the T-410 plate on as well.

Lastly, I smothered the little bolt thats closing up the tooling hole with a generous amount of sealant.  I went ahead and did the left tanks tooling hole bolt as well, because I had some extra left over.  Why waste it right?


And that wrapped up the session for tonight! This tank is darn near ready for its baffle!  I am still waiting on the parts from Van’s for my return lines, so I can’t seal up the inboard rib just yet.  But, I can go ahead and start on the left tank getting it up to this point while I wait on those parts I guess.  I will also need to order some more sealant, this quart is almost empty and I know it wont be enough to finish. I’ll go ahead and get another quart on its way so it will be here by the time this one runs dry.

Google Photos Link:  https://photos.app.goo.gl/csVbPFtH2QgoTtZ1A

  • IMG_1779
    IMG_1779
  • IMG_1780
    IMG_1780
  • IMG_1781
    IMG_1781
  • IMG_1782
    IMG_1782
  • IMG_1783
    IMG_1783
  • IMG_1784
    IMG_1784
  • IMG_1785
    IMG_1785
  • IMG_1786
    IMG_1786
  • IMG_1787
    IMG_1787
  • IMG_1788
    IMG_1788
  • IMG_1789
    IMG_1789
  • IMG_1790
    IMG_1790
  • IMG_1791
    IMG_1791
  • IMG_1792
    IMG_1792
  • IMG_1793
    IMG_1793
  • IMG_1794
    IMG_1794
  • IMG_1795
    IMG_1795
  • IMG_1796
    IMG_1796
  • IMG_1797
    IMG_1797
  • IMG_1798
    IMG_1798
  • IMG_1799
    IMG_1799
  • IMG_1800
    IMG_1800
  • IMG_1801
    IMG_1801
  • IMG_1802
    IMG_1802
  • IMG_1803
    IMG_1803
  • IMG_1804
    IMG_1804
  • IMG_1805
    IMG_1805
  • IMG_1806
    IMG_1806
  • IMG_1807
    IMG_1807
  • IMG_1808
    IMG_1808

Hours Worked: 3.5

Sealing the Right Tank Ribs – Part 2

With a much fresher mind and body, it’s time to finish up where I left off.  In the last session, I managed to rivet 4 out of 5 ribs, and dollop the shop head on two of them.  I also left two bad rivets I needed to fix.  After letting the sealant cure, it was much easier to drill them out and clean the holes for a new rivet.  I’m glad I didn’t dollop on the sealant on those shop heads now!  So, after getting those two rivets drilled out, I gathered up my tools, and then mixed up 50 grams of proseal to use on the dimples of that last rib, and leave enough to get a good dollop on all the shop heads on all the ribs.  I did get my Wyze camera setup in the shop to capture a Time-Lapse, which is below:

Notice I am wearing that respirator for almost the entire duration of this session! I got a little bit woozy last time by not wearing it, and wearing crummy gloves.  I have that corrected this time 🙂 I only had one rib left to rivet, so I cleaned out the dimples, and swabbed in some sealant using a q-tip in the dimples.  Then stuck in an AD426AD3-3.5 rivet and flush riveted it by bucking.  Just like last time pretty much.  I also did the same to the last few rivets that needed fixing, and then double checked all the rest to make sure I didn’t miss anymore.

Once I had the rib done, I moved on to dolloping some sealant onto the shop heads of all the rivets.  This was pretty easy work, albeit a little time consuming but eventually I had all the rivets nice and encapusalted.  It’s a pretty big mess in the tanks, but I’d much rather have too much messy sealant in a tight tank, than not enough in a leaky tank.

After all the sealant work was done, I grabbed a towel soaked in MEK and did a cleanup inside the tank, getting all the loose bits of goop and smears trying to clean it up the best I could.  I left the two end ribs off for now, as I’m waiting on the return line fittings to get delivered from Van’s.  I still have some work to do on this tank while I wait though.  I’ll get the outboard rib sealed and riveted, and then work on mounting the capacitive sender plates and the fuel pickup next.  Those will be nice and easy (and fun) jobs to do.  I’m REALLY hoping this thing doesn’t leak!


Google Photos Link:  https://photos.app.goo.gl/95H99UXVMUNBgfWy5

  • IMG_1766
    IMG_1766
  • IMG_1767
    IMG_1767
  • IMG_1768
    IMG_1768
  • IMG_1769
    IMG_1769
  • IMG_1770
    IMG_1770
  • IMG_1771
    IMG_1771
  • IMG_1772
    IMG_1772
  • IMG_1773
    IMG_1773
  • IMG_1774
    IMG_1774

Hours Worked: 2.5

Sealing the Right Tank Ribs Part 1

I’ve let the ribs cure from their sealant in the last session, and now its time to rivet them.  I didn’t get many photos from this session, as I was pretty focused on knocking these out.  I had planned to do all 5 of the interior ribs, but I only managed to get 4 done, and didn’t get the shop heads dolloped in sealant either, this was more work than I thought.  I should have quit earlier, because I wound up with some shoddy work at the end, that I’ll have to fix the next session.

First I removed every other cleco in the ribs, so I could rivet those holes first, then I mixed up 70 grams of sealant to be used to wet set the rivets and also dollop on the shop head after I was done.  My plan was to use up all 70 grams and then call it a night when it ran out, but it went a LOT further than I had thought!  Once I had it mixed up, I used a q-tip to smear a tiny amount into the dimples on a rib, and then stuck a rivet in the hole.  The rivets were soaking on MEK to be nice and clean, so I had them on a towel drying off, later putting them into a small metal tin for easier handling.  After that it was pretty standard flush riveting.  I used the jig to help hold the tank in a good position for riveting, and I’d clamp it to whichever side of the table gave me the best access to the interior to buck with.

Once I got the first set of rivets set, I’d remove the other clecos, and repeat the process of dabbing on some sealant into the dimples, putting in a rivet, and the bucking it nice and flush.  After getting two ribs done, I figured I’d start dolloping on the sealant onto the shop heads while it was still workable and not hardening.  After I got the first two ribs riveted and the shop heads dolloped, I was running a bit low on sealant, so I decided to use what I had left to smear into the dimples, and rivet the rest and then come back later to dollop on the sealant since there was no rush at this point.

I managed to get a total of 4 out of 5 ribs riveted, before I totally ran out of steam.  I was also feeling a bit woozy from the fumes, so I stopped after noticing two rivets were not set very good.  I marked them for repair later and called it a night.  I didn’t get the dollops on 2 of the ribs, so I’ll get them in the next session.

Google Photos Link: https://photos.app.goo.gl/61oUwzaN3RjRNjdJ6

  • IMG_1750
    IMG_1750
  • IMG_1751
    IMG_1751
  • IMG_1752
    IMG_1752
  • IMG_1753
    IMG_1753

Hours Worked: 2.75

Sealing the Right Tank Ribs

Excellent day today! I took Acacia (my now 4 year old) up for her first flight today!  We took her up in our 1973 Cessna Cardinal RG and flew over Nana’s house, then over Lake Ocoee before heading back to KFGU.  She did great and looks like she’s going to love flying!  Tammy was in the back with her, and shot a video of her from taxi, takeoff and climbout for about the first 15 minutes of the flight.  Here’s that video:

Now, on to the build!  I decided to tackle the biggest sealing job so far: Sealing the interior ribs. I have decided to try the fay sealing method, on this tank and see how it does before doing the other tank.  Essentially, you butter up the flanges of the ribs with sealant, then cleco them in place with every hole getting a cleco, doing all of the interior ribs first.  Leaving the end ribs out for now makes it a bit easier to rivet.  Then Once the ribs are 100% clecoed, you can take your time and make really nice filets on the inside of the tank, around the flanges of the ribs.  Then you let the ribs sit at least overnight, longer if needed, before wet riveting them.  Supposedly, this is way less messy and promotes a better seal.  You can read about the method on the VAF thread here:  http://vansairforce.com/community/showthread.php?t=7602

So, I started the night by cleaning the tank skin and ribs with MEK.  They were already cleaned and scuffed in a prior build session, but I wanted to get them CLEAN before sealing. I opened my back door to let in some fresh air as MEK is pretty stinky, along with the Proseal!

Once I had my ribs and skin thoroughly cleaned, I mixed up my first batch of sealant.  I initially mixed up 70 grams, but that only got 3 ribs done.  So I wound up mixing two more batches, ultimately I ended up using about 250 grams of sealant to get a good buttering on the rib flanges, and leave enough to touch up on my filets.  I’ll go ahead and mix up 250 grams when I do the next tank, so figure about 50 grams of sealant per rib (there’s 5 internal ribs).   Pro-Tip:  Keep a glass jar of MEK ready to go for cleanup.  I kept a paper towel(s) and would routinely dip it in the MEK to wipe of any errant sealant from my gloves and tools.  That REALLY helped keep any mess down.

But, the biggest thing that made this go sooooo easily was a Semco Sealant gun. I had bought mine from Brown Tool a while back, along with the cartridges, nozzles and accessories for pretty cheap, and decided I’d use it this time.  Here’s what it looks like:

After I mixed up my sealant, I scooped it into the plastic tube for the Semco and screwed on a nozzle with a large opening.  Then assembled the Semco and started with my ribs.  This thing is freaking amazing!  It lays out a very nice bead of sealant with a gently squeeze of the valve.  What I found worked for me was this:  Grab a rib, and start by laying a nice thick bead of sealant along the BOTTOM flange first, using the semco.  I did go around the nose of the rib, and up an inch or so on the top flange with the bead.  Then, I used a popsicle stick to smooth that new bead across the entire flange, so I could get nice even coverage when I attached the rib.  After I had the sealant buttered on the flange, I clecoe’d it to the tank skin, bottom flange first.  Then moved on to the next rib and did the same process.  I ad my tank skin laying on its top surface, making it really easy to work on, and since I only had sealant on the BOTTOM flange, there was almost no mess.  See the photo below, those ribs only have sealant on the bottom flange where its clecoed.  You can sort of make out where the sealant has oozed out from the flange, leaving me a good amount to make a filet with.

Once I had all 5 of the interior ribs sealed and cleco’d to the bottom of the skin, I flipped the skin so it’d lay on its bottom surface, and I used the semco to lay another nice bead of sealant on the TOP flanges of the ribs.  Having the ribs clecoed in, made them super easy to work with and laying the bead with the semco was easy peasy.  Like before, I smeared the bead across the entire flange evenly using a popsicle stick, making sure there was enough to cover the fluted areas.  Then, I used my tank jig and slowly and gently inserted the tank into the jig, which helped wrap the skin around the ribs smooshing the sealant down nicely, without smearing it around.  I was honestly surprised at how well this worked!  Once I had the tank fully inserted into the tank jig, I grabbed my clecoes and started 100% clecoing every hole in the top of the skin, working from the leading edge back.


Once I had all the clecoes in every hole, I flipped my tank jig on its side, leaving the back of the tanks easier to access, and then used a filet spoon (also picked up from Brown Tool), to form my filets on the bottom of the skin, and then the top of the skin, making sure I took special attention on the ribs nose. Here are some photos of my filets:


Since there was no rush to rivet things before it dried, I was able to spend a good deal of time making sure I had nice filets around the flanges.  Where ever it needed, I would use the semco to squirt a little bead of sealant so I’d have enough for the filet, and then work with with the filet spoon into a nice smooth filet.  There was surprisingly very little mess so far, and very little waste of sealant.  I will say though, I am going to need to order another batch of this stuff.  I don’t think there will be enough left over to complete my other tank.  I’ll get an order in to Van’s when its close to empty as this stuff does have a shelf life.

Once I had my filets done, all that was left was the tiny bit of cleanup.  The plastic tube and nozzle on the semco are disposable, and make cleanup a breeze.  I highly recommend picking one of these things up to do your tanks!  I’ll leave these to cure at least overnight, or maybe 2 days, then I’ll wet rivet the ribs.  Wet riveting is where you dab some sealant into the dimple, and then rivet.  Then, you go back and dollop some sealant onto the shop head of the rivet to complete the encapsulation seal.  Take a look at the photo gallery below for more pictures of how the filets turned out. I think they’ll hold up just fine.  I am planning on doing a water test on these tanks before attaching the rear baffles.  Thats where you get everything sealed, except for the very rear baffle, then you leave the tanks in the jig (leading edge facing the ground of course), and fill them all way up to the baffle with water and leave them sitting for a few days to look for drips. That way I can easily touch up any areas with sealant before attaching the baffles.  Also, I am going to setup some cheap Wyze camera in the shop so I can record footage of me working and include in these blog posts.  Stay tuned 🙂

Google Photos Link: https://photos.app.goo.gl/qhYTeQ41dfknd2yX6

  • IMG_1719
    IMG_1719
  • IMG_1720
    IMG_1720
  • IMG_1721
    IMG_1721
  • IMG_1722
    IMG_1722
  • IMG_1723
    IMG_1723
  • IMG_1724
    IMG_1724
  • IMG_1725
    IMG_1725
  • IMG_1726
    IMG_1726
  • IMG_1727
    IMG_1727
  • IMG_1784
    IMG_1784
  • IMG_1785
    IMG_1785
  • IMG_1786
    IMG_1786
  • IMG_1787
    IMG_1787
  • IMG_1788
    IMG_1788
  • IMG_1789
    IMG_1789
  • IMG_1790
    IMG_1790


Hours Worked: 2.25

Right Tank Return line and Preparing for Sealing

I’ve decided to go ahead and plumb in a return line for my fuel tanks, just in case I go with a fuel system that needs it my tanks will be ready for it.  This will save a lot of hassle if I do have to use a return system.  If not, i’ll just keep them capped off, and it will only add a few ounces of weight to the airplane. It’s also time to start getting the tanks and ribs prepped for sealing and riveting.  So, I started off by locating where I wanted to run the return line.  I’m going to run my return line almost to the very outboard fuel bay in the tank, actually one in from the outboard most fuel bay.  This way, the warm fuel can return into the tank and have time to cool off with the rest of the fuel, and to help reduce any foaming that may occur.  By not going all the way to the outermost fuel bay, it keeps the return from mixing with the fuel vent line, and keep the return safe from any fueling nozzles etc.  I will probably bend the return line upward aiming it towards the top leading edge of the skin so it can splash up against the skin further cooling it.

I found a good spot on the ribs that kept the line clear of the capacitive sender plates, and the vent line as well as left me plenty of clearance distance from the flanges and other holes.  I drilled a pilot hole in my first rib with a #30 bit where I wanted that return to go.  I’ll widen the hole with a step bit.  But first, I need to transfer this hole to the same spot on all my other ribs! To do this, I grabbed some scrap wood and clamped my rib onto the wood, and marked all the holes from my rib onto the piece of wood with a sharpie to use as indexes for the other ribs.  Then I backdrilled my new #30 hole for the return line all the way through the wood.  This will give me a drilling jig to transfer the hole to the exact location on all my other ribs.

\    

I’ll just need to clamp each rib onto the wood, lining it up with the sharpie marks, and use the #30 through hole I drilled in the wood as a drilling jig to drill the hole into the rib.  A simple and easy way to transfer a hole!  Now, my piece of wood is in the rough shape of the rib simply because it was the scrap I had left from making my leading edge jig, any piece of scrap would have worked.

Once I had the #30 holes drilled into all the ribs (I left out the inboard end rib for now, I’ll get it later when I decide where the plumbing will go) I chucked up my step bit, and opened the holes to 3/8″, just big enough for the plastic bushings to fit.  I am using -4 aluminum tube for my return line, its the same size as the vent line, so I’ll just the same size bushings for these return line holes.  I think they were SB-437-4 size.  Once I had the holes opened up to the right size, I deburred them and moved on.

This next part was where I spent the bulk of my time for the session:  Scuffing and cleaning the right tank parts!  I put the tank skin on the bench and then scuffed all the rivet lines throughly with some scotchbrite to give the sealant more surface area to cling to.  Once I had both the top and bottom side of the skin, as well as the rivet line on the skin for the tank baffle, I moved on to scuffing both sides of the flanges for all the ribs.  I turned on some music and got comfy in my shop chair while I was scuffing these things.  After I had them scuffed, I cleaned them very well with some acetone followed by MEK.  I did the same with the tank skin, but instead of focusing on JUST the rivet line, I went ahead and COMPLETELY cleaned the entire surface of the skin, since it will be closed up pretty soon.  I wanted to make sure I had ALL of the little bits of sealant and ink markings gone from the skin to prevent fuel contamination.  I’ll do one more wipe down before closing it up with the baffle of course.  Heres how clean everything came:


The MEK is pretty strong organic vapors, so I made sure to wear some PPE when working with it.  Gloves and a respirator.  Here’s a photo of my PPE and Me for proof I’m doing the work 🙂

Once I had the ribs and skin scuffed and cleaned, Van’s has us re-assemble the tank and ribs fully clecoing everything together to make sure its all in the right shape before we seal the ribs.  They want us to remove one rib at a time, seal it and rivet it before moving on to the next rib.  Makes sense, as it assures that the tank keeps the proper shape during riveting.  So, I re-assembled the right tank, putting a cleco in every hole to hold it tight. I left the inboard end rib undone for now, since I need to trim my return line to fit.

For the return line, I unspooled enough of the -4 aluminum tubing to reach the outboard most inner fuel bay, and gave myself a tiny bit extra for the bend to fit the fittings, making sure I’d have enough to do both tanks to the spot where I wanted it. You can see where the tube will end up at inside the fuel bay.


This photo shows the hole I will use for the return line, in all the ribs.

Once I had the return line cut, i deburred both ends of it, and set it aside for now.  Then I clecoed both the end ribs in place so I can start the work of sealing everything at a later build session.  I’ll need to order a few fittings for my return line, so I’ll get an order in to Spruce to get them on their way and be ready by the time I need to seal up the inboard end rib (where all the fittings will be going).  Here’s where the tank is as of right now:

Thats a good stopping point for tonight. Scuffing and cleaning took up a bunch of time, and I was pretty shot after this sort-of-long work session.  It’s a good place to start the sealing work, as all I’ll need to do is mix up a batch of proseal, and get after it.  I do plan on removing a rib, cleaning the rib and skin with a quick wipe of acetone to clean up any stray contaminants, and then sealing / riveting it into place, then repeat.  I’m hoping I can get all 5 of the interior ribs done in my next session.  That would leave me in good shape to let it cure, then move on to the end ribs in another session.  We’ll see.

Google Photos Link: https://photos.app.goo.gl/TRr7uDDGNKEAn2y59

  • IMG_1701
    IMG_1701
  • IMG_1700
    IMG_1700
  • IMG_1699
    IMG_1699
  • IMG_1698
    IMG_1698
  • IMG_1697
    IMG_1697
  • IMG_1696
    IMG_1696
  • IMG_1695
    IMG_1695
  • IMG_1694
    IMG_1694
  • IMG_1693
    IMG_1693
  • IMG_1691
    IMG_1691
  • IMG_1689
    IMG_1689
  • IMG_1688
    IMG_1688
  • IMG_1687
    IMG_1687
  • IMG_1686
    IMG_1686
  • IMG_1685
    IMG_1685
  • IMG_1684
    IMG_1684
  • 61525464198__A0AE0C6F-47FE-4346-A1F8-FF6B70D194BA
    61525464198__A0AE0C6F-47FE-4346-A1F8-FF6B70D194BA

Hours Worked: 3.25


Sealing the Left Tank Drain and Fuel Cap

Tonight was pretty much a repeat of the right tank drain and fuel cap sealing. I also had my wife Tammy helping me since we were kidless for the night!  We made a trip down to our favorite restaurant “Boathouse Raw Bar and Rotisserie” and had a great meal, then I somehow managed to talk her into helping me on the tanks tonight since she is waaaaayyy less messy than me with working with goops.  This session started off like all sealing sessions:  Scuffing and cleaning the areas to be sealed.  We scuffed both sides nice and well, and then cleaned both sides with some MEK until the paper towels came up clean.  We did this for the drain flange and the tank filler neck.


Then Tammy mixed up 40 grams of sealant, while I applied some masking tape to the areas around the tank drain to create the little channels for water to drain safely into the sump. I did this last time and it worked great, so why not do it again this time?

Once Tammy had the sealant ready, she slathered some on the back side of the tank drain, and then put it in place on the tank skin while I clecoed it.  She’s much cleaner at working with this stuff than I am! We went ahead and clecoed all the holes in the tank drain to hold it secure while we worked on the tank filler flange.  This is where I didn’t get a chance to get any good photos, since we were gloved up and had sealant going everywhere.  But, Tammy slathered a nice layer onto the skin facing side of the filler neck flange and then we clecoed it in place, making sure to not forget the vent tube holder.

Now its time to set the rivets.  I pulled out the AN426AD3-4 rivets, cleaned them in a jar of MEK, and then dried them on a towel.  Then I inserted then into the tank drain flange, and squeezed them with my squeezer.  I was able to use my 4″ flush squeezer yoke to get all of these rivets very nicely, just be cautious as the set will slip and slide on the sealant so keep a steady hand and bring the set up to the work very gently.  I’m happy in how it turned out. All the rivets set very nicely, and flush in their dimples, with a tiny bit of sealant oozed around them to further help them seal.  Here is what they look like after they were cleaned off:

Tammy then dolloped on the sealant on the shop head side of the rivets on the tank drain, and then we pulled off the masking tape to clean up any little bits of sealant before it dried.  She did a good job on this, and made sure there was a clean path for the water to drain, as well as making sure the threads were all cleared of sealant.

While she was working on that, I used the squeezer to start setting the rivets on the fuel filler neck.  I was able to reach all but 4 of the inboard rivets with the squeezer.  However, like the right tank, the plans called for AN425AD3-4 rivets, but they seemed to short for the deluxe caps flange.  So I used the sizer and went with AN425AD3-5 rivets cleaned with MEK.  The 4 inboard rivets I set with a standard rivet gun and bucking bar, and they came out really nicely. here is what it looks like after riveting, and before applying sea

lant on the back side.

And heres the view of the outside of the filler neck flange, after being cleaned up with some MEK.  We also cleaned the oozed sealant from the inside of the flange but left enough for a small fillet, as you can see in the photo below.

.  

All that was left was to apply the dollops on the shop head side of the filler neck flange.  Just like I did on the right tank, I decided to completely cover this area with sealant since it’s an area that will get a lot of abuse from rampers and me filling the tanks with fuel.  Its a bit overkill, but better safe than sorry!


That finished up this build session.  I cleaned off all my tools with MEK and paper towels and also cleaned up some stray sealant from the tank skin as well.  I’ll let this cure for a few days and start working on sealing the ribs on the right tank.  These things are starting to come together!

Google Photos Link: https://photos.app.goo.gl/YmGi19CDqvoznqko8

Hours Worked: 1.25