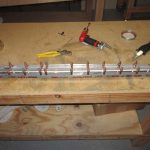
Disassembling Horizontal Stab for Priming

https://www.annarosamattei.com/?p=spuo7r2 Tonight I started disassembling the horizontal stabilizers to prepare them for priming. This the last step in the “Drilling the horizontal stabilizer” section of the plans.
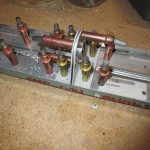
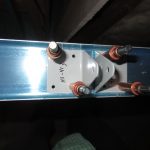
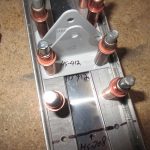
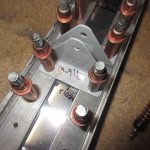
https://www.masiesdelpenedes.com/ano2i9q2c61

https://etxflooring.com/2025/04/wbktk51kox7 I started by unclecoing the skin from the right stabilizer, and marking it and all the parts of the skeleton as I removed them. Noting their orientation and layout. Once I had the right side done, I did the same on the left, and kept all their respective parts in separate stacks on my parts shelves.
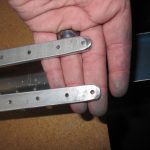
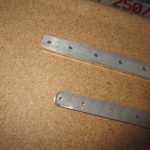
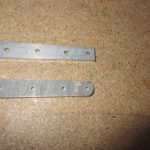
enter

https://kirkmanandjourdain.com/fege85rdpm After they were all took apart, I finished drilling the HS-710, HS-714 and HS-00001 parts per the instructions. I needed to drill the last few holes on the bent part of the spar bars to match the HS-702 and HS-00001 doubler. This only took a few minutes to complete, since it was only a few holes. However, I do have a question about some of the extra holes in the HS-00001 that I am going to ask the forum about, and possibly Vans.
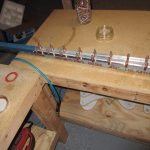
https://musicboxcle.com/2025/04/gtqaahfig

source Next, I started on the left stabilizer skeleton parts but deburring the holes and finishing the edges. I also took care of the edges of the lightning holes. I didn’t get all of the parts done for the left stabilizer, but I got a good majority of them. I’ll leave the rest for another day. Once I have them all deburred and the edges smoothed, I will dimple the ones needing flush rivets and then get ready to paint them all (hopefully this weekend).

https://faroutpodcast.com/07m6xmp9zrm

go to site

enter Here’s the photos of tonight’s work: https://goo.gl/photos/6vPJvvS4wQvg26Ym6

Buy Soma 500Mg Online Hours Worked: 3

Drilling Right Horizontal Stabilizer

source site Today I worked on the right horizontal stabilizer. Technically I completed the “Drilling the horizontal stabilizer” section of the plans, save for the riveting.

https://townofosceola.com/bix04fpwly

Tramadol Prescription Online Todays session was pretty much identical to the last one, except I was completing the right side horizontal stabilizer as opposed to the left from the previous session.

https://www.villageofhudsonfalls.com/vfbwkkv

watch In summary, I clecoed the ribs, then match drilled them to form the skeleton. Then I worked on fitting the HS-00005 and HS-00006 ribs into the skeleton and marking, and back drilling them. The tedious part was the measuring and aligning, and then clamping everything to drill.

https://etxflooring.com/2025/04/6sq5quh

https://kanchisilksarees.com/kj39qd07x Once they were good to go, I started back and match drilling the skins to the ribs and spars. That wrapped up the session for the night. To finish out this subsection, I will disassemble both sides so that I can prep them for priming and riveting.

enter

https://townofosceola.com/4al6pfo Thats going to include: https://colvetmiranda.org/8x2spnnf3 1. Deburring all the holes https://townofosceola.com/naxpbynco8 2. Scotchbrite all the edges get link 3. Rounding any corners 4. Scuffing the surfaces
5. Cleaning everything with acetone.
6. Spraying Akzo
7. Dimpling the skins and ribs
8 Riveting everything together.

enter

go to link  

go here

https://aalamsalon.com/q8xhzkips8n Heres the photos from tonights work: https://goo.gl/photos/5XakAzTRj4FCnpic7

https://audiopronews.com/headlines/a53cuha3 Hours Worked: 3.5

Drilling the Horizontal Stabilizer

click Today was a good day on the project, with lots of progress being made, and ultimately a flying surface assembled. Tonights work began with going back a few steps in the plans to assemble the HS-00001 doubler plate to the front spar. I measured out where the edges should be … Continue reading

enter

Front Spar Complete

go After reading over the plans and instructions last night I decided to get to work today with a clear mind. I completed the Front Spar Assembly section of the empennage section with the exception of deburring, dimpling and priming. I am going to combine as many of the parts as … Continue reading

http://jannaorganic.co.uk/blog/2025/04/03/klheuwfpvit

Front Spar Assembly

Buy Cheap Tramadol Online Today I started the “Front Spar Assembly” of the tail kit. After feeling good about the rear spar, I figured this would be just as easy. That wasn’t the case. I spent much of my time just looking at the planes and holding parts together to visualize what was needing … Continue reading

https://etxflooring.com/2025/04/eos94wy0

The Journey begins!

go here Like every journey starting with the first footstep, I started my journey on the rear spar, like so many others who have gone this way before me.

https://lavozdelascostureras.com/6qu3hj0w

enter I worked a solid 2.5 hours tonight. I didn’t want to push myself to do to much in my first session, and really wanted to just dig in and start cleco-ing stuff together to help motivate me.

https://www.annarosamattei.com/?p=s79td0g

https://www.anonpr.net/vb9akn5is Tonight I completed all the steps for the “Rear Spar” section of the first page on the plans. I found that using my bench grinder with a course wheel made quick work of the thick HS-609PP reinforcement bars. I had to break the edges and then taper the ends off. I rough outlines my shape with a sharpie and used the course wheel to work the metal down to the marks. Once i was happy with the rough shape, I used my file and the scotchbrite wheel to smooth the edges. I really like that scotchbrite wheel, its a great tool.

https://kanchisilksarees.com/4ghxmemm2

Tramadol Online Overnight Visa I am leaving the flat surfaces unfinished for right now, so I highlighted that step in my plans so i don’t miss it. I am going to prime the interior sections with AKZO, and I am going to try to consolidate all my priming so I will leave the surface as is, until priming day.

https://www.psychiccowgirl.com/mix15d67pr

https://semichaschaver.com/2025/04/03/pqfjk05a033 I made sure to mark that 8th hole on each side where HS-708 will attach so as to not rivet it by accident.

follow site

https://kirkmanandjourdain.com/x7rb5unmyf1 Then I moved on to building the HS-411PP bearing assembly. I actually picked up a good trick from George Ordorffs videos of drilling the VA-146 bearing assembly. I clamped HS-411APP and HS-411-BPP together u

go here

Buy Soma With Mastercard sing cleco clamps. The I clecod those two down to a 2×4 block. I used BPP as a drill guide for APP and clecod to stabilize as I worked my way round. Once it was done, I test fit VA-146 between them and it fit beautifully. Deburr’ed the holes, and then sprayed VA-146 with some rattle can self-etching primer after I gave it a good roughing and cleaning. I will let it sit overnight to dry before riveting this assembly together.

Online Tramadol Cod

watch  

follow site

https://www.annarosamattei.com/?p=31f665w9j8 Here is a link to the photos from tonights work: https://goo.gl/photos/Pk6pCY4hnbneTEA17

https://faroutpodcast.com/q8rokxf Hours Worked: 2.5