


Purchase Klonopin Online Back on the ribs tonight. Since I have finished up the control surfaces for the wings, and I am still needing to build my wing stands, the only thing I can work on is the holes for my conduit and pitot and AOA plumbing in the wing ribs. I have been putting a lot of thought to this issue over the past few weeks, and I have decided to drill two extra holes in my ribs, and enlarge one of the tooling holes. The session started with me looking over the recommended wing wiring diagrams from Vans, and then looking at what other builders have done. I also unboxed my pitot-static-AOA plumbing kit from SafeAir1 and checked the outside diameter of the tubing used to make sure I didn’t over size my holes.
Buy Ultram OnlineBuy Soma Online I have decided to drill the suggested 3/4″ hole at the bottom portion of the ribs, between the forward and second lightening holes per the Vans recommendation. I will run the 5/8″ nylon conduit that Van’s sells in these holes and I’ll use it for the majority of wiring in my wings. In addition to this larger hole, I am going to drill an additional hole sized to 3/8″ just above the forward and center tooling holes in the ribs. Then I’ll open the smaller tooling hole to 3/8″ as well, and use these two 3/8″ holes for my pitot and AOA tubing, protecting them with a snap-in bushing. This illustration gives a better idea of what I want to do:
https://ballymenachamber.co.uk/?page_id=8877
https://www.infoturismiamoci.com/2018/09/castel-dei-mondi-festival-andria/ 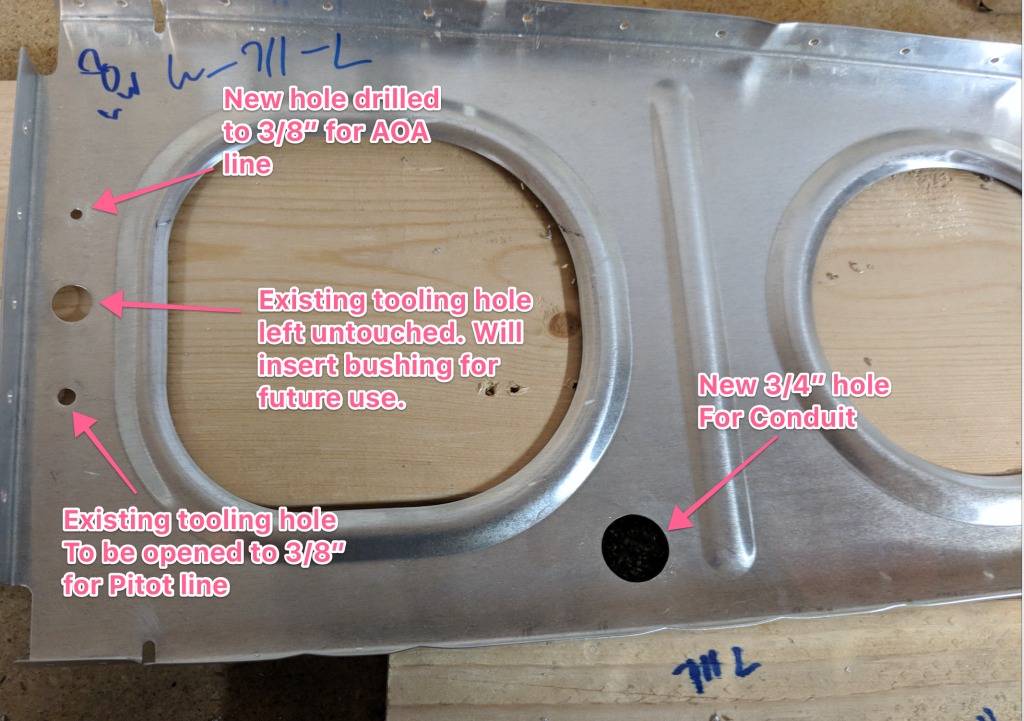
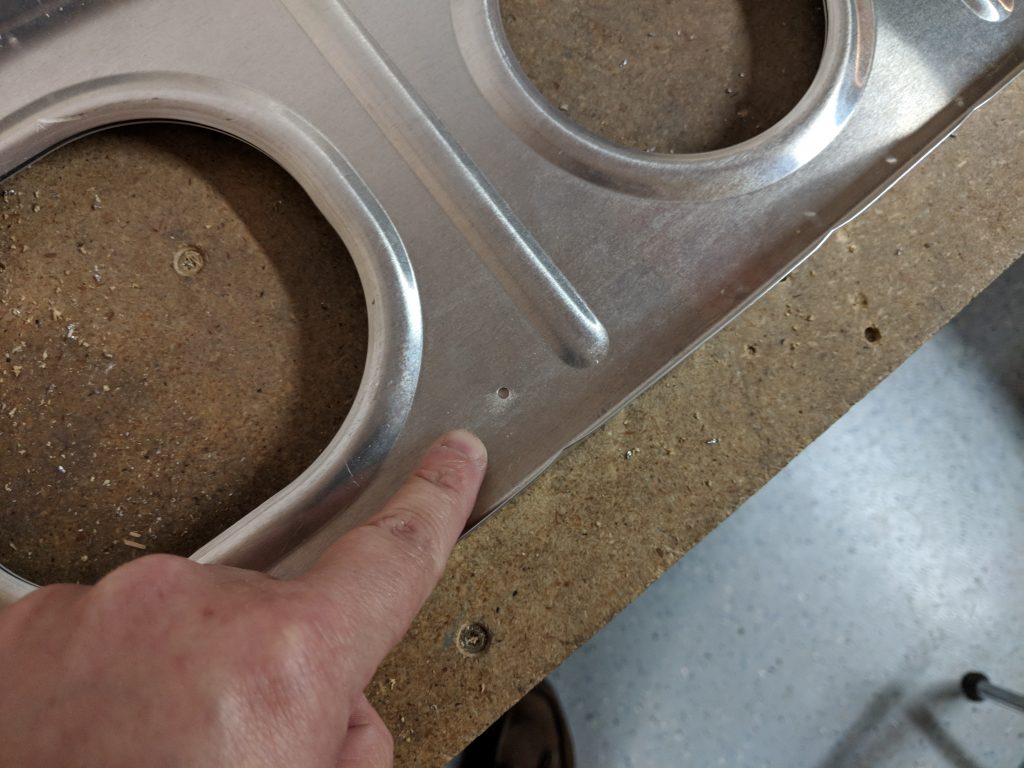
see url I will probably not immediately use the existing 1/2″ tooling hole on the forward edge of the rib, but I will probably go ahead and stick in a nylon bushing just in case I want to use it in the future. I started out by measuring out where I wanted to put the 3/4″ hole. Vans just gives us a suggested location of “towards the bottom of the rib, between the first and second lightening holes”. I did some measuring and decided roughly where I wanted the center of the hole to be. Then I used a #30 drill bit to drill the center. I then measured our equidistant from the 1/2″ tooling hole at the forward end of the rib and tried my best to get the new hole to be symmetrical to the existing holes. It really doesn’t matter, so long as I drill the holes in the same locations (roughly) in each rib.
https://londonplaywrightsblog.com/alex-critoph/Buy Amoxicillin Online Without Prescription I drilled the new holes with a #30 to pilot the holes, and then I made a simple jig so I could transfer the holes to the rest of the ribs repeatedly and get the location exactly the same each time. I had a scrap chunk of 2×4 that worked great for this purpose.
Get Tramadol Online
Buy Ambien Online Without Prescription 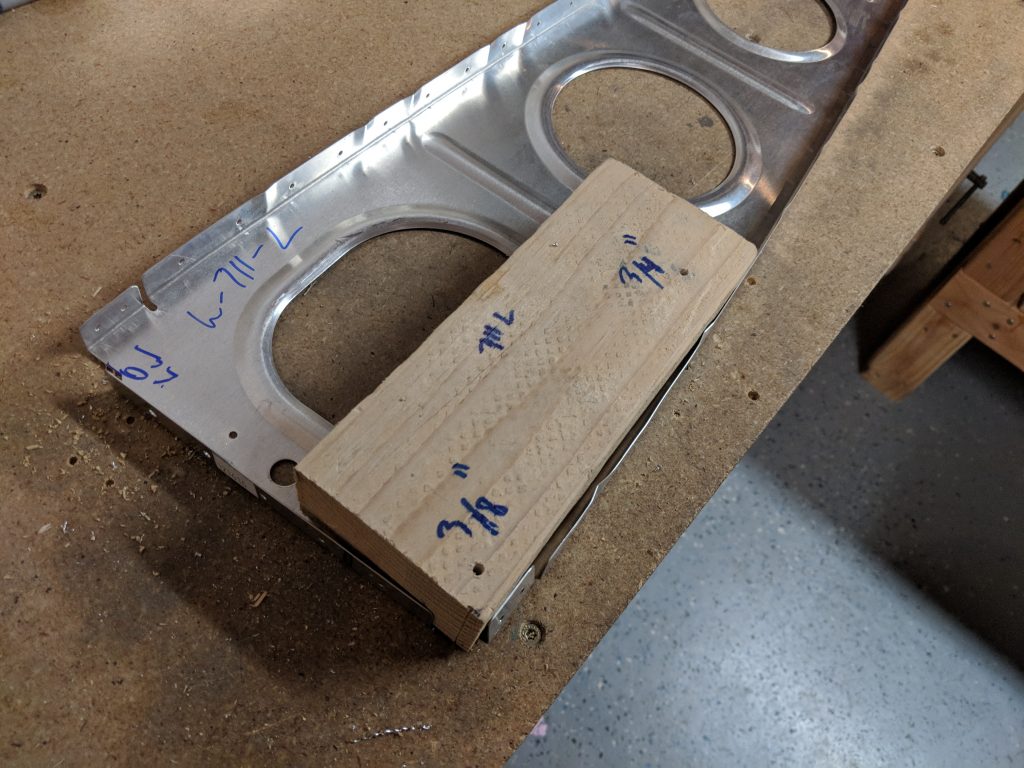
https://arquine.com/tienda/ I just placed the 2×4 in the bottom corner of the rib, held it securely and transferred the hole I marked and drilled into the board. I did this for each of the new holes. Once I had the bottom hole (marked as 3/4″ on the board) drilled in the rib, all I have to do is slide the 2×4 to the top of the rib and match drill the new 3/8″ hole in using the guide marked as “3/8” on the board.
https://auracareclinic.com/dermaplaning/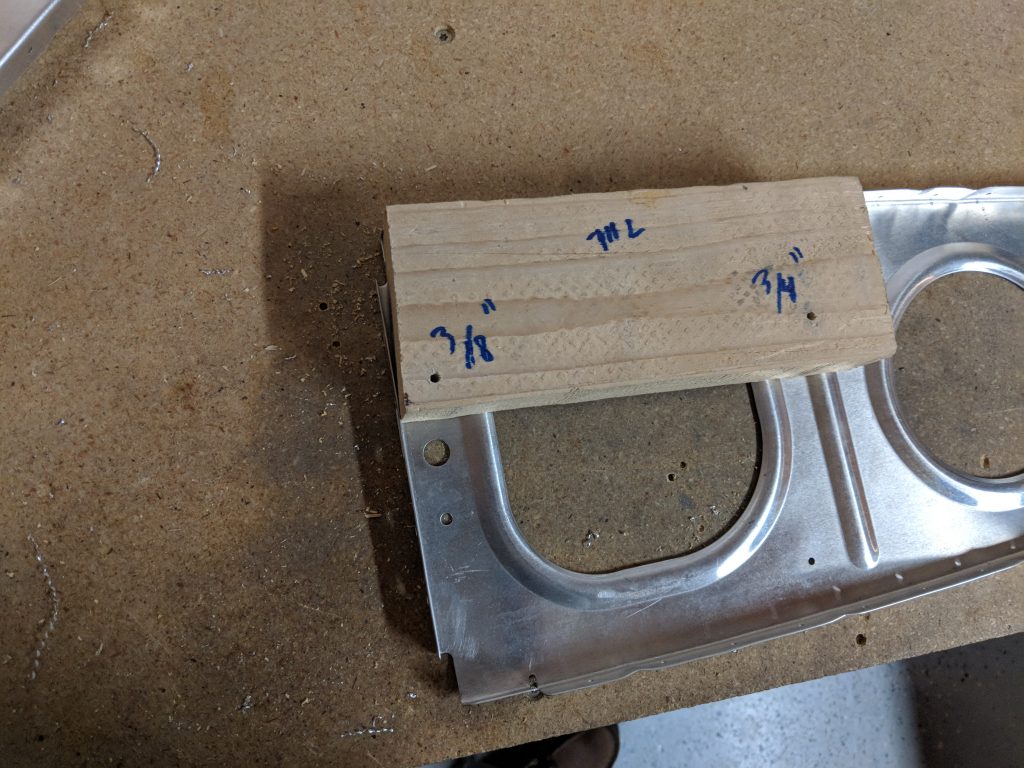
go site The only catch is this template/jig only works for the “left handed” ribs. So, instead of making a whole new template for the “right handed” ribs, I just placed the left handed and newly drilled ribs on top of the right handed ribs flanges facing away from each other and back drilled the new holes.
Order Soma Online Once I had the new holes drilled to a #30, it was time to enlarge the holes to their final size. I used a uni-bit (step drill) to enlarge the holes. I first started out by drilling the 3/4″ hole, using some spare wood blocks to hold the rib above my work bench to give the unit-but room to do its job. I went ahead and drilled all the ribs 3/4″ conduit hole since it wont interfere with any other build steps. I even did the inboard and outboard ribs.
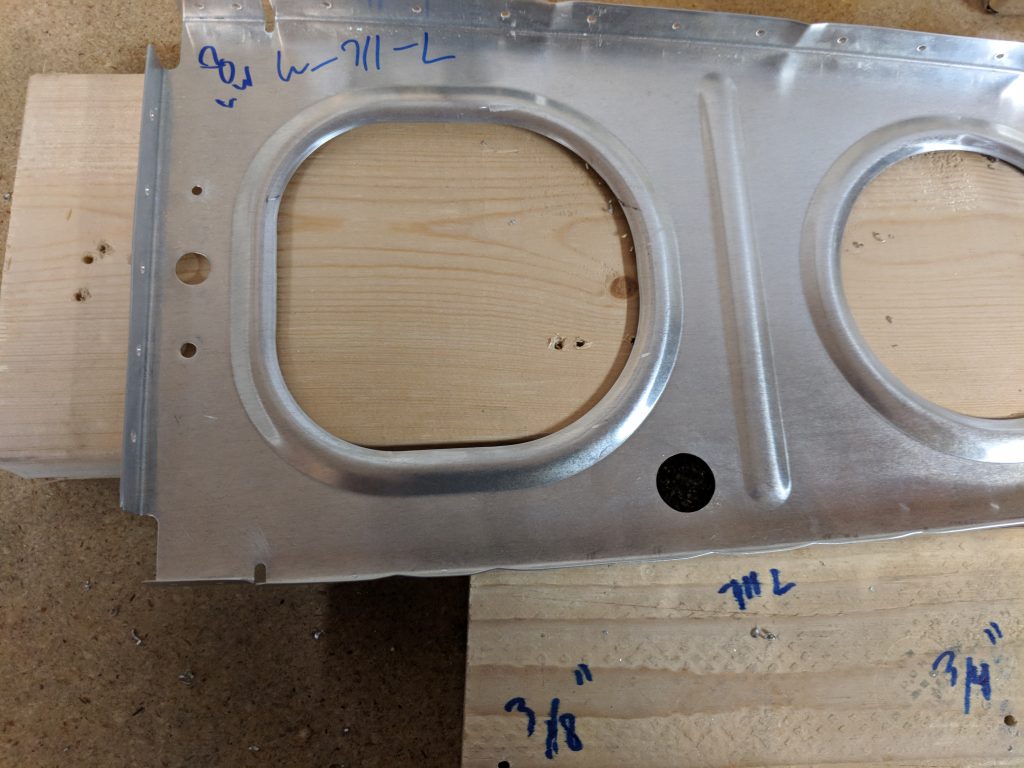
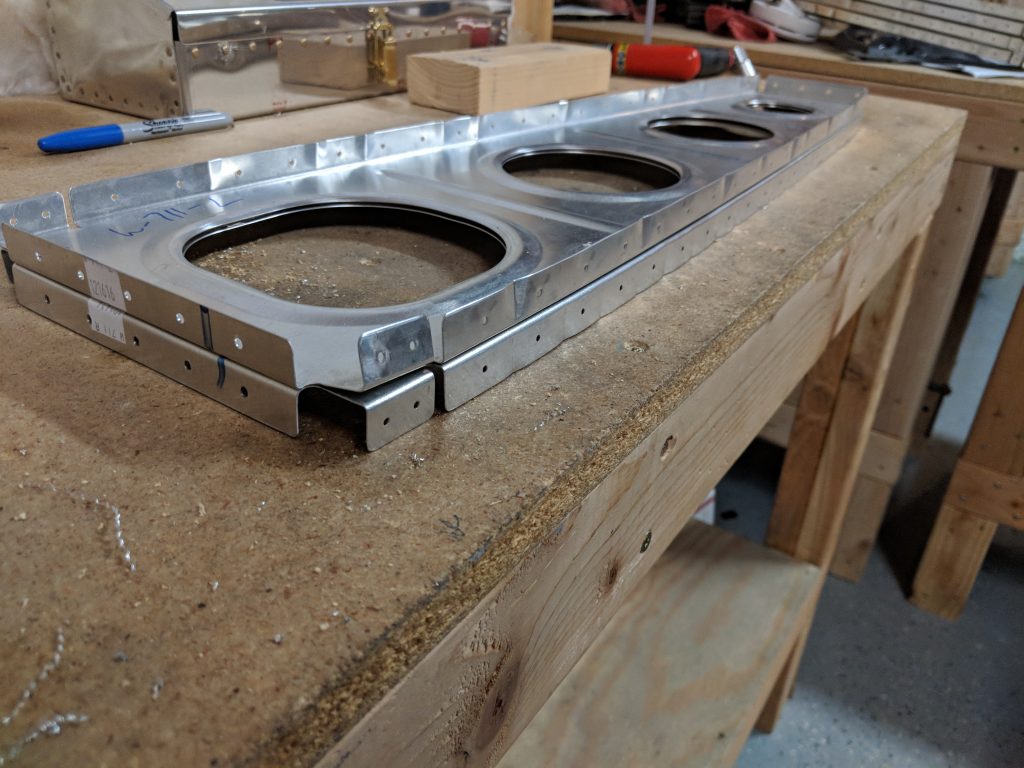
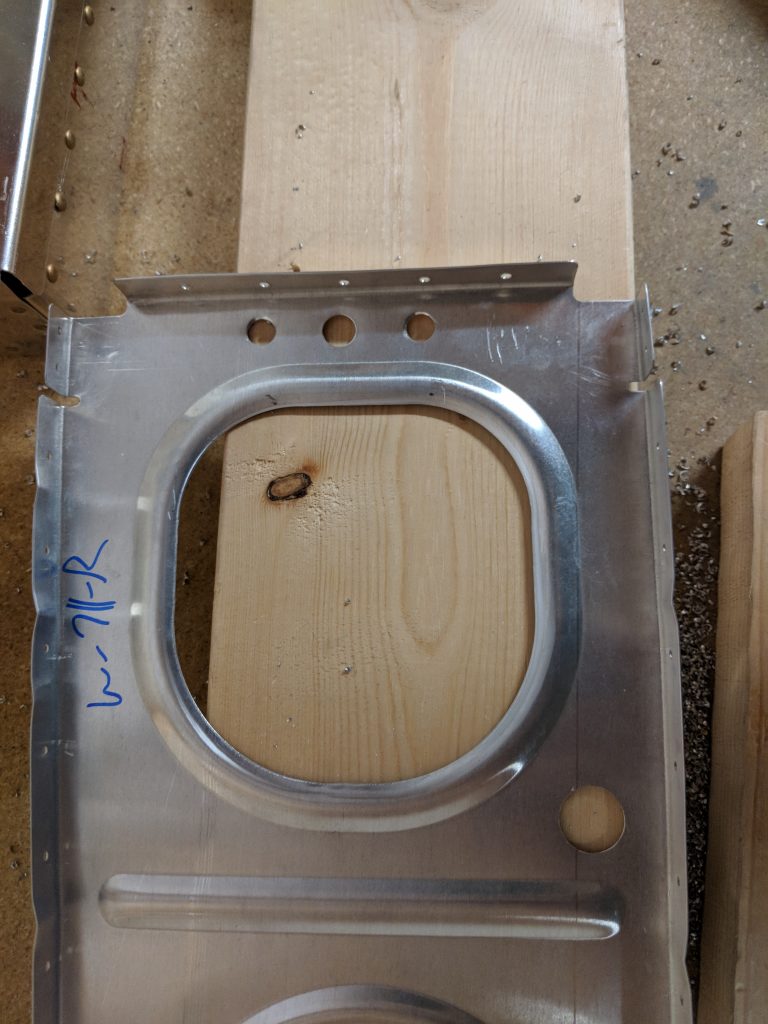
https://londonplaywrightsblog.com/a-writers-guide-to-making-the-most-out-of-vault-festival/ Then I enlarged the new 3/8″ hole on all the ribs, including the outboard ribs. BUT, I did not enlarge the existing tool holes on the outer and inner most ribs since they are used for aileron alignment. I’ll leave these for the very very last once I have the control surfaces aligned and mounted. Here’s what the holes look like once they are all drilled and enlarged to size.
Order Lyrica Online After I had all the holes done, I decided to call it a night. I need to deburr all the holes, but I may leave that as a job for when I deburr all the other holes. The next thing I HAVE to get done is build my wing stand, since it is now the critical path in my build. Heres all the photos from tonights build:


enter site Google Photos Link: https://photos.app.goo.gl/MrcQXdzN83ZGRWKU2
Buy Tramadol 100 Mg Online Hours Worked: 2.5