https://www.maderaplasticabarahona.com/productos/ More Stiffeners!! Tonight I think I should be done with stiffeners at least for a little while (wing kit maybe?). I worked to rivet the last remaining stiffeners on the left elevator, and then moved on to attaching the E-615PP trim support plate. First, I started off by working on dimpling and countersinking the E-615PP support plate to get it ready to rivet on the nut plates. I found my #6 dimple die and I have decided to use NAS1097 3-3.5 rivets to hold the nut plates on. I used my deburring bit and machine countersunk the E-615PP by hand. This took a little time, but it guarantees a very nice finish. I test fit each rivet in the holes to make sure they were nice and flush.
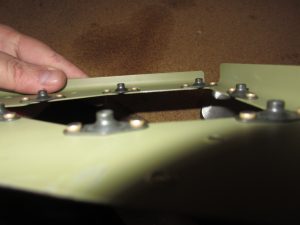
https://www.maderaplasticabarahona.com/galeria/ https://bodyandskinclinic.com/emtone-treatment/Buy Ambien Online Without Prescription Then I dimpled the screw hole with a #6 dimple die to fit the dimple in the trim cover plate and its screw. Once I had all the holes countersunk and dimpled, I began back riveting the nut plates onto the plate. I decided to back rivet because this leaves a very nicely finished rivet and doesn’t take any extra work. I am really happy with how the nut plates turned out:
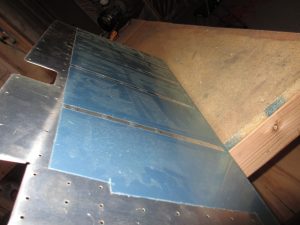
go site Order Soma 350Mg Onlinego site With the E-615PP completed, I moved on to the last of the stiffeners! There isn’t much to talk about here, since I have done this several times in the past, and the process is the same. I back rivet the stiffeners onto the skins and make sure everything is flush and straight. The only difference is that this time, we are also going to back rivet the E-615PP support plate to the skin as well. It serves as both a stiffener for the inboard end, as well as a doubler for the electric trim servo and its mounting plate. I took my time, and everything came out looking really nicely.
source link Buy Ambien Online OvernightOrder Soma Online This was about 2 hours of work, but I decided to take a break and then start working on my bending brake for the trailing edge of the elevators, and maybe bend one up. Thats all for this session, here are all the photos from the build:
https://www.ontheballwalkies.com/pet-services/Order Clonazepam Online This slideshow requires JavaScript.
https://drsurdis.com/contact/ Google Photos Link: https://goo.gl/photos/JTmj5mFvK3qrvBbr8
Hours Worked: 2


