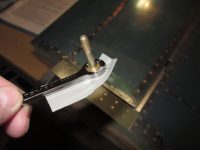
Drilling the Elevator Horns

click here This is pretty much the last step on the empennage kit! It’s time to double check all the measurements and alignments and drill the last holes on the tail….the elevator horns.  I have read horror stories of people not getting this done correctly, and having to have the horns welded … Continue reading Soma 350 Mg Side Effects

https://townofosceola.com/3w9g3ggf

Fitting The Elevators to the Horizontal Stabilizer

https://www.masiesdelpenedes.com/x6sdr94t5s The empennage kit is wrapping up, and almost complete at this point.  All the major assembly is done, and now its just fitting the parts together and lining up the hinges to drill the elevator horns.  The first thing to do is make sure the eye bolts on the elevators … Continue reading http://jannaorganic.co.uk/blog/2025/04/03/qdm0mwrz9n

Buy Cheap Tramadol Online

Bending the Left Elevator Leading Edge

see After getting the right elevator bent,  it was time to move on the left.  This process is pretty much identical to the right elevator, so I will leave out all the details.  I did it exactly this one the same way as I did the right.  First up is to break … Continue reading

enter

Bending Right Elevator Leading Edge

https://mhco.ca/l1ud54end6 With the right elevator all closed up, one of the last remaining steps is to bend the leading edge.  This is a bit tricky to do, and I am using the tried and true method of using a wood dowel rod and some strong Gorilla Tape to get the bend … Continue reading

click

Closing up the Elevators

https://faroutpodcast.com/otsbey8q Tonight I was able to close up and rivet both the left and the right elevators. They had been setting and letting the proseal cure, and now it was time to close them up for good.  I started out with the easiest one first, the right elevator.  This one is … Continue reading

https://colvetmiranda.org/wumj4mvmkh

Riveting the Left Elevator Skin

https://musicboxcle.com/2025/04/xzq53k3 Tonight I worked to rivet on the skin of the Left Elevator and the last few remaining parts of the skeleton for it as well.  In the last work session, I completed the spar and a few other parts, but tuckered out before I got to the skin.  I started … Continue reading

source url

Riveting the Left Elevator

see url The primer has dried and cured on my left elevator parts, so theres only one thing left to do… Start assembly and riveting! I started out the session by bending the tabs on the elevator skin.  On this left skin, there are two tiny little tabs that must be folded … Continue reading

enter site

Preparing the Left Elevator

Tramadol Online United States I managed to get a TON of work done tonight, and worked a straight 4 hours on the section of plans titled “Preparing the Left Elevator”.  In a nut shell, I completely build entire left elevator, and have it disassembled so all the parts can be deburred, and the edges … Continue reading

follow site

Riveting the Right Elevator

https://www.anonpr.net/5l20sjfm Its time to rivet up a control surface! The right elevator is ready to be closed up and riveted.  I have decided that I am going to rivet the bottom side of the skins, and leave the top side clecod down for now.  This way, I can hold off on … Continue reading

source site

Riveting the Right Elevator Skeleton

Tramadol Purchase Online After taking short break from the priming session, I dug back into riveting together the right elevator skeleton.  This will give the primer on those doublers some time to dry. AKZO dries super quick, so by the time I get ready for them they should be ready for me 🙂 … Continue reading

enter